Sceptre E205W-16003RTT
Sceptre 20-inch LED Monitor User Manual
Model: E205W-16003RTT
1. Introduction
This user manual provides detailed instructions for the setup, operation, and maintenance of your Sceptre 20-inch LED Monitor (Model: E205W-16003RTT). This monitor features a 1600 x 900 HD+ resolution, up to 75Hz refresh rate, two HDMI ports, one VGA port, built-in speakers, 99% sRGB color gamut, and is wall mount ready. Please read this manual thoroughly before using the product to ensure proper and safe operation.

Figure 1.1: Sceptre 20-inch LED Monitor (E205W-16003RTT)
This image displays the Sceptre 20-inch LED Monitor from the front, showcasing its slim bezel design and the Sceptre logo at the bottom center. The screen displays a vibrant, abstract image with waves of blue, pink, and yellow colors.
2. Safety Information
To ensure safe operation and prevent damage, please observe the following precautions:
- Do not expose the monitor to rain or moisture to prevent fire or shock hazards.
- Do not open the monitor casing. There are no user-serviceable parts inside. Refer all servicing to qualified service personnel.
- Place the monitor on a stable, flat surface to prevent it from falling.
- Ensure proper ventilation. Do not block ventilation openings.
- Use only the power adapter supplied with the monitor.
- Disconnect the power plug from the outlet if the monitor will not be used for an extended period.
3. Package Contents
Verify that all items are present and in good condition upon unpacking:
- Sceptre 20-inch LED Monitor (E205W-16003RTT)
- Monitor Stand (Base and Neck)
- Power Adapter
- HDMI Cable
- VGA Cable
- Audio Cable
- User Manual
- Screwdriver (for stand assembly)
4. Setup
4.1 Assembling the Stand
- Carefully place the monitor face down on a soft, clean surface to prevent scratches.
- Attach the stand neck to the back of the monitor, aligning the screw holes.
- Secure the neck to the monitor using the provided screws and screwdriver.
- Attach the stand base to the bottom of the stand neck, aligning the screw hole.
- Secure the base to the neck using the provided screw.
- Gently lift the monitor and place it upright on a stable surface.

Figure 4.1: Monitor Dimensions
This image shows the side profile of the Sceptre 20-inch LED Monitor with its stand, indicating its dimensions: 13.58 inches in height, 18.01 inches in width, and 7.02 inches in depth.
4.2 Connecting to a Device
The monitor supports HDMI and VGA connections. Choose the appropriate cable for your device.
- HDMI Connection: Connect one end of the HDMI cable to the HDMI port on your computer or video source and the other end to an HDMI port on the monitor. The monitor has two HDMI 1.4 ports, supporting up to 75Hz refresh rate.
- VGA Connection: Connect one end of the VGA cable to the VGA port on your computer and the other end to the VGA port on the monitor. This port also supports up to 75Hz refresh rate.
- Audio Connection: If using VGA, connect an audio cable from your computer's audio output to the monitor's Audio In port. For HDMI, audio is transmitted digitally through the HDMI cable. The monitor also has an Audio Out port for connecting external speakers or headphones.
- Power Connection: Connect the power adapter to the monitor's power input and then plug the adapter into a wall outlet.

Figure 4.2: Monitor Input Ports
This diagram illustrates the various input ports located on the back of the Sceptre monitor, including two HDMI 1.4 ports, one VGA port, an Audio In jack, an Audio Out jack, and the power input.

Figure 4.3: VESA Wall Mount Compatibility
This image highlights the VESA wall mount screw holes on the back of the Sceptre monitor, indicating its compatibility with standard wall mounting brackets for flexible placement options.
5. Operating Instructions
5.1 Powering On/Off
Press the power button located on the bottom right side of the monitor to turn it on or off. The power indicator light will illuminate when the monitor is on.
5.2 On-Screen Display (OSD) Menu
The OSD menu allows you to adjust various monitor settings. Use the buttons on the bottom right of the monitor to navigate and select options.
- Menu Button: Opens the OSD menu.
- Up/Down Buttons: Navigate through menu options.
- Enter Button: Selects a highlighted option or confirms a setting.
- Exit Button: Exits the current menu or the OSD.
5.3 Key Features and Adjustments
- Resolution (1600 x 900 HD+): The monitor supports a native resolution of 1600 x 900, providing clear and crisp visuals for everyday tasks and entertainment.
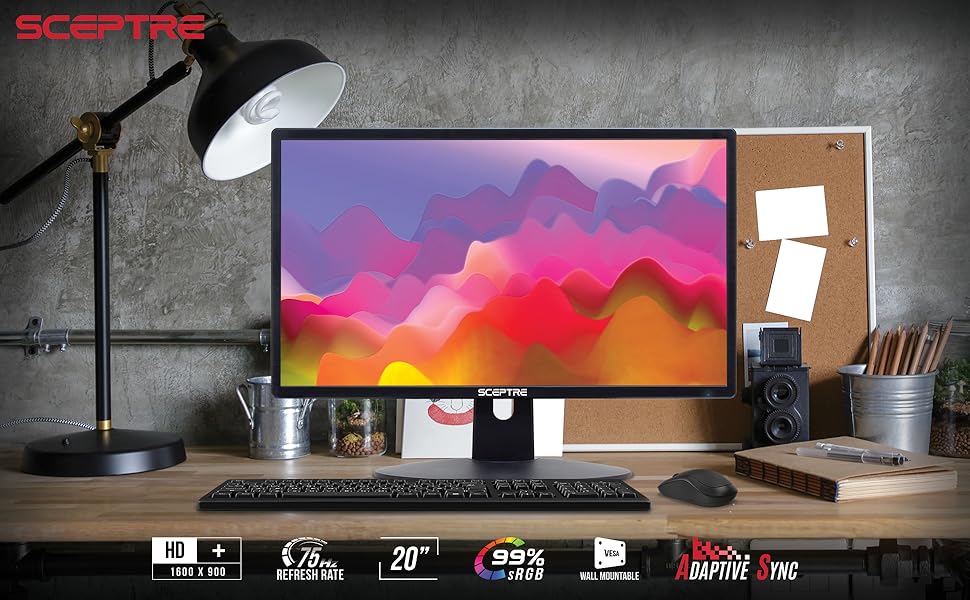
Figure 5.1: Monitor Features Overview
This image shows the Sceptre monitor set up on a desk, highlighting its key features including HD+ resolution (1600x900), 75Hz refresh rate, 20-inch display, 99% sRGB color, wall mount readiness, and Adaptive Sync technology.
- Refresh Rate (Up to 75Hz): Experience smoother motion and reduced screen tearing with a refresh rate of up to 75Hz, especially beneficial for gaming and fast-paced video content.

Figure 5.2: 60Hz vs 75Hz Refresh Rate
This visual comparison demonstrates the difference between a 60Hz and 75Hz refresh rate, showing how a higher refresh rate (75Hz) results in a clearer and smoother image, particularly for fast-moving objects like a car.
- Adaptive Sync: This technology synchronizes the monitor's refresh rate with your graphics card's frame rate, eliminating screen tearing and stuttering for a fluid visual experience.

Figure 5.3: Adaptive Sync On vs Off
This image illustrates the effect of Adaptive Sync, showing a scene with a car and bicycle. When Adaptive Sync is off, horizontal tearing lines are visible across the image. When Adaptive Sync is on, the image is smooth and free of tearing.
- Built-in Speakers: The monitor includes integrated speakers, providing convenient audio without the need for external speakers.

Figure 5.4: Built-in Speakers
This diagram highlights the location of the built-in speakers on the back of the Sceptre monitor, with visual representations of sound waves indicating audio output.
- 99% sRGB Color Gamut: Enjoy accurate and vibrant colors, ideal for photo editing, graphic design, and immersive media consumption.
- Blue Light Shift: Reduce eye strain during prolonged use by activating the Blue Light Shift feature in the OSD menu, which filters out harmful blue light emissions.

Figure 5.5: Blue Light Shift Effect
This image compares the effect of blue light on eye comfort, showing a person with tired eyes under "Normal" conditions and a person with relaxed eyes after applying "Blue Light Shift" to the monitor.
- Anti-Flicker: This technology reduces screen flickering, providing a more comfortable viewing experience and minimizing eye fatigue.

Figure 5.6: Conventional vs Anti-Flicker
This image contrasts a "Conventional" display with visible flickering lines around a moving car against an "Anti-Flicker" display where the car and background appear smooth and stable, demonstrating the benefit of flicker reduction.
- Security Lock: The monitor includes a security lock slot to help prevent theft. Use a compatible security cable (not included) to secure the monitor.

Figure 5.7: Security Lock Slot
This diagram illustrates the security lock slot on the back of the Sceptre monitor, showing how a security cable can be attached to deter theft.
5.4 Official Product Video
Video 5.1: Sceptre 20" 1600 x 900 75Hz LED Monitor Overview
This official Sceptre video provides a comprehensive overview of the 20-inch LED Monitor, highlighting its 1600 x 900 resolution, 75Hz refresh rate, HDMI and VGA connectivity, built-in speakers, and 99% sRGB color capabilities. It showcases the monitor's features and design in detail.
6. Maintenance
Proper maintenance ensures the longevity of your monitor:
- Cleaning the Screen: Gently wipe the screen with a soft, lint-free cloth. For stubborn marks, dampen the cloth with a small amount of non-ammonia, non-alcohol based glass cleaner. Do not spray cleaner directly onto the screen.
- Cleaning the Casing: Use a soft, dry cloth to wipe the monitor casing. Avoid abrasive cleaners.
- Ventilation: Ensure the ventilation openings on the back of the monitor are clear of dust and debris to prevent overheating.
7. Troubleshooting
If you encounter issues with your monitor, refer to the following common problems and solutions:
| Problem | Possible Cause | Solution |
|---|---|---|
| No image on screen | Power cable disconnected; Video cable disconnected; Incorrect input source selected. | Check power connections; Ensure video cable is securely connected; Select the correct input source using the OSD menu. |
| Image is blurry or distorted | Incorrect resolution setting; Loose video cable. | Set the display resolution to 1600 x 900; Reconnect the video cable securely. |
| No audio from speakers | Volume too low; Audio cable disconnected (for VGA); Muted in OSD. | Increase volume; Ensure audio cable is connected (if using VGA); Check OSD audio settings. |
| Screen tearing or stuttering | Adaptive Sync is off; Graphics card not synchronized. | Enable Adaptive Sync in the OSD menu and on your graphics card settings. |
8. Specifications
| Feature | Detail |
|---|---|
| Model Number | E205W-16003RTT |
| Screen Size | 20 Inches |
| Resolution | 1600 x 900 (HD+) |
| Refresh Rate | Up to 75Hz |
| Aspect Ratio | 1.77:1 |
| Color Gamut | 99% sRGB |
| Connectivity | 2 x HDMI 1.4, 1 x VGA, Audio In, Audio Out |
| Built-in Speakers | Yes |
| Wall Mountable | Yes (VESA compatible) |
| Item Weight | 4.3 pounds |
| Product Dimensions (LxWxH) | 7.02 x 18.01 x 13.58 inches |
9. Warranty and Support
For warranty information and technical support, please refer to the warranty card included in your product packaging or visit the official Sceptre website. You can also find additional support resources and FAQs online.
Official Sceptre Store: Sceptre Store on Amazon
Ask a question about this manual
Ask about setup, troubleshooting, compatibility, parts, safety, or missing instructions. Manuals+ will review the question and use this page’s manual context to help answer it.