1. Introduction
Thank you for choosing the FLB FORELIBRA Lab Scale. This precision electronic balance is designed for accurate weighing and counting in various applications, including laboratory, industrial, and scientific settings. With a maximum capacity of 7.5kg and a readability of 0.1g, it offers reliable performance for your measurement needs. Please read this manual thoroughly before operating the device to ensure proper use and maintenance.

An overview of the FLB FORELIBRA Lab Scale, highlighting its key dimensions and components like the weighing pan and control panel.
2. Safety Information
- Always operate the scale on a stable, level surface free from vibrations.
- Avoid exposing the scale to extreme temperatures, humidity, or direct sunlight.
- Do not overload the scale beyond its maximum capacity of 7.5kg.
- Keep the scale away from strong electromagnetic fields.
- Use only the provided power adapter.
- Do not attempt to disassemble or repair the scale yourself. Contact qualified personnel for service.
3. Package Contents
Verify that all items are present in the package:
- FLB FORELIBRA Lab Scale Unit
- Stainless Steel Weighing Pan
- Power Adapter
- Calibration Weight (if included with your model)
- User Manual
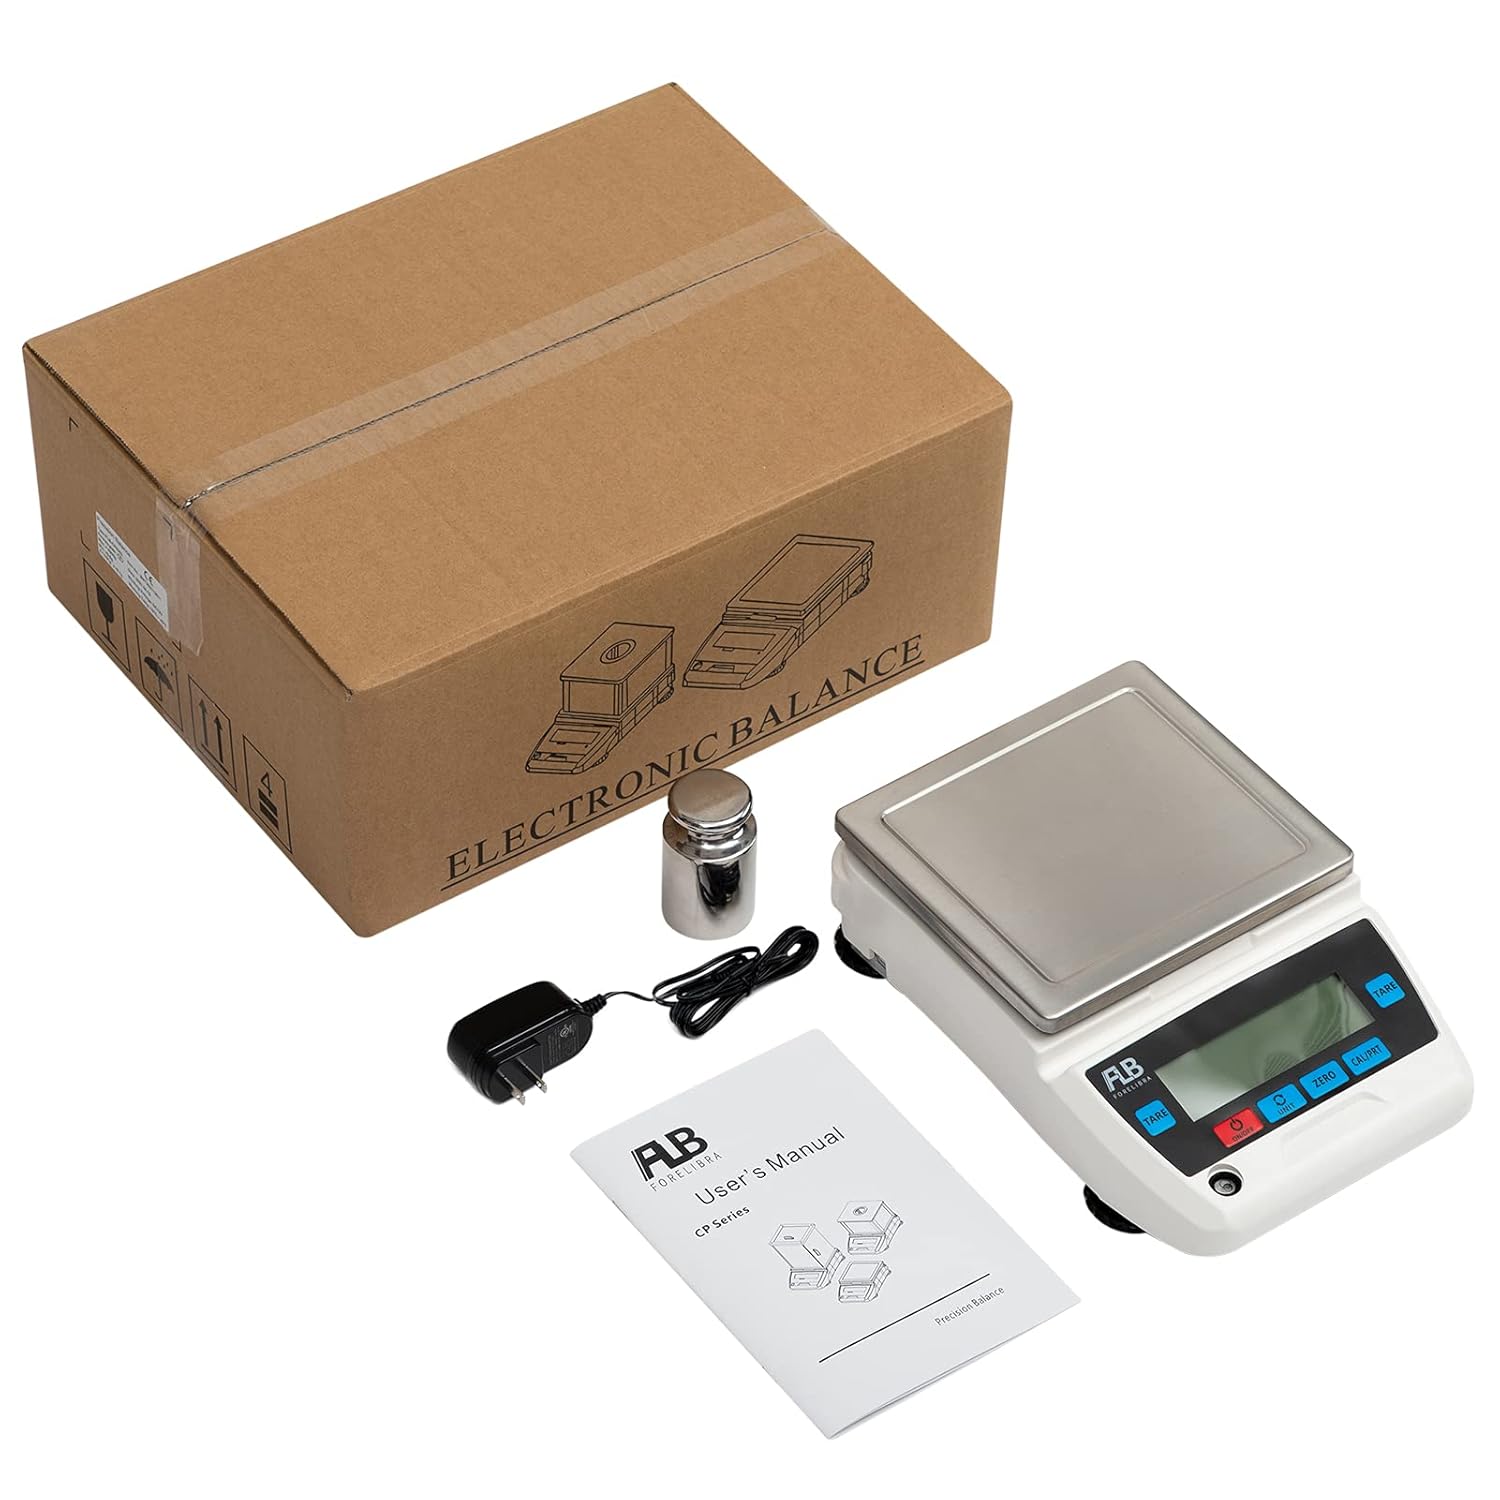
The complete package contents of the FLB FORELIBRA Lab Scale, showing the main unit, power adapter, a calibration weight, and the user manual.
4. Product Features
- High-precision load cell for accurate measurements.
- Large LCD display with backlight for clear readability.
- Multiple weighing units (g, kg, lb, oz, ct, tl, etc.).
- Tare function for zeroing containers.
- Counting function for quantity measurement.
- External calibration capability.
- RS232 interface for data connectivity to computers or printers.
- Adjustable feet and level bubble for precise leveling.

Detailed views of the scale's features: the integrated level bubble for proper setup, adjustable feet for stability, the RS232 interface for data connectivity, and the power input port.
5. Setup
5.1 Unpacking and Placement
- Carefully remove the scale and all accessories from the packaging.
- Place the scale on a firm, level, and stable surface, away from drafts, vibrations, and direct heat sources.
- Ensure adequate space around the scale for operation and ventilation.
5.2 Removing the Protection Screw
Crucial Step: Before initial use, you must remove the long protection screw located at the bottom of the scale. This screw secures the weighing mechanism during transport and must be removed for accurate operation.

The aluminum pan bracket of the scale, with a visible sticker reminding users to remove the bottom protection screw before operation.
An image of the underside of the scale, clearly indicating the location of the long protection screw that needs to be removed prior to initial use to ensure proper function.
5.3 Leveling the Scale
Use the adjustable feet at the bottom of the scale to level the unit. Adjust the feet until the bubble in the level indicator (usually located near the display) is centered. Proper leveling is essential for accurate measurements.
5.4 Power Connection
Connect the provided power adapter to the power input port on the back of the scale, then plug the adapter into a suitable electrical outlet.
5.5 Initial Inspection and Video Guide
Before first use, it is recommended to watch the setup and operation video for a visual demonstration of these steps.
This video provides a visual guide to setting up and operating the FLB FORELIBRA Lab Scale. It covers unpacking, a 360-degree view of the device, how to switch between different weighing units, performing calibration, using the counting function, conducting a four-corner test for accuracy, and connecting the scale to a computer or printer for data logging. It also shows the crucial step of removing the long protection screw.
6. Operating Instructions
6.1 Power On/Off
- Press the ON/OFF button to turn the scale on.
- Press and hold the ON/OFF button to turn the scale off.
6.2 Unit Conversion
Press the UNIT button to cycle through available weighing units (e.g., grams (g), kilograms (kg), pounds (lb), ounces (oz)). The selected unit will be displayed on the screen.
6.3 Tare Function
To weigh items in a container without including the container's weight:
- Place the empty container on the weighing pan.
- Press the TARE button. The display will reset to zero.
- Add the items to be weighed into the container. The display will show the net weight of the items.
6.4 Zero Function
If the display does not show zero when the pan is empty, press the ZERO button to reset it to zero. This compensates for minor fluctuations or debris on the pan.
6.5 Calibration
For optimal accuracy, periodic calibration is recommended. Refer to the video guide for a visual demonstration of the calibration process.
- Ensure the scale is on a stable surface and empty.
- Press and hold the CAL/PRT button until the display shows a calibration prompt (e.g., "CAL").
- Follow the on-screen instructions to place the specified calibration weight(s) on the pan.
- Wait for the scale to stabilize and display "PASS" or return to weighing mode.
6.6 Counting Function
The scale can count items based on a sample quantity.
- Place a known sample quantity of items (e.g., 10, 20, 50, 100 pieces) on the pan.
- Press the UNIT button repeatedly until the display shows "Pcs" (pieces) or a similar counting indicator.
- The display will prompt you to select the sample size (e.g., "50 Pcs"). Use the UNIT button to select the correct sample size corresponding to the items on the pan.
- Press CAL/PRT to confirm the sample. The scale will now display the count of items.
- You can now add or remove items, and the scale will display the total count.

The front panel of the scale, showing the digital display with '9 Pcs' visible, demonstrating the counting mode in operation.
6.7 Data Output (RS232)
The scale features an RS232 interface for connecting to a computer or printer. This allows for data logging and printing of measurement results. Consult the specific software or printer manual for detailed connection and operation instructions.
7. Maintenance
- Cleaning: Wipe the scale surface and weighing pan with a soft, damp cloth. Do not use abrasive cleaners or immerse the scale in water.
- Storage: When not in use for extended periods, store the scale in a dry, dust-free environment.
- Battery (if applicable): If your model uses batteries, ensure they are replaced when the low battery indicator appears.
8. Troubleshooting
| Problem | Possible Cause | Solution |
|---|---|---|
| Scale does not turn on | No power, faulty adapter, loose connection | Check power adapter connection and outlet. Ensure adapter is functional. |
| Inaccurate readings | Not leveled, protection screw not removed, vibrations, drafts, needs calibration | Level the scale, remove protection screw, move to a stable environment, perform calibration. |
| Display shows "OVERLOAD" | Weight exceeds maximum capacity | Remove excess weight immediately. |
| Display shows "UNST" or unstable readings | Unstable surface, air currents, vibrations | Ensure stable surface, close windows/doors, avoid touching the table during weighing. |
9. Specifications
| Feature | Detail |
|---|---|
| Brand | FLB FORELIBRA |
| Model Number | FLBNJCP7501 |
| Capacity | 7.5 kg (16.5 lb) |
| Readability | 0.1 g |
| Weigh Scale Type | Floor Scale (Precision Electronic Balance) |
| Material | Acrylonitrile Butadiene Styrene, Aluminum, Stainless Steel |
| Connectivity | RS232 Interface |
| Recommended Uses | Packages, Envelopes, Coins, Jewellery, Medicines, Powder, Gemstones, Metals, Herbs, Beads, Pins, Screws |
10. Warranty Information
FLB FORELIBRA products are manufactured to high-quality standards. This product comes with a standard manufacturer's warranty against defects in materials and workmanship. Please retain your proof of purchase for warranty claims. For specific warranty terms and conditions, refer to the documentation included with your purchase or contact customer support.
11. Support
For technical assistance, troubleshooting, or general inquiries, please contact FLB FORELIBRA customer support. Visit our official website or refer to the contact information provided in your product packaging.