LucaSng BlowTie Diaphragm Ball Lock Spunding Valve Complete Kit
LucaSng BlowTie Diaphragm Ball Lock Spunding Valve Complete Kit Instruction Manual
1. Introduction
This manual provides comprehensive instructions for the assembly, operation, and maintenance of your LucaSng BlowTie Diaphragm Ball Lock Spunding Valve Complete Kit. This kit is designed to facilitate pressurized fermentation in home brewing, allowing for precise control over the pressure within your fermenter or keg.

Figure 1: LucaSng BlowTie Diaphragm Ball Lock Spunding Valve Complete Kit.
2. Kit Components
The LucaSng BlowTie Diaphragm Ball Lock Spunding Valve Complete Kit includes the following items:
- 1 x BlowTie Spunding Valve
- 1 x Duotight 8mm Tee Piece
- 1 x Duotight FFL to 8mm Fitting
- 1 x 1.5" TC Connector (Note: This component is listed in the product description but not explicitly shown in all images or directly used in the spunding valve assembly for pressure regulation. Its use may vary based on specific brewing setups.)
- 1 x 8mm Push-in 0-40psi Gauge
- 1 x Premium Ball Lock Disconnect (MFL) Grey/Gas
- 2 x 8mm White Straight Joiner Pieces
- 2 x Lengths of EVABarrier 8mm OD Tubing (for floating dip tube assembly, if applicable)

Figure 2: Exploded view of the kit components, showing the individual parts included.
3. Setup
Follow these steps to assemble and connect your BlowTie Spunding Valve kit:
- Assemble the Spunding Valve: Connect the 8mm Push-in 0-40psi Gauge to one end of the Duotight 8mm Tee Piece. Connect the BlowTie Spunding Valve to the other end of the Duotight 8mm Tee Piece. Ensure all connections are tight to prevent leaks.
- Connect to Ball Lock Disconnect: Attach the Duotight FFL to 8mm Fitting to the Premium Ball Lock Disconnect (Grey/Gas). Then, connect this assembly to the remaining port on the Duotight 8mm Tee Piece.
- Connect to Keg/Fermenter: Attach the assembled spunding valve to the gas (IN) post of your Cornelius keg or pressurized fermenter. Ensure the connection is secure.

Figure 3: The BlowTie Spunding Valve kit fully assembled and connected to a keg's gas post.
3.1 Optional: Floating Dip Tube Installation
If your kit includes components for a floating dip tube, follow these general steps. This allows for drawing liquid from the top of the fermenter, avoiding sediment.
- Remove Liquid Post Dip Tube: Ensure the keg is depressurized. Use a wrench to unscrew the liquid (OUT) post and carefully remove the existing dip tube.
- Assemble Floating Dip Tube: Attach one end of the provided 8mm OD tubing to the short dip tube, and the other end of the tubing to the floating ball.
- Install Floating Dip Tube: Insert the assembled floating dip tube into the keg through the lid opening. Reinstall the liquid post and tighten it securely.
Video 1: Demonstration of installing a floating dip tube in a keg. This video illustrates the process of replacing a standard dip tube with a floating one, which is useful for drawing clear liquid from the top of the fermenter.
4. Operating Instructions
The BlowTie Spunding Valve allows you to control the pressure during fermentation or when transferring beer.
- Initial Connection: Connect the assembled BlowTie Spunding Valve to the gas (IN) post of your fermenter or keg.
- Adjusting Pressure: The yellow adjustment knob on the BlowTie Spunding Valve controls the pressure at which gas is released.
- Turning the knob clockwise increases the set pressure, meaning gas will be released at a higher pressure.
- Turning the knob anticlockwise decreases the set pressure, meaning gas will be released at a lower pressure.
- Setting Desired Pressure: We recommend gassing a keg to a known pressure (e.g., 15psi) then attach your BlowTie Kit to the keg and adjust the yellow knob to your desired pressure (e.g., 10psi). The gauge will show the internal pressure, and the valve will release excess gas once the set pressure is exceeded.
- Pressure Fermentation: During fermentation, the yeast will produce CO2, increasing the pressure inside the vessel. The spunding valve will automatically release excess pressure, maintaining your set pressure. This allows for controlled pressure fermentation, which can influence flavor profiles and reduce ester production.
- Closed Transfer: The spunding valve can also be used to control the flow rate during a closed beer transfer from a fermenter to a keg, minimizing oxygen exposure.
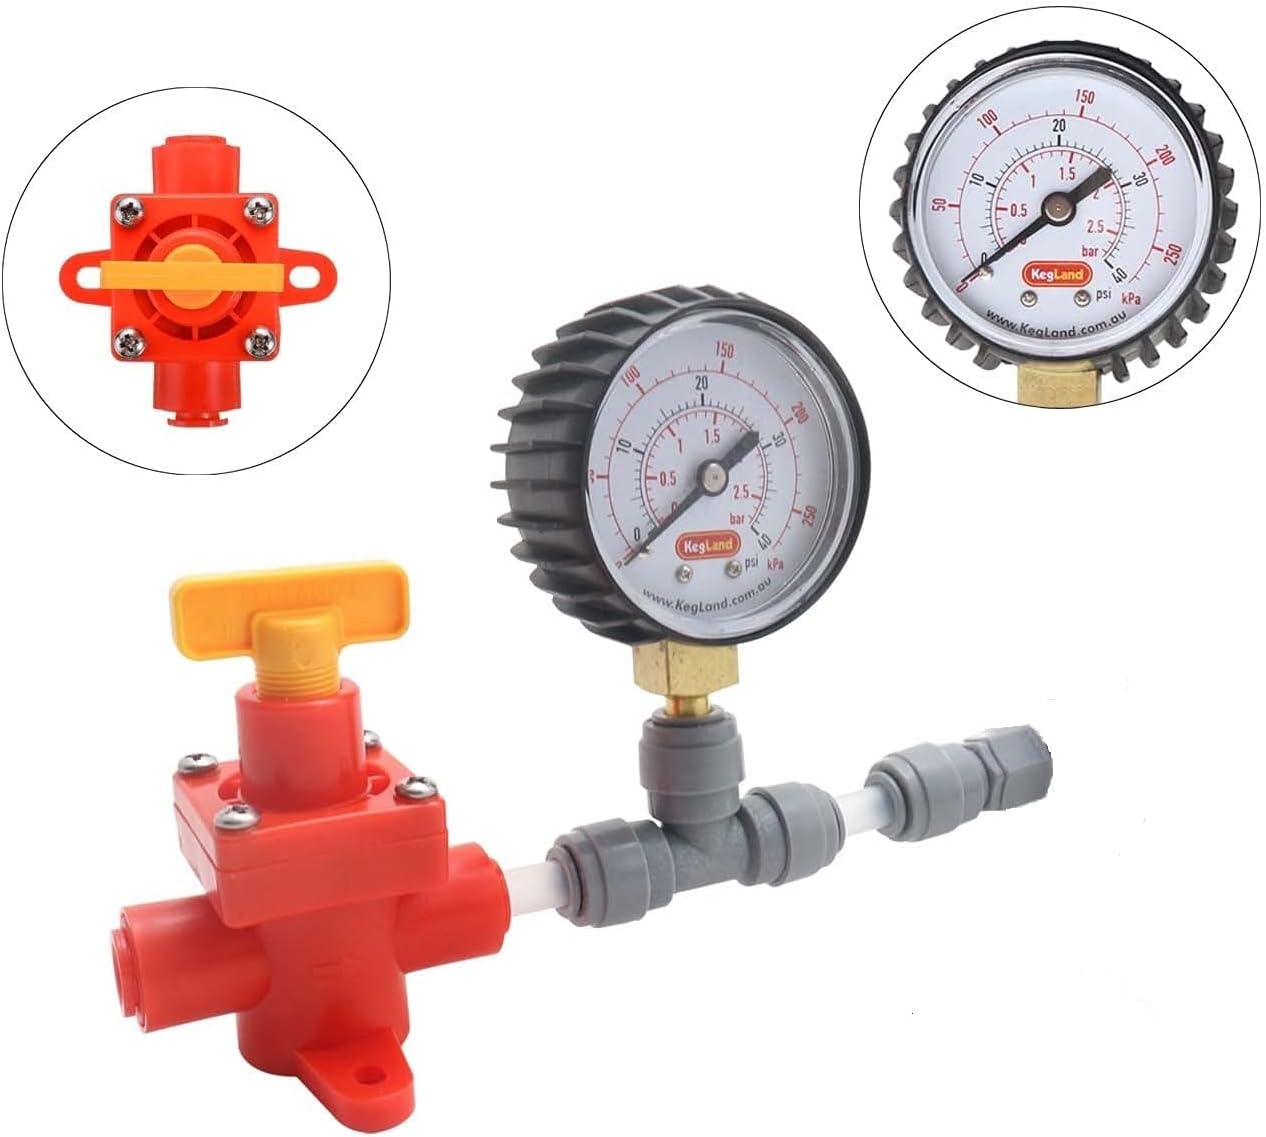
Figure 4: Close-up view of the BlowTie Spunding Valve, highlighting the pressure gauge and adjustment knob.
Video 2: An overview of the BlowTie Diaphragm Ball Lock Spunding Valve, demonstrating its connection and basic function for pressure regulation in brewing.
Video 3: This video demonstrates the use of a constant pressure valve for homebrew fermentation, showing how it helps maintain stable pressure in the vessel.
Video 4: A demonstration of a beer spunding valve in action, illustrating how it releases excess pressure to maintain a desired fermentation environment.
5. Maintenance
Proper cleaning and maintenance will ensure the longevity and optimal performance of your spunding valve kit.
- Cleaning: After each use, disassemble the spunding valve components. Clean all parts thoroughly with a suitable brewing sanitizer or a mild detergent solution. Rinse well with clean water.
- O-Ring Inspection: Regularly inspect all O-rings for signs of wear, cracking, or damage. Damaged O-rings can lead to leaks and improper pressure regulation. Replace O-rings as needed.
- Storage: Store all components in a clean, dry place when not in use.
Video 5: Instructions on how to easily install color-coded O-rings for Cornelius kegs. This is crucial for maintaining a proper seal and preventing leaks in your brewing setup.
Video 6: A demonstration of a 36-piece color-coded O-ring gasket set for Cornelius kegs, showing the various O-rings and their application for rebuilding kegs.
6. Troubleshooting
If you encounter issues with your BlowTie Spunding Valve, consider the following:
- Valve not holding pressure or releasing too early: Ensure all connections are tight and O-rings are properly seated and undamaged. Check the adjustment knob; it might be set too low or require fine-tuning.
- Difficulty setting low pressure (e.g., below 15psi): Some units may require careful adjustment or a break-in period. If the valve consistently fails to regulate at lower pressures, inspect the internal diaphragm and spring for any obstructions or defects.
- Gauge not reading correctly: Verify the gauge is securely attached and not damaged. Compare its reading with another known pressure source if possible.
7. Specifications
| Feature | Detail |
|---|---|
| Package Dimensions | 5.16 x 4.06 x 3.5 inches |
| Item Weight | 13.1 ounces |
| Pressure Gauge Range | 0-40 psi |
| Tubing Compatibility | 8mm OD (Outer Diameter) |
8. Warranty and Support
For warranty information or technical support, please refer to the product packaging or contact the manufacturer directly. Keep your purchase receipt for any warranty claims.
Ask a question about this manual
Ask about setup, troubleshooting, compatibility, parts, safety, or missing instructions. Manuals+ will review the question and use this page’s manual context to help answer it.