1. Introduction
This manual provides detailed instructions for the installation, operation, and maintenance of your Cooler Master 240 Elite Liquid CPU Cooler. Designed for high-performance systems, this all-in-one (AIO) liquid cooler features a dual-chamber pump, customizable aRGB lighting, and broad compatibility with modern Intel and AMD processors. Please read this manual thoroughly before installation to ensure proper setup and optimal performance.

Image 1.1: The Cooler Master 240 Elite Liquid CPU Cooler, showcasing the radiator, two 120mm fans, and the hexagonal pump unit.
2. Package Contents
Verify that all components are present in your package:
- Cooler Master 240 Elite Liquid Radiator with Integrated Pump and Tubing
- 120mm aRGB Fans (x2)
- Intel Mounting Hardware (LGA 1851, LGA 1700, LGA 1200, LGA 115x)
- AMD Mounting Hardware (AM5, AM4)
- Fan and aRGB Connection Cables
- User Manual (this document)
3. Setup and Installation
Follow these steps for a successful installation. Ensure your system is powered off and disconnected from the power source before beginning.
3.1. Prepare the Motherboard
Identify the correct mounting brackets for your CPU socket (Intel LGA 1851/1700 or AMD AM5/AM4). Attach the appropriate backplate to the rear of your motherboard, aligning the holes with the CPU socket mounting points.
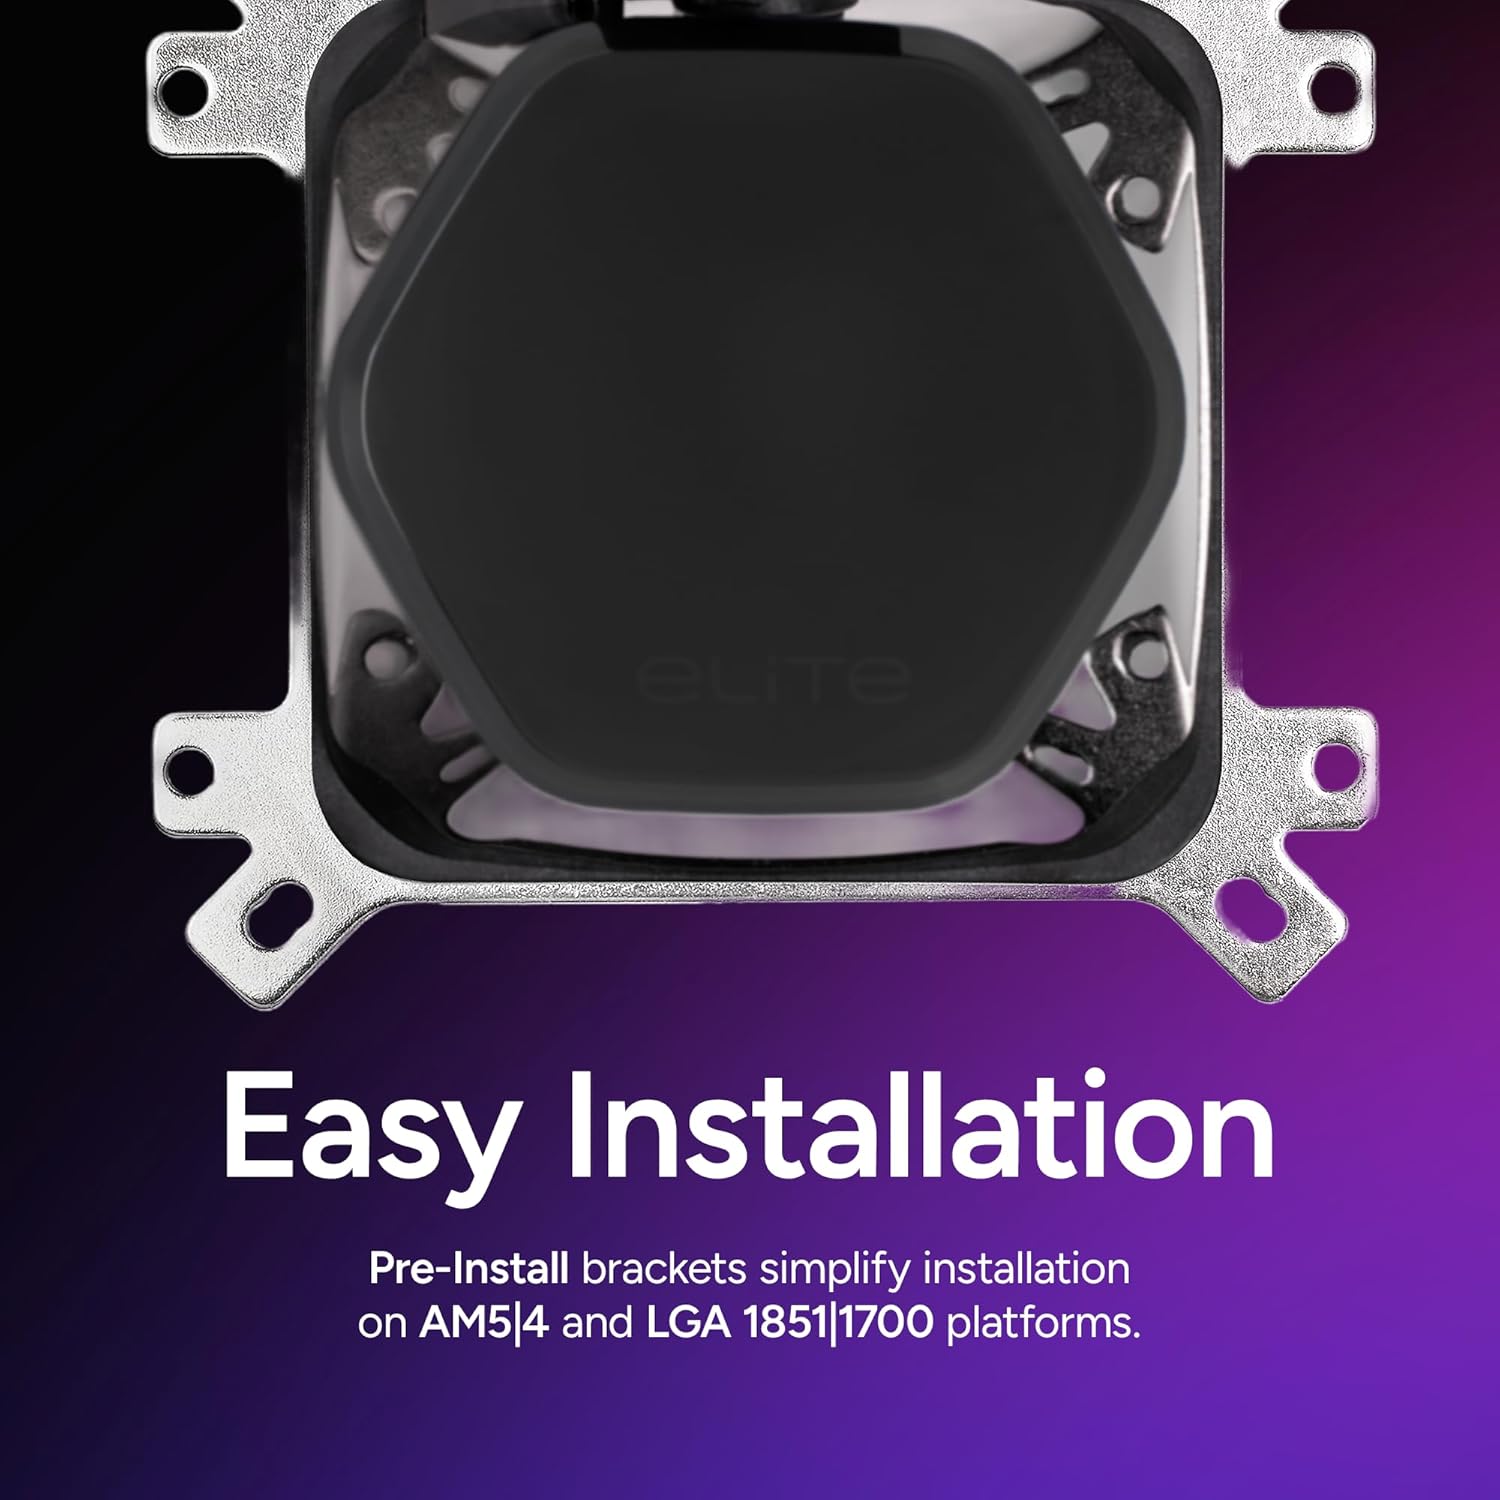
Image 3.1: Pre-installed mounting brackets designed for simplified installation on various platforms.
3.2. Install Radiator and Fans
Mount the two 120mm aRGB fans to the radiator using the provided screws. The fans are designed for daisy-chaining, simplifying cable management. Position the radiator in your PC case (typically at the top or front) and secure it with screws.

Image 3.2: Detail of the daisy-chain fan system, showing how multiple fans connect using a single PWM connector.
3.3. Mount the Pump
Apply a thin, even layer of thermal paste to the CPU's integrated heat spreader (IHS). The Cooler Master 240 Elite Liquid comes with CryoFuze thermal paste pre-applied, but ensure the surface is clean if reapplying. Carefully place the pump unit onto the CPU, aligning it with the mounting posts. Secure the pump with the retention screws, tightening them in a diagonal pattern until snug.

Image 3.3: The dual-chamber pump design, engineered to optimize water flow to the CPU hotspot for efficient cooling.
3.4. Connect Cables
Connect the pump's 3-pin or 4-pin power cable to the CPU_FAN or AIO_PUMP header on your motherboard. Connect the daisy-chained fan PWM cable to a fan header on your motherboard. Connect the aRGB cables from the fans and pump to an aRGB header on your motherboard or a compatible aRGB controller.
4. Operating Instructions
Once installed, the Cooler Master 240 Elite Liquid CPU Cooler operates automatically, regulating fan and pump speeds based on CPU temperature. You can customize the aRGB lighting effects.
4.1. aRGB Lighting Control
The hexagonal pump cap and frosted fan blades feature customizable aRGB lighting. If connected to a motherboard aRGB header, use your motherboard's lighting control software to synchronize and customize effects. If using a separate controller, refer to its specific instructions.

Image 4.1: The translucent hexagonal pump cap, illustrating its unique design and customizable aRGB lighting capabilities.

Image 4.2: A close-up of the frosted fan blades, designed to create vibrant and evenly dispersed aRGB lighting.
4.2. Pump and Fan Speed
The pump and fans are PWM controlled, allowing your motherboard to dynamically adjust their speeds based on CPU load and temperature. This ensures optimal cooling performance while maintaining quiet operation.

Image 4.3: A single 120mm fan, highlighting its design for quiet operation and efficient cooling performance.
5. Maintenance
Regular maintenance helps ensure the longevity and performance of your liquid cooler.
- Dust Cleaning: Periodically clean the radiator fins and fan blades to prevent dust buildup, which can impede airflow and cooling efficiency. Use compressed air or a soft brush.
- Tubing Inspection: Occasionally inspect the tubing for any signs of kinks, leaks, or damage. Ensure connections are secure.
- Pump Check: Listen for unusual noises from the pump, which could indicate an issue.
6. Troubleshooting
If you encounter issues with your Cooler Master 240 Elite Liquid CPU Cooler, refer to the following common problems and solutions:
- High CPU Temperatures:
- Ensure the pump is properly seated and making full contact with the CPU.
- Verify that the pump and fan cables are securely connected to the motherboard headers.
- Check for dust buildup on the radiator fins and clean if necessary.
- Confirm that fans are spinning in the correct direction (pushing air through the radiator).
- Pump Noise:
- A slight gurgling sound during initial startup is normal as air settles. If persistent, try gently tilting your PC case to help trapped air move to the radiator.
- Ensure the pump is receiving adequate power.
- Fan Noise:
- Check for obstructions or loose cables hitting the fan blades.
- Adjust fan curves in your motherboard's BIOS/UEFI settings to reduce speeds at lower temperatures.
- aRGB Lighting Not Working:
- Verify all aRGB cables are correctly connected to the motherboard or controller.
- Ensure your motherboard's aRGB software is installed and configured correctly.
7. Specifications
| Feature | Specification |
|---|---|
| Model Number | ELW-D24M-A21DA-R1 |
| Radiator Dimensions | 4.7"L x 4.7"W x 1"H (approximate, for 120mm fan area) |
| Fan Size | 120mm |
| Fan Speed | 650 - 2100 RPM (PWM) |
| Noise Level | 39.5 dB (Max) |
| Cooling Method | Liquid (Water) |
| Compatible Sockets | Intel: LGA 1851, LGA 1700, LGA 1200, LGA 115x AMD: AM5, AM4 |
| Material | Aluminum, Copper, Plastic |
| Tubing Length | 400mm (Ideal for various chassis configurations) |
7.1. Key Features
- Dual-Chamber Pump: Fluid dynamic design for enhanced CPU hotspot cooling.
- Quiet Operation: Dynamic PWM fans optimized for low noise.
- Easy Installation: Pre-installed brackets for quick setup on Intel and AMD platforms.
- CryoFuze Thermal Paste: Pre-installed for excellent thermal conductivity.
- Unique Hexagon Design: Translucent cap with customizable aRGB lighting.
- Daisy-Chained Fans: Simplifies wiring with a single PWM connector.
- Frosted Blade Design: Enhances aRGB lighting dispersion.
- Compact Fin Array: Optimized radiator fin density for maximum heat dissipation.

Image 7.1: Illustration of the compact fin array within the radiator, designed for efficient heat exchange.

Image 7.2: The 400mm tubing length, providing flexibility for installation in various PC chassis configurations.
8. Warranty and Support
Cooler Master products are backed by a manufacturer's warranty. For specific warranty terms, duration, and support, please visit the official Cooler Master website or contact their customer service. Keep your proof of purchase for warranty claims.
For additional support and resources, you may refer to the official user manual PDF available here.