Discovery Kids B0944V3S4S
Discovery Kids Time and Space Projection Alarm Clock
Instruction Manual
1. Introduction
This manual provides detailed instructions for the setup, operation, and maintenance of your Discovery Kids Time and Space Projection Alarm Clock. This device features a rocketship-themed design, projects time and four unique space-themed images, and includes a full date and time display. Please read this manual thoroughly before use to ensure proper functionality and safety.
2. Important Safety Information
- This product is intended for indoor use only.
- Do not expose the device to water or excessive moisture.
- Keep out of reach of small children unless supervised, as small parts may pose a choking hazard.
- Use only the specified battery type (3 x AAA, not included). Do not mix old and new batteries or different types of batteries.
- Remove batteries if the device will not be used for an extended period.
- Do not attempt to disassemble or modify the device.
- Avoid direct eye exposure to the projection light.
3. Package Contents
Please verify that all items are present in your package:
- Discovery Kids Time and Space Projection Alarm Clock (Rocketship Unit)
- Instruction Manual (this document)

Figure 3.1: The retail packaging for the Discovery Kids Time and Space Projection Alarm Clock, showing the product and its key features on the box.
4. Product Overview
Familiarize yourself with the various parts of your projection alarm clock:
- Projection Lenses: Located at the top, these project time and images.
- Digital Display: Shows current time, date, and alarm status.
- Control Buttons: TIME, UP, IMAGE, DOWN, ALARM SET, TIME SET, ALARM OFF.
- Image Selector Wheel: Rotates to change projection images.
- Battery Compartment: Located at the bottom.
- DC Input: For optional AC adapter (not included).
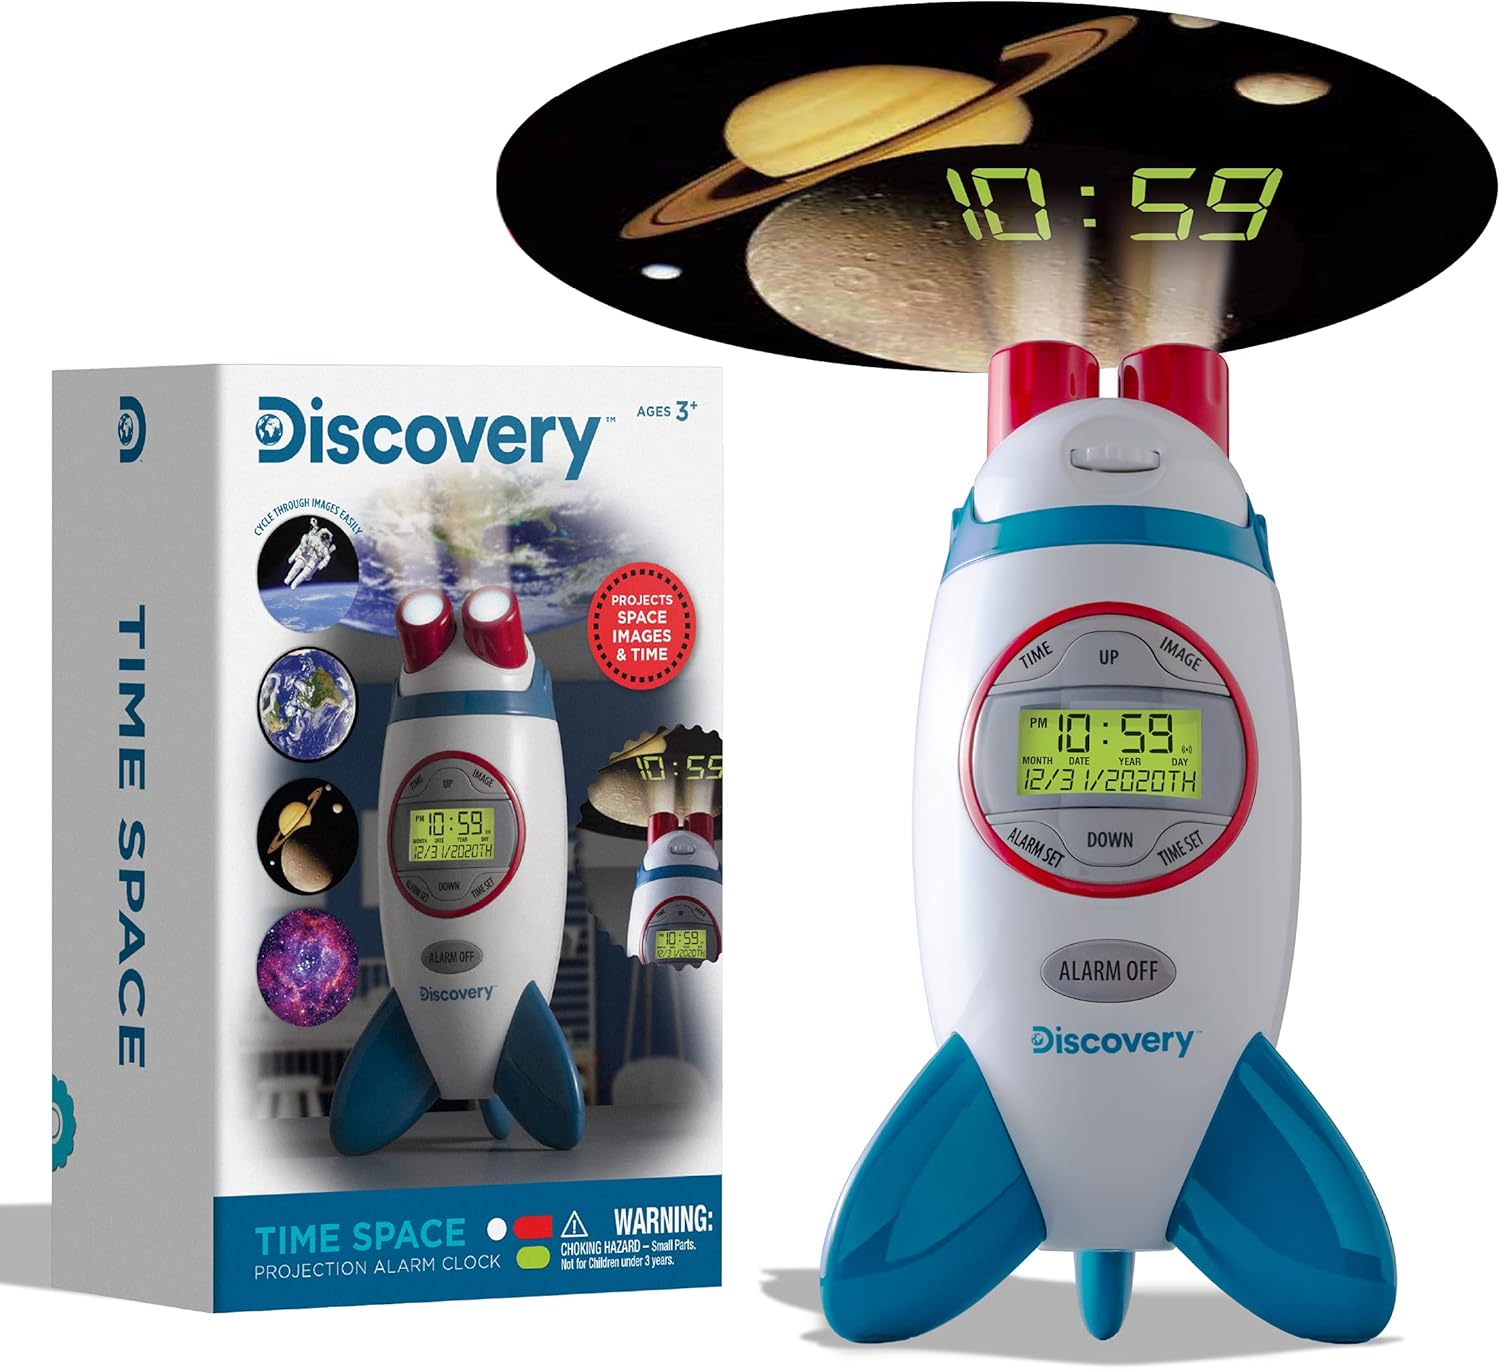
Figure 4.1: A front view of the Discovery Kids Time and Space Projection Alarm Clock, shaped like a rocketship, displaying the time and date on its digital screen.
5. Setup
5.1 Battery Installation
The alarm clock requires 3 x AAA batteries (not included) for operation.
- Locate the battery compartment cover on the bottom of the unit.
- Using a small Phillips head screwdriver, unscrew the battery compartment cover.
- Insert 3 new AAA batteries, ensuring correct polarity (+/-) as indicated inside the compartment.
- Replace the cover and secure it with the screw.
5.2 Power Connection (Optional)
The clock can also be powered by an AC adapter (not included). If using an adapter, plug it into the DC input port on the unit and then into a standard wall outlet. When plugged in, the projection feature can remain active for 8 hours; on battery power, it operates for 30 minutes.
6. Operating Instructions
6.1 Setting Time and Date
- Press and hold the TIME SET button until the hour display begins to flash.
- Use the UP or DOWN buttons to adjust the hour. Pay attention to the AM/PM indicator.
- Press TIME SET again to move to minutes, then use UP or DOWN to adjust.
- Continue pressing TIME SET to cycle through and set the month, date, and year using the UP or DOWN buttons.
- Press TIME SET one last time to confirm all settings and exit the time setting mode.
6.2 Setting the Alarm
- Press and hold the ALARM SET button until the alarm hour display begins to flash.
- Use the UP or DOWN buttons to adjust the alarm hour.
- Press ALARM SET again to move to alarm minutes, then use UP or DOWN to adjust.
- Press ALARM SET one last time to confirm the alarm setting.
- To activate or deactivate the alarm, press the ALARM OFF button. The alarm icon on the display indicates its status.
6.3 Projection Features
The alarm clock can project the current time and space-themed images onto a wall or ceiling.
- Time Projection: Press the TIME button to activate or deactivate the time projection.
- Image Projection: Press the IMAGE button to activate or deactivate the image projection.
- The projection can reach up to 10 feet away, with images as large as 4 feet wide.
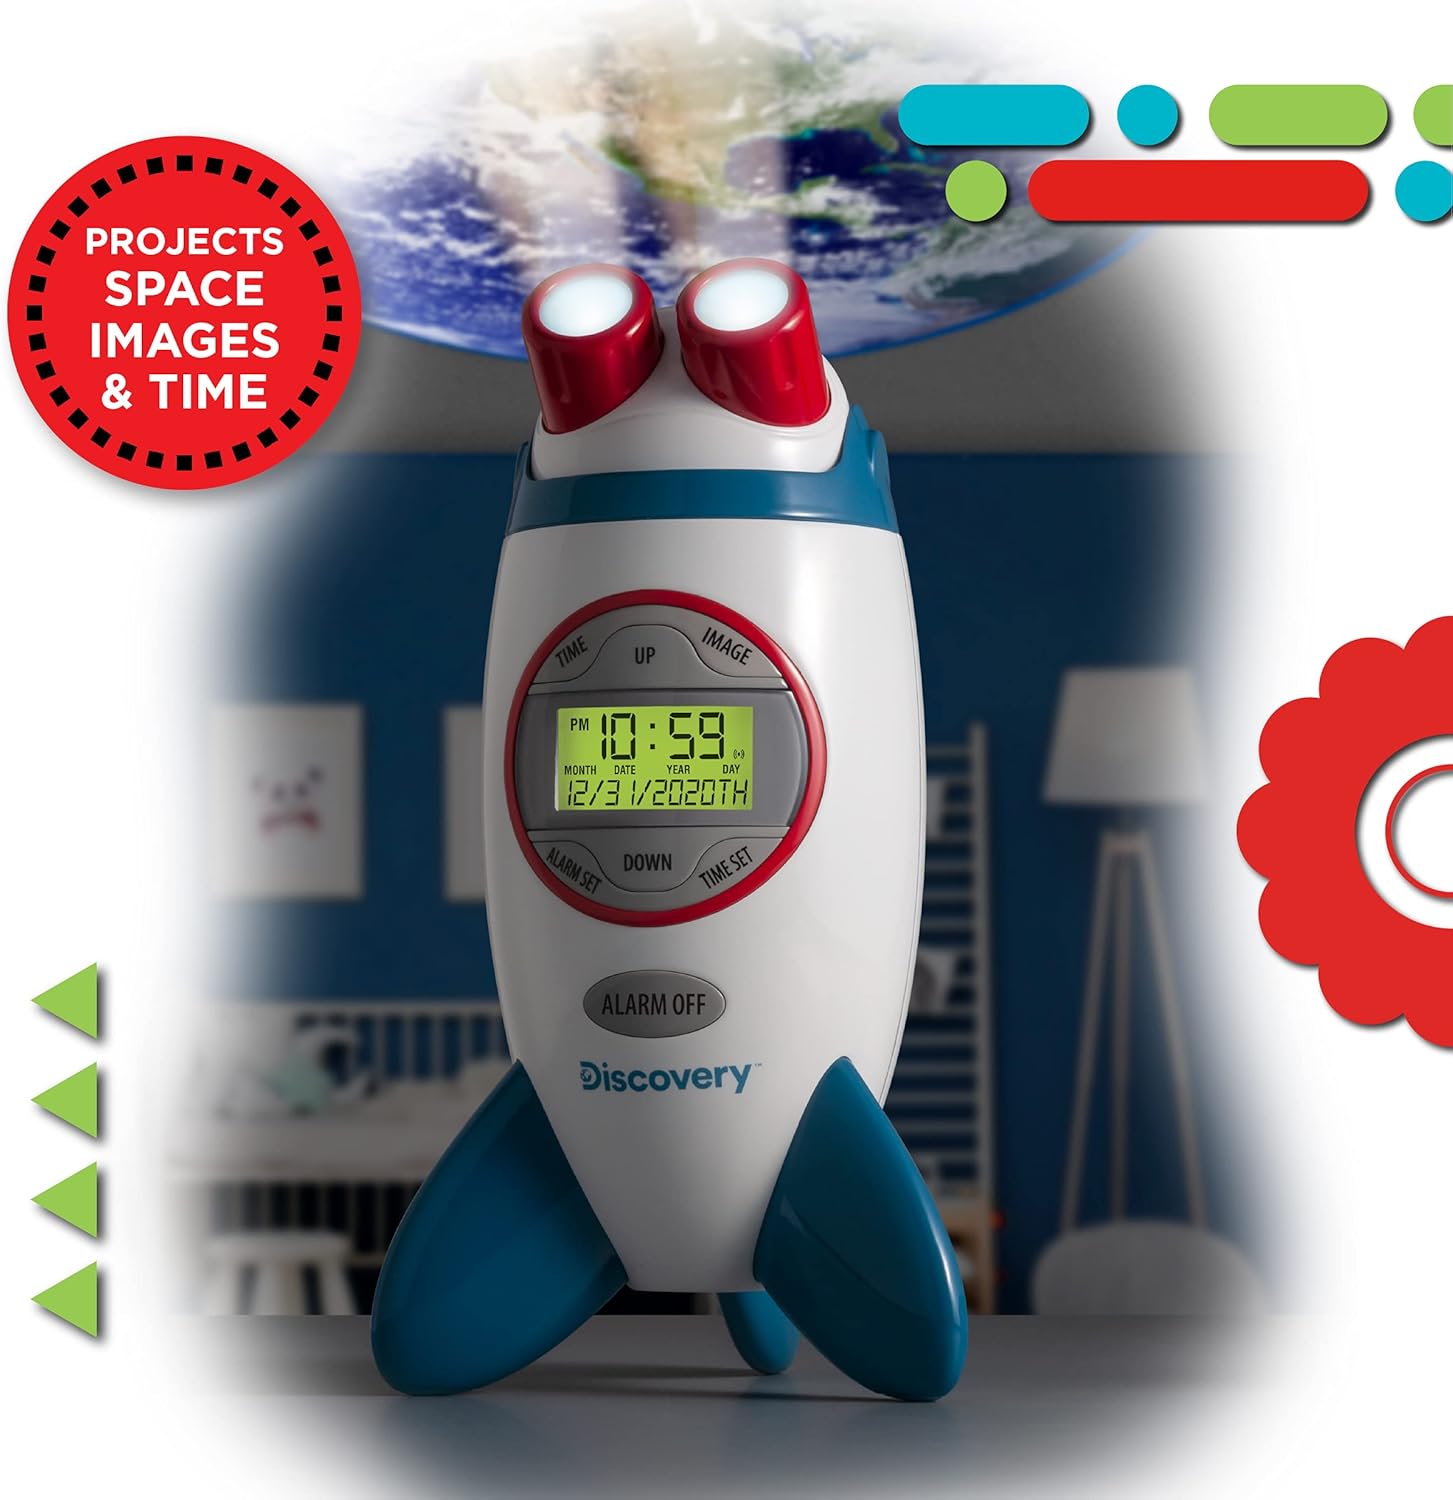
Figure 6.1: The rocketship-shaped alarm clock placed on a surface, projecting a space-themed image and the current time onto a wall or ceiling in a child's room.

Figure 6.2: A detailed view of the digital time and a space image (like Saturn) projected clearly onto a surface by the alarm clock.
6.4 Selecting Projection Images
The alarm clock includes 4 unique space-themed images. To change the projected image:
- Ensure the image projection is active (press the IMAGE button).
- Rotate the Image Selector Wheel located on the top of the unit to cycle through the available images.

Figure 6.3: A close-up of the top part of the alarm clock, showing the rotating image selector wheel used to cycle through the four space-themed projection images.
7. Maintenance
- Clean the device with a soft, dry cloth. Do not use abrasive cleaners or solvents.
- Keep the projection lenses clean and free of dust for optimal image clarity.
- Store the alarm clock in a cool, dry place when not in use for extended periods.
8. Troubleshooting
| Issue | Possible Cause | Solution |
|---|---|---|
| Device does not power on or display is blank. | Batteries are dead or incorrectly installed; power adapter not connected (if applicable). | Replace batteries with new AAA batteries, ensuring correct polarity. If using an adapter, ensure it is securely plugged in. |
| Projection is blurry or faint. | Projection lenses are dirty; device is too far from the projection surface; focus not adjusted. | Clean the projection lenses with a soft cloth. Move the clock closer to the wall/ceiling. There is no explicit focus adjustment mentioned, but ensuring optimal distance is key. |
| Images are not changing. | Image selector wheel is stuck or not rotated properly. | Gently rotate the Image Selector Wheel to cycle through the images. Ensure no obstructions. |
| Alarm does not sound. | Alarm is not activated; alarm time is incorrect. | Press the ALARM OFF button to ensure the alarm is activated (alarm icon should be visible). Verify the alarm time setting. |
9. Specifications
- Brand: Discovery Kids
- Model: Time and Space Projection Alarm Clock
- Display Type: Digital
- Power Source: 3 x AAA Batteries (not included) or DC 4.5V AC Adapter (not included)
- Product Dimensions: Approximately 7.01" W x 11.03" H (Rocketship shape)
- Projection Distance: Up to 10 feet
- Projected Image Size: Up to 4 feet wide
- Projection Duration (Battery): 30 minutes
- Projection Duration (Plugged In): 8 hours
- Theme: Space
- Material: Plastic
- ASIN: B0944V3S4S
- UPC: 843479147735
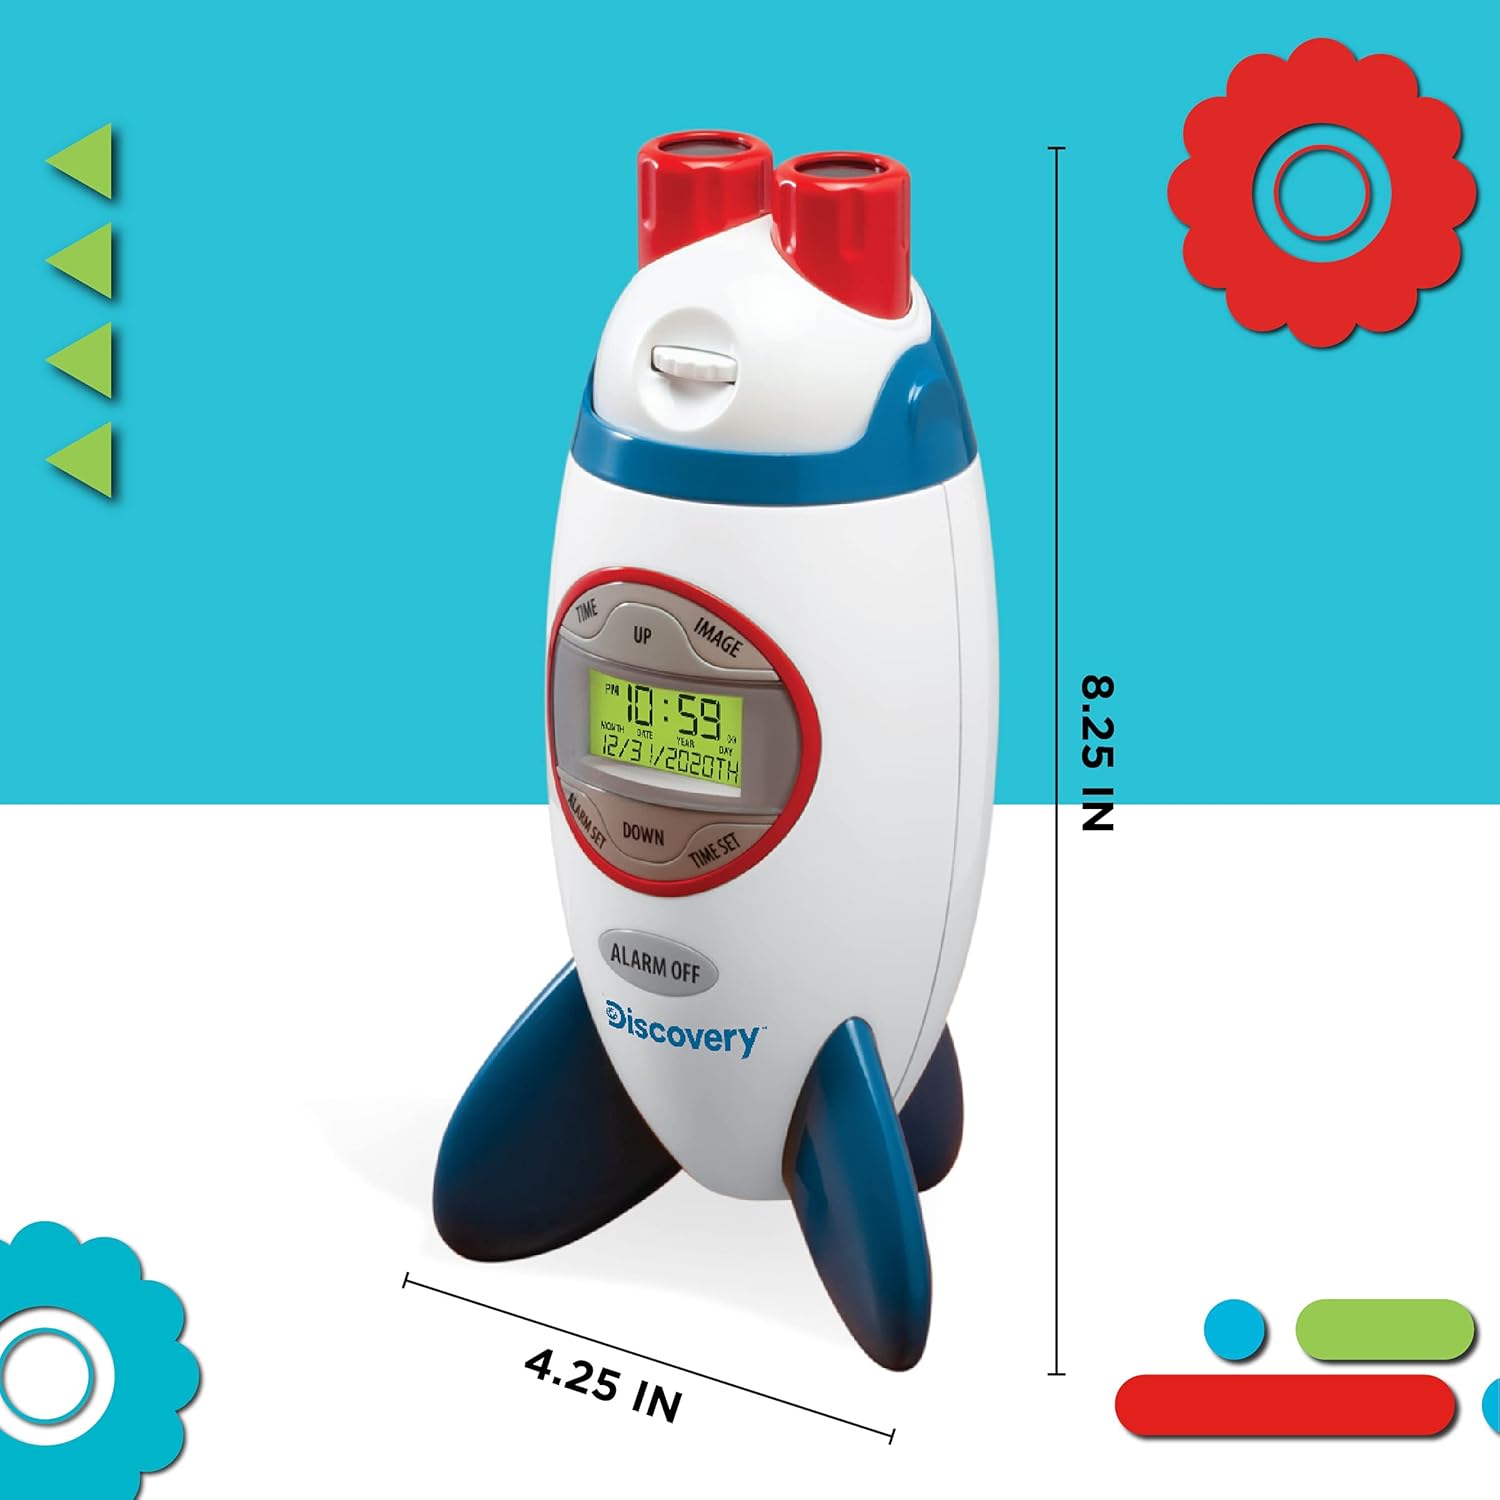
Figure 9.1: An illustration of the alarm clock with its approximate height (8.25 inches) and width (4.25 inches) indicated.
10. Warranty and Customer Support
For information regarding warranty coverage, product registration, or customer support, please refer to the contact information provided on the product packaging or visit the official Discovery Kids website. Keep your purchase receipt as proof of purchase.
Ask a question about this manual
Ask about setup, troubleshooting, compatibility, parts, safety, or missing instructions. Manuals+ will review the question and use this page’s manual context to help answer it.