
1. Introduction
The ScorpionEXO EXO-COM Bluetooth Communicator Kit is designed to integrate seamlessly with compatible ScorpionEXO helmets, providing advanced communication and audio features for riders. This manual provides essential information for the proper installation, operation, and maintenance of your EXO-COM system.
Key features include Bluetooth 5 connectivity, DynaMESH intercom for group communication, high-definition speakers with integrated dual microphones, and adjustable noise cancellation for clear audio.
2. Safety Information
Please read and understand all safety warnings before using the EXO-COM system.
- Do not use this device in a manner that distracts you from operating your vehicle safely. Always prioritize road safety.
- Follow all local laws and regulations regarding the use of communication devices while operating a motorcycle.
- Ensure proper installation to prevent interference with helmet components or discomfort during use.
- Handle the battery pack with care. Do not expose it to extreme temperatures, puncture, or disassemble it. Dispose of batteries according to local regulations.
- Keep the volume at a level that allows you to hear ambient traffic sounds and emergency signals. Prolonged exposure to loud sounds may cause hearing damage.
3. Package Contents
Verify that all items listed below are present in your EXO-COM kit:
- EXO-COM Main Unit
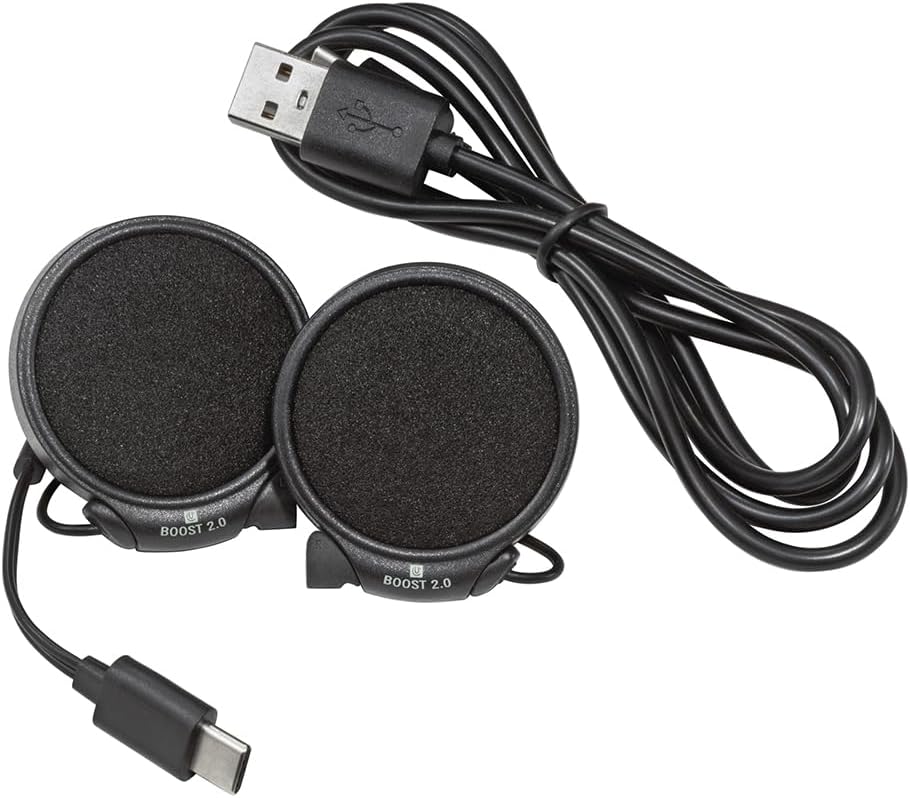
- High-Definition Speakers with Integrated Microphones (Boost 2.0)
- Rechargeable Battery Pack
- USB Charging Cable (USB-A to USB-C)
- Speaker Spacers/Velcro Pads
- Installation Guide (often integrated into the helmet manual or app)


4. Setup and Installation
The EXO-COM system is designed for integrated installation into specific ScorpionEXO helmet models: AT960, T520, and GT930. Refer to your helmet's specific manual for detailed instructions on removing and re-installing interior padding.
4.1. Initial Charging
Before installation, fully charge the battery pack. Connect the USB charging cable to the battery pack and a compatible USB power source. The charging indicator will show the charging status.
4.2. Helmet Preparation
- Carefully remove the helmet's cheek pads and comfort liner according to your helmet's instruction manual.
- Locate the designated speaker pockets and wiring channels within the helmet.
4.3. Speaker and Main Unit Installation
- Place the speakers into the helmet's speaker pockets. Use the provided Velcro pads or spacers if needed to ensure a snug fit and optimal ear alignment. The integrated microphones are part of the speaker units.
- Route the speaker wires through the designated channels to the rear of the helmet, ensuring they do not interfere with padding or cause discomfort.
- Install the EXO-COM main unit into its designated slot on the exterior or interior of the helmet, typically near the left side. Ensure it clicks securely into place.
- Connect the speaker wires to the main unit.

4.4. Battery Pack Placement
- The battery pack is typically placed in a dedicated slot at the rear base of the helmet, under the neck roll.
- Connect the battery pack to the main unit.
- Carefully re-install the helmet's comfort liner and cheek pads, ensuring all wires are tucked away and do not create pressure points.
5. Operating Instructions
5.1. Power On/Off
- To Power On: Press and hold the Power button until the indicator light illuminates.
- To Power Off: Press and hold the Power button until the indicator light turns off.
5.2. Bluetooth Pairing with Mobile Device
- With the EXO-COM powered off, press and hold the Power button for approximately 5-7 seconds until the indicator light flashes rapidly, indicating pairing mode.
- On your mobile device, go to Bluetooth settings and select 'EXO-COM' from the list of available devices.
- Once paired, the indicator light will change to a steady blue or flash slowly.
5.3. DynaMESH Intercom
The EXO-COM features DynaMESH intercom technology, allowing up to 4 riders to communicate. The system automatically reorganizes the network as riders move, maintaining connection.
- Initiating Intercom: Follow the specific instructions in the EXO-COM Mobile App or the detailed manual for initiating a DynaMESH group.
- Intercom Range: Up to 0.8 KM (0.5 mile) per person in optimal conditions.
- Universal Pairing: Limited pairing with other compatible brands is supported.
5.4. Phone Calls
- Answering/Ending Calls: Press the designated button on the main unit (refer to the specific button layout for your model).
- Voice Dialing: Activate your phone's voice assistant (Siri, Google Assistant) by pressing the appropriate button.
- The integrated dual microphones and adjustable ABF (Advanced Beam Forming) noise cancellation enhance call clarity.
5.5. Music Playback
- Play/Pause: Press the designated button.
- Next/Previous Track: Use the designated buttons for track control.
- Volume Adjustment: Use the volume up/down buttons.
- The 40mm premium drivers and adjustable graphic equalizer provide enhanced sound quality.
5.6. EXO-COM Mobile App
Download the EXO-COM Mobile App from your device's app store. The app allows you to:
- Customize user preferences.
- Adjust audio settings, including the graphic equalizer.
- Access a complete PDF manual.
- Seamlessly connect with compatible onboard OEM systems (motorcycles, UTVs, snowmobiles) and GPS units.
6. Maintenance
6.1. Cleaning
- Wipe the main unit and speakers with a soft, damp cloth. Do not use harsh chemicals or abrasive cleaners.
- Ensure all ports are dry before charging.
6.2. Battery Care
- Charge the battery regularly, even if not in frequent use, to maintain battery health.
- Avoid fully discharging the battery for extended periods.
- Store the device in a cool, dry place when not in use.
- The battery pack is replaceable. Contact ScorpionEXO support for replacement options.
7. Troubleshooting
If you encounter issues with your EXO-COM system, try the following steps:
- No Power: Ensure the battery is fully charged. Check that the battery pack is securely connected to the main unit.
- Pairing Issues: Ensure the device is in pairing mode. Turn off and restart both the EXO-COM and your mobile device. Delete previous pairings and attempt to pair again.
- No Audio/Poor Audio Quality: Check volume levels on both the EXO-COM and your connected device. Ensure speakers are correctly positioned and connected. Verify that wires are not pinched or damaged.
- Intercom Disconnections: Ensure all riders are within range. The DynaMESH system is self-healing, but extreme distances or obstacles can affect connectivity.
- Microphone Issues: Ensure the integrated microphones are not obstructed. Adjust noise cancellation settings via the mobile app if experiencing excessive wind noise.
- System Reset: If the device becomes unresponsive, perform a factory reset (refer to the EXO-COM Mobile App or detailed manual for specific instructions).
For persistent issues, contact ScorpionEXO customer support.
8. Specifications
| Model Number | COM-338104 |
| Connectivity Technology | Bluetooth 5.0 |
| Intercom Type | DynaMESH (up to 4 riders) |
| Intercom Range | Up to 0.8 KM (0.5 mile) per person |
| Speakers | 40mm Premium Drivers |
| Microphones | Integrated Dual Microphones with ABF Noise Cancellation |
| Battery Type | Lithium Ion (replaceable) |
| Battery Life (Average) | Up to 15 hours |
| Standby Time | Up to 400 hours |
| Charging Time | 2.5 - 3.5 hours |
| Charging Port | USB-C |
| Compatible Helmets | ScorpionEXO AT960, T520, GT930 |
| Product Dimensions | 1 x 1 x 1 inches |
| Item Weight | 12 ounces |
9. Warranty and Support
For warranty information, product support, or to purchase replacement parts, please visit the official ScorpionEXO website or contact their customer service department. Keep your proof of purchase for warranty claims.
ScorpionEXO Official Website: Visit the ScorpionEXO Store on Amazon
