
1. Product Overview
The JUYEER HOTAS Flight Simulation Desk Mount (Model JY-HOTAS-MOUNT) is designed to provide a stable and adjustable platform for your flight simulation controllers, including joysticks and throttles. It features a robust construction and a versatile clamping system to secure your equipment to a desk, enhancing your gaming experience.
Key Features:
- Wide Adaptability: Compatible with a broad range of flight simulation control devices.
- Enhanced Stability: Utilizes a stainless steel quick-release clamp for secure attachment to desks.
- Ergonomic Design: Allows for vertical and horizontal adjustment to achieve optimal positioning.
- Durable Construction: Made with high-quality metal and a surface spray coating for longevity.
- Desk Protection: Features a silicone pad under the top plate to prevent desk damage and slipping.
2. Package Contents
Please verify that all components are present before beginning assembly:
- Desk Mount Brackets (2 units)
- Mounting Plates for Controllers (2 units)
- Quick-Release Clamps (2 units)
- Assorted Screws, Nuts, and Washers
- Hex Keys / Wrenches for Assembly
3. Setup and Installation
Follow these steps to assemble and install your JUYEER HOTAS Desk Mount:
- Attach Mounting Plate to Bracket: Align the mounting plate with the vertical bracket. Insert the small nuts into the rails on the main support. While holding the nuts in place, secure the mounting plate to the bracket using the provided screws. Ensure a snug fit without overtightening. Repeat for the second mount.
- Install Quick-Release Clamp: Attach the quick-release clamp mechanism to the vertical bracket. Ensure all screws are tightened securely.
- Position on Desk: Place the assembled mount onto your desk. The silicone pad on the top plate should rest on the desk surface.
- Secure to Desk: Adjust the quick-release clamp to fit your desk thickness (0.5 cm to 24.4 cm). Tighten the clamp firmly to ensure the mount is stable and does not wobble.
- Attach Controllers: Place your HOTAS joystick and throttle onto the respective mounting plates. Use the appropriate screws and holes on the plate to secure your specific controller model. The plates feature multiple pre-drilled holes for wide compatibility.
- Adjust Height and Position: Loosen the adjustment screws on the vertical bracket to slide the mounting plate up or down. Adjust to your preferred ergonomic height. Tighten the screws firmly once the desired height is achieved. You can also adjust the horizontal position of the mount on your desk.

Figure 1: Product features highlighting the silicone pad, metal construction, and quick-release clamp.

Figure 2: Vertical adjustability of the mount, allowing for personalized height settings.
4. Operating Instructions
Once installed, the JUYEER HOTAS Desk Mount provides a stable base for your flight simulation controllers. Ensure your controllers are securely fastened to the mounting plates before use.
Using Your Controllers:
- Confirm that the desk clamp is tight and the mount does not move during intense gameplay.
- Verify that your joystick and throttle are firmly attached to their respective plates.
- Adjust the height and horizontal position as needed for comfort and optimal control during your simulation sessions.

Figure 3: Example setup with a joystick and throttle mounted on the desk.

Figure 4: Another example of a HOTAS setup using the JUYEER desk mounts.
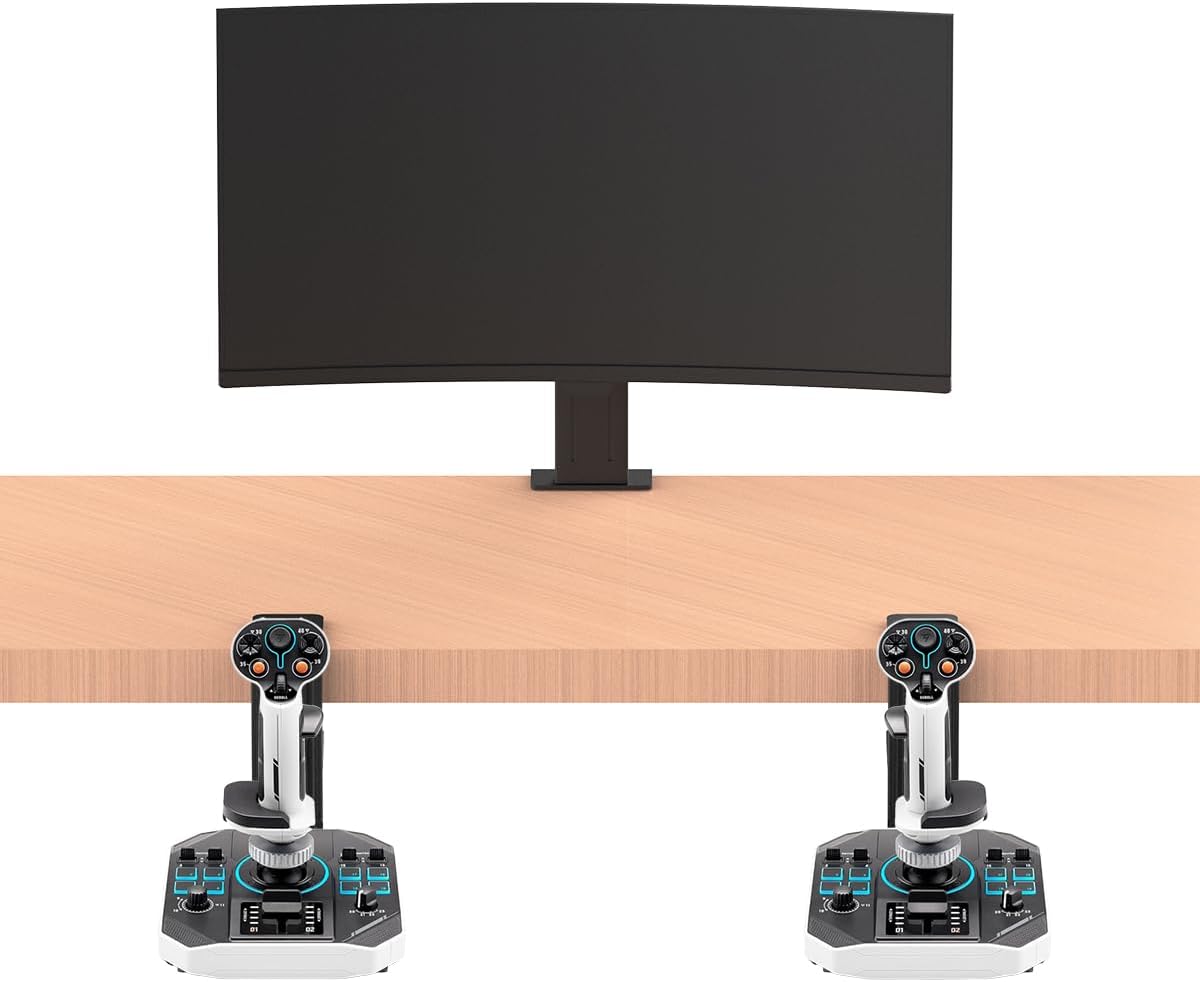
Figure 5: Overview of compatible flight simulation controller models.
5. Maintenance
Regular maintenance ensures the longevity and optimal performance of your desk mount.
- Cleaning: Wipe the metal surfaces with a soft, dry cloth. Avoid abrasive cleaners or solvents that could damage the finish.
- Check Tightness: Periodically inspect all screws and the desk clamp for tightness. Re-tighten if any components feel loose to maintain stability.
- Silicone Pad: Ensure the silicone pad remains clean and free of debris to maintain its anti-slip properties and protect your desk.
6. Troubleshooting
If you encounter issues with your JUYEER HOTAS Desk Mount, refer to the following common solutions:
- Mount feels loose or wobbly:
- Ensure the quick-release desk clamp is fully tightened.
- Check all screws connecting the mounting plate to the bracket and the bracket to the clamp. Tighten any loose screws.
- Verify that your desk surface is stable and not prone to movement.
- Difficulty attaching controllers:
- Confirm that you are using the correct screws for your specific controller model.
- Align the controller carefully with the pre-drilled holes on the mounting plate.
- Mounting plate slides down after adjustment:
- Ensure the vertical adjustment screws are tightened firmly after setting the desired height.
7. Specifications
| Attribute | Detail |
|---|---|
| Model Number | JY-HOTAS-MOUNT |
| Package Dimensions | 28.09 x 18.39 x 5.69 cm |
| Item Weight | 1.8 kilograms |
| Desk Thickness Compatibility | 0.5 cm to 24.4 cm |
| Material | High-quality metal, stainless steel clamp, silicone pad |
8. Warranty and Support
Warranty information for the JUYEER HOTAS Desk Mount is not provided in the available product data. For specific warranty details or technical support, please contact JUYEER directly through their official website or the retailer where the product was purchased.