
1. Product Overview
This H-ANT Ni-MH Ni-Cd Battery Charger (Model MAK-CH09) is designed to charge Makita 7.2V, 9.6V, 12V, 14.4V, and 18V Ni-MH and Ni-Cd batteries. It features a universal input voltage range of 100V-240V, making it suitable for various regions. The charger incorporates built-in diagnostic programs to prevent battery damage from overload and overcharge.

Image 1.1: Front view of the H-ANT Ni-MH Ni-Cd Battery Charger (MAK-CH09).
Video 1.1: A 360-degree view of the H-ANT Ni-MH Ni-Cd Battery Charger, showcasing its design and various angles.
2. Safety Information
- Read all instructions before using the charger.
- Do not charge non-rechargeable batteries.
- Do not expose the charger to rain or wet conditions.
- Use only with specified battery types (Ni-MH, Ni-Cd) and voltages (7.2V-18V).
- Do not operate the charger if it has received a sharp blow, been dropped, or otherwise damaged.
- Unplug the charger from the outlet when not in use or before cleaning.
- Ensure adequate ventilation during charging. Do not block ventilation openings.
- Keep the charger away from heat sources and direct sunlight.
3. Product Features
- Input Voltage: 100V-240V, 30W, 50/60HZ.
- Output: 7.2V/9.6V/12V/14.4V/18V, 1.5A.
- Compatible with Makita 7.2V, 9.6V, 12V, 14.4V, 18V Ni-MH and Ni-Cd batteries.
- Built-in charger diagnostic program.
- Overload and overcharge protection to prevent battery damage.
- Compact design with precise interface for secure battery connection.

Image 3.1: Close-up view of the charger's precise battery interface and the charging indicator light.
4. Package Contents
The package includes:
- 1 x H-ANT Ni-MH Ni-Cd Battery Charger (MAK-CH09)
Note: Batteries are not included with the charger.
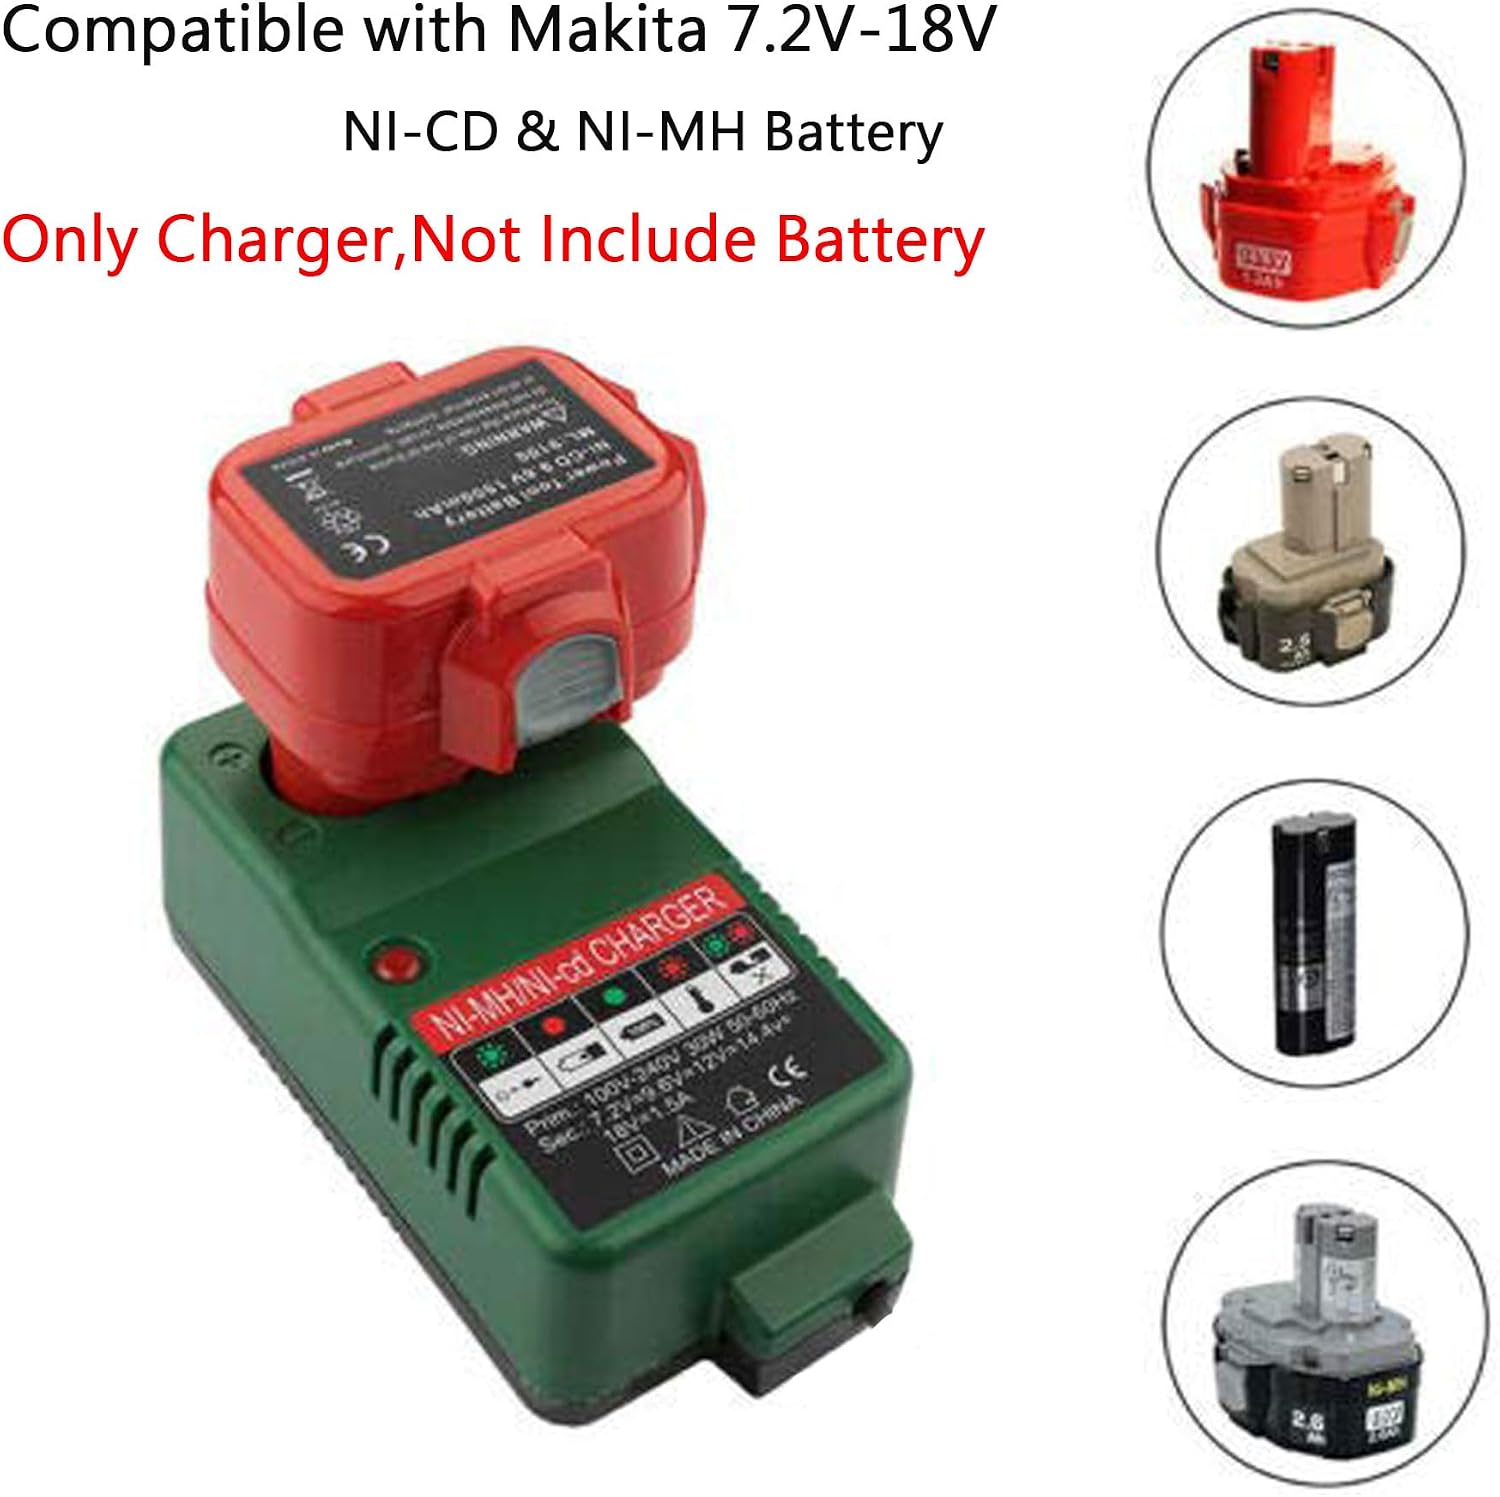
Image 4.1: The charger shown with various compatible Makita batteries, emphasizing that batteries are sold separately.
5. Setup
- Unpack the Charger: Carefully remove the charger from its packaging.
- Inspect for Damage: Before use, inspect the charger and its power cord for any signs of damage. Do not use if damaged.
- Connect to Power: Plug the charger's power cord into a standard 100V-240V AC electrical outlet. Ensure the outlet is easily accessible.
- Insert Battery: Align the battery pack with the charger's slot and slide it in until it clicks securely into place. Ensure the battery is fully seated.

Image 5.1: The US standard plug of the H-ANT battery charger.
6. Operating Instructions
The charger features LED indicators to communicate the charging status. Refer to the table below for details:
| Battery Status | LED Indicator | Action/Meaning |
|---|---|---|
| Plugged in (No Battery) | Green flashing | Charger is powered on and ready. |
| Charging | Red light ON | Battery is currently charging. |
| Fully Charged | Green light ON | Charging is complete. Remove battery. |
| Hot Battery/Charger | Red flashing | Charger or battery is too hot. Allow to cool down before resuming. |
| Defective | Green, Red Flashing | Battery pack or charger is defective. Do not use. |

Image 6.1: Detailed table explaining the LED indicator functions of the charger.
Once the battery is fully charged (Green light ON), disconnect the battery from the charger and unplug the charger from the power outlet.
7. Maintenance
- Cleaning: Disconnect the charger from the power supply before cleaning. Use a soft, dry cloth to wipe the exterior of the charger. Do not use abrasive cleaners or solvents.
- Storage: Store the charger in a cool, dry place away from direct sunlight and moisture.
- Inspection: Periodically inspect the charger, cord, and plug for any signs of wear or damage.
8. Troubleshooting
| Problem | LED Indicator | Possible Cause | Solution |
|---|---|---|---|
| Charger not working | No light | No power, faulty outlet, or damaged charger. | Check power connection. Try a different outlet. If still no light, the charger may be defective. |
| Battery not charging | Red flashing | Battery or charger is too hot. | Remove battery and allow both charger and battery to cool down in a well-ventilated area. Reinsert battery once cooled. |
| Battery not charging | Green, Red Flashing | Defective battery or charger. | Try charging a different, known-good battery. If the issue persists, the charger may be defective. If other batteries charge, the original battery is likely defective. |
| Slow charging | Red light ON | Battery deeply discharged or nearing end of life. | Allow more time for charging. If consistently slow or not reaching full charge, consider replacing the battery. |
9. Specifications
| Specification | Detail |
|---|---|
| Brand | H-ANT |
| Model Number | MAK-CH09 |
| Input Voltage | 100V-240V, 50/60Hz |
| Output Voltage | 7.2V / 9.6V / 12V / 14.4V / 18V |
| Output Current | 1.5A |
| Power | 30W |
| Compatible Battery Type | Ni-MH, Ni-Cd |
| Item Weight | 1.1 pounds (approx. 500 grams) |
| Package Dimensions | 7.87 x 3.94 x 3.94 inches |
| Color | Green |
| Material | ABS |
10. Warranty and Support
This H-ANT battery charger comes with a one-year quality warranty from the date of purchase.
For technical support, warranty claims, or any product-related inquiries, please contact the seller directly through the platform where the product was purchased. For purchases made on Amazon, you can typically find seller contact information via your order history.
Seller: SZ-JHM tool battery