
1. Introduction
This manual provides essential information for the installation, operation, and maintenance of your new QYMOTO OEM replacement fuel pump. This product is designed to meet or exceed original equipment specifications, ensuring reliable performance for your CFMOTO ATV.
Please read this manual thoroughly before attempting any installation or maintenance procedures. Proper installation and care are crucial for the longevity and safe operation of the fuel pump and your vehicle.
2. Safety Information
Working with fuel systems involves inherent risks. Always prioritize safety to prevent injury or damage.
- Disconnect Battery: Always disconnect the vehicle's battery before beginning any work on the fuel system.
- Ventilation: Work in a well-ventilated area to avoid inhaling fuel vapors.
- No Open Flames: Keep all sources of ignition (sparks, open flames, hot surfaces) away from the work area.
- Eye Protection: Wear appropriate eye protection to shield against fuel splashes or debris.
- Fuel Pressure: Relieve fuel system pressure before disconnecting any fuel lines. Refer to your ATV's service manual for specific procedures.
- Professional Installation: If you are not confident in your mechanical abilities, it is recommended to have the fuel pump installed by a qualified technician.
3. Package Contents
Verify that all components are present and undamaged upon opening the package:
- 1 x QYMOTO ATV Fuel Pump Assembly
- 1 x O-Washer
- 1 x O-Sealing Ring

Image: Complete QYMOTO fuel pump kit including the main pump assembly, O-washer, and O-sealing ring.
4. Compatibility
This QYMOTO fuel pump (OEM Part Number: 901F-150900-10000) is compatible with the following CFMOTO ATV models:
- CFMOTO CFORCE 400 (CF400AU) - Various years (2016-2022)
- CFMOTO CFORCE 500 S (CF500AU-7S) - Various years (2017-2022)
- CFMOTO CFORCE 500 HO (CF500AU-6L) - Various years (2015-2018)
- CFMOTO CFORCE 500 SWB - Various years (2012-2016)
- CFMOTO CFORCE 600 (CF600AU-3S) - Various years (2019-2022)
- CFMOTO CFORCE 600 Touring (CF600AU-3L) - Various years (2019-2022)
- CFMOTO CFORCE 600 LWB - Various years (2013-2014)
- CFMOTO X5 (CFORCE 500) LWB/SWB - Various years (2010-2012)
- CFMOTO X6 (CFORCE 600) LWB/SWB - Various years (2010-2012)
Always cross-reference the OEM part number (901F-150900-10000) with your vehicle's existing part or service manual to ensure proper fitment before installation.
5. Setup and Installation
The following steps provide a general overview for fuel pump replacement. Specific procedures may vary by ATV model. Always consult your vehicle's official service manual for detailed, model-specific instructions.
- Preparation: Park the ATV on a level surface. Ensure the engine is cool. Disconnect the negative terminal of the battery.
- Access Fuel Tank: Locate and access the fuel tank. This may involve removing seats, body panels, or other components.
- Relieve Fuel Pressure: Follow your ATV's service manual to safely relieve fuel system pressure.
- Disconnect Fuel Lines and Electrical Connector: Carefully disconnect the fuel lines from the fuel pump assembly. Be prepared for residual fuel spillage. Disconnect the electrical connector from the pump.
- Remove Old Fuel Pump: Unfasten the retaining ring or bolts securing the fuel pump assembly to the fuel tank. Carefully remove the old fuel pump assembly from the tank.
- Inspect Tank: Inspect the inside of the fuel tank for any debris or contamination. Clean if necessary.
- Install New Fuel Pump: Install the new QYMOTO fuel pump assembly, ensuring the new O-washer and O-sealing ring are correctly seated to prevent leaks. Secure the retaining ring or bolts.
- Reconnect: Reconnect the fuel lines and the electrical connector. Ensure all connections are secure.
- Final Checks: Reconnect the battery. Turn the ignition key to the 'ON' position (without starting the engine) for a few seconds to allow the fuel pump to prime the system. Check for any fuel leaks.
- Test Operation: Start the ATV and check for proper operation and any warning lights.

Image: Top view of the fuel pump assembly, highlighting the electrical wiring (red and blue) and the fuel outlet connection.
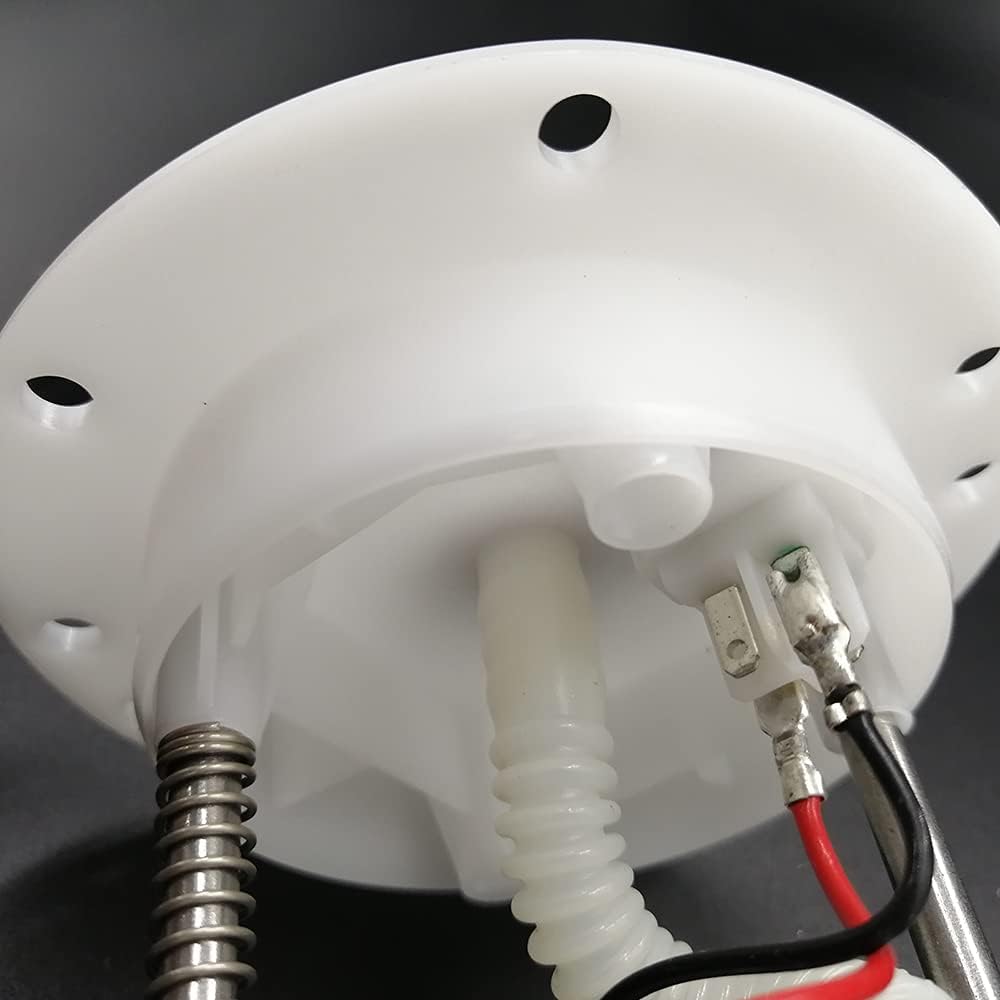
Image: Bottom view of the fuel pump assembly, showing the fuel inlet and internal wiring connections.
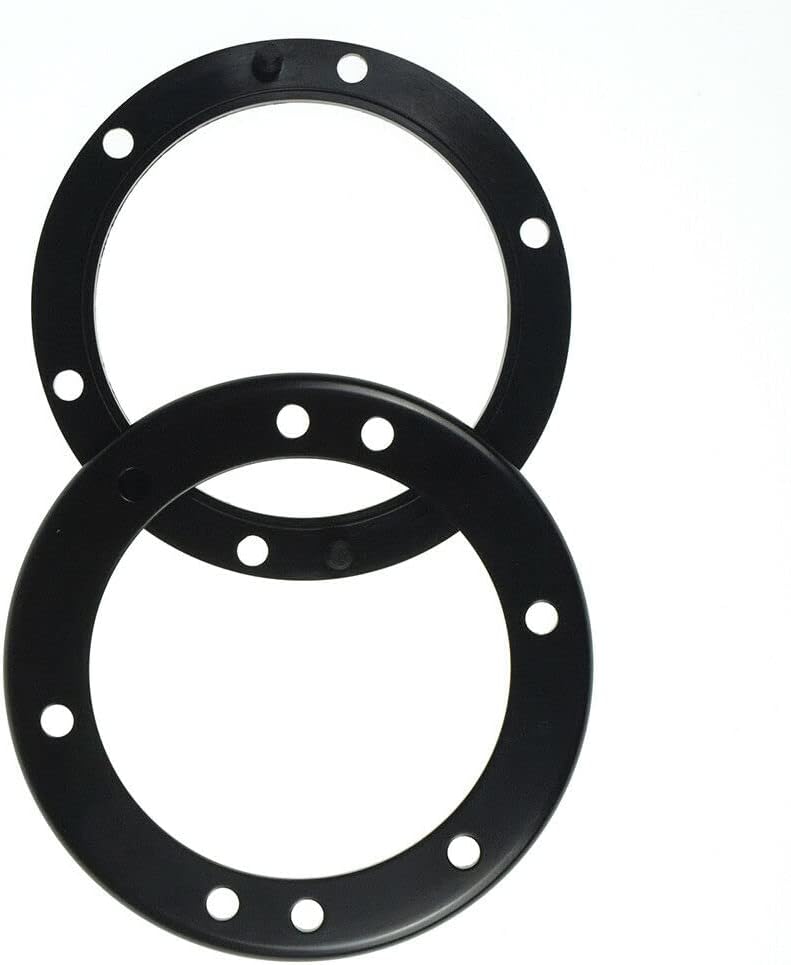
Image: Two black O-rings, essential for creating a proper seal during fuel pump installation.
6. Operating Principles
The fuel pump is an electric component responsible for drawing fuel from the tank and delivering it under pressure to the engine's fuel injection system. It maintains a consistent fuel supply to ensure optimal engine performance and combustion. When the ignition is turned on, the pump activates to pressurize the fuel lines before the engine starts, and continues to operate while the engine is running.
7. Maintenance
While the fuel pump itself is generally a sealed unit requiring no direct maintenance, proper fuel system care can extend its lifespan:
- Use Clean Fuel: Always use high-quality, clean fuel to prevent contaminants from clogging the fuel filter and pump.
- Replace Fuel Filter: Regularly replace the inline fuel filter according to your ATV's maintenance schedule. A clogged filter can overwork the fuel pump.
- Avoid Running on Low Fuel: Consistently running the fuel tank very low can cause the pump to draw in air and sediment, and can also lead to overheating as fuel helps cool the pump motor.

Image: The fuel filter or strainer, an integral part of the fuel pump assembly, designed to prevent debris from entering the pump and fuel system.
8. Troubleshooting
If you experience issues after fuel pump installation, consider the following common troubleshooting steps:
- No Start/Hard Start: Check electrical connections to the fuel pump. Ensure the fuel lines are correctly connected and not kinked. Verify there is fuel in the tank. Listen for the pump priming sound when the ignition is turned on.
- Engine Stalling/Loss of Power: This could indicate insufficient fuel pressure. Check for leaks in the fuel lines or connections. A clogged fuel filter (if separate from the pump) could also be a cause.
- Fuel Leaks: Immediately address any fuel leaks. Recheck the O-rings and sealing ring for proper placement and integrity. Ensure the retaining ring or bolts are tightened correctly.
- Check Engine Light: If a check engine light illuminates, retrieve diagnostic trouble codes (DTCs) using an OBD-II scanner (if applicable to your ATV) to pinpoint the issue.
If problems persist, consult a qualified ATV mechanic.
9. Specifications
| Specification | Detail |
|---|---|
| Brand | QYMOTO |
| Model Number | 901F-150900-10000 |
| Fit Type | Vehicle Specific Fit |
| Vehicle Service Type | ATV |
| Item Weight | 0.61 Kilograms (1.34 pounds) |
| Specification Met | OE (Original Equipment) |
| Auto Part Position | Front |
| Body Material | Alloy Steel |
| Gas Type | Gasoline |
| Operation Mode | Mechanical |
| Product Grade | Replacement Part |
10. Warranty and Support
This product is typically covered by a return policy allowing for refunds or replacements within 30 days of purchase. For specific warranty details or technical support, please refer to the seller's information on the purchase platform or contact QYMOTO directly through their official channels.
For additional products and information from QYMOTO, you may visit the QYMOTO Store.