
1. Product Overview
The RUIZHI Digital Temperature Controller with Sensor and Timer is designed for intelligent temperature and time management across various environments. It is suitable for applications such as greenhouses, aquariums, terrariums, aquaculture, and general home use. This device features an external temperature probe for accurate detection and offers multiple operational modes including cycle timing, time-based output, and temperature-controlled switching.
Key features include:
- Multi-Compatibility: Provides intelligent temperature and time control for diverse settings.
- Smart Timing Functions: Offers cycle timer, timer ON, timer OFF, and timer switch capabilities. Time range: 0-99 hours 59 minutes, with a maximum time accuracy of 10 minutes.
- Automatic Mode Switching: Automatically transitions between heating and cooling modes based on user-defined start and stop temperatures.
- Wide Temperature Range: Operates within a temperature range of -40°C to 120°C, with a control accuracy of ±1%.
- Multiple Operating Modes: Select from Temperature Control Mode, F01 Cycle Timer Mode, F02 Countdown ON Mode, F03 Countdown OFF Mode, and F04 Countdown ON/OFF Mode. Note that timing and temperature control functions cannot be used simultaneously.
- Data Retention: LCD display, temperature calibration, and all parameter settings are saved even after power loss.

Figure 1: RUIZHI Digital Temperature Controller, showcasing its application in a reptile terrarium environment.
2. Safety Information
Please read all safety instructions before operating this device. Failure to follow these instructions may result in electric shock, fire, or serious injury.
- Ensure the power supply voltage matches the device's specifications (100-250V AC).
- Do not exceed the maximum load capacity of 16A (3680W).
- Keep the device and its probe away from water or excessive moisture unless specifically designed for submersible use.
- Do not disassemble or modify the device. Refer all servicing to qualified personnel.
- Always unplug the device from the power outlet before cleaning or performing maintenance.
- Use a 3-prong adapter if necessary, as recommended for proper grounding.
3. Package Contents
Verify that all items are present in the package:
- 1 x RUIZHI Digital Temperature Controller
- 1 x Temperature Probe (Detector)
- 1 x User Manual
4. Setup
4.1 Connecting the Device
- Unpack the temperature controller and all accessories.
- Insert the temperature probe into the designated port on the side of the controller. Ensure it is securely connected.
- Plug the temperature controller into a standard 100-250V AC power outlet.
- Connect your heating or cooling appliance (e.g., heater, fan) to the appropriate outlet on the temperature controller. The controller typically has separate outlets for heating and cooling, or a single outlet that switches function based on mode.

Figure 2: The temperature controller connected to a power source, with the sensor probe ready for placement.
4.2 Probe Placement
Place the temperature probe in the area where you want to monitor and control the temperature. Ensure the probe is not directly exposed to heat sources or drafts, which could lead to inaccurate readings.

Figure 3: Dimensions of the controller and the length of the temperature probe cable.
5. Operating Instructions
5.1 Understanding the Display and Buttons
The device features an LCD display showing measured temperature, start temperature, and stop temperature. Buttons include MODE, SET, UP, and DOWN.
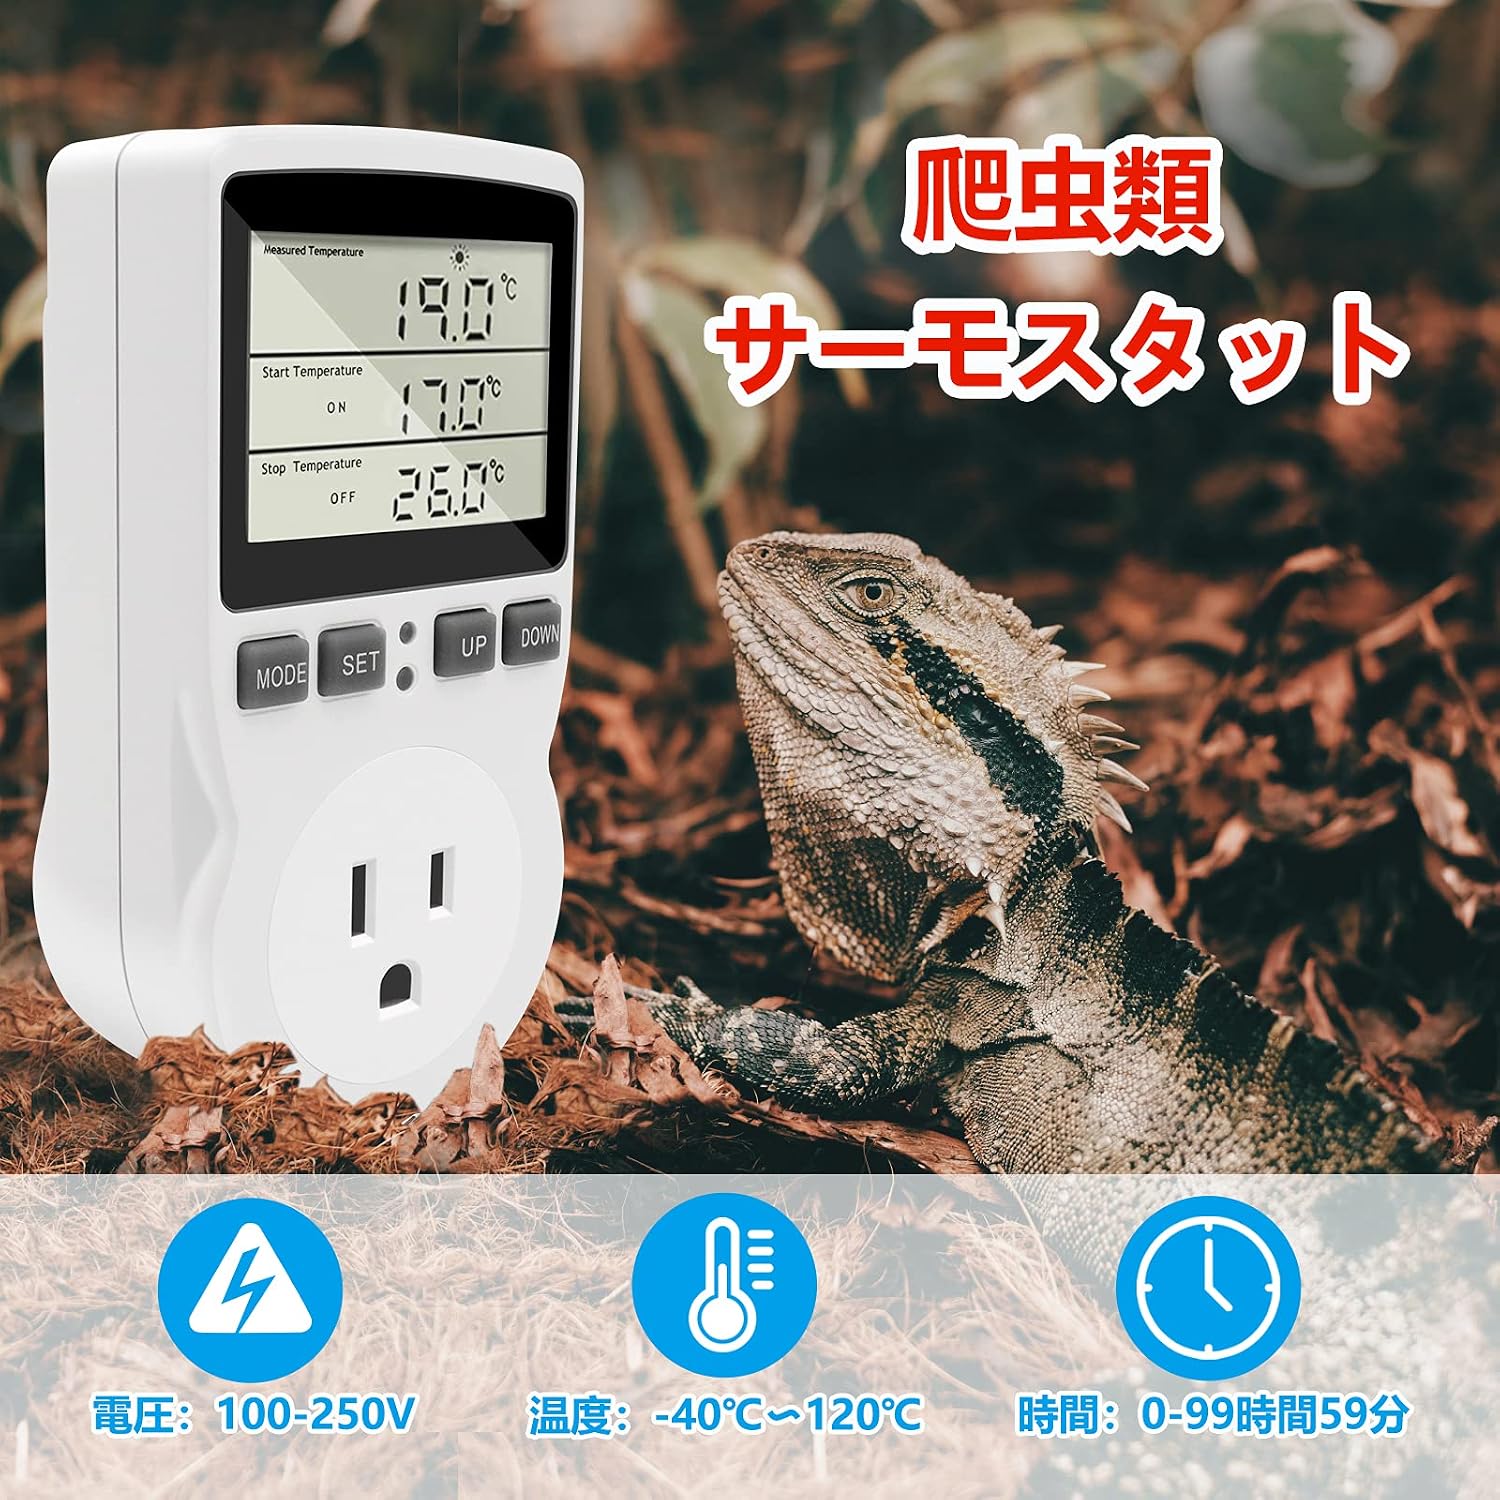
Figure 4: Overview of the LCD display and control buttons.
5.2 Temperature Control Mode
In this mode, the device controls the temperature by switching connected appliances ON or OFF based on your set start and stop temperatures.
- Press the MODE button until the display shows the temperature control interface (typically showing Measured Temperature, Start Temperature, Stop Temperature).
- Press the SET button once. The 'Start Temperature' value will flash. Use the UP and DOWN buttons to adjust the desired start temperature.
- Press SET again. The 'Stop Temperature' value will flash. Use the UP and DOWN buttons to adjust the desired stop temperature.
- Press SET a third time to confirm and save the settings.
Heating Mode: If the start temperature is set lower than the stop temperature, the device will operate in heating mode. For example, if Start Temp = 17°C and Stop Temp = 26°C, the heater will turn ON when the temperature drops to 17°C and turn OFF when it reaches 26°C.
Cooling Mode: If the start temperature is set higher than the stop temperature, the device will operate in cooling mode. For example, if Start Temp = 26°C and Stop Temp = 17°C, the cooler will turn ON when the temperature rises to 26°C and turn OFF when it drops to 17°C.

Figure 5: Example of Temperature Control Mode settings for heating.
5.3 Timer Modes
The device offers several timing modes for various applications. Press the MODE button repeatedly to cycle through the available modes (F01, F02, F03, F04).
- F01 Cycle Timer Mode: Allows setting an ON duration and an OFF duration for a repeating cycle.
- F02 Countdown ON Mode: The device will turn ON after a set countdown period.
- F03 Countdown OFF Mode: The device will turn OFF after a set countdown period.
- F04 Countdown ON/OFF Mode: Combines countdown ON and OFF functionalities.
To set parameters in any timer mode:
- Select the desired timer mode using the MODE button.
- Press the SET button. The relevant time parameter (e.g., ON hours, ON minutes) will flash.
- Use the UP and DOWN buttons to adjust the time.
- Press SET to move to the next parameter or to confirm and save the settings.

Figure 6: Different timer modes displayed on the LCD screen.

Figure 7: Example of F01 Cycle Timer Mode settings.
5.4 Temperature Calibration
If you suspect the temperature readings are inaccurate, you can calibrate the sensor. Consult the detailed instructions in the included user manual for the specific calibration procedure.
5.5 Video Guide: Temperature Controller Settings
Video 1: This video demonstrates how to set up and adjust the temperature on a similar temperature controller. It shows how to switch between Fahrenheit and Celsius, and how to set heating and cooling modes. While the interface may vary slightly, the core principles of setting temperature parameters are applicable.
6. Maintenance
Proper maintenance ensures the longevity and accuracy of your temperature controller.
- Cleaning: Disconnect the device from power before cleaning. Wipe the unit with a soft, dry cloth. Do not use abrasive cleaners or immerse the device in water.
- Probe Care: Keep the temperature probe clean and free from debris. Avoid bending or damaging the probe cable.
- Storage: When not in use for extended periods, store the device in a cool, dry place away from direct sunlight and extreme temperatures.
7. Troubleshooting
If you encounter issues with your RUIZHI Digital Temperature Controller, refer to the following common problems and solutions:
| Problem | Possible Cause | Solution |
|---|---|---|
| Device does not power on. | No power supply; loose connection. | Check power outlet and ensure the controller is securely plugged in. Verify power to the outlet. |
| Inaccurate temperature reading. | Probe improperly placed or damaged; needs calibration. | Ensure probe is correctly positioned and not near direct heat/cold sources. Perform temperature calibration as per manual. Inspect probe for damage. |
| Appliance not turning ON/OFF. | Incorrect temperature settings; appliance not plugged into controller; appliance malfunction. | Verify start/stop temperature settings. Ensure appliance is correctly plugged into the controller. Test the appliance independently. |
| Timer function not working. | Incorrect timer mode selected; timer parameters not set. | Ensure the correct timer mode (F01-F04) is selected. Set the ON/OFF durations or countdown times. Remember timing and temperature control cannot run simultaneously. |
8. Specifications
Detailed technical specifications for the RUIZHI Digital Temperature Controller:
| Parameter | Value |
|---|---|
| Brand | RUIZHI |
| Material | ABS, PC |
| Color | White |
| Voltage | 100-250V AC, 50/60Hz |
| Maximum Load | 16A (3680W) |
| Temperature Range | -40℃ to 120℃ |
| Temperature Control Accuracy | ±1% |
| Time Accuracy | Max 10 minutes |
| Product Size | 12 x 5.8 x 3.2 cm |
| Product Weight | 200 g |
| Sensor Type | NTC10K / B3950 |
| Output | Max 16A/230V |
9. Warranty and Support
For warranty information and technical support, please refer to the contact details provided with your purchase documentation or visit the official RUIZHI website. Keep your proof of purchase for warranty claims.