WEPARTICULAR DR-9 Car Radio User Manual
Model: DR-9
1. Introduction
The WEPARTICULAR DR-9 is a 1-DIN car stereo head unit designed to provide a comprehensive audio experience in your vehicle. It features an integrated DAB/DAB+ and FM tuner for crystal-clear digital and analog radio reception, Bluetooth connectivity for hands-free calling and wireless music streaming, and support for USB and AUX audio playback. This manual provides detailed instructions for installation, operation, and maintenance of your DR-9 car radio.
2. Package Contents
Please check the package for the following items:
- 1 x DR-9 Head Unit
- 1 x Installed Frame
- 1 x Wire Harness
- 1 x Antenna Adapter
- 1 x English Manual
- 1 x Dismantling Tools
- 1 x Steering Wheel Remote Control
3. Product Overview
3.1 Front Panel Layout
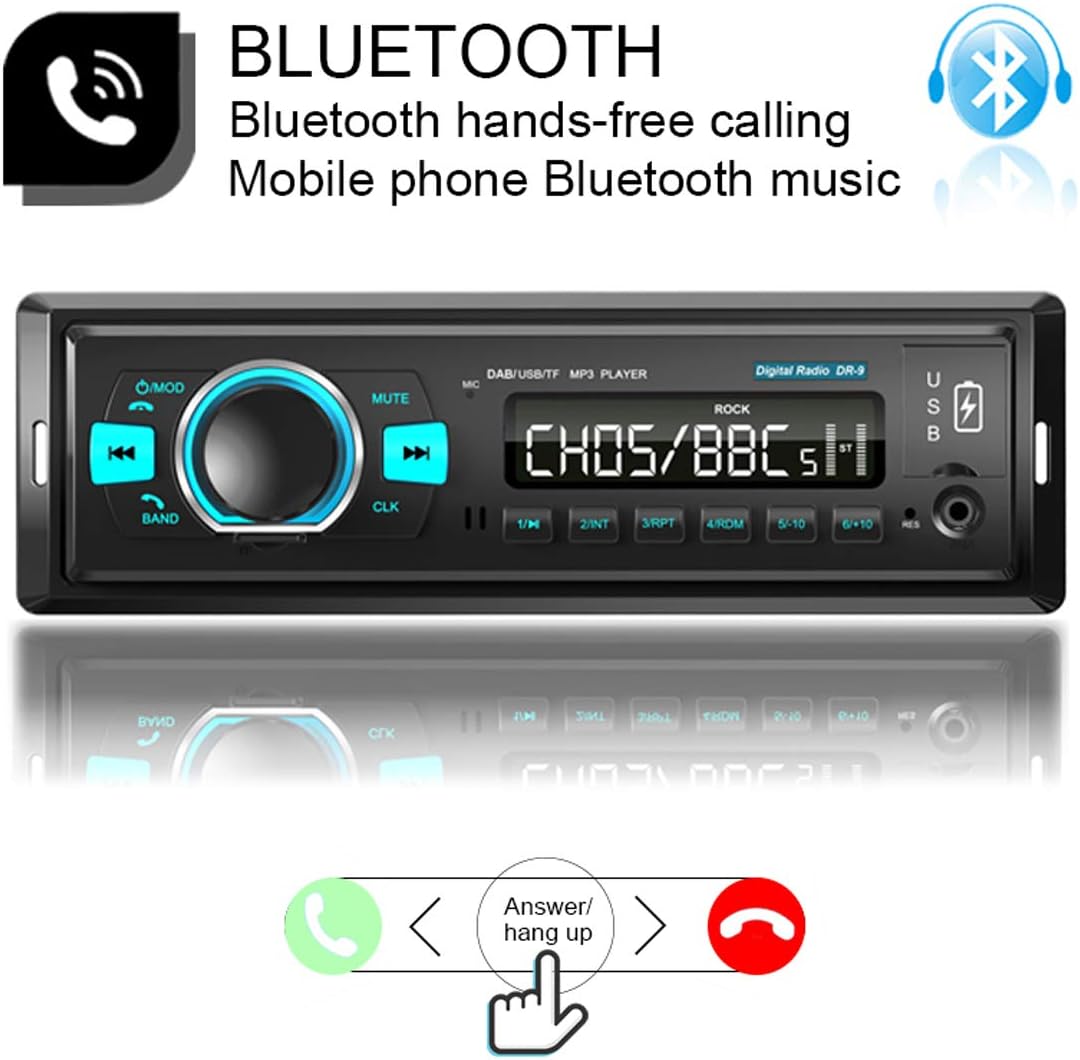
Figure 1: Front Panel Controls and Ports
This image illustrates the front panel of the DR-9 car radio, highlighting the functions of each button and port. Key controls include the Power/Mode button, Volume/Select knob, Mute button, Band selection, Previous/Next track controls, Clock display, USB Read port, USB Charging port, Reset button, and AUX Input.
3.2 Rear Panel Connections

Figure 2: Rear Panel Wiring Diagram
The rear view of the DR-9 car radio displays the various connection points: the Radio antenna input, Left and Right channel inputs (1 and 2), Left and Right channel outputs (1 and 2), the ISO standard plug for power and speakers, and the fuse for protection.
3.3 Product Dimensions

Figure 3: Product Dimensions
This image displays the physical dimensions of the DR-9 car radio, indicating its width, height, and depth measurements, which are essential for proper installation planning within a 1-DIN slot.
4. Setup and Installation
The DR-9 car radio is designed for installation in vehicles with a standard 1-DIN slot. Ensure your vehicle's dashboard has adequate space before proceeding.
4.1 Wiring Connections
Connect the included wire harness to the corresponding ports on the rear of the head unit and to your vehicle's wiring system. Ensure all connections are secure to prevent malfunctions. The ISO standard plug simplifies power and speaker connections.
4.2 Antenna Connection
Connect your car's original radio antenna to the designated input on the rear panel. The DR-9's integrated DAB/FM tuner is designed to utilize your existing antenna for both analog and digital radio reception.

Figure 4: DAB Antenna System Comparison
This visual compares the DAB/FM tuner system of the DR-9, which utilizes the car's original antenna for reception, against other systems that may require a separate, often windshield-mounted, DAB antenna. The DR-9's integrated system aims for better reception performance.
4.3 Physical Installation
Once wiring is complete, slide the head unit into the 1-DIN slot in your dashboard. Secure it using the provided mounting frame and tools. Ensure the unit is firmly in place to prevent movement during driving.

Figure 5: Installed Car Radio Example
This image provides a visual example of the DR-9 car radio after installation into a standard 1 DIN slot in a vehicle's dashboard, demonstrating its integrated appearance.
5. Operating Instructions
5.1 Power On/Off and Mode Selection
Press the Power/Mode button to turn the unit on or off. Repeatedly press the Mode button to cycle through available audio sources: DAB, FM, AM, Bluetooth, USB, and AUX.
5.2 DAB/DAB+ Radio Operation

Figure 6: DAB+ Digital Radio Feature
This image highlights the DAB+ functionality of the DR-9 car radio, indicating its support for high-definition digital signal broadcasting and full compatibility with DAB+ standards for superior audio quality.
- Scanning: In DAB mode, press the Band button to initiate a scan for available digital radio stations.
- Station Selection: Use the Previous/Next buttons to navigate through the scanned DAB stations.
- Presets: The unit supports 6 DAB station presets. To save a station, tune to the desired station, then press and hold one of the preset buttons (1-6) until you hear a beep.
5.3 FM/AM Radio Operation

Figure 7: FM/AM Radio Functionality
This image describes the FM radio functionality, providing access to real-time traffic, news, and weather. It emphasizes the sound quality, which is close to CD quality, and specifies the FM receiver range of 87.5-108 MHz.
- Band Selection: In radio mode, press the Band button to switch between FM1, FM2, FM3, and AM bands.
- Automatic Scan: Press and hold the Band button (AMS) to automatically scan and save strong stations to presets.
- Manual Tuning: Use the Previous/Next buttons for manual tuning.
- Presets: The unit supports 18 FM station presets. To save a station, tune to the desired station, then press and hold one of the preset buttons (1-6) until you hear a beep.
5.4 Bluetooth Connectivity

Figure 8: Bluetooth Hands-free and Music Streaming
The image illustrates the Bluetooth capabilities of the DR-9, enabling hands-free phone calls and wireless music streaming from mobile devices. It shows the interface for answering and hanging up calls.
- Pairing: Enable Bluetooth on your mobile device and search for "DAB-CAR". Select it to pair.
- Hands-free Calling: When a call comes in, press the Answer Call button (often the Band/AMS button) to answer. Press the Call End button (often the Power/Mode button) to end a call.
- Music Streaming: Once paired, you can play audio from your device wirelessly through the car radio. Use the Previous/Next buttons to control playback.
5.5 USB/AUX Playback and Charging
- USB Playback: Insert a USB flash drive into the USB Read port. The unit will automatically switch to USB mode and begin playing compatible audio files (MP3/WMV/APE/FLC).
- AUX Input: Connect an external audio device (e.g., MP3 player, smartphone) to the 3.5mm AUX input jack using an audio cable. Select AUX mode to play audio from the connected device.
- Phone Charging: Use the dedicated USB Charging port to charge your mobile phone.
5.6 Audio Settings
Press the VOL/SEL knob to access audio settings such as EQ (Equalizer), BALANCE, and LOUD (Loudness). Rotate the knob to adjust values and press to confirm selections.
6. Troubleshooting
If you encounter issues with your DR-9 car radio, please refer to the following common problems and solutions:
- No Power: Check the fuse on the rear panel and ensure all power connections are secure. Verify the vehicle's ignition is on.
- No Sound: Check speaker connections. Ensure volume is not muted or set to zero. Verify the correct audio source is selected.
- Poor Radio Reception: Ensure the antenna is properly connected. Check for obstructions or interference. In DAB mode, perform a new station scan.
- Bluetooth Pairing Issues: Ensure Bluetooth is enabled on both the car radio and your mobile device. Delete previous pairings and try again. Move closer to the unit.
- USB Playback Errors: Ensure the USB flash drive is formatted correctly (FAT32 recommended) and contains compatible audio files. Try a different USB drive.
- Unit Not Responding: Press the Reset button (usually a small pinhole) on the front panel using a thin object like a paperclip. This will restore factory settings.
7. Technical Specifications
| Parameter | Value |
|---|---|
| Model | DR-9 |
| Operation Voltage | 12V (10.5-16V) |
| FM Receiver Range | 87.5-108MHz |
| DAB/DAB+ Receiver Range | 170-240MHz |
| Bluetooth Version | BT4.2 |
| Bluetooth Name | DAB-CAR |
| Supported Media | TF card, USB flash drive |
| Decode Formats | MP3/WMV/APE/FLC |
| Audio Output Power | 25W x 4 |
| Speaker Impedance | 4-8Ω |
| RCA Terminal | 4 RCA outputs (red / white) |
| Installation Size (WHD) | 182mm x 53mm x 80mm |
8. Maintenance
To ensure the longevity and optimal performance of your DR-9 car radio, follow these maintenance guidelines:
- Cleaning: Use a soft, dry cloth to clean the front panel. Avoid abrasive cleaners or solvents.
- Fuse Replacement: If the unit loses power, check the fuse on the rear panel. Replace it with a fuse of the same rating if blown.
- Software Updates: Periodically check the manufacturer's website for any available firmware updates to improve performance or add features.
9. Safety Information
- Do not operate the unit in a way that distracts you from driving.
- Ensure proper ventilation around the unit to prevent overheating.
- Avoid exposing the unit to extreme temperatures, direct sunlight, or moisture.
- Only qualified personnel should perform installation or repairs.
10. Warranty and Support
For warranty information and technical support, please refer to the documentation provided with your purchase or contact WEPARTICULAR customer service directly. Keep your proof of purchase for warranty claims.