Optimum G2.6
Optimum G2.6 Professional Countertop Blender User Manual
Model: G2.6 | Brand: Optimum
1. Introduction
This manual provides essential information for the safe and efficient operation, maintenance, and troubleshooting of your Optimum G2.6 Professional Countertop Blender. Please read this manual thoroughly before first use and retain it for future reference.
The Optimum G2.6 is a high-performance blender designed for a variety of kitchen tasks, featuring a powerful 2400W motor, 6 stainless steel blades, and a 2-liter BPA-free jug.
2. Important Safety Instructions
WARNING: To reduce the risk of fire, electric shock, or injury, always follow basic safety precautions.
- Read all instructions before operating the blender.
- Do not immerse the motor base in water or other liquids.
- Close supervision is necessary when any appliance is used by or near children.
- Unplug from outlet when not in use, before assembling or disassembling parts, and before cleaning.
- Avoid contact with moving parts.
- Do not operate any appliance with a damaged cord or plug, or after the appliance malfunctions or has been dropped or damaged in any manner.
- The use of attachments not recommended or sold by the manufacturer may cause fire, electric shock, or injury.
- Do not use outdoors.
- Do not let cord hang over edge of table or counter, or touch hot surfaces.
- Keep hands and utensils out of container while blending to reduce the risk of severe injury to persons or damage to the blender. A scraper may be used but only when the blender is not running.
- Blades are sharp. Handle with care.
- Always operate blender with lid in place.
- When blending hot liquids, use caution; steam can cause burns. Do not fill the container above the maximum hot liquid level.
- Do not use the appliance for other than intended use.
3. Product Components
The Optimum G2.6 Professional Countertop Blender includes the following main components:
- Motor Base: Houses the 2400W motor and control panel.
- 2L BPA-Free Jug: The blending container with imperial and metric gradations.
- Lid Assembly: Includes a tight-seal blending jug lid and a small lid for adding ingredients during operation.
- 6 Stainless Steel Blades: Integrated into the jug for efficient blending.
- Tamper Tool: For pushing ingredients towards the blades during blending.

Image 1: Overview of the Optimum G2.6 Blender components, highlighting the powerful 3.5 horsepower motor, 6-blade stainless steel assembly, and overload protection switch.

Image 2: The 67.6 oz (2L) BPA-free container and the included tamper tool.
Video 1: A 360-degree view of the Optimum G2.6 blender, showcasing its physical design and components. This video is provided by the seller, Froothie.
4. Setup
- Unpacking: Carefully remove all components from the packaging. Retain packaging for storage or return if necessary.
- Initial Cleaning: Before first use, wash the jug, lid, and tamper tool with warm, soapy water. Rinse thoroughly and dry. Wipe the motor base with a damp cloth.
- Placement: Place the motor base on a clean, dry, and stable surface. Ensure adequate ventilation around the unit.
- Assemble Jug: Place the blending jug securely onto the motor base. Ensure it is properly seated.
- Power Connection: Plug the power cord into a grounded electrical outlet. The display will illuminate.
5. Operating Instructions
5.1 Control Panel Overview

Image 3: The digital control panel featuring one-touch programs and manual controls.
The control panel features a digital display and several touch-sensitive buttons for various functions:
- ON/OFF: Powers the unit on or off.
- Pulse: Provides short bursts of high-speed blending.
- Speed Up/Down Arrows: Adjusts manual blending speed.
- Time Up/Down Arrows: Adjusts manual blending duration.
- Pre-set Programs: Dedicated buttons for Grind, Smoothies, Sauce, Vegetable, Sorbet, and Soup.
5.2 General Blending Procedure
- Prepare Ingredients: Cut ingredients into appropriate sizes. For optimal blending, add liquids first, followed by soft ingredients, then hard ingredients, and finally ice or frozen items.
- Load Jug: Place ingredients into the blending jug. Do not exceed the maximum fill line.
- Secure Lid: Place the lid firmly onto the jug. Ensure the small lid insert is also in place.
- Select Program or Manual Settings:
- Pre-set Programs: Press the desired pre-set button (e.g., "Smoothies"). The blender will automatically run through a pre-programmed cycle.
- Manual Control: Use the "Speed" arrows to select a desired speed (1-10). Use the "Time" arrows to set the blending duration. Press the ON/OFF button to start.
- Pulse Function: Press and hold the "Pulse" button for short bursts of high-speed blending. Release to stop.
- Monitor Blending: Observe the blending process. If ingredients get stuck, use the tamper tool through the small lid opening to push them towards the blades. Never use the tamper tool when the lid is not fully secured or when the blender is running without the lid.
- Finish: Once blending is complete, the blender will stop automatically if a pre-set program was used, or you can press ON/OFF to stop manual blending.
- Serve: Carefully remove the jug from the motor base and pour out the contents.
5.3 Specific Applications
- Smoothies & Milkshakes: Use the "Smoothies" pre-set program. For best results, add liquids first, then soft fruits, leafy greens, and finally frozen fruits or ice.
- Nut Butters: Use the "Grind" pre-set program or manual high speed. Add nuts gradually. Use the tamper tool to keep ingredients moving towards the blades.
- Hot Soups: The powerful motor can heat ingredients through friction. Use the "Soup" pre-set program. Start with room temperature ingredients. Do not fill above the hot liquid maximum line. Ensure the lid is securely in place.
- Ice Crushing: Use the "Pulse" function for short bursts or the "Sorbet" pre-set for finer ice.
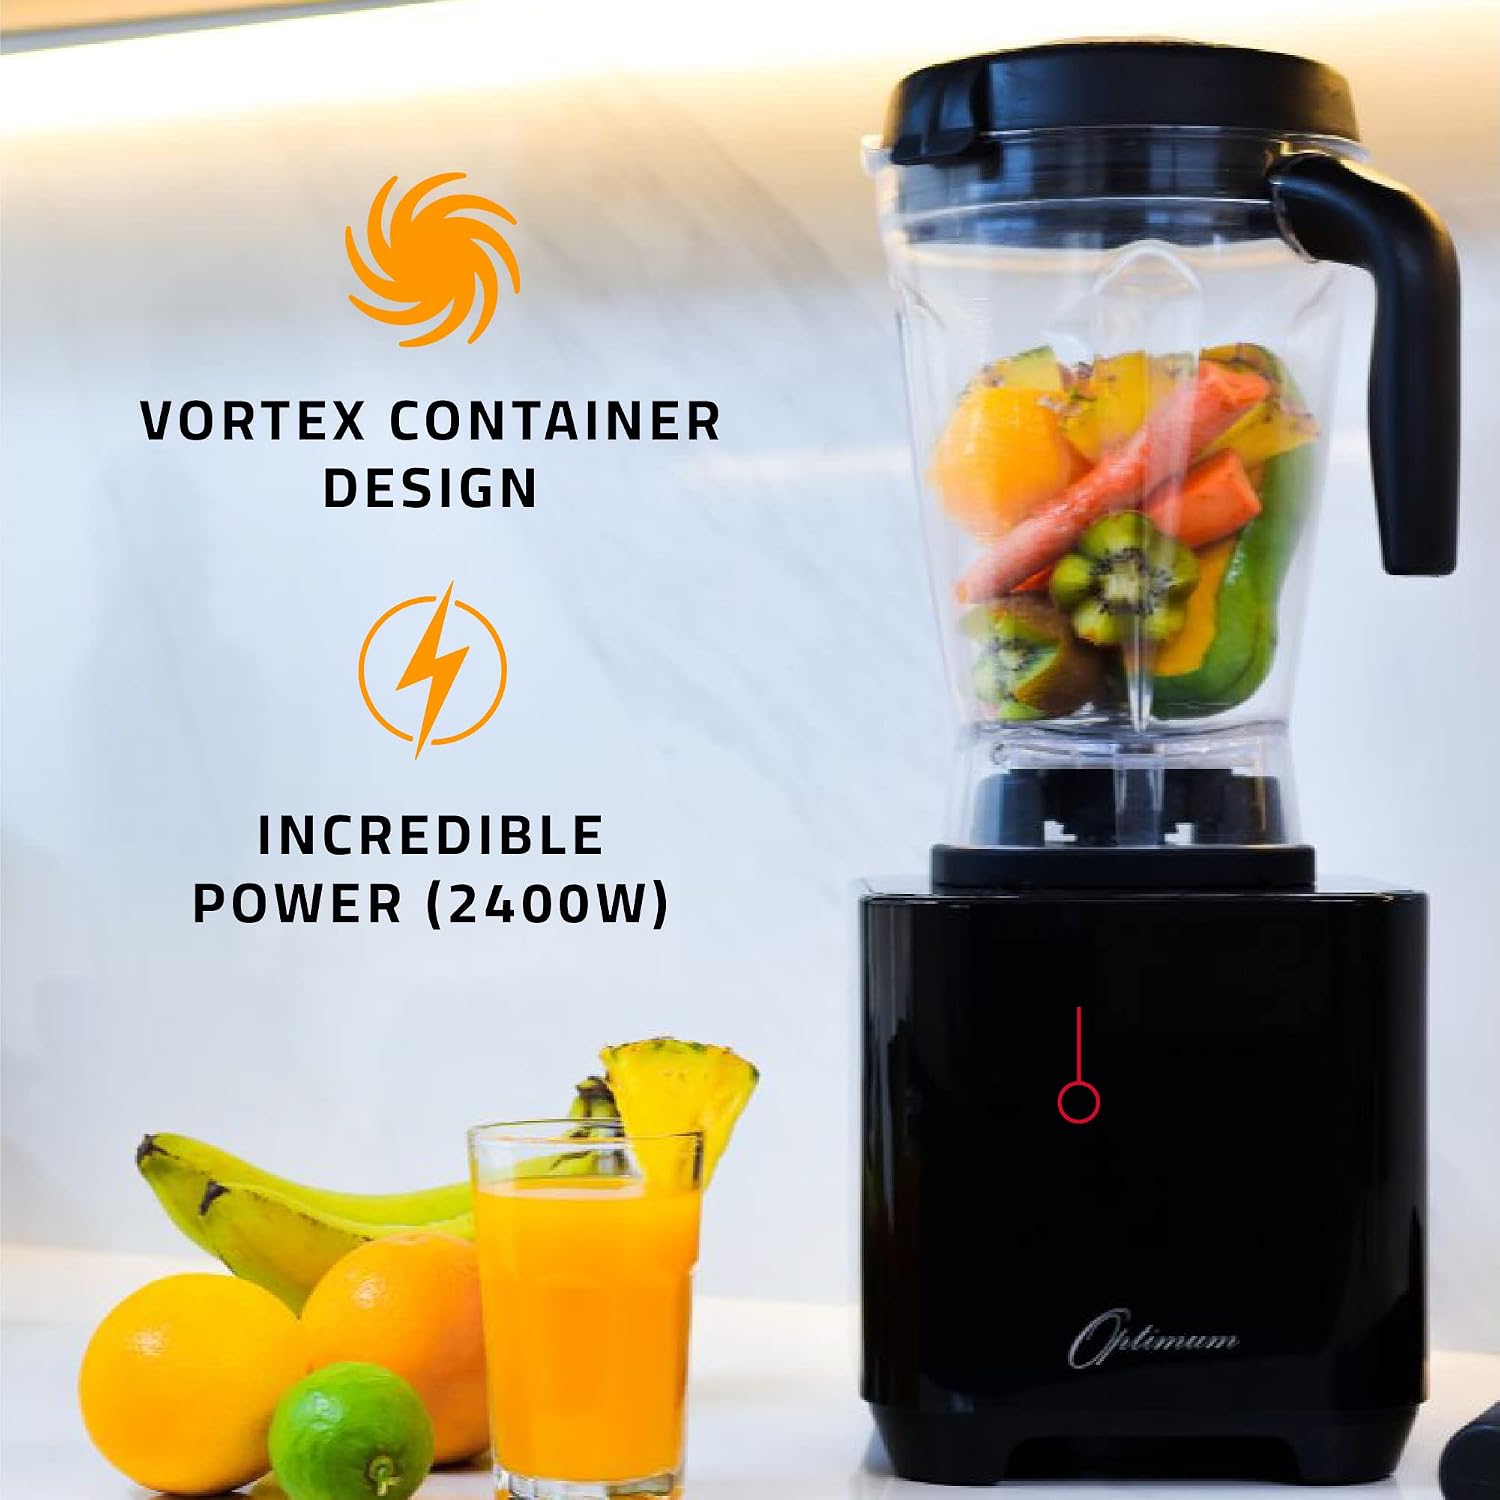
Image 4: The blender in a kitchen setting, demonstrating its design and power for various preparations.

Image 5: A detailed view of the 6 stainless steel blades within the blending jug.
Video 2: An overview of the Optimum G2.6 blender, showcasing its features and design. This video is provided by the seller, Froothie.
6. Maintenance and Cleaning
Regular cleaning and maintenance will ensure the longevity and optimal performance of your blender.
6.1 Cleaning the Jug
- Quick Clean: After each use, rinse the jug. Fill it halfway with warm water and add a few drops of dish soap. Secure the lid and run the blender on a low speed for 30-60 seconds. Rinse thoroughly.
- Deep Clean: For stubborn residue, disassemble the lid and small lid insert. Wash the jug, lid, and tamper tool with warm, soapy water using a brush if necessary. Rinse thoroughly and allow to air dry. The innovative design allows for easy cleaning without removing the blade assembly.
- Dishwasher: The jug, lid, and tamper tool are generally top-rack dishwasher safe, but hand washing is recommended to prolong their lifespan.

Image 6: The blender's design facilitates easy cleaning.
6.2 Cleaning the Motor Base
- Wipe the motor base with a damp cloth. Do not immerse the motor base in water.
- Ensure the motor base is unplugged before cleaning.
7. Troubleshooting
| Problem | Possible Cause | Solution |
|---|---|---|
| Blender does not turn on. | Not plugged in; power outlet not active; jug not properly seated; overload protection activated. | Check power cord connection; test outlet with another appliance; ensure jug is securely placed on the motor base; unplug for 15 minutes to reset overload protection. |
| Ingredients are not blending smoothly. | Too little liquid; ingredients too large; air pocket around blades. | Add more liquid; cut ingredients into smaller pieces; use the tamper tool to push ingredients towards the blades. |
| Blender stops during operation. | Overload protection activated; motor overheating. | Unplug the unit and allow it to cool down for 15-30 minutes. Reduce load or add more liquid for next use. |
| Loud noise or unusual smell. | Foreign object in jug; motor strain; new motor smell. | Immediately turn off and unplug. Check for foreign objects. If new, a slight odor is normal for first few uses. If persistent or accompanied by smoke, discontinue use and contact support. |
8. Specifications
| Feature | Detail |
|---|---|
| Brand | Optimum |
| Model Number | G2.6 |
| Motor Power | 2400 Watts (3.5 Horsepower) |
| Blade Material | Stainless Steel (6 blades) |
| Jug Capacity | 2 Liters (67.6 oz) |
| Jug Material | BPA-Free Eastman Tritan |
| Number of Speeds | 10 |
| Voltage | 120 Volts |
| Product Dimensions | 8.26"D x 7.48"W x 19.09"H |
| Item Weight | 11 pounds |
| Special Features | Multiple Speeds, 6 One-Touch Pre-sets, Overload Protection Switch |
9. Warranty and Support
The Optimum G2.6 Professional Countertop Blender comes with a full 1-year warranty. For warranty claims, technical support, or any inquiries, please contact Optimum's Expert Support Team.
Contact Information: Refer to the official Optimum website or your purchase documentation for the most current contact details.
Online Resources: Visit the Optimum Store on Amazon for additional product information and support.
Ask a question about this manual
Ask about setup, troubleshooting, compatibility, parts, safety, or missing instructions. Manuals+ will review the question and use this page’s manual context to help answer it.