
1. Introduction
The Kiprim DC310S is a high-precision programmable DC power supply designed for various applications requiring stable and adjustable voltage and current. Featuring a 2.8-inch color LCD display and multiple protection functions, this device offers reliable performance for laboratory, educational, and electronic production environments.
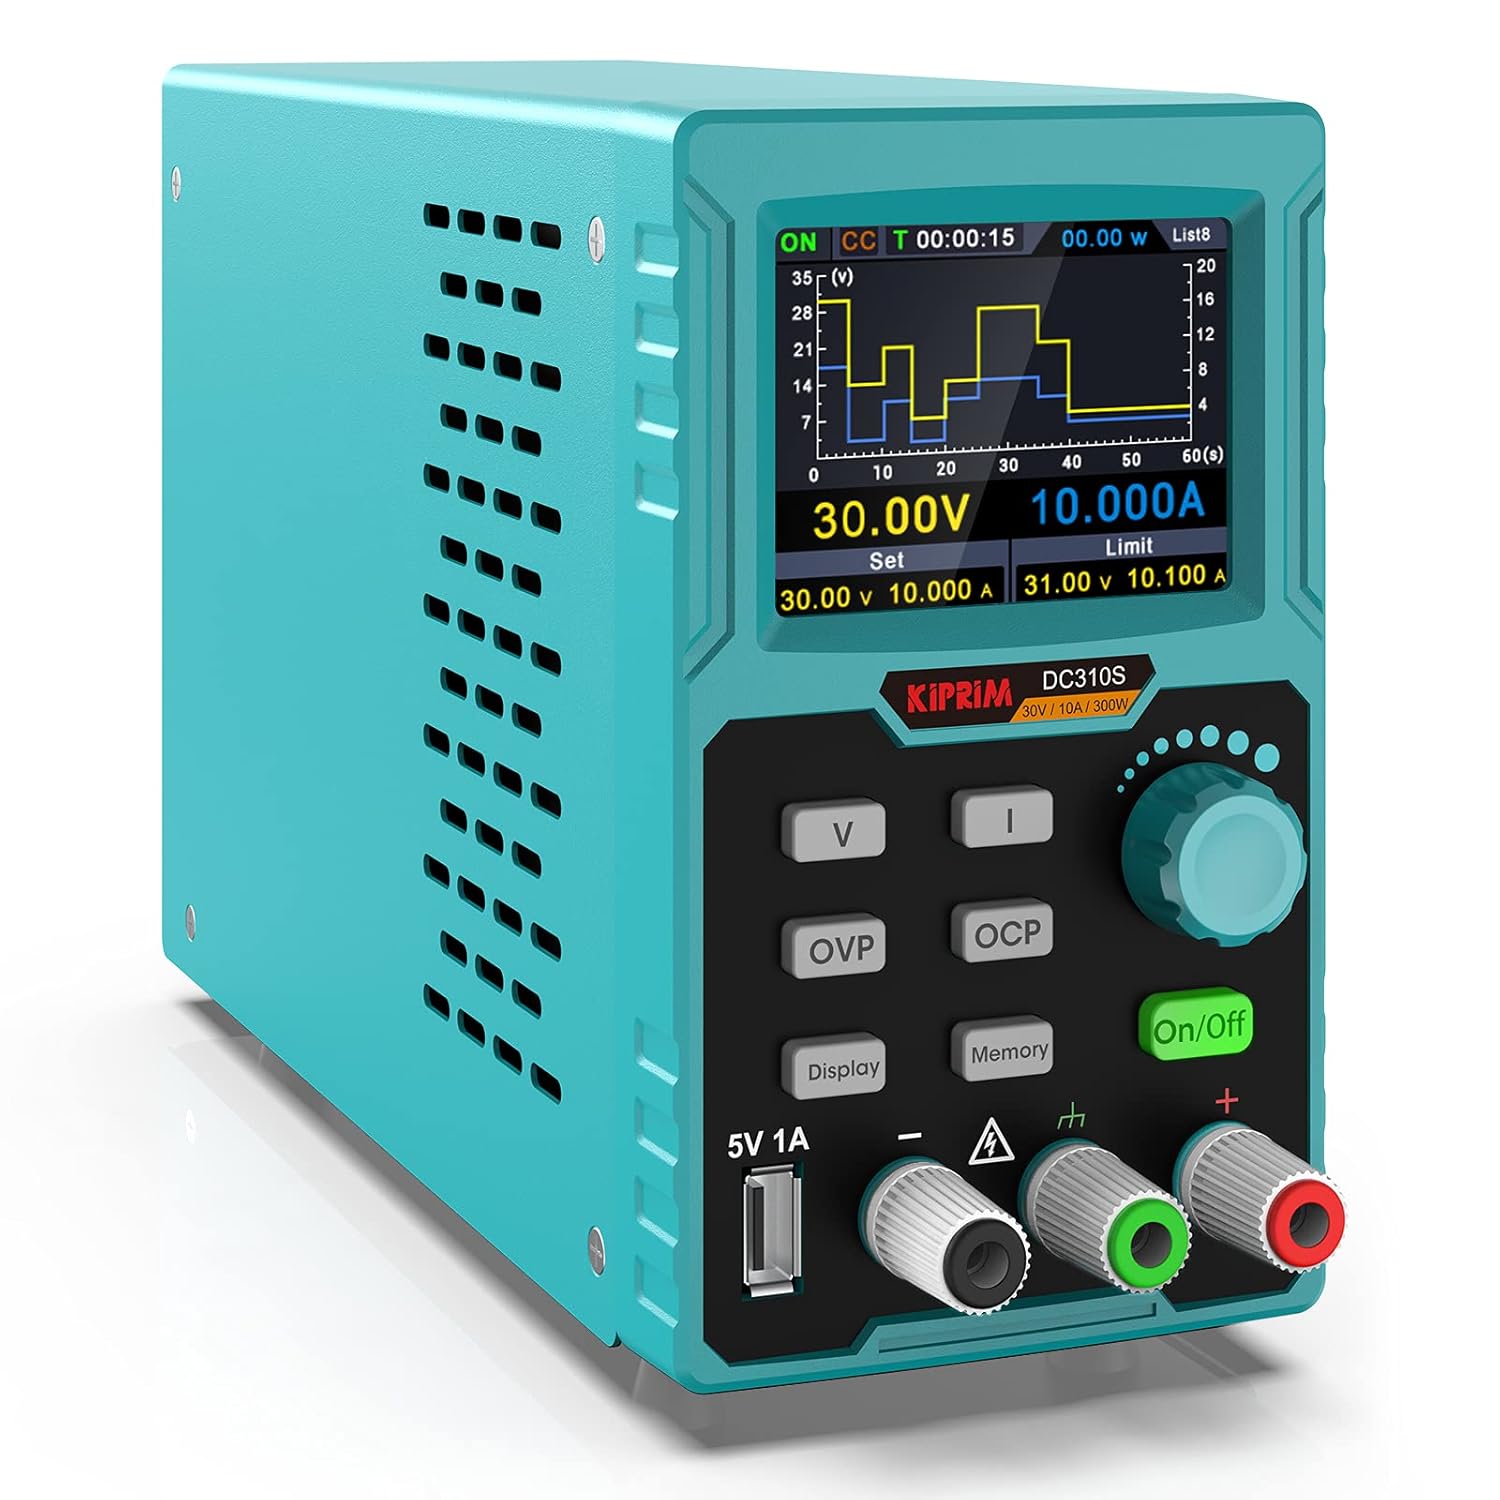
Figure 1: Front view of the Kiprim DC310S Programmable DC Power Supply.
2. General Safety Warnings
Before using this product, please read the following safety precautions to avoid any accidents or damage to the device.
- Always use the provided power cable.
- Do not use this product in environments with flammable or explosive materials.
- Avoid exposure to direct sunlight, high temperatures, or high humidity.
- Ensure proper ventilation; do not block cooling vents.
- This product is grounded. Ensure the power cord protective grounding conductor is connected to ground.
- Do not remove covers. Refer servicing to qualified personnel.
- Verify input voltage (115V/230V) is correctly set for your region before connecting to power.
- Do not use this power supply to charge batteries directly without proper protection circuits.
3. Product Features
- Multiple Protections: Includes Overvoltage (0-31V), Overcurrent (0-10.1A), and Overheat protection (85°C) with intelligent fan cooling. Users can set overvoltage and overheat protection limits.
- Multi-Function Display: A 2.8-inch color LCD displays output voltage (set and actual), current (set and actual), actual output power, cumulative execution time, and channel output status. The DISPLAY key allows switching between numerical and curve data display. Rated output: 0-30V, 0-10A. Resolution: Voltage 10mV; Current 1mA.
- Programmable Power Supply: Features a Memory key to save and quickly recall 4 sets of channel parameters (M1 to M4). Supports List waveform output settings with 10 editable points, including output voltage, current, and waveform duration.
- Dual USB Ports: Equipped with a rear USB interface for program upgrades and PC software control, and a front 5V 1A USB interface for charging mobile devices.
4. Package Contents
- 1 x Kiprim DC310S Programmable DC Power Supply (30V10A)
- 1 x User Manual
- 1 x Spare Fuse
- 1 x Banana Plug to Alligator Clip Cable
- 1 x Power Cable
- 1 x CD (containing software and drivers)

Figure 2: Included items in the Kiprim DC310S package.
5. Product Overview
Front Panel

Figure 3: Front panel components of the DC310S.
- Display Area: 2.8-inch color LCD for displaying parameters and curves.
- Voltage Setting Key (V): Adjusts output voltage.
- Current Setting Key (I): Adjusts output current.
- Over Voltage Protection (OVP) Key: Sets overvoltage protection limit.
- Over Current Protection (OCP) Key: Sets overcurrent protection limit.
- Memory Button: Saves and recalls parameter sets (M1-M4).
- Display Switch Button: Toggles between numerical and curve display modes.
- Voltage/Current Adjust Knob: Rotary encoder for fine adjustment of values.
- On/Off Key: Toggles power output.
- USB Charging Port (5V 1A): For charging external devices.
- Channel Output Terminals: Red (+) for positive, Black (-) for negative, Green for Ground.
Rear Panel

Figure 4: Rear panel components of the DC310S.
- Cooling Fan: Provides intelligent fan cooling to prevent overheating.
- AC Power Input: Connects to the main power supply.
- Power Switch: Main power toggle for the unit.
- Fuse Box: Contains the protective fuse.
- Device USB Port: Rear USB interface for PC software control and firmware upgrades.
6. Setup & Installation
- Unpacking: Carefully remove all components from the packaging. Verify that all items listed in the Package Contents section are present.
- Power Connection: Connect the provided power cable to the AC Power Input on the rear panel of the DC310S and then to a suitable AC power outlet.
- Initial Power On: Flip the Power Switch on the rear panel to the 'ON' position. The device's LCD screen will light up.
- Language Selection: Upon first use, you may be prompted to select a language. Use the navigation buttons and knob to select 'EN' for English and confirm.
- Output Connections: Connect your load to the Channel Output Terminals using the banana plug to alligator clip cable. Ensure correct polarity: Red (+) to positive, Black (-) to negative, Green to ground.
7. Operating Instructions
7.1 Basic Voltage and Current Adjustment
- Set Voltage: Press the 'V' button. Rotate the Voltage/Current Adjust Knob to set the desired output voltage. Press the knob to confirm or move between digits for fine-tuning.
- Set Current: Press the 'I' button. Rotate the Voltage/Current Adjust Knob to set the desired output current limit. Press the knob to confirm.
- Enable Output: Once voltage and current limits are set, press the 'On/Off' key to enable power output to your connected load. The display will show actual output values.
- Disable Output: Press the 'On/Off' key again to disable power output.
7.2 Protection Settings (OVP/OCP)
- Set Overvoltage Protection (OVP): Press the 'OVP' button. Use the knob to set the maximum allowable output voltage. If the output exceeds this value, the power supply will shut down to protect the load.
- Set Overcurrent Protection (OCP): Press the 'OCP' button. Use the knob to set the maximum allowable output current. If the current exceeds this value, the power supply will shut down.
7.3 Memory Functions
The DC310S allows you to save and quickly recall up to 4 sets of frequently used voltage and current parameters.
- Save Parameters: Set the desired voltage and current. Long-press the 'Memory' button. Use the knob to select a memory slot (M1-M4) and press the knob to save.
- Recall Parameters: Short-press the 'Memory' button. Use the knob to select a saved memory slot (M1-M4) and press the knob to load the parameters.
7.4 PC Software Control
The DC310S can be controlled and monitored via PC software. The software and drivers can be found on the manufacturer's website or the included CD.
- Connect to PC: Use a USB-C to USB-A cable to connect the rear Device USB Port of the power supply to your computer.
- Install Software: Install the provided PC software and drivers.
- Launch Software: Open the software on your PC. Select the correct COM port and establish a connection.
- Remote Control: You can now adjust voltage, current, set protection limits, and monitor real-time data from your computer.

Figure 5: PC software control interface.
7.5 USB Charging Port
The front 5V 1A USB port can be used to charge compatible mobile phones and other USB-powered devices.

Figure 6: Charging a mobile device using the front USB port.
8. Performance Characteristics
8.1 High Precision Display
The 4-digit display provides high precision readings for voltage and current, ensuring accurate control for sensitive applications.

Figure 7: High-precision 4-digit display.
8.2 Output Stability (Transient & Ripple)
The DC310S is designed for stable output. When enabling or disabling output, the voltage transition is smooth with minimal overshoot or undershoot. The output ripple is maintained at low levels, ensuring clean power delivery to sensitive circuits.
For a visual demonstration of the power supply's output stability and ripple characteristics, please refer to the official product video below.
Video 1: Official Kiprim DC310S Product Overview, demonstrating features and output stability.
9. Maintenance & Care
- Cleaning: Use a soft, dry cloth to clean the exterior of the power supply. Do not use abrasive cleaners or solvents.
- Ventilation: Ensure the cooling fan and vents are free from dust and obstructions to maintain proper airflow.
- Storage: Store the device in a cool, dry place away from direct sunlight and extreme temperatures.
- Fuse Replacement: If the device fails to power on, check the fuse located in the fuse box on the rear panel. Replace with a fuse of the same type and rating (5x20mm T5/T8A).
10. Troubleshooting
| Problem | Possible Cause | Solution |
|---|---|---|
| Device does not power on. | No power from outlet; Power cable not connected; Fuse blown. | Check power outlet; Ensure power cable is securely connected; Replace fuse. |
| No output voltage/current. | Output is OFF; OVP/OCP triggered; Load disconnected/faulty. | Press 'On/Off' key; Check OVP/OCP settings and reset if necessary; Verify load connection and functionality. |
| Inaccurate readings. | Poor connection; Device needs calibration. | Ensure secure connections; Contact support for calibration guidance. |
| Overheat protection triggered. | Blocked ventilation; Excessive ambient temperature. | Clear vents; Operate in a cooler environment. |
11. Specifications
- Model Number: DC310S
- Output Voltage: 0-30V
- Output Current: 0-10A
- Output Wattage: 300W
- Input Voltage: 110V (AC)
- Display: 2.8-inch Color LCD
- Voltage Resolution: 10mV
- Current Resolution: 1mA
- Protection: OVP, OCP, Overheat Protection
- USB Charging: Front 5V 1A port
- Dimensions: 8.9 x 3.23 x 5.59 inches
- Item Weight: 4.41 Pounds (2 Kilograms)
12. Warranty & Support
Kiprim provides a 12-month warranty for this product. If you have any questions or require technical assistance, please contact Kiprim Direct US via Amazon. We are committed to providing a satisfactory answer and support.
For software and driver downloads, please refer to the link provided in the product description on Amazon or contact customer support directly.