Introduction
Thank you for choosing the XTU WiFi Dashcam. This compact device is designed to provide reliable video recording of your journeys, enhancing safety and providing crucial evidence in case of incidents. It features Full HD 1080P recording, a 170-degree ultra-wide-angle lens, WDR/HDR technology for clear images in various lighting conditions, a G-sensor for impact detection, and 24-hour parking monitoring. With built-in WiFi, you can easily manage recordings via a smartphone app. A 32GB SD card is included to get you started immediately.

Image: The XTU WiFi Dashcam with an included 32GB SD card, showcasing its compact design.
Package Contents
Please check the package contents upon opening. If any items are missing or damaged, contact customer support.
- XTU WiFi Dashcam Unit
- Adhesive Mount
- Power Cable (Car Charger)
- 32GB Micro SD Card
- User Manual (this document)
Product Features
- FHD 1080P Recording: Captures clear video footage at 1080p resolution.
- 170° Ultra Wide-Angle Lens: Provides a broad field of view to cover multiple lanes and minimize blind spots.
- WDR/HDR Technology: Enhances image clarity by balancing exposure in high-contrast lighting conditions, preventing overexposure and underexposure.
- G-Sensor (Impact Detection): Automatically detects sudden shakes or collisions and locks the current video footage to prevent it from being overwritten.
- 24-Hour Parking Monitoring: Monitors your vehicle even when parked, recording incidents like bumps or vandalism.
- WiFi Connectivity: Allows wireless connection to a smartphone app for live view, video playback, and settings adjustment.
- Loop Recording: Continuously records by overwriting the oldest unlocked footage when the memory card is full.
- LED Signal Light Compatibility: Designed to record LED traffic signals accurately, accounting for regional power frequency differences.
- Night Vision Function: Improves visibility and recording quality in low-light conditions.

Image: Demonstrates WiFi connectivity, allowing users to view recordings on their smartphone.

Image: Illustrates the 170-degree wide-angle field of view, capturing more of the road.

Image: Shows the dashcam's night vision capability, providing clear footage in dark environments.
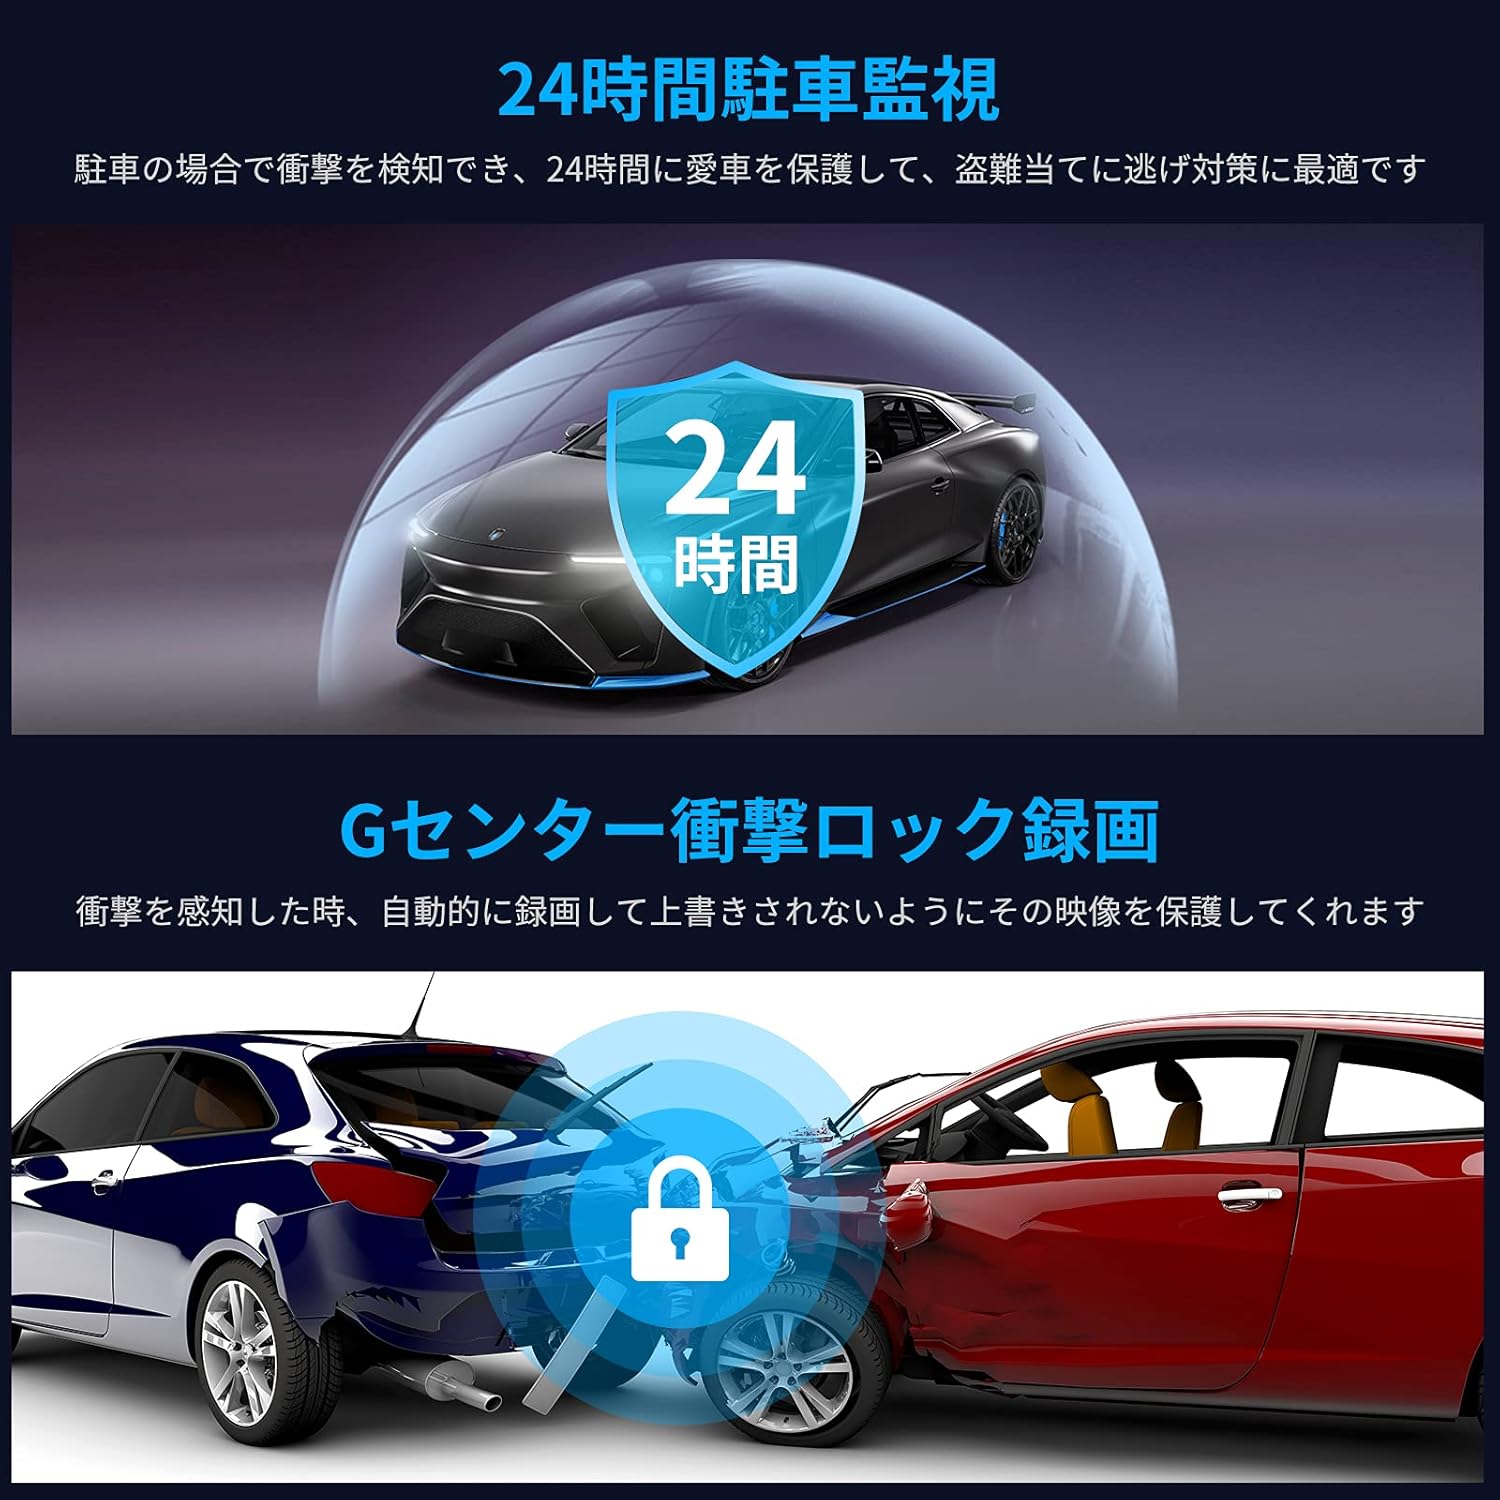
Image: Depicts the 24-hour parking monitoring and G-sensor impact lock features, protecting your vehicle.
Setup
1. Insert the Micro SD Card
Locate the Micro SD card slot on the dashcam. Gently insert the provided 32GB Micro SD card until it clicks into place. Ensure the card is inserted correctly to avoid damage. It is recommended to format the SD card within the dashcam settings before first use.

Image: A visual representation of the included 32GB SD card.
2. Mount the Dashcam
Clean the desired area on your windshield, typically behind the rearview mirror, to ensure a strong adhesive bond. Attach the adhesive mount to the dashcam, then firmly press the mount onto the cleaned windshield surface. Ensure the camera lens has a clear view of the road ahead and does not obstruct your driving visibility.

Image: The compact dashcam, illustrating its small size for discreet mounting.
3. Connect Power
Connect the provided car charger to your vehicle's cigarette lighter socket and plug the other end into the dashcam's power input. Route the cable neatly along the windshield and dashboard edges to avoid interference with driving controls. The dashcam will typically power on automatically when the vehicle starts.
Operating Instructions
Automatic Recording
Once powered on, the dashcam will automatically begin recording. The recording will stop when the vehicle is turned off and power is disconnected.
Loop Recording
The dashcam records video in segments (e.g., 1, 3, or 5 minutes). When the SD card is full, the oldest unlocked video segments will be automatically overwritten by new recordings. Videos locked by the G-sensor or manual locking will not be overwritten.
G-Sensor (Emergency Recording)
In the event of a sudden impact or collision, the built-in G-sensor will trigger emergency recording. This footage is automatically locked and saved to a separate folder on the SD card, preventing it from being overwritten by loop recording.
24-Hour Parking Monitoring
To activate 24-hour parking monitoring, the dashcam requires a continuous power supply (e.g., via a hardwire kit, sold separately). When enabled, the dashcam will detect impacts or motion around your parked vehicle and automatically record, providing surveillance even when you're away.
WiFi App Connection
- Download the designated smartphone application (e.g., "Dvr-N3" as suggested in customer reviews, or refer to the packaging for the correct app name).
- Turn on the dashcam's WiFi function (refer to the device's small screen or buttons for activation).
- On your smartphone, connect to the dashcam's WiFi network. The network name (SSID) and password will be displayed on the dashcam screen or in the quick start guide.
- Open the app to view live footage, browse recorded videos, download files to your phone, and adjust settings.
Maintenance
SD Card Management
Regularly format the Micro SD card (at least once a month) to ensure optimal performance and prevent data corruption. This can usually be done through the dashcam's settings menu via the app or device interface. Always power off the dashcam before removing the SD card.
Lens Cleaning
Keep the dashcam lens clean from dust, fingerprints, and smudges. Use a soft, lint-free cloth specifically designed for optical lenses. Avoid abrasive materials or harsh cleaning chemicals.
Firmware Updates
Check the manufacturer's website periodically for firmware updates. Updates can improve performance, add new features, or fix bugs. Follow the provided instructions carefully when performing a firmware update.
Troubleshooting
| Problem | Possible Cause | Solution |
|---|---|---|
| Dashcam does not power on. | No power supply; faulty power cable; vehicle's cigarette lighter socket not working. | Check power connection. Ensure the car charger is firmly plugged in. Test the cigarette lighter socket with another device. |
| Recording stops unexpectedly or footage is corrupted. | SD card full; SD card error; incompatible or low-quality SD card. | Format the SD card regularly. Replace the SD card if errors persist. Use a high-speed (Class 10 or U3) Micro SD card from a reputable brand. |
| WiFi connection issues with smartphone app. | Incorrect WiFi password; app not updated; dashcam WiFi not enabled. | Ensure the correct WiFi password is entered. Update the app to the latest version. Verify WiFi is enabled on the dashcam. Restart both the dashcam and smartphone. |
| Video quality is poor (blurry, dark, overexposed). | Dirty lens; protective film still on lens; incorrect settings; extreme lighting conditions. | Clean the lens. Remove any protective film. Adjust WDR/HDR settings if available. Ensure the dashcam is positioned correctly. |
| G-sensor not triggering or too sensitive. | G-sensor sensitivity setting is too low/high. | Adjust the G-sensor sensitivity in the dashcam settings via the app. |
Specifications
| Feature | Detail |
|---|---|
| Brand | XTU |
| Model | XTU Dashcam |
| Video Capture Resolution | 1080p (Full HD) |
| Screen Size | 1.5 inches |
| Display Type | LCD |
| Connectivity Technology | Wi-Fi |
| Mounting Type | Adhesive Mount |
| Special Features | Loop Recording, G-Sensor, 24-Hour Parking Monitoring, WDR/HDR, Night Vision, 170° Wide Angle |
| Included Components | User Manual, 32GB Micro SD Card |
| Product Dimensions | Approximately 23.2 x 11 x 6.2 cm |
| Item Weight | Approximately 420 g |
Warranty and Support
This XTU Dashcam comes with a 24-month warranty from the date of purchase. This warranty covers manufacturing defects and malfunctions under normal use. Please retain your proof of purchase for warranty claims.
For technical support, troubleshooting assistance, or warranty inquiries, please contact XTU customer support through the retailer where you purchased the product or visit the official XTU website for contact information. Our support team is available to assist you with any questions or issues you may encounter.