1. Introduction
The PULUZ Studio Light Box PS2532 is a portable and foldable photo studio designed to provide optimal lighting for product photography. It features integrated LED lighting with dimmable modes and comes with multiple colored backdrops to enhance your shooting experience. This manual provides detailed instructions for setting up, operating, and maintaining your light box.
2. Package Contents
Please verify that all items listed below are included in your package:
- 1 x PULUZ Studio Light Box (with Ring Lights)
- 6 x Colored Backdrops (Red, Orange, Green, Blue, White, Black)
- 1 x Soft Carrying Bag
- 1 x USB Cable
- 1 x Packing Box
This image clearly outlines the items included in the product package: the Studio Light Box with ring lights, a set of 6 colored backdrops, a soft carrying bag, and the original packing box.
3. Setup Instructions
Follow these steps to assemble your PULUZ Studio Light Box:
- Step 1: Unpack the Box
Carefully remove all components from the packing box. - Step 2: Expand the Structure
Unfold the light box from its compact form. The sides will pop into place, forming a cube shape. - Step 3: Open the Support Board
Ensure the internal support boards are fully extended and secured to maintain the box's structure. - Step 4: Complete Assembly
Once fully expanded, the light box is ready for use. Connect the USB power cable.

This visual guide provides four simple steps for assembling the light box: 1. Take out the box, 2. Expand the structure, 3. Open the support board, and 4. Complete assembly. Each step is accompanied by an illustrative image.
4. Operating Instructions
4.1 Power Connection
Connect the provided USB cable to the light box and then to a compatible USB power source. This can be a USB charger, power bank, desktop computer, or laptop. The light box requires 5V power input.
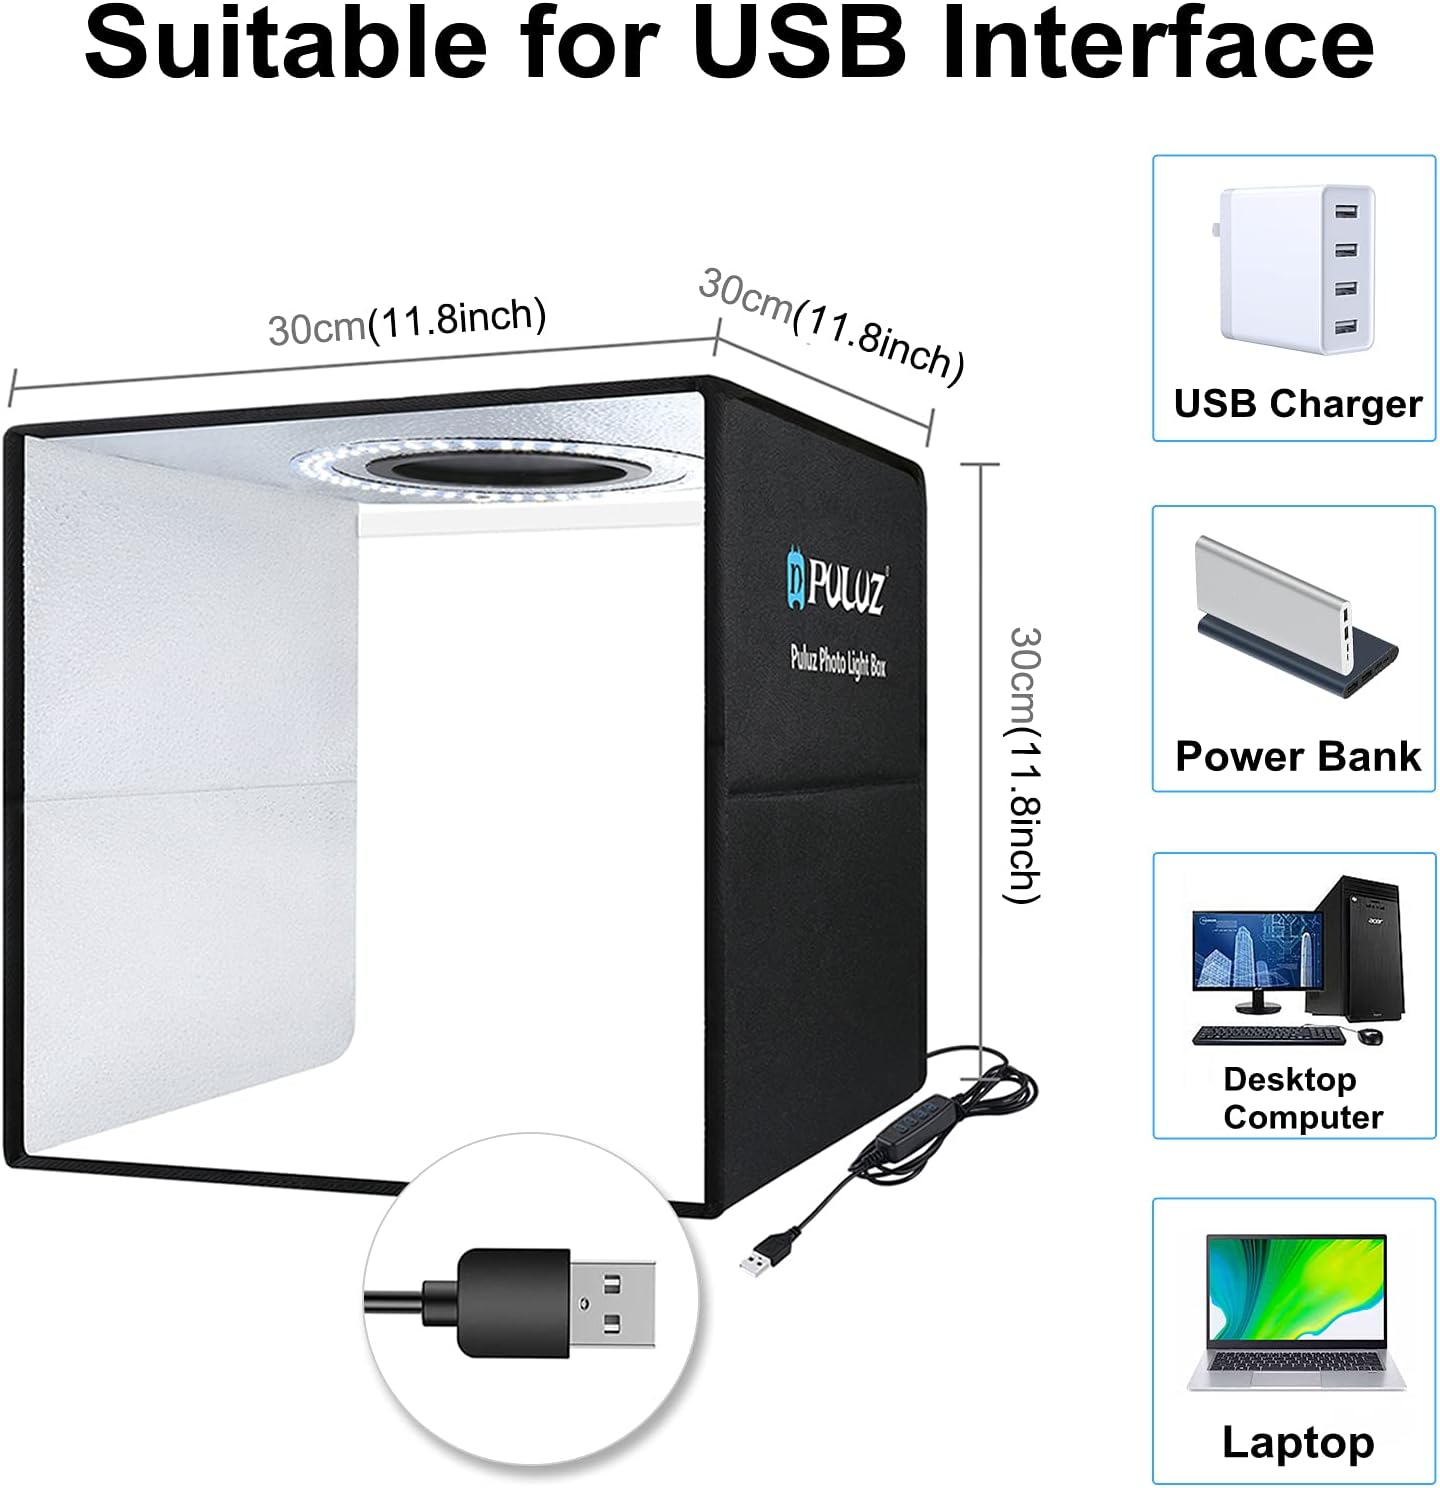
This diagram illustrates the compact dimensions of the PULUZ Studio Light Box and highlights its compatibility with various USB power sources such as USB chargers, power banks, desktop computers, and laptops.
4.2 Light Control
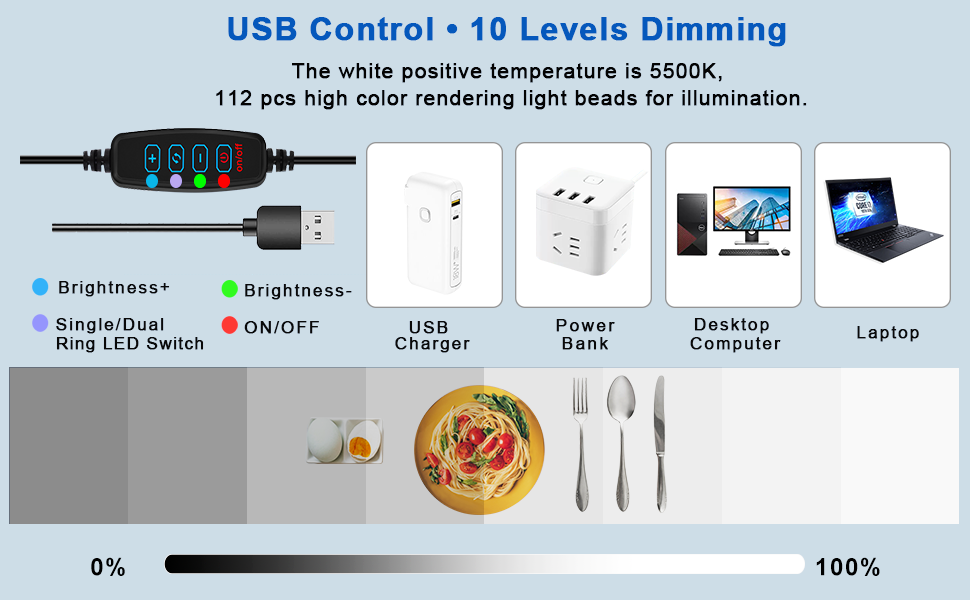
The light box features an inline control panel on the USB cable for managing the LED lights:
- ON/OFF Button: Press to turn the LED lights on or off.
- Brightness + / - Buttons: Adjust the brightness level. The light box offers 10 levels of dimming, from 0% to 100%.
- Single / Dual Ring LED Switch: Toggle between using a single LED ring or both LED rings for different lighting effects.

This image displays the inline control panel for the light box, featuring buttons to increase brightness, decrease brightness, switch between single or dual LED rings, and power the unit on or off. A gradient bar indicates the dimming range from 25% to 100%.
4.3 Using Backdrops
Select one of the six colored backdrops (red, orange, green, blue, white, black) and place it inside the light box to create different backgrounds for your product photos. The backdrops are designed to be easily interchangeable.

This image highlights the material properties of the light box, showing it is waterproof, dustproof, and has a smooth texture. It also displays the six included colored backdrops (red, orange, green, blue, white, black) with a product example on each.
5. Key Features
- Integrated LED Lighting: Equipped with 112 LED beads, providing bright and even illumination.
- High Color Rendering Index (CRI 95): Ensures accurate and vibrant color reproduction in your photographs.
- Dimmable Modes: 10 levels of brightness adjustment for precise lighting control.
- Reflective Interior: The inner wall is made of stone grain high-reflective granular fabric, designed to evenly reflect light and enhance the three-dimensional quality of objects.
- Multi-Angle Shooting: Features openings for both overlook (top) and tile (front) shooting, offering flexibility for various product angles.
- Portable and Foldable Design: Easy to assemble, disassemble, and store, making it suitable for both indoor and outdoor use.
- 6 Colored Backdrops: Includes a variety of backdrops to suit different product photography needs.
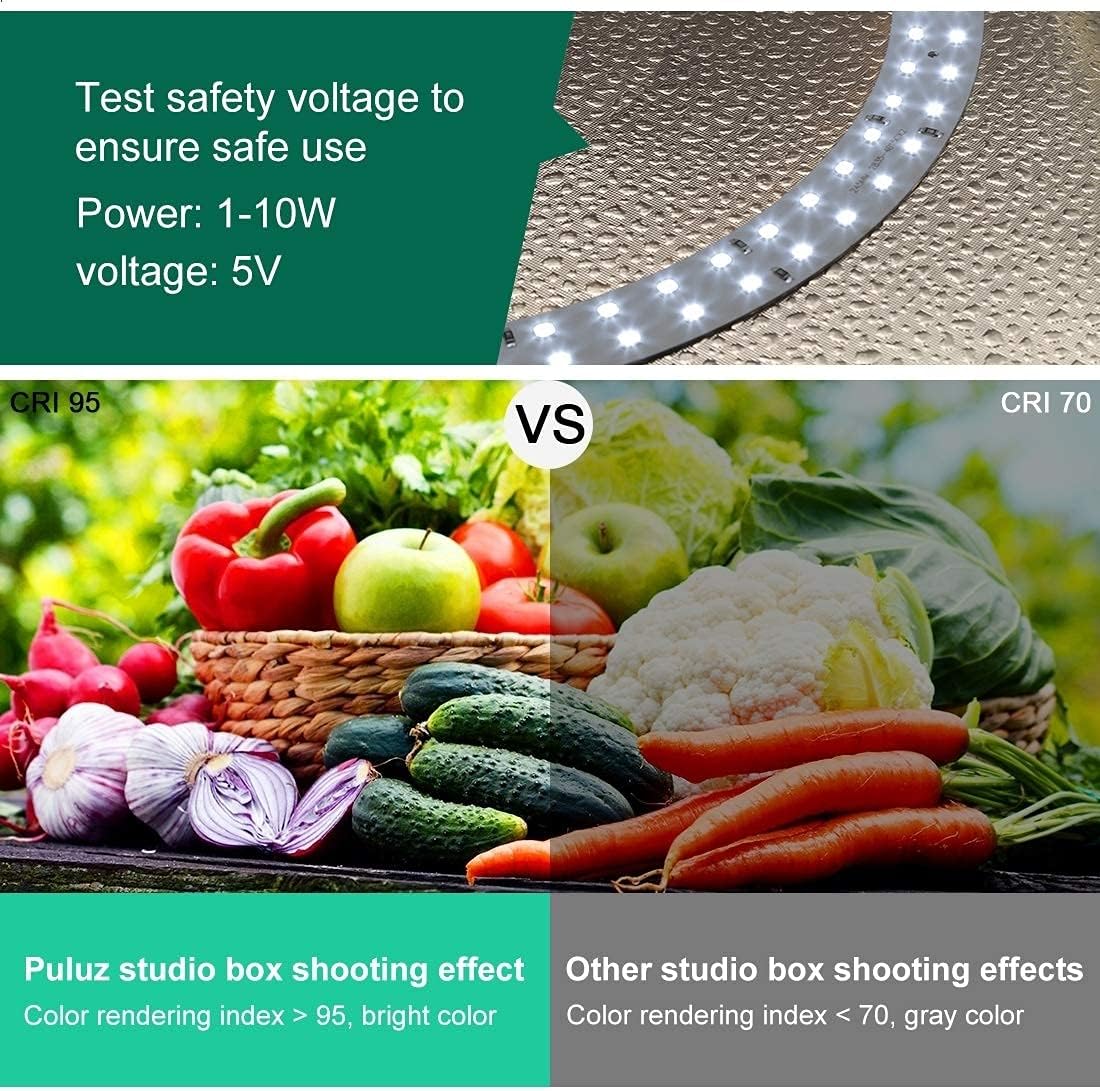
This visual comparison demonstrates the superior color accuracy provided by a CRI 95 light source (left) compared to a CRI 70 light source (right). The image on the left shows vegetables with bright, true-to-life colors, while the image on the right shows the same vegetables with a noticeable gray tint and less vibrancy.

This diagram illustrates how light from the LED source is refracted at 45-degree angles within the light box, ensuring even and diffused illumination of the product. Below, 'Before Use' and 'After Use' examples show how this lighting enhances the three-dimensional quality of an object.

This image demonstrates the versatility of the light box for multi-angle photography. It shows examples of 'Overlook shooting' (from above) and 'Tile shooting' (from the front), along with images of a person using a camera to shoot from the top opening and the front opening of the light box.

This image illustrates the foldable design of the PULUZ Studio Light Box. It shows the light box assembled and then transforming into a flat, compact package with a handle, emphasizing its portability and ease of storage.
6. Maintenance
- Cleaning: Use a soft, dry cloth to wipe down the exterior and interior surfaces of the light box. For stubborn marks, a slightly damp cloth can be used, ensuring the surface is dried immediately. Avoid abrasive cleaners or solvents.
- Backdrops: The backdrops can be wiped clean with a damp cloth. Store them flat or rolled to prevent creases.
- Storage: When not in use, fold the light box into its compact form and store it in the provided soft bag to protect it from dust and damage.
7. Troubleshooting
| Problem | Possible Cause | Solution |
|---|---|---|
| Lights do not turn on. | No power supply or faulty connection. | Ensure the USB cable is securely connected to both the light box and a working USB power source. Try a different USB port or power adapter. |
| Lights are too dim or too bright. | Brightness level not adjusted correctly. | Use the '+' and '-' buttons on the inline control panel to adjust the brightness to your desired level. |
| Uneven lighting or shadows. | Product placement or backdrop issue. | Adjust the position of the product inside the light box. Ensure the backdrop is smooth and properly secured. Utilize the reflective interior for optimal light distribution. |
| Light box does not hold its shape. | Support boards not fully extended. | Ensure all internal support boards are fully opened and locked into place during assembly. |
8. Specifications
- Product Dimensions: 11.81 x 11.81 x 11.81 inches (30 x 30 x 30 cm)
- Item Weight: 3.36 pounds
- Model Number: PS2532
- Brand: PULUZ
- Material: Polyvinyl Chloride (PVC)
- Light Source Type: LED
- LED Beads: 112 pcs
- Color Temperature: 5500 Kelvin (White positive temperature)
- Color Rendering Index (CRI): 95
- Power Input: 5V (USB)
- Power Range: 1-10W
- Dimmable Modes: 10 levels
- Backdrops Included: 6 colors
9. Warranty and Support
For warranty information or technical support, please refer to the contact details provided with your purchase or visit the official PULUZ website. Keep your proof of purchase for any warranty claims.