1. Product Overview
This manual provides instructions for the installation, operation, and maintenance of your American Volt 15-inch electric radiator cooling fan. This universal 12V high-performance fan is designed for automotive radiator cooling applications.
Key Features:
- Universal 12V high-performance 15-inch electric radiator cooling fan.
- Upgraded 130-watt motor draws 11 amps, producing over 2723 CFM.
- Configured as an air puller by default or reversible to an air pusher.
- Includes mounting bracket feet and complete cooler fin tie strap kit.
- Measures 15" x 14" x 3.2" thickness at center and slim 1.8" at edge.

Image 1.1: American Volt 15-inch electric radiator cooling fan, showing the fan blades, motor, and wiring.
2. Safety Information
Read all instructions carefully before installation and operation. Failure to follow these instructions may result in property damage, personal injury, or death.
- Always disconnect the vehicle's battery before performing any electrical work.
- Ensure all wiring connections are secure and properly insulated to prevent short circuits.
- Do not operate the fan if any components are damaged.
- Keep hands and loose clothing away from moving fan blades.
- Wear appropriate personal protective equipment (PPE) during installation.
- This fan is designed for 12V automotive systems only. Do not connect to other voltage sources.
3. Package Contents
Verify that all items listed below are included in your package:
- 1x American Volt 15-inch Electric Radiator Cooling Fan
- 4x Mounting Bracket Feet
- 1x Cooler Fin Tie Strap Kit (includes zip ties, tension springs, spacers, plastic locks)
- 1x Wiring Harness (3-Pin connector)

Image 3.1: Included mounting bracket feet and cooler fin tie strap kit components.
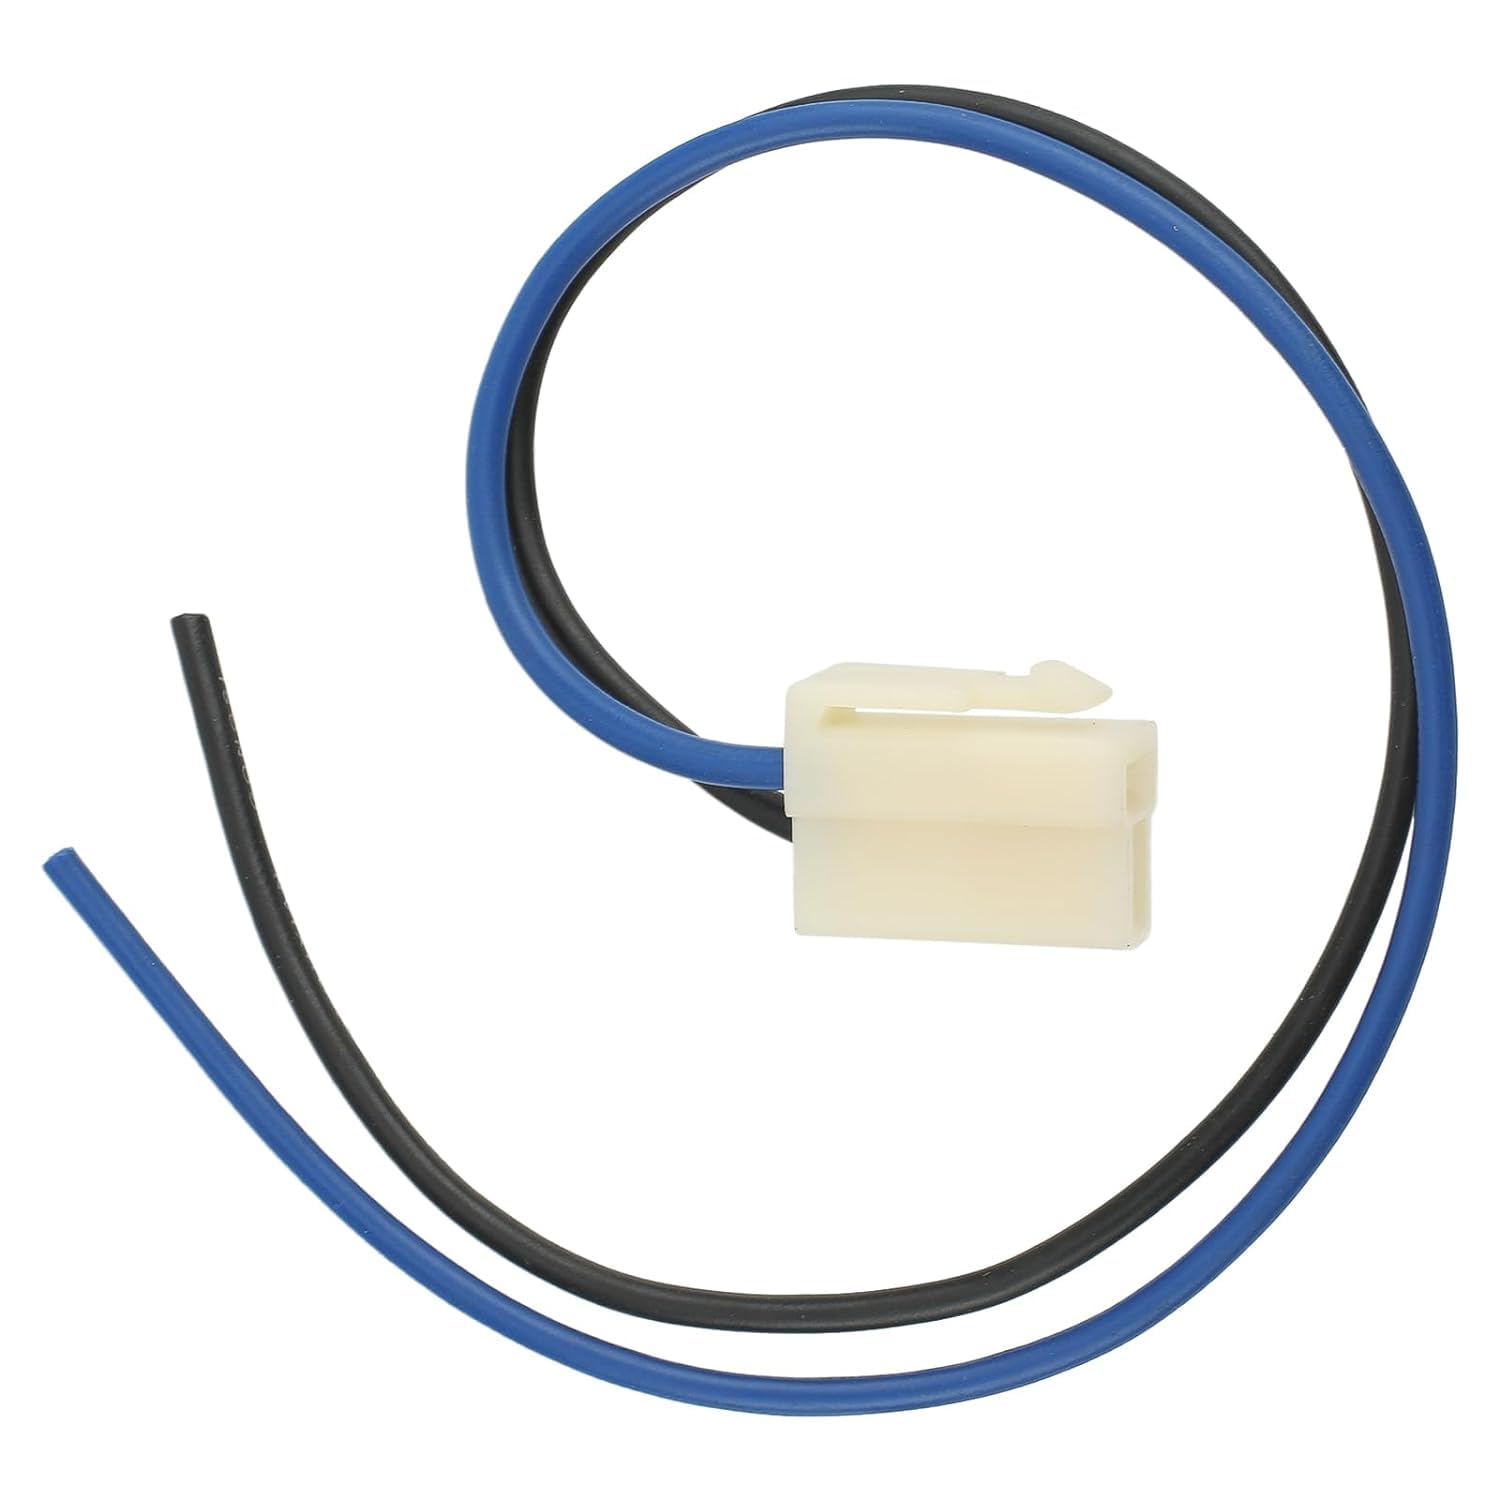
Image 3.2: The included 3-pin wiring harness.
4. Specifications
| Product Dimensions | 15"L x 3.2"W x 14"H |
| Brand | American Volt |
| Power Connector Type | 3-Pin |
| Voltage | 12 Volts |
| Wattage | 130 watts |
| Cooling Method | Air |
| Compatible Devices | Radiator |
| Material | Plastic |
| Maximum Rotational Speed | 5500 RPM |
| Air Flow Capacity | 2723 Cubic Feet Per Minute (CFM) |
| Model Number | AV-1115 |
5. Setup and Installation
5.1 Mounting the Fan
The fan can be mounted directly to the radiator using the provided tie strap kit. Ensure the fan is positioned to maximize airflow across the radiator core.
- Attach the four mounting bracket feet to the fan shroud.
- Insert the zip ties through the fan mounting brackets and then through the radiator fins.
- Place the spacers and tension springs (optional, for vibration reduction) as shown in the diagram.
- Secure the zip ties with the plastic locks on the opposite side of the radiator, ensuring the fan is held firmly but without excessive pressure that could damage the radiator fins.
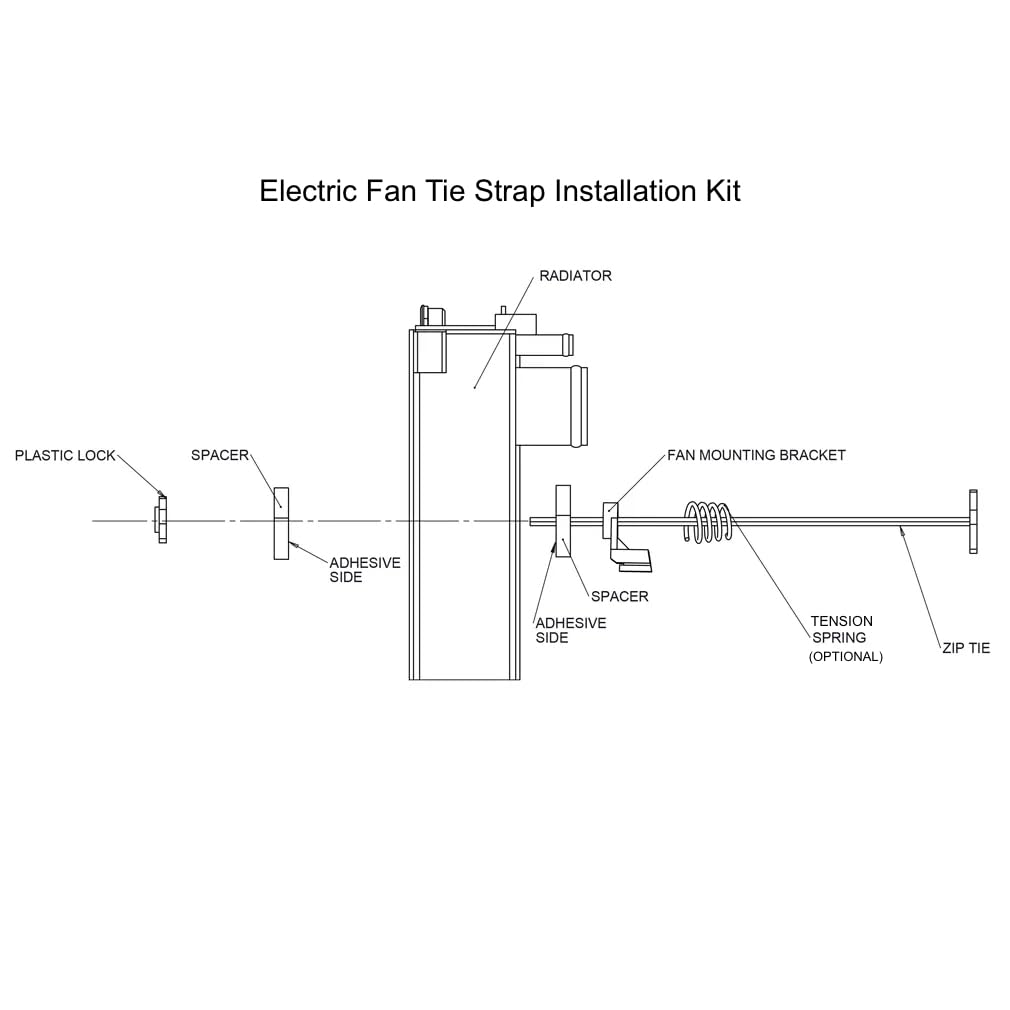
Image 5.1: Electric Fan Tie Strap Installation Diagram.
5.2 Wiring and Reversibility
The fan is configured as an air puller by default. To reverse the airflow (to an air pusher), simply reverse the polarity of the wiring connections.
- Air Puller (Default): Connect the blue wire to the positive (+) 12V power source and the black wire to ground (-). This configuration pulls air through the radiator.
- Air Pusher: Connect the black wire to the positive (+) 12V power source and the blue wire to ground (-). This configuration pushes air through the radiator.
It is recommended to use a relay and a temperature switch for automatic operation, or a manual switch for controlled operation. Ensure all wiring is properly fused.

Image 5.2: Close-up of the fan motor and wiring connection point.
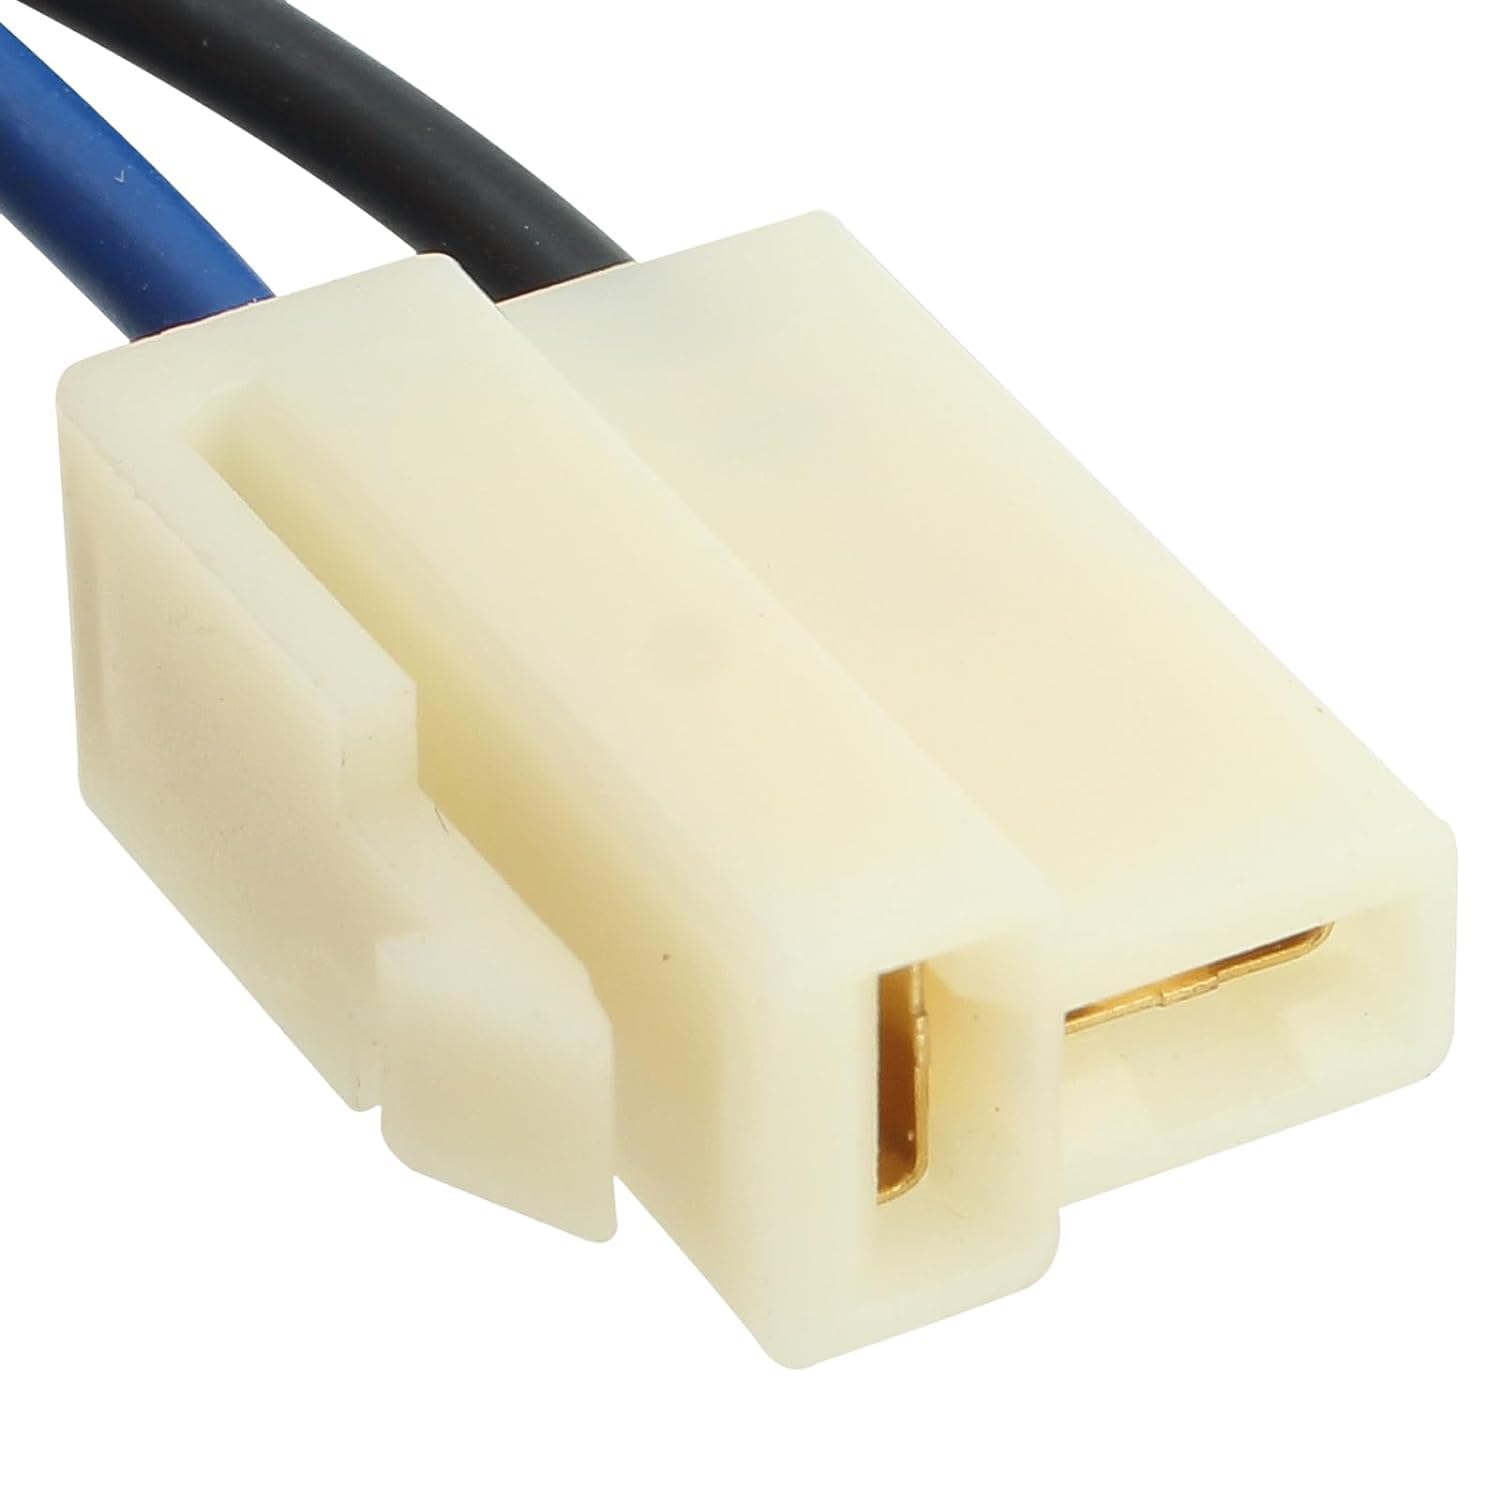
Image 5.3: Detail of the 3-pin wiring connector.
6. Operating Instructions
Once properly installed and wired, the fan will operate based on the control method chosen (e.g., thermostat switch, manual switch). Ensure the fan is operating in the correct direction for your application (puller or pusher).
- Air Puller: Mounts on the engine side of the radiator and pulls air through the radiator towards the engine.
- Air Pusher: Mounts on the front side of the radiator and pushes air through the radiator away from the engine.
Regularly check for proper fan rotation and adequate airflow, especially during initial setup and after any maintenance.
7. Maintenance
To ensure optimal performance and longevity of your cooling fan, perform the following maintenance checks periodically:
- Cleaning: Keep the fan blades and shroud free from dirt, debris, and obstructions. Use a soft brush or compressed air to clean. Do not use harsh chemicals.
- Wiring Inspection: Periodically check all wiring connections for corrosion, fraying, or loose terminals. Ensure all insulation is intact.
- Mounting Security: Verify that the fan remains securely mounted to the radiator. Tighten any loose mounting hardware if necessary.
- Blade Condition: Inspect fan blades for any cracks, chips, or damage. Damaged blades can cause imbalance and reduce efficiency.
8. Troubleshooting
If you encounter issues with your American Volt cooling fan, refer to the following troubleshooting guide:
| Problem | Possible Cause | Solution |
|---|---|---|
| Fan does not turn on | No power, blown fuse, faulty relay/switch, incorrect wiring, motor failure | Check power supply, inspect fuse, test relay/switch, verify wiring connections, contact support if motor is faulty. |
| Low airflow | Incorrect fan direction, obstructed blades/radiator, low voltage | Reverse wiring for correct direction, clear obstructions, check voltage supply. |
| Excessive noise or vibration | Loose mounting, damaged blades, debris in fan | Tighten mounting hardware, inspect and replace damaged blades, remove debris. |
If the problem persists after attempting these solutions, please contact American Volt customer support.
9. Warranty and Support
For warranty information or technical support regarding your American Volt 15-inch Electric Radiator Cooling Fan (Model AV-1115), please refer to the manufacturer's official website or contact their customer service department directly. Keep your purchase receipt for warranty claims.
Manufacturer: American Volt


