1. Overview
The BSIDE S11 Smart Digital Multimeter is a versatile and user-friendly tool designed for electricians and beginners. It features an EBTN color display that shows three test results simultaneously: test value, analog bars, and hertz/room temperature. This multimeter automatically identifies the parameters being tested and selects the required range, simplifying operation. It supports measurements for AC/DC voltage, resistance, frequency, capacitance, diode, continuity, and duty cycle. Additionally, it includes V-Alert (NCV) for non-contact voltage detection and live wire checking with a single probe.
Key Features:
- Smart Mode: Automatically measures AC/DC voltage, resistance, and continuity.
- Color LCD Display: 3.5-inch EBTN display for enhanced readability in various lighting conditions.
- 3 Results Display: Shows test value, analog bars, and frequency/temperature concurrently.
- Rechargeable: Built-in 800mAh Li-ion battery with USB-C charging.
- Protective Case: Durable case for protection against shocks, friction, and bumps.
- NCV Function: Non-contact voltage detection with audible alerts.
- Live Wire Check: Identifies live wires using a single probe.
- Automatic Range & Power Off: Enhances ease of use and battery life.
- Data Hold: Freezes the displayed measurement for convenient recording.
2. What's in the Box
Upon opening your BSIDE S11 Smart Digital Multimeter package, you will find the following items:
- 1 x BSIDE S11 Smart Digital Multimeter
- 1 x Pair of Test Leads (Red and Black)
- 1 x Protective Case
- 1 x USB-C Charging Cable
- 1 x English Instruction Manual
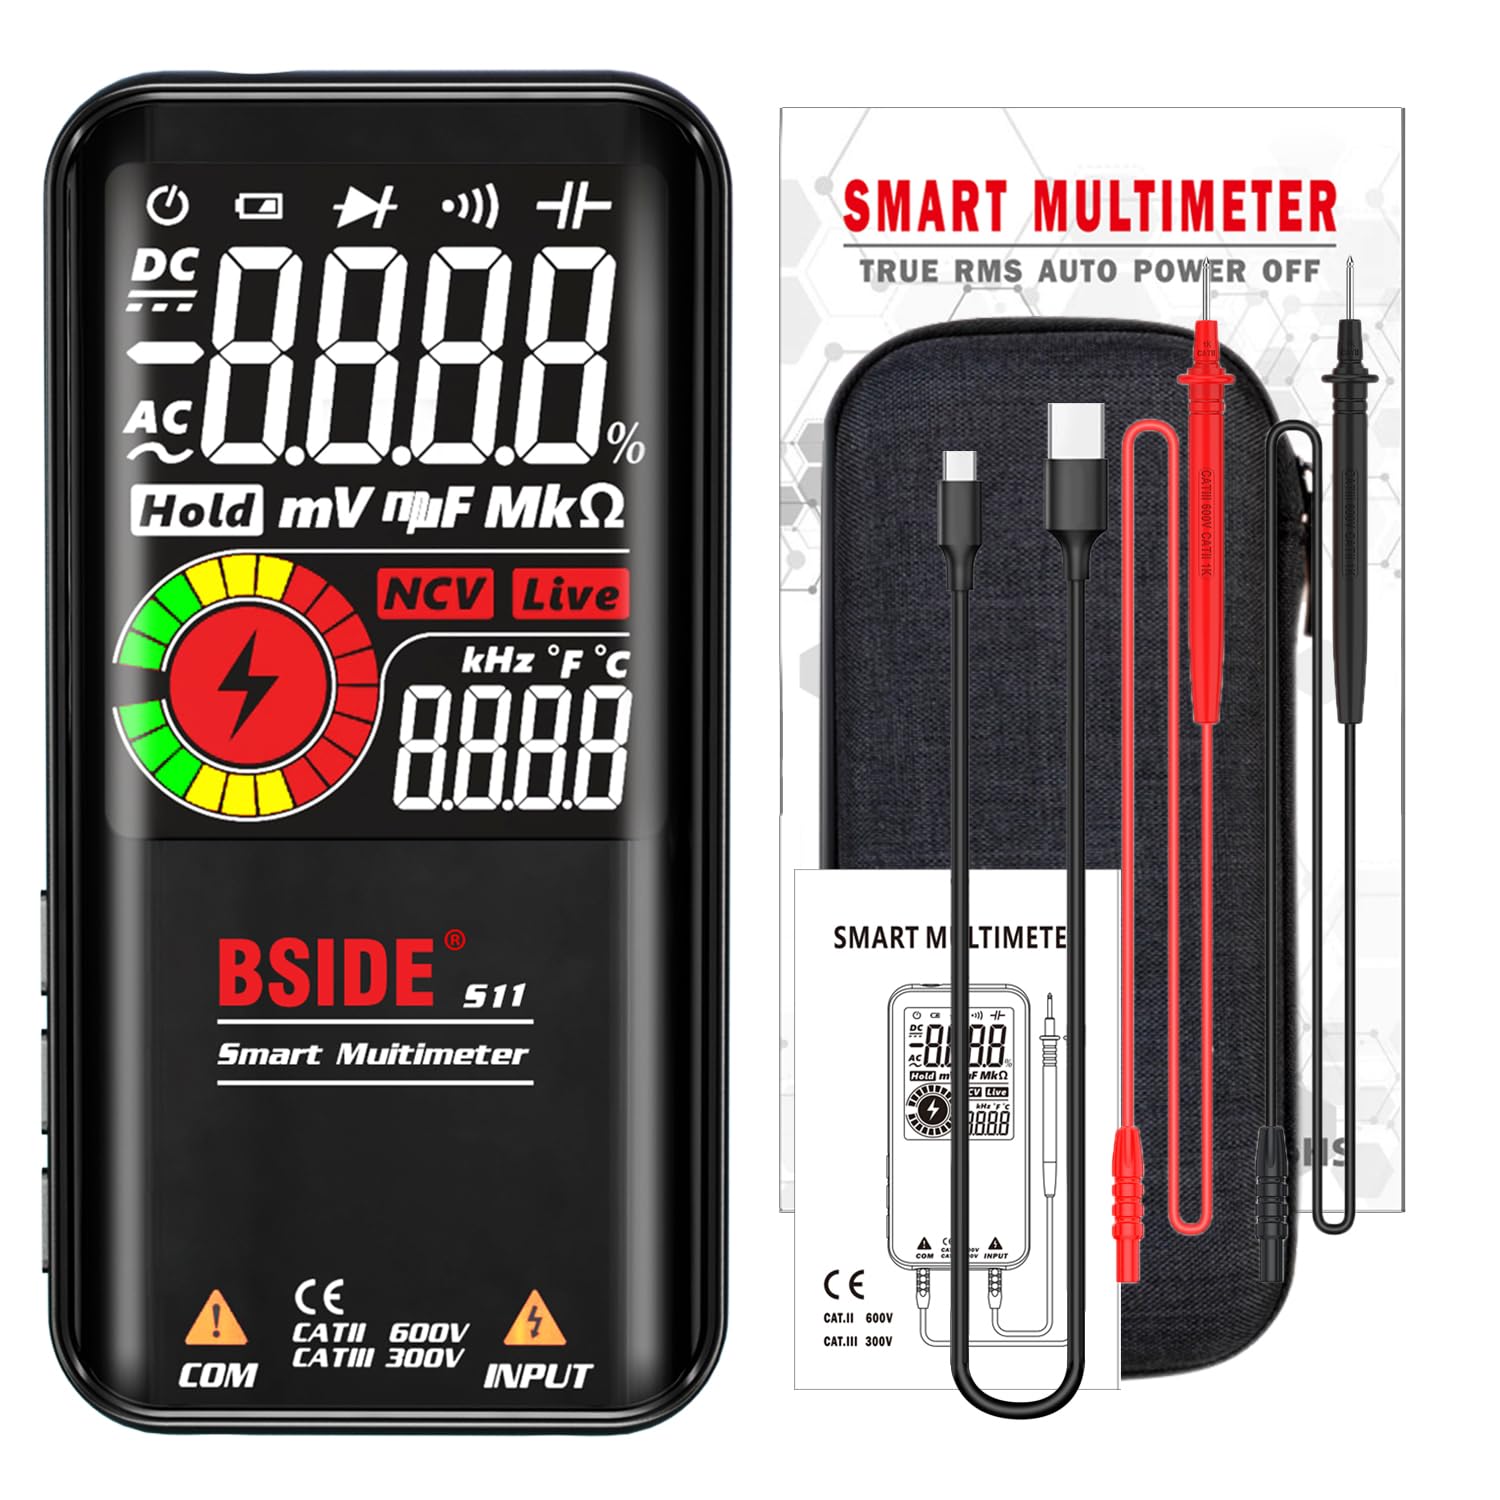
Figure 2.1: BSIDE S11 Multimeter and included accessories.
3. Setup
3.1 Initial Charging
The BSIDE S11 Multimeter is equipped with a built-in 3.7V rechargeable Li-ion battery. Before first use, it is recommended to fully charge the device. Use the provided USB-C charging cable to connect the multimeter to a standard USB power source (e.g., computer, wall adapter). The charging indicator light will typically show the charging status.

Figure 3.1: BSIDE S11 Multimeter being charged via USB-C cable.
3.2 Connecting Test Leads
Insert the red test lead into the 'INPUT' jack and the black test lead into the 'COM' (common) jack on the bottom of the multimeter. Ensure they are securely connected. The test leads come with protective caps; remove them before use and replace them for storage.

Figure 3.2: Correct connection of test leads to the multimeter.
3.3 Powering On/Off
Press and hold the power button (usually located on the top or side) for approximately 2 seconds to turn the multimeter on or off. The device features an automatic power-off function to conserve battery life if inactive for a period.
4. Operating Instructions
The BSIDE S11 operates primarily in Smart Mode, automatically detecting the measurement type. You can also manually select functions using the 'FUNC' button.

Figure 4.1: Multimeter in Smart 'AUTO' mode with function indicators.
4.1 AC/DC Voltage Measurement
In Smart Mode, the multimeter will automatically detect and measure AC or DC voltage. Connect the test leads across the circuit or component you wish to measure. The display will show the voltage value, frequency (for AC), and an analog bar graph.

Figure 4.2: Example of 3-result display during voltage measurement.

Figure 4.3: Measuring DC voltage in an automotive application.
4.2 Resistance Measurement
To measure resistance, ensure the circuit is de-energized. Place the test leads across the component. The multimeter will automatically switch to resistance mode and display the value in Ohms (Ω), kilo-Ohms (kΩ), or mega-Ohms (MΩ).
4.3 Capacitance Measurement
For capacitance measurements, ensure the capacitor is discharged before testing. Connect the test leads to the capacitor terminals. The display will show the capacitance value in nano-Farads (nF), micro-Farads (µF), or milli-Farads (mF).

Figure 4.4: Measuring capacitance in an electronic maintenance scenario.
4.4 Diode Test
Select the diode test function (if not in Smart Mode). Connect the red lead to the anode and the black lead to the cathode of the diode. The display will show the forward voltage drop. Reverse the leads to check for open circuit (OL) indication.
4.5 Continuity Test
For continuity testing, ensure the circuit is de-energized. Touch the test leads to the two points you want to check. If the resistance is less than 30Ω, an audible beep will sound, indicating continuity.
4.6 Frequency and Duty Cycle
The multimeter can measure frequency (Hz) and duty cycle (%). These measurements are often displayed alongside voltage in Smart Mode or can be selected manually.
4.7 V-Alert (NCV) and Live Wire Detection
The NCV function detects non-contact voltage. Bring the top of the multimeter near an AC voltage source. The device will beep and the display will show a V-Alert indication. For live wire checking, use a single probe to identify live conductors; the LCD screen will light up and an audible beep will sound.
Video 4.1: Demonstration of BSIDE S11 Multimeter features, including unboxing, charging, and various measurement functions like voltage, resistance, diode, NCV, and duty cycle. Note: Some parts of the video may show the S10 model, which uses AAA batteries, while the S11 is rechargeable via USB-C.
5. Maintenance
5.1 Cleaning
To clean the multimeter, use a soft, damp cloth. Do not use abrasive cleaners or solvents. Ensure the device is powered off and disconnected from any circuits before cleaning.
5.2 Battery Care
The built-in Li-ion battery should be charged regularly to maintain its performance. Avoid completely draining the battery frequently. Store the multimeter in a cool, dry place when not in use for extended periods.
5.3 Protective Case
Always use the provided durable protective case to shield the multimeter from physical damage, such as shocks, friction, and bumps. The case is detachable for convenience.

Figure 5.1: BSIDE S11 Multimeter with its protective case.
6. Troubleshooting
- No Display/Power: Ensure the battery is charged. Press and hold the power button for 2 seconds. If the issue persists, try charging the device for a longer period.
- Inaccurate Readings: Verify that the test leads are correctly inserted and making good contact with the circuit/component. Ensure the correct measurement mode is selected if not using Smart Mode. Check for low battery indication.
- 'OL' Indication: 'OL' (Overload) indicates that the measured value is outside the device's range or there is an open circuit.
- No Continuity Beep: Ensure the circuit is de-energized. Check if the resistance is above 30Ω.
- Device Beeps Continuously (NCV): The device is highly sensitive to electrical fields. Keep it away from batteries or voltage panels when not actively using the NCV function to avoid false positives.
7. Specifications
| Parameter | Value |
|---|---|
| Display | 9999 Counts, 3.5" Color EBTN LCD |
| DC Voltage | 0V-620V ±(0.5%+3); Resolution: 0.001V |
| AC Voltage | 0V-620V ±(0.5%+5); Resolution: 0.001V |
| Resistance | 1Ω-999.9Ω ±(2.0%+5), 1kΩ-60MΩ ±(1.0%+3); Resolution: 0.1Ω |
| Capacitance | 1nF-999.9nF ±(6.0%+5), 1uF-99.99mF ±(3.0%+3); Resolution: 0.001nF |
| Frequency | 1Hz-1000Hz ±(1.0%+5) (ACV: 2V-10V); 1KHz-60KHz ±(1.0%+5) (ACV: 10V-620V); Resolution: 0.001Hz |
| Operating Cycle | 0.1% - 99.9% ±(3.0%+5) (LCA: 2V-620V); Resolution: 0.1% |
| Diode Test | Automatic identification if less than 3.0V |
| Continuity | Beep sounds if less than 30Ω |
| V-Alert (NCV) | Beep sounds when voltage detected |
| Live Wire Check | Beep sounds, LCD screen lights up |
| Power Supply | 1 x 3.7V rechargeable battery (included) |
| Dimensions | 143 x 69 x 17 mm (5.63 x 2.72 x 0.67 inches) |
| Weight | 119 Grams (4.2 ounces) |
8. Warranty & Support
For warranty information and technical support, please refer to the contact details provided with your purchase or visit the official BSIDE website. Additional instructions in French may be available via email upon request.