Yuegan 011U
Yuegan FM Rechargeable Radio Model 011U User Manual
Model: 011U | Brand: Yuegan
1. Introduction
Thank you for choosing the Yuegan FM Rechargeable Radio Model 011U. This manual provides essential information for the safe and efficient operation of your device. Please read it thoroughly before use and retain it for future reference.
The Yuegan 011U is a portable FM radio designed for clear audio reception and ease of use. It features a rechargeable battery, compact design, and intuitive controls for an enjoyable listening experience.
2. Important Safety Instructions
- Do not expose the radio to water or excessive moisture.
- Avoid extreme temperatures and direct sunlight.
- Do not attempt to disassemble or modify the device.
- Use only the specified charging method and accessories.
- Keep out of reach of children.
- Clean the device with a soft, dry cloth.
3. Package Contents
Please check that all items are present:
- Yuegan FM Rechargeable Radio Model 011U
- Rechargeable Battery
- Charging Cable (may be sold separately or included)
- User Manual (this document)
4. Product Overview
Familiarize yourself with the radio's components:

Figure 1: Front view of the Yuegan 011U FM Radio with its telescopic antenna extended. The radio features a speaker grille on the left, a display panel, and a numeric keypad with control buttons on the right. A wrist strap is visible on the left side.
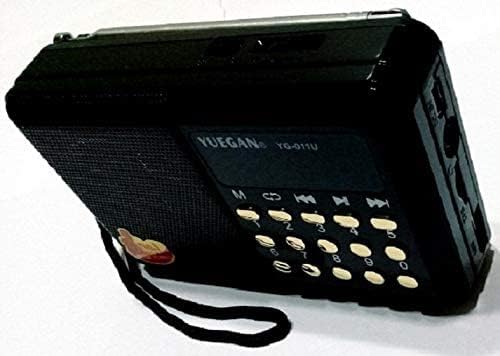
Figure 2: Side view of the Yuegan 011U FM Radio, highlighting the various ports and controls located on the side panel. These typically include a charging port, USB port, and potentially a memory card slot.
Controls and Ports:
- Telescopic Antenna: For FM signal reception.
- Speaker: Audio output.
- Display Panel: Shows frequency, mode, and other information.
- Numeric Keypad (0-9): For direct frequency input or track selection.
- Mode (M) Button: Switches between radio, USB, or other input modes.
- Previous/Next Track Buttons: For media playback or station tuning.
- Play/Pause Button: For media playback.
- Charging Port: For connecting the charging cable.
- USB Port: For playing media from USB drives.
- Volume Control: Typically integrated with the power switch or dedicated buttons.
5. Setup
5.1. Charging the Battery
- Ensure the radio is turned off.
- Connect the charging cable to the radio's charging port.
- Connect the other end of the charging cable to a compatible USB power adapter (not always included) or a computer's USB port.
- The charging indicator light (if present) will illuminate during charging.
- Once fully charged, the indicator light may change color or turn off. Disconnect the charger.
Note: For first-time use, fully charge the battery before operation.
5.2. Extending the Antenna
For optimal FM reception, gently extend the telescopic antenna to its full length. Adjust its direction for the best signal clarity.
6. Operating Instructions
6.1. Power On/Off
Locate the power switch or button (often combined with volume control) and slide/press it to turn the radio on or off.
6.2. FM Radio Operation
- Turn on the radio.
- Press the Mode (M) button until "FM" or the FM frequency is displayed.
- Automatic Scan: Press and hold the Play/Pause button to initiate an automatic scan for available FM stations. The radio will save found stations.
- Manual Tuning: Use the Previous/Next Track buttons to fine-tune the frequency or cycle through saved stations.
- Direct Frequency Input: Use the numeric keypad (0-9) to directly enter the desired FM frequency (e.g., 102.5).
- Adjust the volume using the volume control.
6.3. USB/MP3 Playback (if applicable)
If your radio supports USB media playback:
- Insert a USB flash drive containing MP3 audio files into the USB port.
- Press the Mode (M) button until "USB" or "MP3" is displayed.
- The radio should automatically begin playing the first track.
- Use the Play/Pause, Previous Track, and Next Track buttons to control playback.
- Use the numeric keypad to select specific tracks by number.
7. Maintenance
7.1. Cleaning
Wipe the radio's exterior with a soft, dry, lint-free cloth. Do not use abrasive cleaners, solvents, or chemical sprays.
7.2. Battery Care
- Avoid fully discharging the battery frequently.
- If storing the radio for an extended period, charge the battery to about 50% and recharge every few months to maintain battery health.
- Do not expose the battery to high temperatures.
8. Troubleshooting
| Problem | Possible Cause | Solution |
|---|---|---|
| Radio does not turn on. | Battery is discharged. | Charge the battery fully. |
| Poor FM reception. | Antenna not extended or poor signal area. | Extend the telescopic antenna and adjust its position. Try moving to a different location. |
| No sound. | Volume is too low or muted. | Increase the volume. Ensure no headphones are connected if you expect sound from the speaker. |
| USB playback not working. | USB drive not inserted correctly, unsupported file format, or radio not in USB mode. | Ensure USB drive is fully inserted. Check if files are in MP3 format. Press the Mode button to select USB mode. |
9. Specifications
| Feature | Detail |
|---|---|
| Model | 011U |
| Brand | Yuegan |
| Tuner Technology | FM |
| Radio Bands Supported | FM |
| Power Source | Battery Powered (Rechargeable) |
| Item Weight | 240 g (0.24 Kilograms) |
| Package Dimensions | 13.8 x 7.8 x 4.2 cm |
| Color | Black and Gold |
| Special Features | Lightweight, Portable, Rechargeable |
| Recommended Uses | Music, News, Sports Broadcast |
10. Warranty Information
Specific warranty details are typically provided at the point of purchase or on the product packaging. Please refer to your purchase receipt or contact the retailer for information regarding warranty coverage and terms.
11. Customer Support
For further assistance, technical support, or inquiries regarding your Yuegan FM Rechargeable Radio Model 011U, please contact your retailer or the manufacturer's customer service department. Contact information may be available on the product packaging or the brand's official website.
Ask a question about this manual
Ask about setup, troubleshooting, compatibility, parts, safety, or missing instructions. Manuals+ will review the question and use this page’s manual context to help answer it.