Introduction
Thank you for choosing the Ringway TB810A Electronic Keyboard. This manual provides essential information for the safe and efficient use of your instrument. Please read it thoroughly before operating the keyboard and keep it for future reference.
Safety Information
- Power Supply: Use only the specified power adapter or batteries. Ensure the voltage matches the keyboard's requirements.
- Water and Moisture: Do not expose the keyboard to water or excessive moisture. Avoid placing liquids near the instrument.
- Ventilation: Ensure proper ventilation around the keyboard. Do not block ventilation openings.
- Cleaning: Clean the keyboard with a soft, dry cloth. Do not use abrasive cleaners or solvents.
- Handling: Handle the keyboard with care. Avoid dropping or subjecting it to strong impacts.
Package Contents
Verify that all items are present in the package:
- Ringway TB810A Electronic Keyboard
- Power Adapter (if included)
- Music Rest
- User Manual
Product Overview
The Ringway TB810A is a 61-key electronic keyboard designed for various skill levels. It features touch-sensitive keys, a multi-function LCD, and a wide range of voices and accompaniment styles.
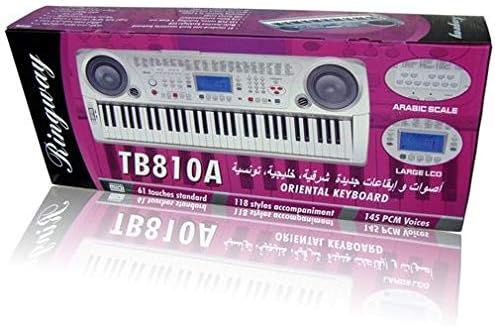
Figure 1: Front view of the Ringway TB810A Electronic Keyboard, showcasing the 61 keys, built-in speakers, and control panel.

Figure 2: Angled view of the Ringway TB810A Electronic Keyboard, including the detachable music rest.
Setup
- Unpacking: Carefully remove the keyboard and all accessories from the packaging.
- Power Connection:
- AC Adapter: Connect the AC adapter to the DC 12V input jack on the rear panel of the keyboard, then plug it into a standard wall outlet.
- Batteries: If using batteries, open the battery compartment on the underside of the keyboard and insert the required batteries (not included), ensuring correct polarity.
- Music Rest: Insert the music rest into the designated slots on the top panel of the keyboard.
- Headphones/Audio Output: For private practice, connect 3.5mm headphones to the headphone jack. To connect to an external amplifier or sound system, use the Line Out jack.
- Pedal: Connect an optional sustain pedal to the Pedal jack for enhanced expression.
Operating Instructions
1. Power On/Off and Volume
- Press the POWER button to turn the keyboard on or off.
- Adjust the master volume using the MASTER VOLUME knob.
2. Display and Control Panel
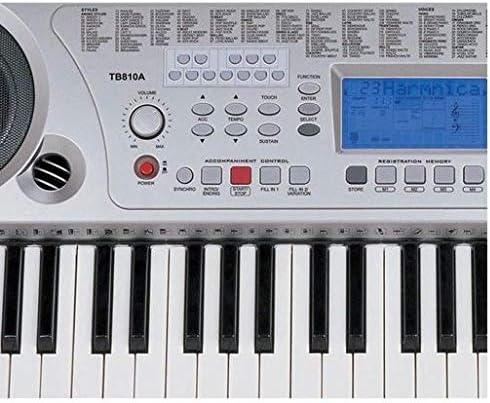
Figure 3: Close-up view of the control panel, showing the LCD screen, power button, volume knob, and various function buttons.
- The multi-function LCD screen displays current settings, voice numbers, rhythm numbers, and other operational information. It is backlit for visibility.
- Use the numeric keypad and +/- buttons to select voices, rhythms, and other parameters.
3. Voices (Tones)
- The keyboard features 141 PCM voices.
- To select a voice, press the VOICE button, then use the numeric keypad or +/- buttons to enter the desired voice number.
- Polyphony: The keyboard supports 64-note polyphony, allowing multiple notes to sound simultaneously.
4. Accompaniment Styles (Rhythms)

Figure 4: Detail of the rhythm selection buttons, showing various style categories.
- The keyboard includes 118 auto accompaniment styles, including 3 Arabic rhythm groups.
- To select a style, press the STYLE button, then use the numeric keypad or +/- buttons.
- Accompaniment Control: Use buttons like SYNC, START/STOP, INTRO/ENDING, FILL 1, and FILL 2/VARIATION to control the accompaniment.
5. Key Modes
- Normal: Standard playing mode.
- Single: Single-finger chord recognition for accompaniment.
- Fingered: Full-finger chord recognition for accompaniment.
- Split: Divides the keyboard into two sections, allowing different voices to be played on each side.
6. Lesson Function (3 Steps)
The keyboard offers a 3-step lesson function to help users learn songs.
- Lesson 1 (One-Key Play): Practice timing by pressing any key to advance the melody.
- Lesson 2 (Follow Me): The keyboard waits for you to play the correct note before proceeding.
- Lesson 3 (Ensemble): Play along with the accompaniment, focusing on rhythm and melody.
- The keyboard includes 50 lesson songs (numbered 51 to 100).
7. Demo Songs
The keyboard has 100 demo songs (numbered 01 to 100) for listening pleasure and demonstration of instrument capabilities.
8. Recording
- The multi-track recording feature allows you to record and play back your performances.
- Refer to the specific recording section in the full manual for detailed instructions on how to record and playback.
9. Registration Memory
Store and recall up to 4 panel settings (voices, rhythms, tempo, etc.) using the registration memory function.
10. Other Functions
- Transpose: Adjust the pitch of the keyboard in semitone steps.
- Tune: Fine-tune the overall pitch.
- Touch: Enable or disable touch sensitivity for the keys.
- Octave: Shift the keyboard's pitch up or down by octaves.
- Sustain: Apply a sustain effect to notes.
- Chorus: Add a chorus effect to the sound.
- Split: Divide the keyboard into two sections with different voices.
- Harmony: Add harmony notes to your melody.
- MIDI In/Out: Connect the keyboard to other MIDI devices or a computer using the MIDI USB port for advanced control and recording.
Maintenance
- Cleaning: Wipe the keyboard surface with a soft, dry, lint-free cloth. For stubborn dirt, slightly dampen the cloth with water and mild soap, then wipe dry immediately.
- Storage: When not in use for extended periods, store the keyboard in a dry, dust-free environment, away from direct sunlight and extreme temperatures.
- Battery Replacement: If using batteries, replace them when the power indicator dims or the keyboard functions become unstable. Always replace all batteries at once with new ones of the same type.
Troubleshooting
| Problem | Possible Cause | Solution |
|---|---|---|
| No power | Power adapter not connected, batteries depleted/incorrectly inserted | Check AC adapter connection; replace batteries ensuring correct polarity. |
| No sound | Volume too low, headphones connected, external device connected to Line Out | Increase Master Volume; disconnect headphones; check external audio connections. |
| Keys not responding | Keyboard in a specific mode (e.g., Lesson mode waiting for input) | Exit lesson mode or reset the keyboard (refer to full manual for reset procedure). |
| Distorted sound | Volume too high, faulty connection | Lower volume; check all cable connections. |
Specifications
| Feature | Description |
|---|---|
| Keys | 61 standard touch-sensitive keys |
| Display | Multi-function LCD with backlight |
| Polyphony | 64 notes |
| Voices | 141 PCM voices |
| Accompaniment Styles | 118 styles (including 3 Arabic rhythm groups) |
| Lesson Function | 3-step (One-Key Play, Follow Me, Ensemble) |
| Lesson Songs | 50 songs (51-100) |
| Demo Songs | 100 songs (01-100) |
| Recording | Multi-track recording and playback |
| Registration Memory | 4 panel settings |
| Connectivity | MIDI In/Out (USB), Pedal, Line Out, Aux In (Mobile), DC 12V |
| Headphone Jack | 3.5mm |
| Power Source | AC Adapter (DC 12V) or Batteries |
| Dimensions (L x W x H) | 950 mm × 350 mm × 130 mm |
| Finish Type | Glossy |
| Skill Level | All |
| Style | Modern |
Warranty and Support
For warranty information and technical support, please refer to the warranty card included with your product or contact your local Ringway distributor. Keep your purchase receipt as proof of purchase for any warranty claims.

