Rolanstar B0912GZX2W
Rolanstar Double Rod Garment Rack User Manual
Model: B0912GZX2W
Introduction
This manual provides comprehensive instructions for the assembly, operation, and maintenance of your Rolanstar Double Rod Garment Rack. Designed for versatility and durability, this rack offers ample space for organizing your garments and accessories. Please read this manual thoroughly before assembly and use to ensure safe and efficient operation.

Figure 1: Overview of the Rolanstar Double Rod Garment Rack. This image displays the full assembled rack with its two hanging rods, lower wooden shelf, and caster wheels.
Safety Information
- Always assemble the garment rack on a flat, stable surface to prevent tipping.
- Do not exceed the maximum weight capacity for the hanging rods or the lower shelf. Refer to the Specifications section for details.
- Ensure all screws and connections are tightened securely before use. Periodically check for loose connections and re-tighten as necessary.
- Keep small parts and packaging materials away from children to prevent choking hazards.
- When moving the rack, ensure the caster wheels are unlocked. Lock the wheels when the rack is in its desired position to prevent accidental movement.
- Avoid placing hot items directly on the wooden shelf.
Parts List
Before beginning assembly, verify that all parts are present and undamaged. If any parts are missing or damaged, please contact customer support.
- Upper Hanging Rods (2)
- Vertical Support Poles (4)
- Lower Wooden Shelf (1)
- Caster Wheels (4, 2 with locking mechanism)
- Connecting Pipes/Joints
- Screws and Assembly Tools (e.g., Allen wrench)
Setup and Assembly Instructions
Assembly typically takes approximately 30 minutes. Follow these steps carefully:
- Unpack Components: Carefully remove all parts from the packaging and lay them out on a clean, soft surface to prevent scratches.
- Attach Caster Wheels: Securely attach the four caster wheels to the designated points on the underside of the lower wooden shelf. Ensure the two lockable wheels are positioned on the same side for easier access.
- Install Vertical Support Poles: Insert the bottom ends of the four vertical support poles into the corresponding holes on the wooden shelf. Tighten any securing screws as indicated in the diagram.
- Assemble Lower Hanging Rod: Connect the components of the lower hanging rod and attach it to the vertical support poles at the desired height. The design allows for adjustment based on garment length.
- Assemble Upper Hanging Rod: Connect the components of the upper hanging rod and attach it to the top of the vertical support poles. Ensure the circular tube ends are facing outwards to prevent clothes from sliding off.
- Tighten All Connections: Once all parts are in place, systematically tighten all screws and connections using the provided tools to ensure the rack is stable and secure.

Figure 2: Detailed dimensions of the assembled garment rack. This image provides measurements for height, width, depth, and the extendable length of the hanging rods, which is crucial for assembly and placement.
Operating Instructions
Your Rolanstar Double Rod Garment Rack is designed for ease of use and versatility.
- Hanging Garments: Utilize the two hanging rods for various clothing items. The lower rod can be adjusted to a higher or lower position to accommodate different garment lengths, such as long dresses or shorter shirts.
- Extendable Rods: The horizontal rods can be extended from approximately 76.2 cm (30 inches) to 138.4 cm (54.5 inches) to increase hanging space. Pull the ends outwards to extend and push inwards to retract. Ensure they are securely locked in place after adjustment.
- Lower Storage Shelf: The sturdy wooden shelf at the bottom provides additional storage space for shoes, boots, storage baskets, or bags.
- Mobility: The four 360-degree rotating caster wheels allow for easy movement of the rack between rooms. Two of the wheels are equipped with locking mechanisms. To move the rack, unlock these wheels. To secure the rack in place, press down on the locking levers of the two lockable wheels.

Figure 3: Key features of the garment rack, including the extendable hanging rods, the wooden storage shelf, and the 360-degree wheels with locking function. This image highlights the practical aspects of the rack's design.
Maintenance and Care
Proper care will extend the life and appearance of your garment rack.
- Cleaning: The melamine veneer surface of the wooden shelf is waterproof, heat-resistant, and dust-proof. Simply wipe it clean with a damp cloth. For the metal parts, use a soft, dry cloth to remove dust. Avoid abrasive cleaners or harsh chemicals.
- Regular Inspection: Periodically check all screws and connections to ensure they remain tight. Re-tighten any loose fittings to maintain stability.
- Weight Distribution: Distribute the weight of your garments evenly across the rods to prevent strain on one side and maintain balance.
Troubleshooting
| Problem | Possible Cause | Solution |
|---|---|---|
| Rack feels unstable or wobbly. | Loose screws or uneven assembly. | Ensure all screws are fully tightened. Check that the rack is assembled on a flat, level surface. Redistribute weight if overloaded on one side. |
| Caster wheels do not roll smoothly. | Wheels are locked, or debris is caught in the wheels. | Unlock the caster wheels. Check for and remove any hair or debris from the wheel mechanisms. |
| Hanging rods slide inwards. | Rods not fully extended or secured. | Ensure the extendable rods are pulled out completely and the internal locking mechanism (if any) is engaged. Avoid overloading the ends of the rods. |
Specifications
| Feature | Detail |
|---|---|
| Model Number | B0912GZX2W |
| Dimensions (L x W x H) | 138.43 x 39.88 x 156.97 cm (54.5 x 15.7 x 61.8 inches) |
| Extendable Rod Length | 76.2 cm to 138.4 cm (30 to 54.5 inches) |
| Weight | 10.12 kg (22.3 lbs) |
| Material | Engineered Wood, Metal (Steel) |
| Hanging Rod Weight Capacity | Up to 54.4 kg (120 lbs) per rod (total 121 lbs for the unit) |
| Lower Shelf Weight Capacity | Up to 15 kg (33 lbs) |
| Installation Type | Freestanding |
| Assembly Required | Yes |
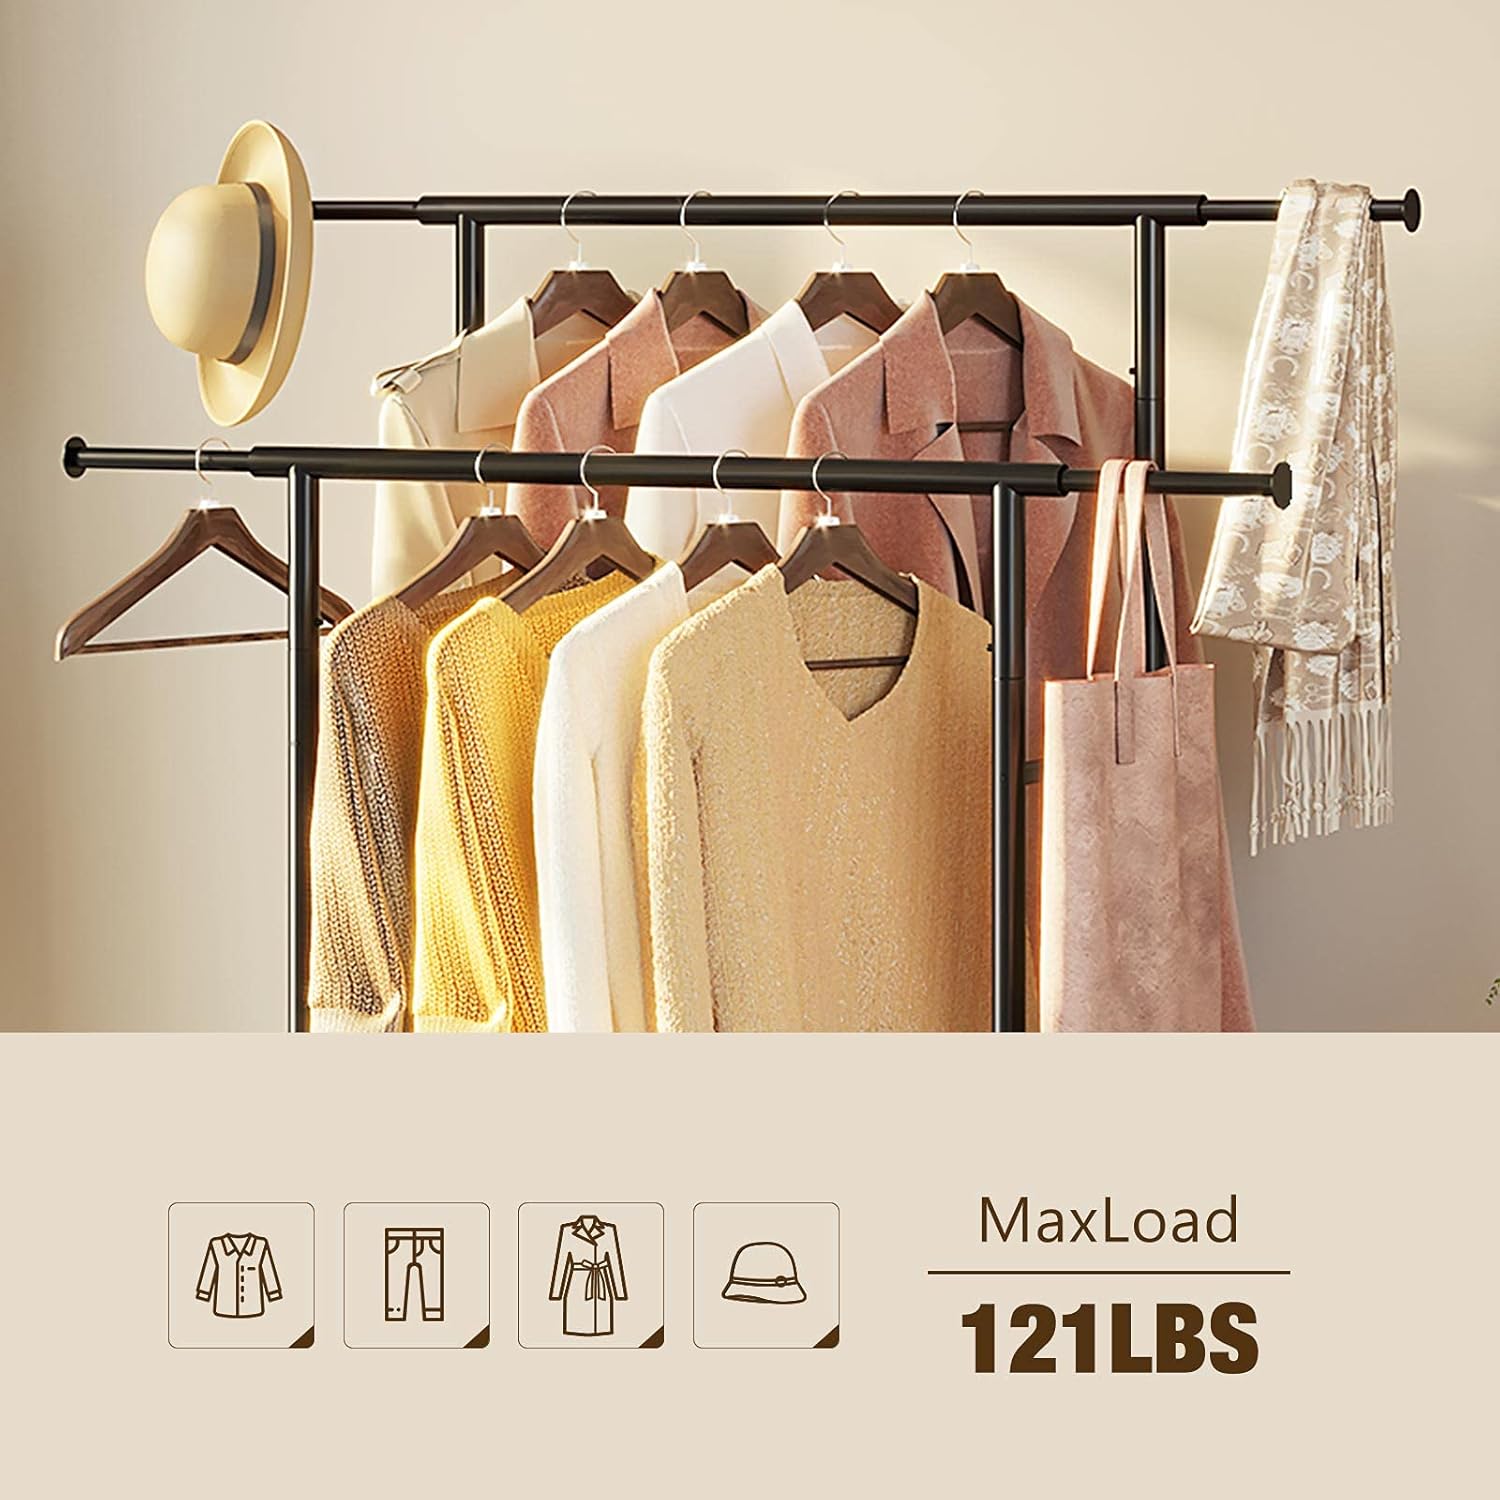
Figure 4: Illustration of the maximum weight capacity for the garment rack, indicating a total load of 121 lbs. This image visually reinforces the rack's robust design.

Figure 5: Information regarding the safety and reliability of the materials used in the garment rack, highlighting compliance with EPA TSCA Title VI and Carb Certification. This image assures users of the product's material quality.
Warranty and Support
For any questions regarding assembly, missing parts, or product performance, please contact Rolanstar customer support. While specific warranty details are not provided in this manual, please retain your purchase receipt for any potential warranty claims.
Information regarding the availability of spare parts is currently unavailable.
Ask a question about this manual
Ask about setup, troubleshooting, compatibility, parts, safety, or missing instructions. Manuals+ will review the question and use this page’s manual context to help answer it.