1. Important Safety Information
Please read all instructions carefully before installation and operation. Failure to follow these instructions may result in property damage, personal injury, or death.
- This product is not suitable for use in the bathroom. It is designed for kitchen, RV, sink, and household washing applications.
- Always ensure the water tank is completely filled with water before turning on the power to prevent damage to the heating element.
- The unit must be energized only when water is flowing from the hot water tap.
- The design features water and electricity separation to enhance safety and prevent corrosion of the heating element.
- Equipped with temperature protection and LED alarms for safe operation. The heater will stop heating if there is no water or low water flow.
- The LED display will show 'LL' if the inlet water temperature is below 3°C (37°F) or 'HH' if it is above 75°C (167°F).
- Ensure proper grounding for the electrical connection.
2. Product Overview
The TFCFL 6L 1500W Electric Tank Water Heater is a compact and efficient solution for instant hot water needs in various settings. It features a direct heating system for maximum thermal energy utilization and adjustable temperature control.
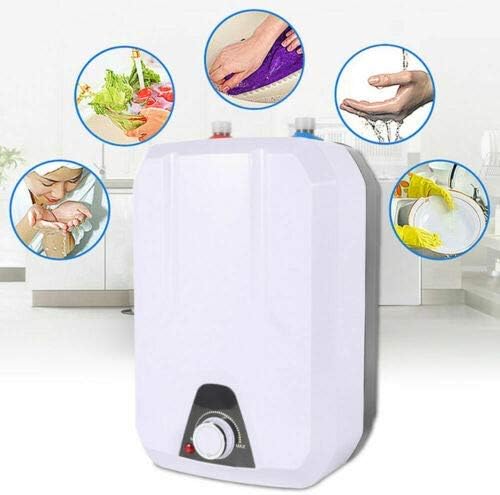
Image 1: Front view of the TFCFL 6L Electric Tank Water Heater, illustrating its versatility for tasks such as washing vegetables, hands, dishes, and personal hygiene.

Image 2: The water heater unit displayed alongside its complete set of included accessories, such as the operation manual, mounting hardware, pressure relief valve, and a clear hose.
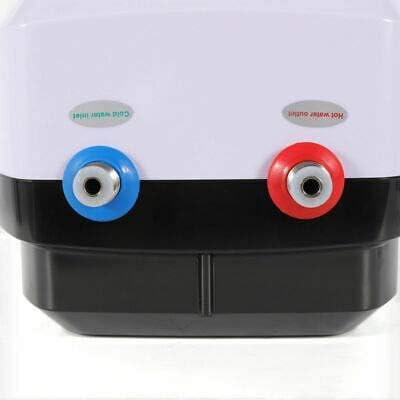
Image 3: A detailed view of the top connections, clearly marked for 'Hot water outlet' (red) and 'Cold water inlet' (blue), indicating the threaded ports for plumbing connections.

Image 4: Close-up of the front control panel, featuring a rotary knob for adjusting the temperature from 'Min' to 'Max' and a red indicator light to show operational status.
Video 1: An overview video demonstrating the TFCFL Electric Tank Water Heater, highlighting its features and design. This video is provided by the seller, WilkenUS.
3. Technical Specifications
| Parameter | Value |
|---|---|
| Rated Voltage | 110V 50HZ |
| Rated Power | 1500W |
| Temperature Adjustment Scope | 55℃ - 70℃ (131°F - 158°F) |
| Minimum Water Pressure | 0.7MPa |
| Water-Proof Level | IPX4 |
| Capacity | 8 Liters (Note: Product title indicates 6L, please verify actual capacity upon receipt) |
| Mount Type | Wall |
| Color | White |
| Model Number | a3d9b520-b6e0-49fe-a3e8-a827fff9e11d |
4. Installation Instructions
This water heater is designed for multiple installation methods, primarily wall-mounted. Ensure you have the necessary tools and follow local plumbing and electrical codes.
- Unpack and Inspect: Carefully remove the water heater and all accessories from the packaging. Inspect for any damage.
- Choose Location: Select a suitable wall location near a water supply and electrical outlet. Ensure the location is not in a bathroom and has adequate space for maintenance.
- Mounting: Use the provided mounting hardware (screws and anchors) to securely attach the water heater to the wall. Refer to the back of the unit for mounting points.

Image 5: Rear view of the water heater, clearly showing the mounting holes for secure wall installation and the exit point for the power cord.
- Water Connections: Connect the cold water supply to the blue 'Cold water inlet' port and the hot water outlet to your fixture using appropriate plumbing. Ensure all connections are tight to prevent leaks. Install the pressure relief valve as per local codes.
Image 6: A detailed view of the top connections, clearly marked for 'Hot water outlet' (red) and 'Cold water inlet' (blue), indicating the threaded ports for plumbing connections.
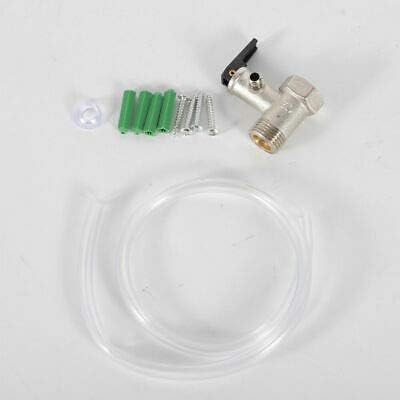
Image 7: A detailed view of the accessories included for installation: a pressure relief valve, mounting screws and anchors, and a clear flexible hose.
- Fill Tank: Before connecting power, open a hot water faucet at your sink or fixture to allow air to escape and the tank to fill completely with water. Wait until water flows steadily from the faucet.
- Electrical Connection: Plug the 3-prong power cord into a grounded 110V 50HZ electrical outlet.
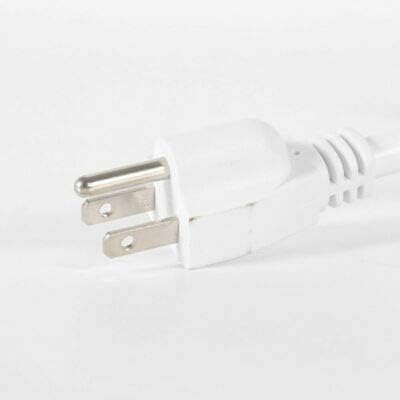
Image 8: Close-up of the 3-prong power plug, designed for standard 110V electrical outlets, ensuring proper grounding.
5. Operating Instructions
Once installed and filled with water, operating your TFCFL water heater is straightforward.
- Power On: Ensure the unit is plugged into a grounded outlet. The red indicator light on the front panel will illuminate.
- Set Temperature: Rotate the knob on the front panel to adjust the desired water temperature. The temperature can be set between 55℃ and 70℃ (131°F - 158°F).
Image 9: Close-up of the front control panel, featuring a rotary knob for adjusting the temperature from 'Min' to 'Max' and a red indicator light to show operational status.
- Heating Cycle: The water heater will begin heating the water to the set temperature. Once the desired temperature is reached, the power will automatically turn off. It will reactivate when the water temperature drops below the set point.
- Hot Water Delivery: Open your hot water faucet. The unit is designed to provide hot water quickly.
6. Maintenance
Regular maintenance ensures optimal performance and longevity of your water heater.
- Cleaning: The water and electricity separated design helps reduce mineral precipitation and extends the unit's life, minimizing the need for frequent cleaning of heating elements. Periodically wipe the exterior with a damp cloth.
- Pressure Relief Valve: Regularly check the pressure relief valve for proper operation as per manufacturer guidelines and local codes.
- Drainage (if applicable): If storing the unit or in freezing conditions, ensure the unit is properly drained. Consult a qualified plumber if unsure.
7. Troubleshooting
Refer to this section for common issues and their solutions.
| Problem | Possible Cause | Solution |
|---|---|---|
| No hot water / Unit not heating | No power; Water tank not filled; Low water flow. | Check power connection; Ensure tank is full before powering on; Verify adequate water pressure. |
| LED shows 'LL' | Inlet water temperature is too low (below 3°C / 37°F). | This is a protective measure. The unit may not operate efficiently in extremely cold conditions. Ensure ambient temperature is suitable. |
| LED shows 'HH' | Inlet water temperature is too high (above 75°C / 167°F). | This is a protective measure. Check the incoming water temperature. |
| Water leakage | Loose connections; Damaged pressure relief valve. | Tighten all plumbing connections; Inspect and replace pressure relief valve if damaged. |
If problems persist after attempting these solutions, please contact customer support.
8. Warranty and Support
For any questions, technical assistance, or warranty claims, please contact the seller or Amazon customer service. Our customer service team aims to provide troubleshooting assistance within 24 hours and offers hassle-free return policies through Amazon.