
Oceanic Water Systems EC20101
Oceanic Water Systems EC20101 Refillable Inline Water Filter Cartridge User Manual
Model: EC20101 | Brand: Oceanic Water Systems
1. Introduction
This manual provides instructions for the proper installation, operation, and maintenance of your Oceanic Water Systems EC20101 Clear Empty Refillable Inline Water Filter Cartridge. This cartridge is designed to be filled with various filtration media, such as DI resin, carbon, calcite, or alkaline media, to address specific water quality concerns. Its inline design allows for direct integration into water lines without requiring a separate filter housing.
Please read these instructions thoroughly before installation and use to ensure optimal performance and safety.
2. Package Contents
- 1 x Empty Refillable Inline Filter Cartridge (2" x 10")
- 1 x Top Filter Screen
- 1 x Bottom Filter Screen
- 1 x Cap O-ring
Note: Two (2) 1/4" MNPT fittings are required for installation and are NOT included with this product.
3. Setup and Installation
3.1 Preparing the Cartridge
- Unscrew the cap from the cartridge body.
- Insert the bottom filter screen into the cartridge body.
- Carefully fill the cartridge with your chosen filtration media (e.g., DI resin, granular activated carbon). Do not overfill; leave a small space for water flow.
- Place the top filter screen on top of the media.
- Ensure the O-ring is properly seated in the cap. Screw the cap back onto the cartridge body until hand-tight.
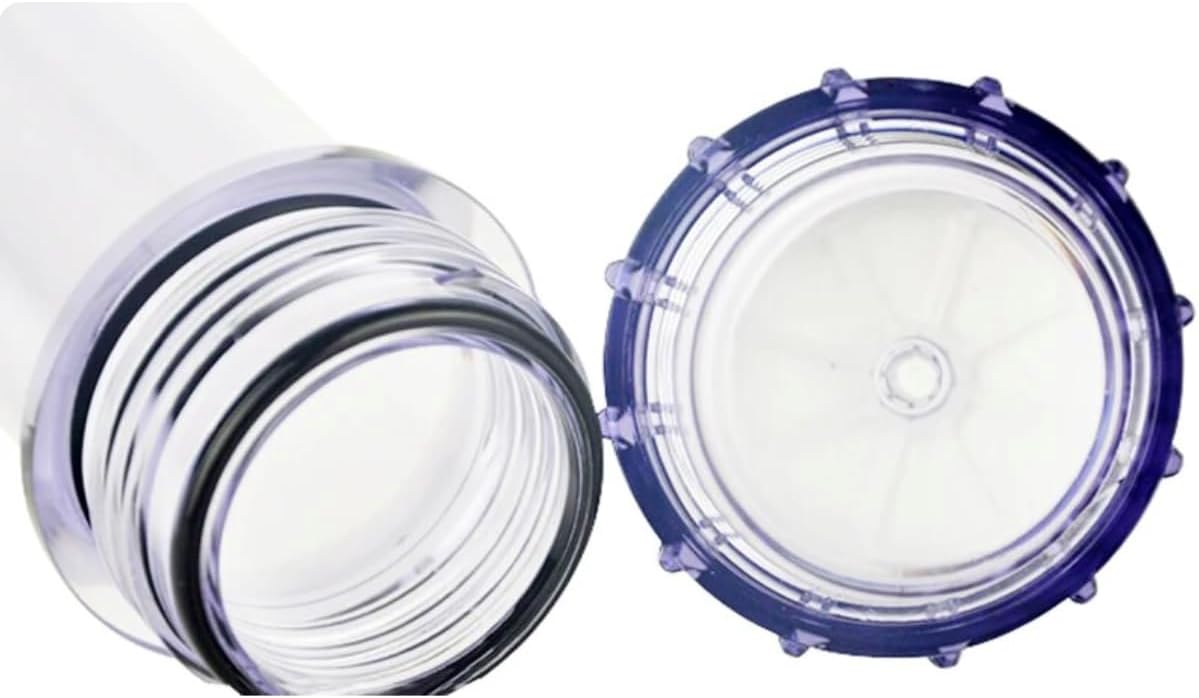
Image 1: Close-up of the cartridge cap and O-ring, essential for a watertight seal.
3.2 Connecting to Water Line
- Identify the appropriate location in your water line for installation. Ensure there is sufficient space for the 2" x 10" cartridge.
- Turn off the main water supply to prevent leaks during installation.
- Apply thread sealant (e.g., PTFE tape) to the threads of the two 1/4" MNPT fittings (not included).
- Carefully screw the 1/4" MNPT fittings into the female threaded ports of the inline filter cartridge.
- IMPORTANT WARNING: Do not use metal or brass fittings directly with this plastic cartridge. Use only plastic fittings to prevent damage. Do not overtighten plastic fittings during installation, as this can cause cracking and leaks. Hand-tighten plus a quarter turn is generally sufficient.
- Connect the inline filter cartridge, with fittings attached, into your water line. Ensure the flow direction matches any arrows on the cartridge body.
- Slowly turn on the main water supply and check for any leaks. If leaks occur, turn off the water, re-tighten fittings slightly, and re-check.
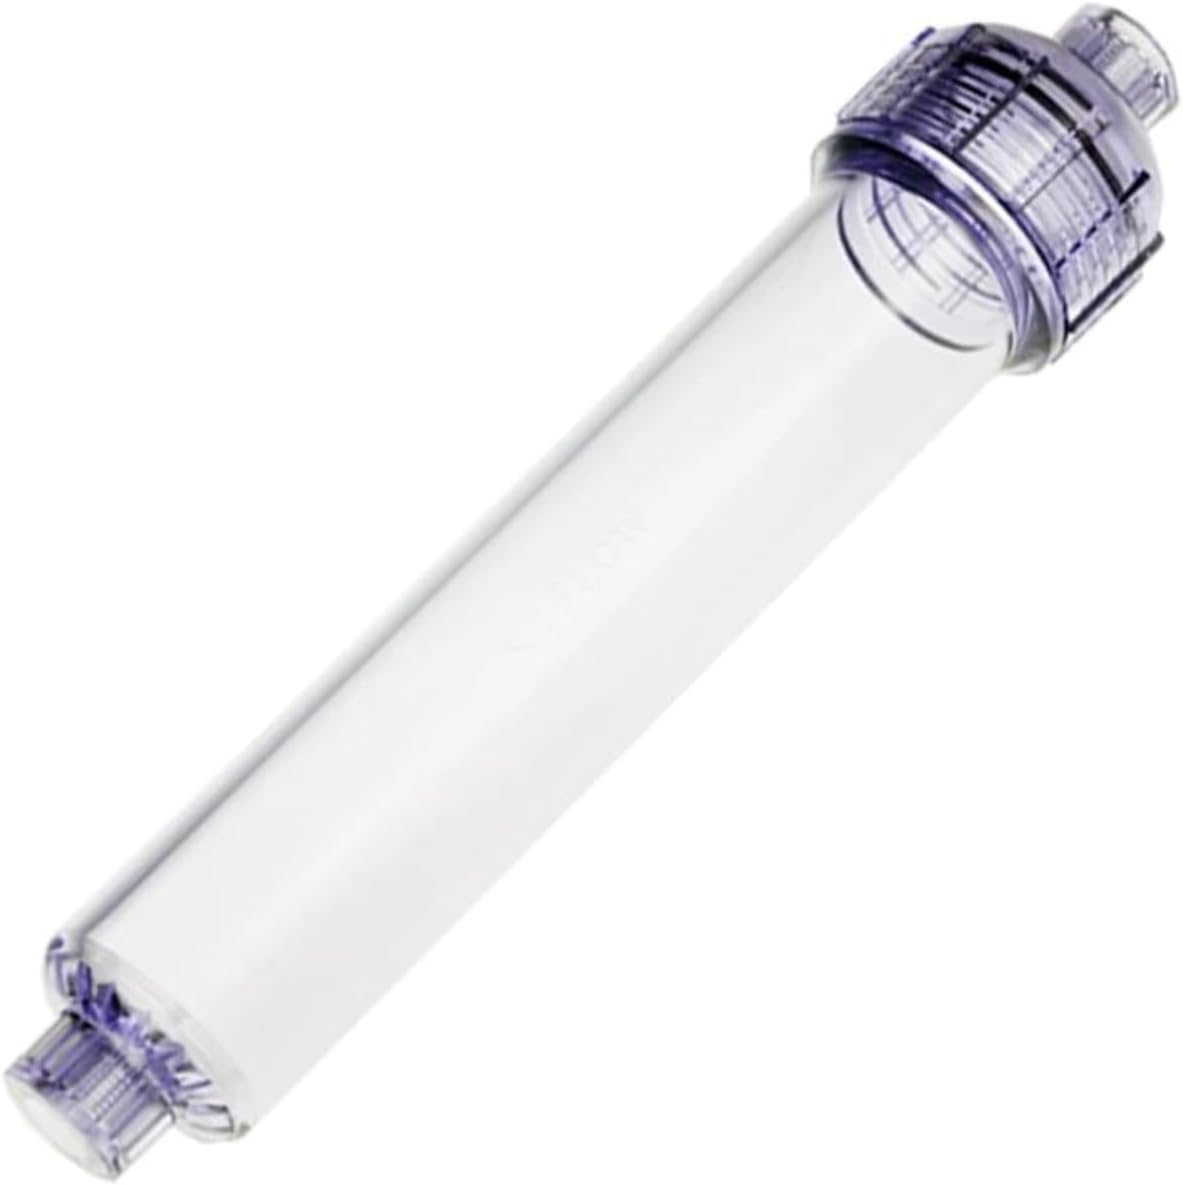
Image 2: Angled view of the cartridge, illustrating the threaded ports for connection.
4. Operation
Once installed, the inline filter cartridge will begin filtering water as it flows through your system. The effectiveness and lifespan of the media depend on the water quality and volume processed.
This cartridge is compatible with various media types, including:
- DI Resin (Deionization)
- Granular Activated Carbon (GAC)
- Calcite (pH neutralization)
- Alkaline Media
- Other specialized filtration media

Image 3: The clear cartridge body allows for visual inspection of the media.
5. Maintenance
5.1 Media Replacement
The filtration media inside the cartridge will eventually become exhausted and require replacement. The frequency of replacement depends on the type of media used, the quality of the incoming water, and the volume of water filtered. Refer to the specific media manufacturer's guidelines for recommended replacement schedules.
- Turn off the water supply to the filter.
- Depressurize the line if necessary.
- Disconnect the cartridge from the water line.
- Unscrew the cap and remove the old media and screens. Dispose of old media responsibly.
- Clean the cartridge body and cap with mild soap and water. Rinse thoroughly.
- Follow the steps in Section 3.1 to refill the cartridge with new media and reassemble.
- Reinstall the cartridge into the water line as described in Section 3.2.
5.2 O-Ring Inspection
Periodically inspect the O-ring on the cap for signs of wear, cracking, or damage. A damaged O-ring can lead to leaks. Replace the O-ring if any damage is observed.
6. Troubleshooting
6.1 Leaks
- Cause: Fittings not tight enough. Solution: Turn off water, gently tighten fittings, and re-check.
- Cause: Overtightened plastic fittings. Solution: Overtightening can crack plastic. If cracked, the cartridge must be replaced.
- Cause: Damaged O-ring. Solution: Inspect O-ring for cuts or deformities. Replace if necessary.
- Cause: Improperly seated O-ring. Solution: Ensure O-ring is correctly positioned in the cap groove.
6.2 Reduced Water Flow
- Cause: Clogged filtration media. Solution: Replace the filtration media (refer to Section 5.1).
- Cause: Sediment buildup in screens. Solution: Disassemble and clean the filter screens.
7. Specifications
| Feature | Detail |
|---|---|
| Model Number | EC20101 |
| Dimensions (D x W x H) | 2" x 10" x 2" |
| Item Weight | 0.3 Pounds (approx. 4.8 ounces) |
| Material | Plastic (Cartridge Body), Activated Carbon, Resin (Compatible Media) |
| Connection Type | 1/4" Female NPT (requires 1/4" MNPT fittings) |
| Product Benefits | Refillable |
| External Testing Certification | NSF |
| UPC | 818368016331 |
8. Warranty Information
Warranty information for the Oceanic Water Systems EC20101 Refillable Inline Water Filter Cartridge is not provided within this manual. For details regarding product warranty, please contact Oceanic Water Systems directly.
9. Customer Support
For any questions, technical assistance, or support regarding your Oceanic Water Systems product, please contact Oceanic Water Systems customer service.
Ask a question about this manual
Ask about setup, troubleshooting, compatibility, parts, safety, or missing instructions. Manuals+ will review the question and use this page’s manual context to help answer it.