
1. Important Safety Instructions
Read and understand all safety warnings and instructions before operating this gas trimmer. Failure to follow these instructions may result in electric shock, fire, and/or serious injury.
- Personal Protective Equipment (PPE): Always wear safety glasses or goggles, hearing protection, heavy-duty long pants, and non-slip footwear. Gloves are recommended.
- Fuel Handling: Mix and store fuel in a well-ventilated area, away from sparks or open flames. Do not smoke while handling fuel. Always allow the engine to cool before refueling.
- Work Area: Keep children, bystanders, and pets at least 15 meters (50 feet) away from the operating area. Clear the work area of debris, rocks, and other objects that could be thrown by the cutting line.
- Operation: Operate the trimmer only in good daylight or artificial light. Do not operate when tired, ill, or under the influence of alcohol or drugs. Maintain a firm grip with both hands on the handles.
- Maintenance: Disconnect the spark plug wire before performing any maintenance or adjustments. Ensure all guards and safety devices are in place and functioning correctly.
2. Package Contents
Carefully unpack all items and ensure you have received the following components:
- Oakland 52cc 2-Stroke Engine Unit
- Straight Shaft Attachment
- Dual Line Cutting Head
- Protective Guard
- Shoulder Strap
- Tool Kit (Spark plug wrench, Hex keys)
- Fuel Mixing Bottle
- User Manual
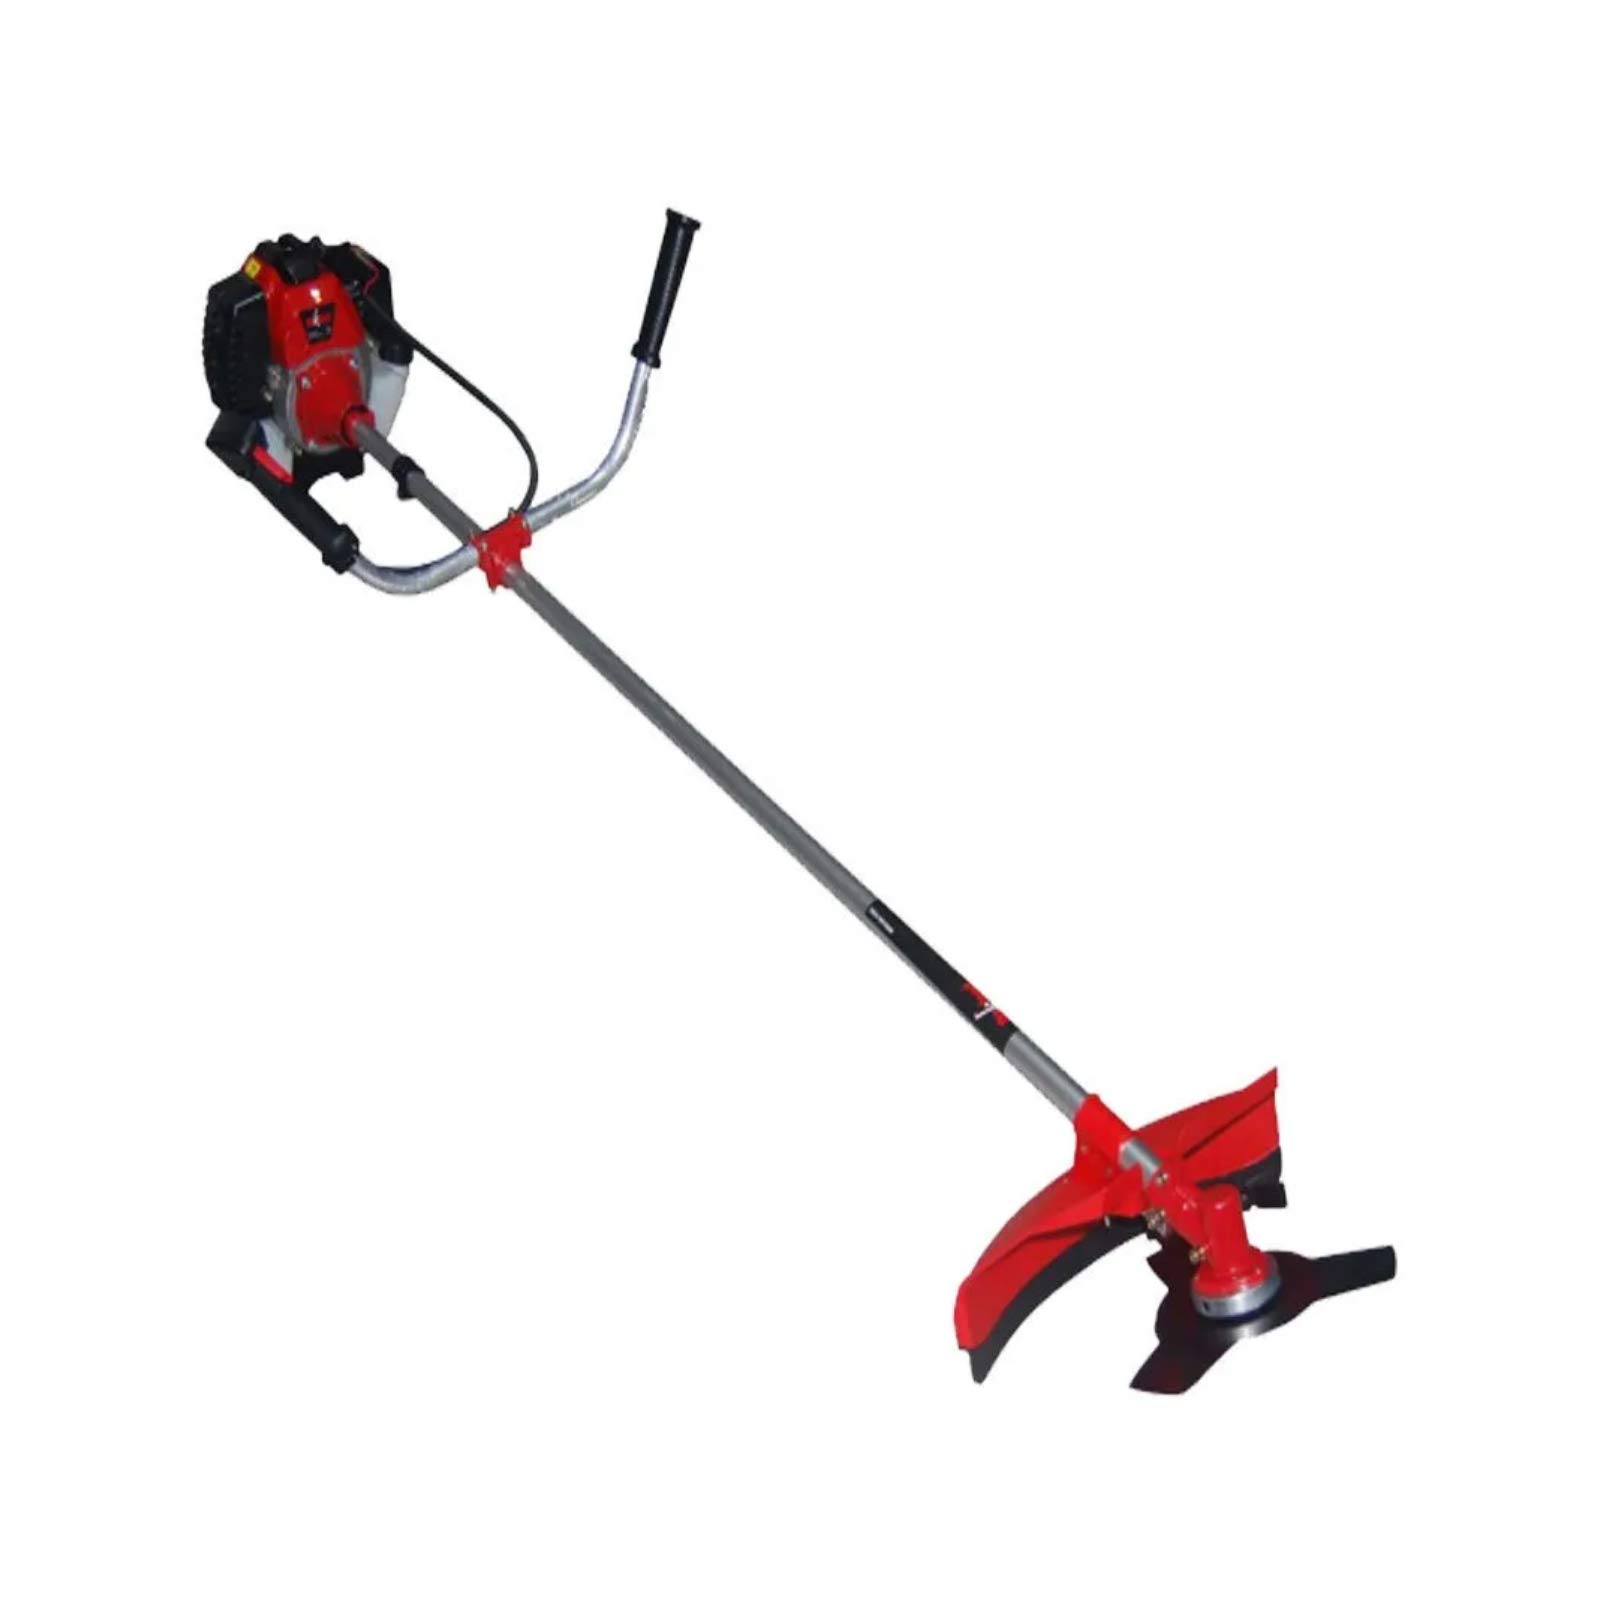
An image showing the complete Oakland 52cc 2-stroke straight shaft gas trimmer, highlighting its design and components.
3. Assembly and Setup
Follow these steps to assemble your gas trimmer:
- Attach the Shaft: Align the two sections of the straight shaft and secure them with the provided coupling mechanism. Ensure it clicks into place or is tightened securely.
- Install the Protective Guard: Mount the protective guard onto the shaft above the cutting head according to the instructions in your manual. This guard protects against thrown debris.
- Attach the Cutting Head: Secure the dual line cutting head to the end of the shaft. Refer to the specific instructions for your cutting head type for proper attachment.
- Adjust the Handle: Position the auxiliary handle for comfortable and balanced operation. Tighten it securely.
- Prepare Fuel Mixture: This trimmer requires a 1:50 gasoline to 2-stroke oil mixture. Use fresh, unleaded gasoline (minimum 87 octane) and high-quality 2-stroke engine oil specifically designed for air-cooled engines. Use the provided mixing bottle for accurate ratios.
- Fill Fuel Tank: Carefully pour the mixed fuel into the fuel tank. Do not overfill. Securely close the fuel cap.
4. Operating Instructions
Before starting, ensure you have read and understood all safety instructions and the trimmer is properly assembled.
- Starting the Engine (Cold Start):
- Place the trimmer on a flat, stable surface.
- Press the primer bulb 5-10 times until fuel is visible in the return line.
- Move the choke lever to the 'FULL CHOKE' position.
- Pull the starter cord firmly and steadily until the engine 'pops' or attempts to start (usually 1-3 pulls). Do not pull the cord to its full extension.
- Move the choke lever to the 'HALF CHOKE' or 'RUN' position.
- Pull the starter cord again until the engine starts.
- Allow the engine to warm up for 30-60 seconds before engaging the throttle.
- Starting the Engine (Warm Start):
- Move the choke lever to the 'RUN' position.
- Pull the starter cord until the engine starts.
- Operating the Trimmer:
- Hold the trimmer firmly with both hands, ensuring a balanced stance.
- Engage the throttle to increase engine speed and activate the cutting line.
- Use a sweeping motion to cut grass and weeds. Avoid hitting hard objects.
- The average cutting area for this model is 150m2, with a duty cycle of 1.5 hours. Allow for cool-down periods during extended use.
- Stopping the Engine: Release the throttle trigger and press the engine stop switch to the 'OFF' position.
5. Maintenance
Regular maintenance ensures optimal performance and extends the life of your trimmer. Always disconnect the spark plug wire before performing maintenance.
- Air Filter: Clean the air filter after every 5-10 hours of operation, or more frequently in dusty conditions. Wash with warm, soapy water, rinse, and allow to dry completely before reinstallation. Replace if damaged.
- Spark Plug: Inspect the spark plug every 25 hours of operation. Clean any carbon deposits and adjust the gap if necessary. Replace if worn or fouled.
- Fuel Filter: Check the fuel filter periodically for clogs. Replace if necessary.
- Cutting Head: Inspect the cutting line and head for wear or damage before each use. Replace worn line as needed.
- Gearhead Lubrication: Periodically check and replenish the grease in the gearhead. Refer to your manual for the specific type of grease and procedure.
- General Cleaning: Keep the engine and cooling fins free of debris to prevent overheating. Clean the exterior of the trimmer after each use.
- Storage: For long-term storage, drain the fuel tank and run the engine until it stops to clear the carburetor. Store in a dry, well-ventilated area.
6. Troubleshooting
Refer to the table below for common issues and their solutions.
| Problem | Possible Cause | Solution |
|---|---|---|
| Engine won't start | No fuel, incorrect choke position, fouled spark plug, clogged fuel filter | Check fuel level and mixture, adjust choke, clean/replace spark plug, clean/replace fuel filter |
| Engine runs poorly/lacks power | Dirty air filter, incorrect fuel mixture, old fuel, spark plug issue | Clean air filter, ensure correct 1:50 fuel mix, use fresh fuel, inspect/replace spark plug |
| Cutting line does not advance | Line tangled, insufficient line, cutting head damaged | Clear tangles, reload new line, inspect/replace cutting head |
| Excessive vibration | Loose components, damaged cutting head, bent shaft | Check all fasteners, inspect cutting head for damage, contact service if shaft is bent |
7. Specifications
| Brand | Oakland |
| Model | 52cc 2-Stroke Straight Shaft |
| Engine Displacement | 52cc |
| Engine Type | 2-Stroke |
| Maximum Speed | 3,600 RPM |
| Fuel Mixture Ratio | 1:50 (Gasoline: 2-Stroke Oil) |
| Average Cutting Area | 150m² |
| Duty Cycle | 1.5 hours |
| UPC | 700343609426 |
| ASIN | B08ZNR3DPP |
8. Warranty and Support
This Oakland product is manufactured to high-quality standards and is warranted against defects in materials and workmanship. Please retain your proof of purchase for warranty claims.
For technical assistance, spare parts, or warranty inquiries, please contact Oakland customer support through the retailer where the product was purchased or refer to the contact information provided on the product packaging.