CeilingConnex 140sqft
CeilingConnex Direct-Mount Ceiling Grid Kit (140sqft, White) Instruction Manual
Brand: CeilingConnex | Model: 140sqft
1. Introduction
This manual provides detailed instructions for the installation and maintenance of your CeilingConnex Direct-Mount Ceiling Grid Kit. This kit is designed to create a finished ceiling appearance by directly attaching to existing ceiling joists, providing a framework for ceiling tiles. Please read all instructions carefully before beginning installation.
2. Safety Information
- Always wear appropriate personal protective equipment (PPE), including safety glasses and gloves, during installation.
- Ensure the work area is well-lit and free from obstructions.
- Use a stable ladder or scaffolding when working at heights.
- Verify the structural integrity of your ceiling joists before attaching any components.
- Exercise caution when using power tools. Follow manufacturer guidelines for all tools.
- Keep children and pets away from the work area.
3. Package Contents
Your CeilingConnex Direct-Mount Ceiling Grid Kit typically includes:
- Main Runners
- Lower 'T' Supports
- Wall 'L' Brackets
- Fasteners (screws)
Note: Specific quantities vary based on the kit size (e.g., 140 sqft).

Image: Various components of the CeilingConnex Direct-Mount Ceiling Grid Kit, including main runners, L-brackets, and T-supports.
4. Tools Required
The following tools are generally required for installation:
- Drill
- Tape Measure
- Chalk Line
- Tin Snips or Utility Knife
- Safety Glasses
- Pencil

Image: A diagram illustrating various tools necessary for the installation of the ceiling grid, such as a drill, tape measure, and tin snips.
5. Setup and Installation
This section outlines the steps for installing your Direct-Mount Ceiling Grid. This system is designed to attach directly to your ceiling joists, unlike a traditional drop ceiling grid.
5.1. Layout Planning
Determine your desired ceiling tile layout. You can choose between a full tile centered layout or a grid-centered layout. The optimal layout depends on room dimensions and personal preference. Hang Main Runners perpendicular to ceiling joists or the surface mounted perpendicular to the room's longest dimension.
5.2. Mounting Wall 'L' Brackets
- Along the perimeter of the wall, mount the Wall 'L' Bracket level, approximately 3/4" to 1" from the bottom of the ceiling joists to the bottom of the bracket.
- Install 'L' Brackets around the entire perimeter of the room. Ensure corners are mitered for a clean finish.
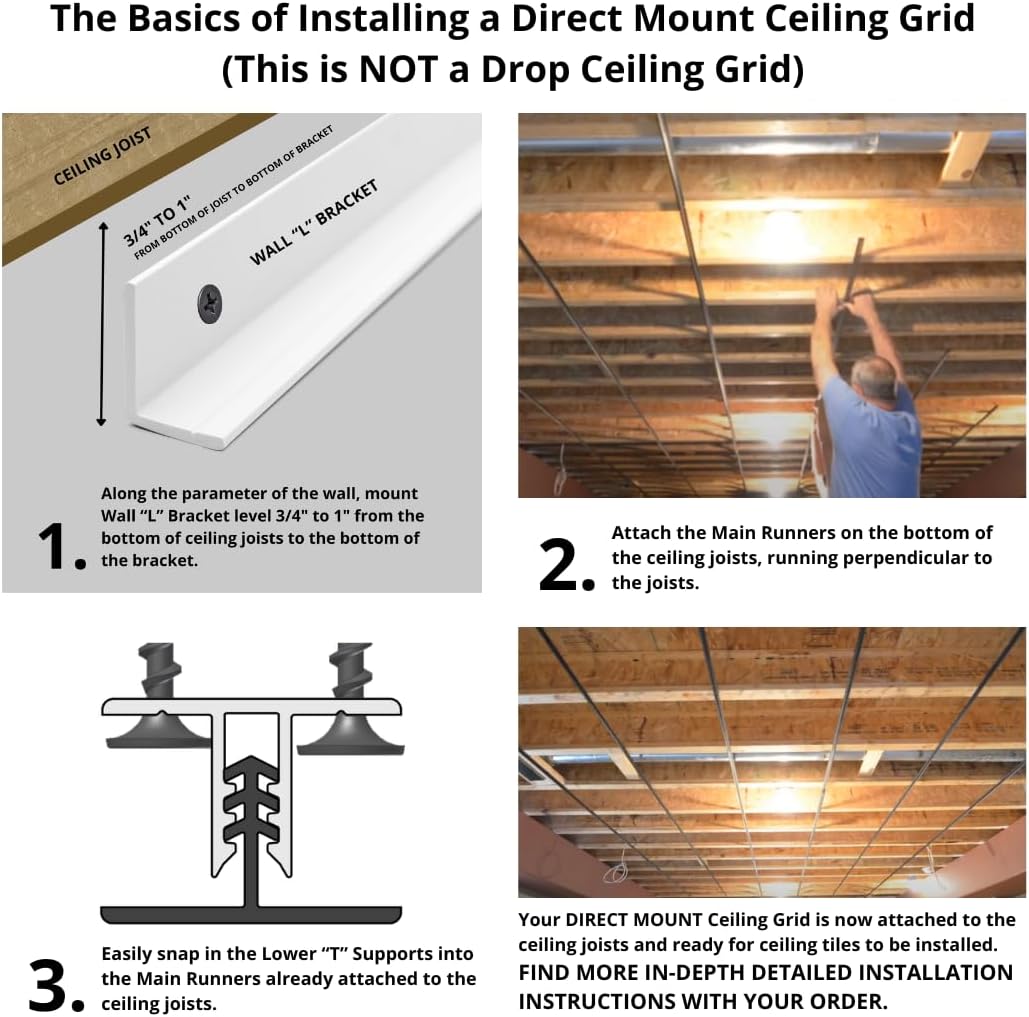
Image: A diagram illustrating the basic installation steps, including mounting the 'L' bracket, attaching main runners, and snapping in 'T' supports.
5.3. Attaching Main Runners
- Attach the Main Runners to the bottom of the ceiling joists. These runners should be perpendicular to the joists.
- Fasten Main Runners securely with a 1-1/4" drywall screw or a staple gun with 1-1/4" staples. Do not overtighten screws or staples as this can deform the shade.

Image: A person actively installing the main runners onto exposed ceiling joists, demonstrating the attachment process.

Image: A view of ceiling joists with multiple main runners already installed, forming the initial grid structure.
5.4. Snapping in Lower 'T' Supports
- Easily snap the Lower 'T' Supports into the Main Runners that are already attached to the ceiling joists.
- Cut Cross Tees to the appropriate length (e.g., 23-3/4" for 2x2 tiles) and snap them into place.
- Ensure all connections are secure. The 'Rock to Release' mechanism allows for adjustment if needed.
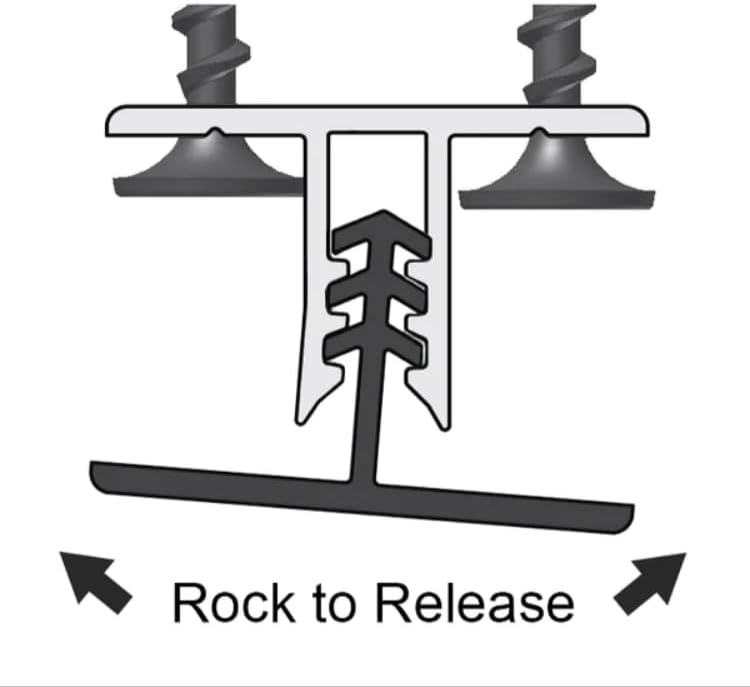
Image: A diagram illustrating the 'Rock to Release' feature of the T-supports, showing how to disengage them for adjustment.

Image: Detailed diagrams showing how to fasten main runners, cut cross tees, and snap in lower T-supports for a complete grid.
5.5. Installing Ceiling Tiles
Once the grid is fully installed, you can proceed with installing your chosen ceiling tiles. Carefully insert each tile into the grid openings, ensuring a snug and level fit.
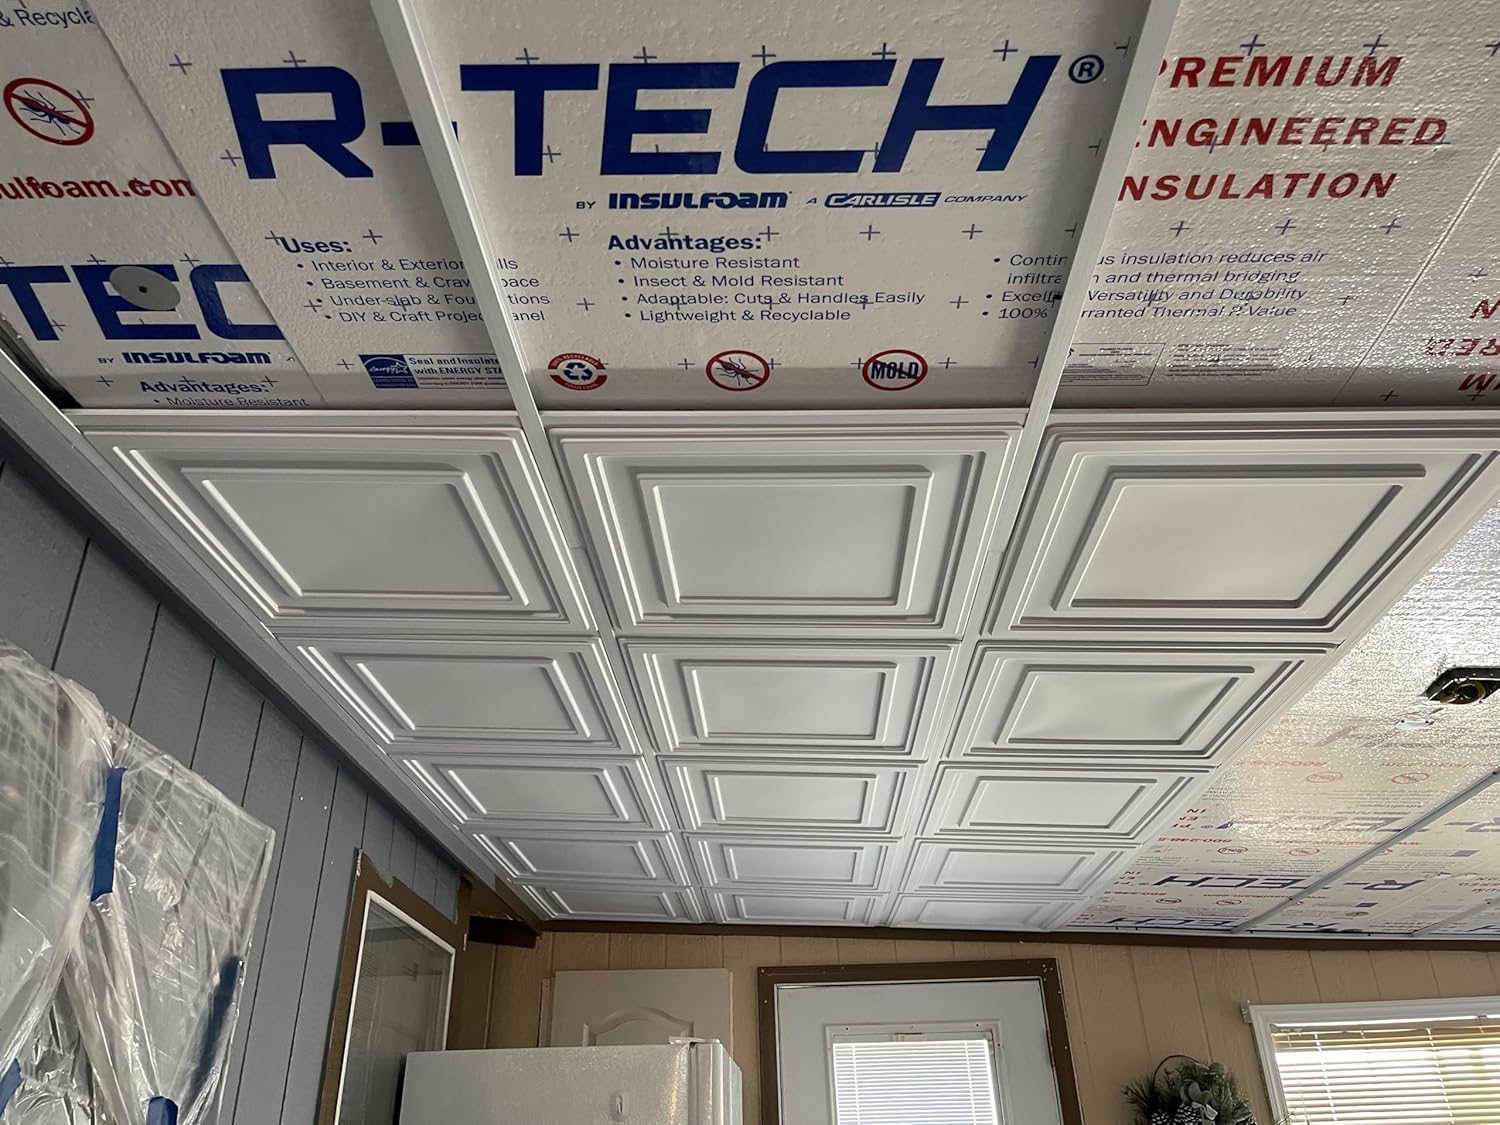
Image: A completed ceiling installation featuring the direct-mount grid system with decorative white ceiling tiles.
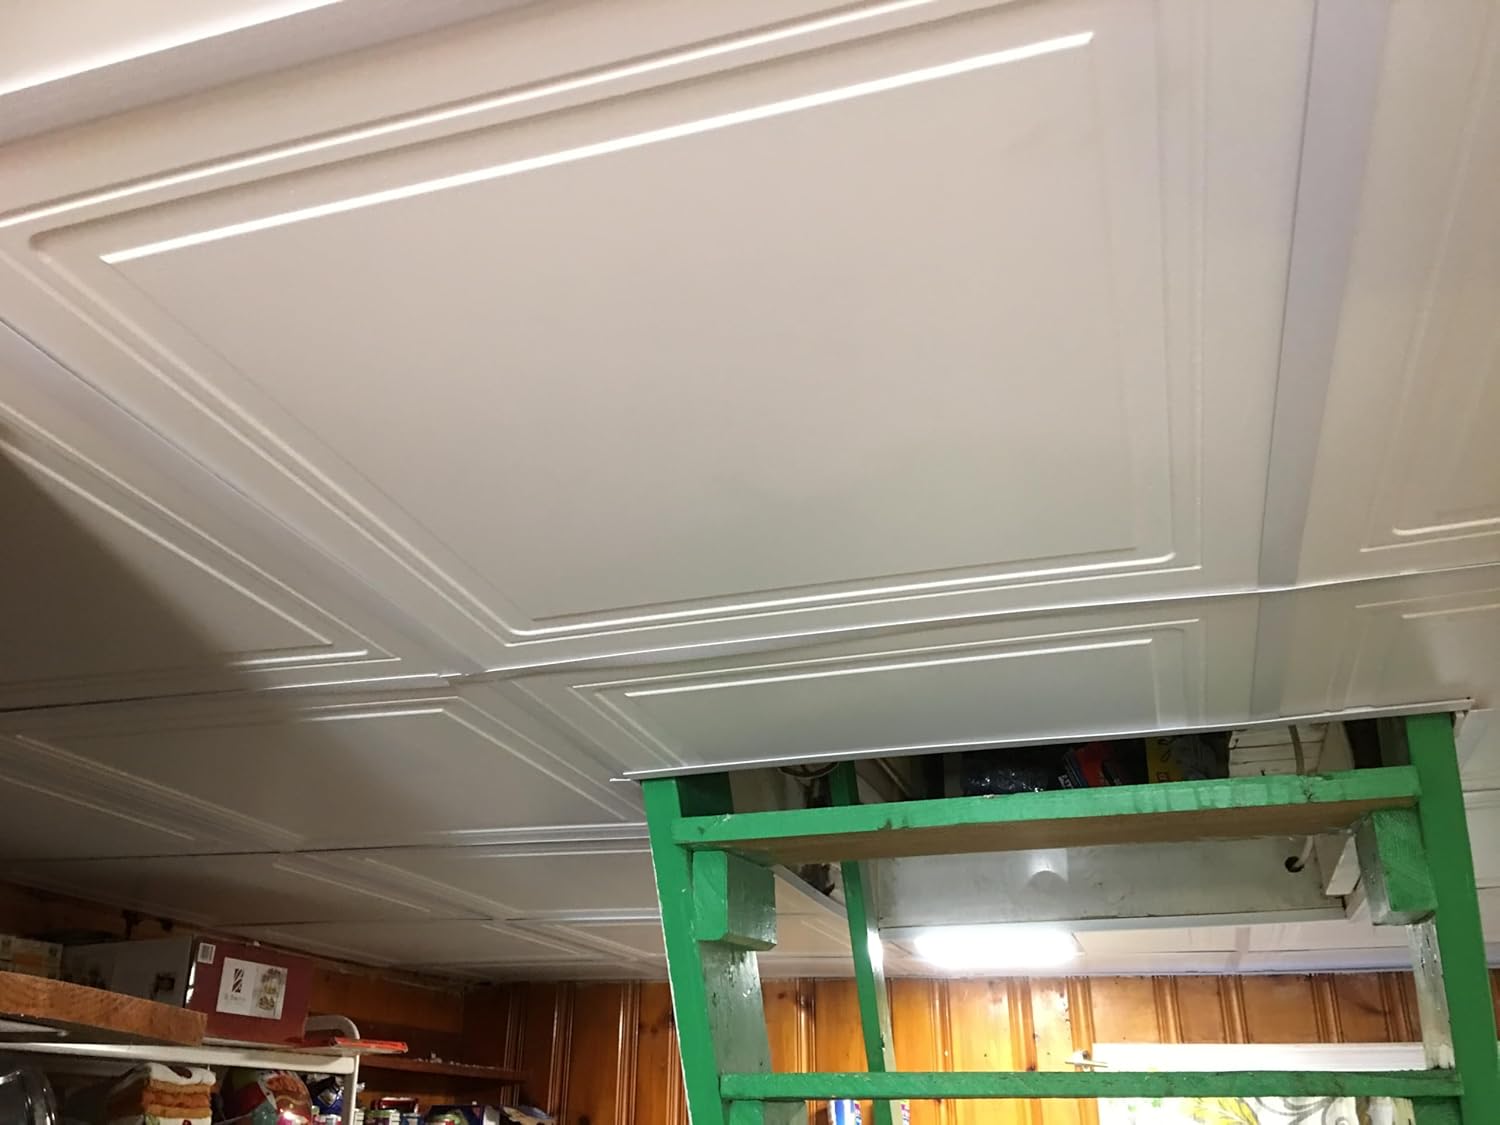
Image: A close-up view of installed ceiling tiles, showcasing the clean lines and finished appearance of the grid system.
6. Maintenance
The CeilingConnex Direct-Mount Ceiling Grid requires minimal maintenance. Periodically inspect the grid for any signs of damage or loosening. Clean the grid components with a soft, damp cloth and mild detergent if necessary. Avoid abrasive cleaners or harsh chemicals.
7. Troubleshooting
- Difficulty Snapping Components: Ensure components are aligned correctly. Apply firm, even pressure. If a component feels overly stiff or brittle, inspect it for manufacturing defects.
- Uneven Grid: Recheck the level of your Wall 'L' Brackets and ensure Main Runners are securely fastened and straight. Adjust as needed using the 'Rock to Release' mechanism for T-supports.
- Tiles Not Fitting: Verify that your ceiling tiles are the correct size for the grid (e.g., 2x2 ft). Ensure the grid is installed squarely.
8. Specifications
| Feature | Detail |
|---|---|
| Manufacturer | CeilingConnex |
| Coverage Area | 140 sqft |
| Color | White |
| Mounting Type | Direct-Mount |
9. Warranty and Support
For warranty information or technical support, please refer to the official CeilingConnex website or contact their customer service department. You can visit the CeilingConnex Store on Amazon for additional product details and contact options.