Important Safety Instructions
Please read all instructions carefully before using the appliance. Failure to follow these instructions may result in electric shock, fire, or serious injury.
- Always ensure the appliance is placed on a stable, dry, and level surface before operation.
- Keep hands clear of the blade during operation and cleaning. The blade is extremely sharp.
- Do not slice meat with bones or foods containing large, hard seeds, as this can damage the blade or motor.
- Always use the food pusher to guide food towards the blade. Never use your hands directly.
- Do not operate the appliance continuously for more than 5 minutes to prevent overheating. Allow a cooling period between uses.
- Unplug the slicer from the power outlet before assembling, disassembling, cleaning, or when not in use.
- Keep the appliance out of reach of children.
- Do not immerse the motor unit in water or other liquids.
Product Overview
The Anescra Meat Slicer Machine SL-520 is designed for efficient and precise slicing of various foods in a home environment. It features a powerful motor, dual stainless steel blades, and adjustable thickness settings.
Components
- Main Unit: Houses the motor and control mechanisms.
- Stainless Steel Blades (x2): Includes one smooth blade for cooked foods and one serrated blade for raw foods and bread.
- Food Carriage: Platform for holding food during slicing.
- Food Pusher: Secures food on the carriage and protects hands.
- Thickness Adjustment Dial: Allows precise adjustment of slice thickness from 0-15 mm.
- On/Off Switch: Controls power to the appliance.
- Anti-slip Suction Feet: Provides stability during operation.
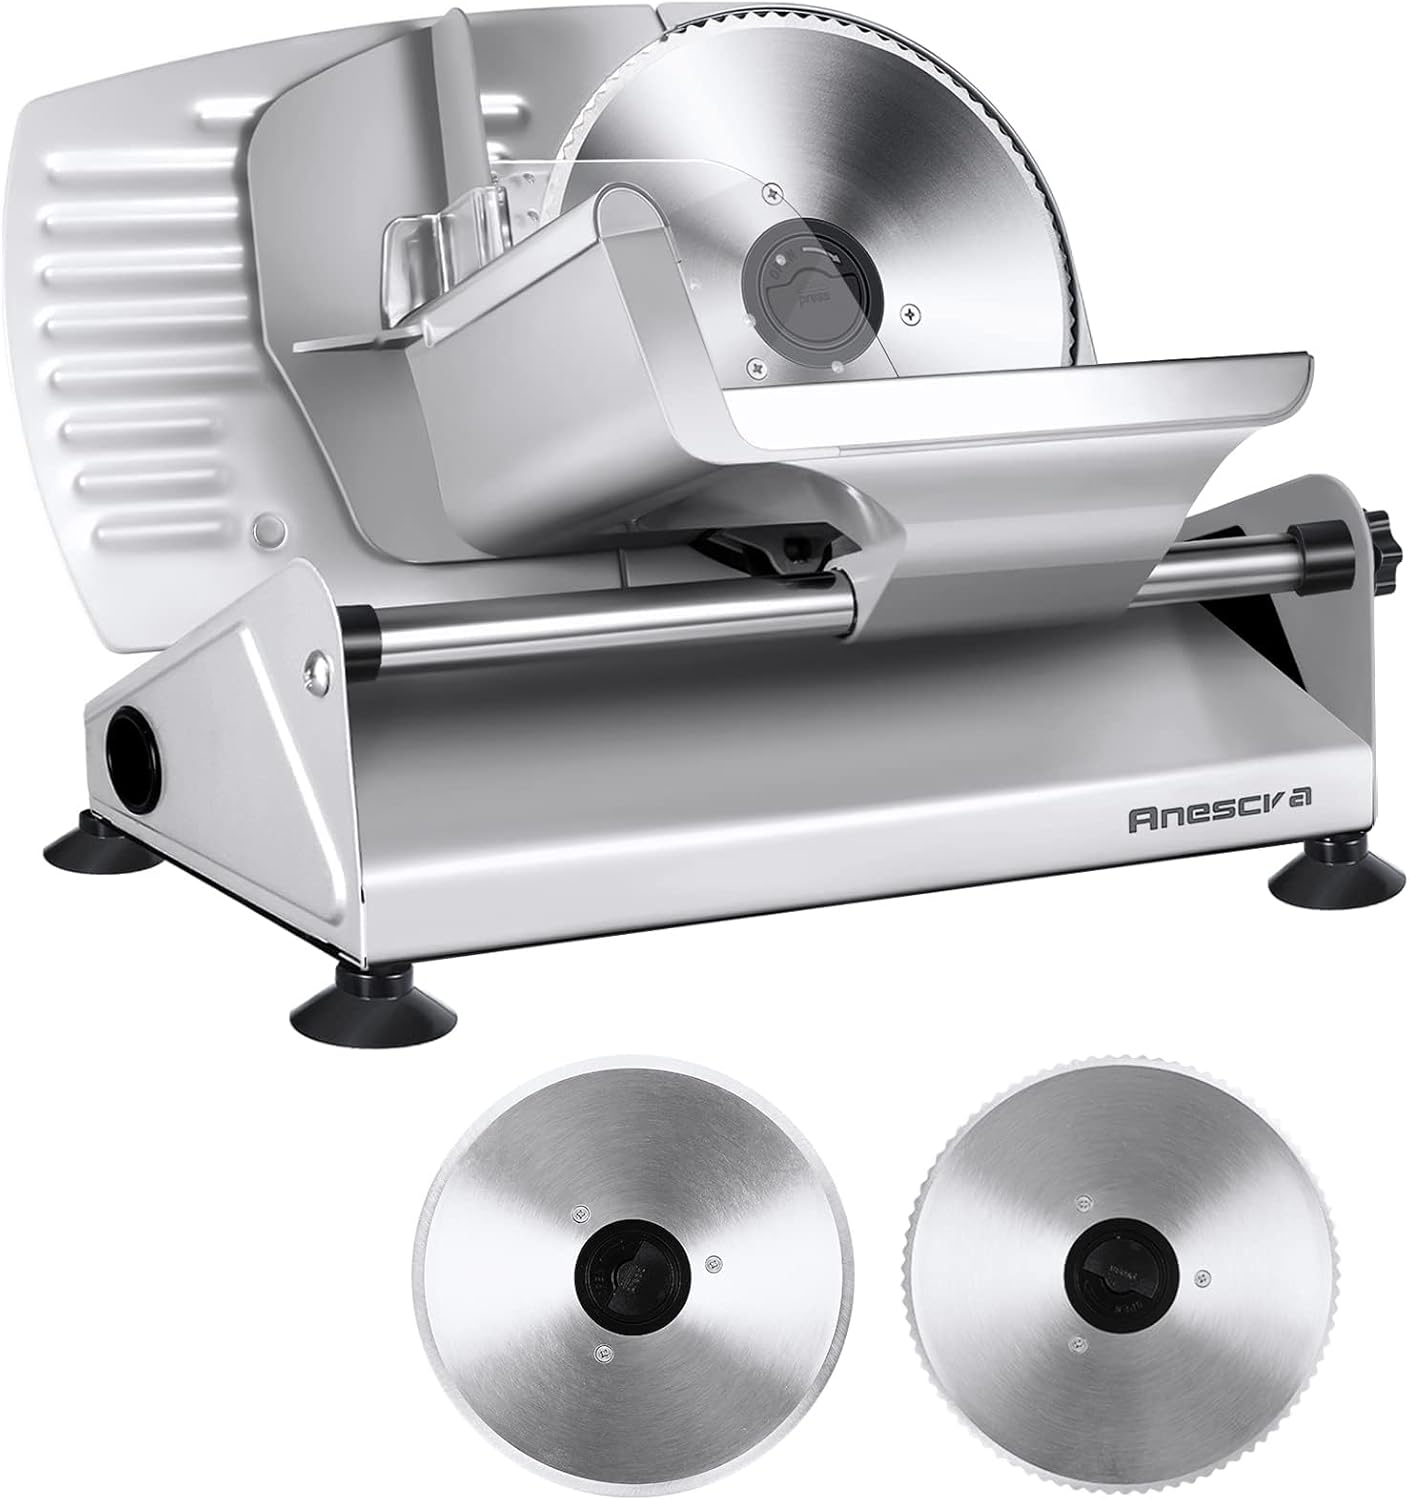
Image: Anescra Meat Slicer Machine SL-520 with its main components and two stainless steel blades.

Image: Detailed view of the food-grade food pusher, the on/off switch, and the anti-slip suction feet for stable operation.
Setup
Unpacking
- Carefully remove all components from the packaging.
- Remove any protective films or packaging materials.
- Verify that all parts listed in the 'Package Contents' section of your product documentation are present and undamaged.
Assembly
- Place the slicer on a clean, dry, stable, and level countertop. Ensure the anti-slip suction feet are firmly gripping the surface.
- Select the appropriate blade for your food type (smooth for cooked, serrated for raw).
- Align the chosen blade with the motor shaft and press it into place until it clicks securely. Refer to the 'Maintenance and Cleaning' section for detailed blade removal/installation steps.
- Ensure the food carriage and food pusher are correctly installed on the sliding bar.
- Plug the power cord into a grounded electrical outlet.

Image: Illustration of the removable blade, sliding bar, and detachable food carriage, highlighting the ease of assembly and disassembly for cleaning.
Operating Instructions
Preparing Food
- Ensure food items are free from bones, large seeds, or other hard inclusions.
- For best results, chill meats slightly before slicing to achieve firmer consistency.
- Place the food item onto the food carriage. The maximum food size that can be cut is approximately 16 cm long and 15 cm high.
- Secure the food item firmly against the food carriage wall using the food pusher.

Image: Visual representation of the maximum food dimensions (16cm length, 15cm height) that the slicer can accommodate.
Adjusting Slice Thickness
- Locate the thickness adjustment dial on the side of the slicer.
- Turn the dial to select your desired slice thickness, ranging from 0 mm (wafer-thin) to 15 mm.
- Start with a thicker setting and adjust as needed to achieve the perfect slice.

Image: The adjustable thickness dial, illustrating the range from 0mm to 15mm for precise slice control.
Slicing Procedure
- With the food properly positioned and thickness set, turn the slicer ON using the On/Off switch.
- Gently push the food carriage back and forth, guiding the food towards the rotating blade using the food pusher.
- Apply even pressure with the food pusher to ensure consistent slices.
- Collect sliced food from the receiving tray.
- After slicing, turn the slicer OFF and unplug it from the power outlet.
Blade Selection
- Smooth Blade: Ideal for slicing cooked meats, cheeses, and vegetables.
- Serrated Blade: Best suited for raw meats, bread, and harder items like ham or sausages.

Image: The two included stainless steel blades, showing the smooth blade for cooked food and the serrated blade for raw food.

Image: Detailed view of the serrated blade suitable for raw meat and the smooth blade ideal for bread and other cooked items.
Maintenance and Cleaning
Regular cleaning ensures optimal performance and extends the lifespan of your slicer. Always unplug the appliance before cleaning.
General Cleaning
- Wipe the exterior of the slicer with a damp cloth. Do not use abrasive cleaners or scouring pads.
- Ensure no water enters the motor housing.
Detaching Components for Cleaning
- Blade Removal: Press the quick-release button in the center of the blade and carefully twist to unlock. Lift the blade off the shaft. Handle with extreme care.
- Food Carriage and Sliding Bar Removal: Locate the removable button at the end of the sliding bar. Press it to detach the sliding bar and food carriage from the main unit.
- Wash the removed blade, food carriage, and food pusher with warm, soapy water. Rinse thoroughly and dry immediately to prevent rust.
- Reassemble all components only when completely dry.
Image: Step-by-step guide illustrating how to remove the blade, sliding bar, and food carriage for thorough cleaning.
Storage
Store the slicer in a clean, dry place when not in use. Ensure all components are dry before storage.
Troubleshooting
| Problem | Possible Cause | Solution |
|---|---|---|
| Slicer does not turn on | Not plugged in; Power switch off; Power outage | Ensure power cord is securely plugged in; Turn the On/Off switch to 'ON'; Check household circuit breaker. |
| Uneven slices | Food not secured; Uneven pressure; Blade dull | Ensure food is firmly held by the food pusher; Apply consistent pressure; Check blade for damage or wear. |
| Slicer stops during operation | Overheating; Food obstruction | Turn off and unplug, allow to cool for 30 minutes; Check for food lodged in the blade or mechanism. |
| Difficulty cleaning components | Food residue dried on; Incorrect disassembly | Clean immediately after use; Refer to 'Detaching Components for Cleaning' section for proper disassembly. |
Specifications
- Model Number: SL-520
- Power: 200W
- Blade Material: Stainless Steel
- Blade Diameter: 19 cm (7.5 inches)
- Adjustable Thickness: 0-15 mm
- Product Dimensions: 36.07 x 24.38 x 26.16 cm (14.2 x 9.6 x 10.3 inches)
- Item Weight: 4.9 Kilograms
- Material: Aluminum (body)
- Color: Silver
- Care Instructions: Hand Wash Only (for removable parts)
- Recommended Uses: Bread, Cheese, Meat, Vegetable
Warranty Information
This Anescra product is covered by a manufacturer's warranty. For specific details regarding warranty coverage, duration, and terms, please refer to the warranty card included with your purchase or contact Anescra customer support directly. Keep your proof of purchase for warranty claims.
Customer Support
Should you have any questions, require assistance, or encounter issues not covered in this manual, please contact Anescra customer support. Contact information can typically be found on the product packaging, the official Anescra website, or the service card included with your product.