1. Introduction
Thank you for choosing the HBN Digital Timer Plug. This device is designed to automatically control the power supply to your indoor appliances, helping you save energy and enhance convenience. It features weekly programming with up to 8 ON/OFF programs per day and a random function for added security. Please read this manual carefully before use to ensure proper operation and safety.
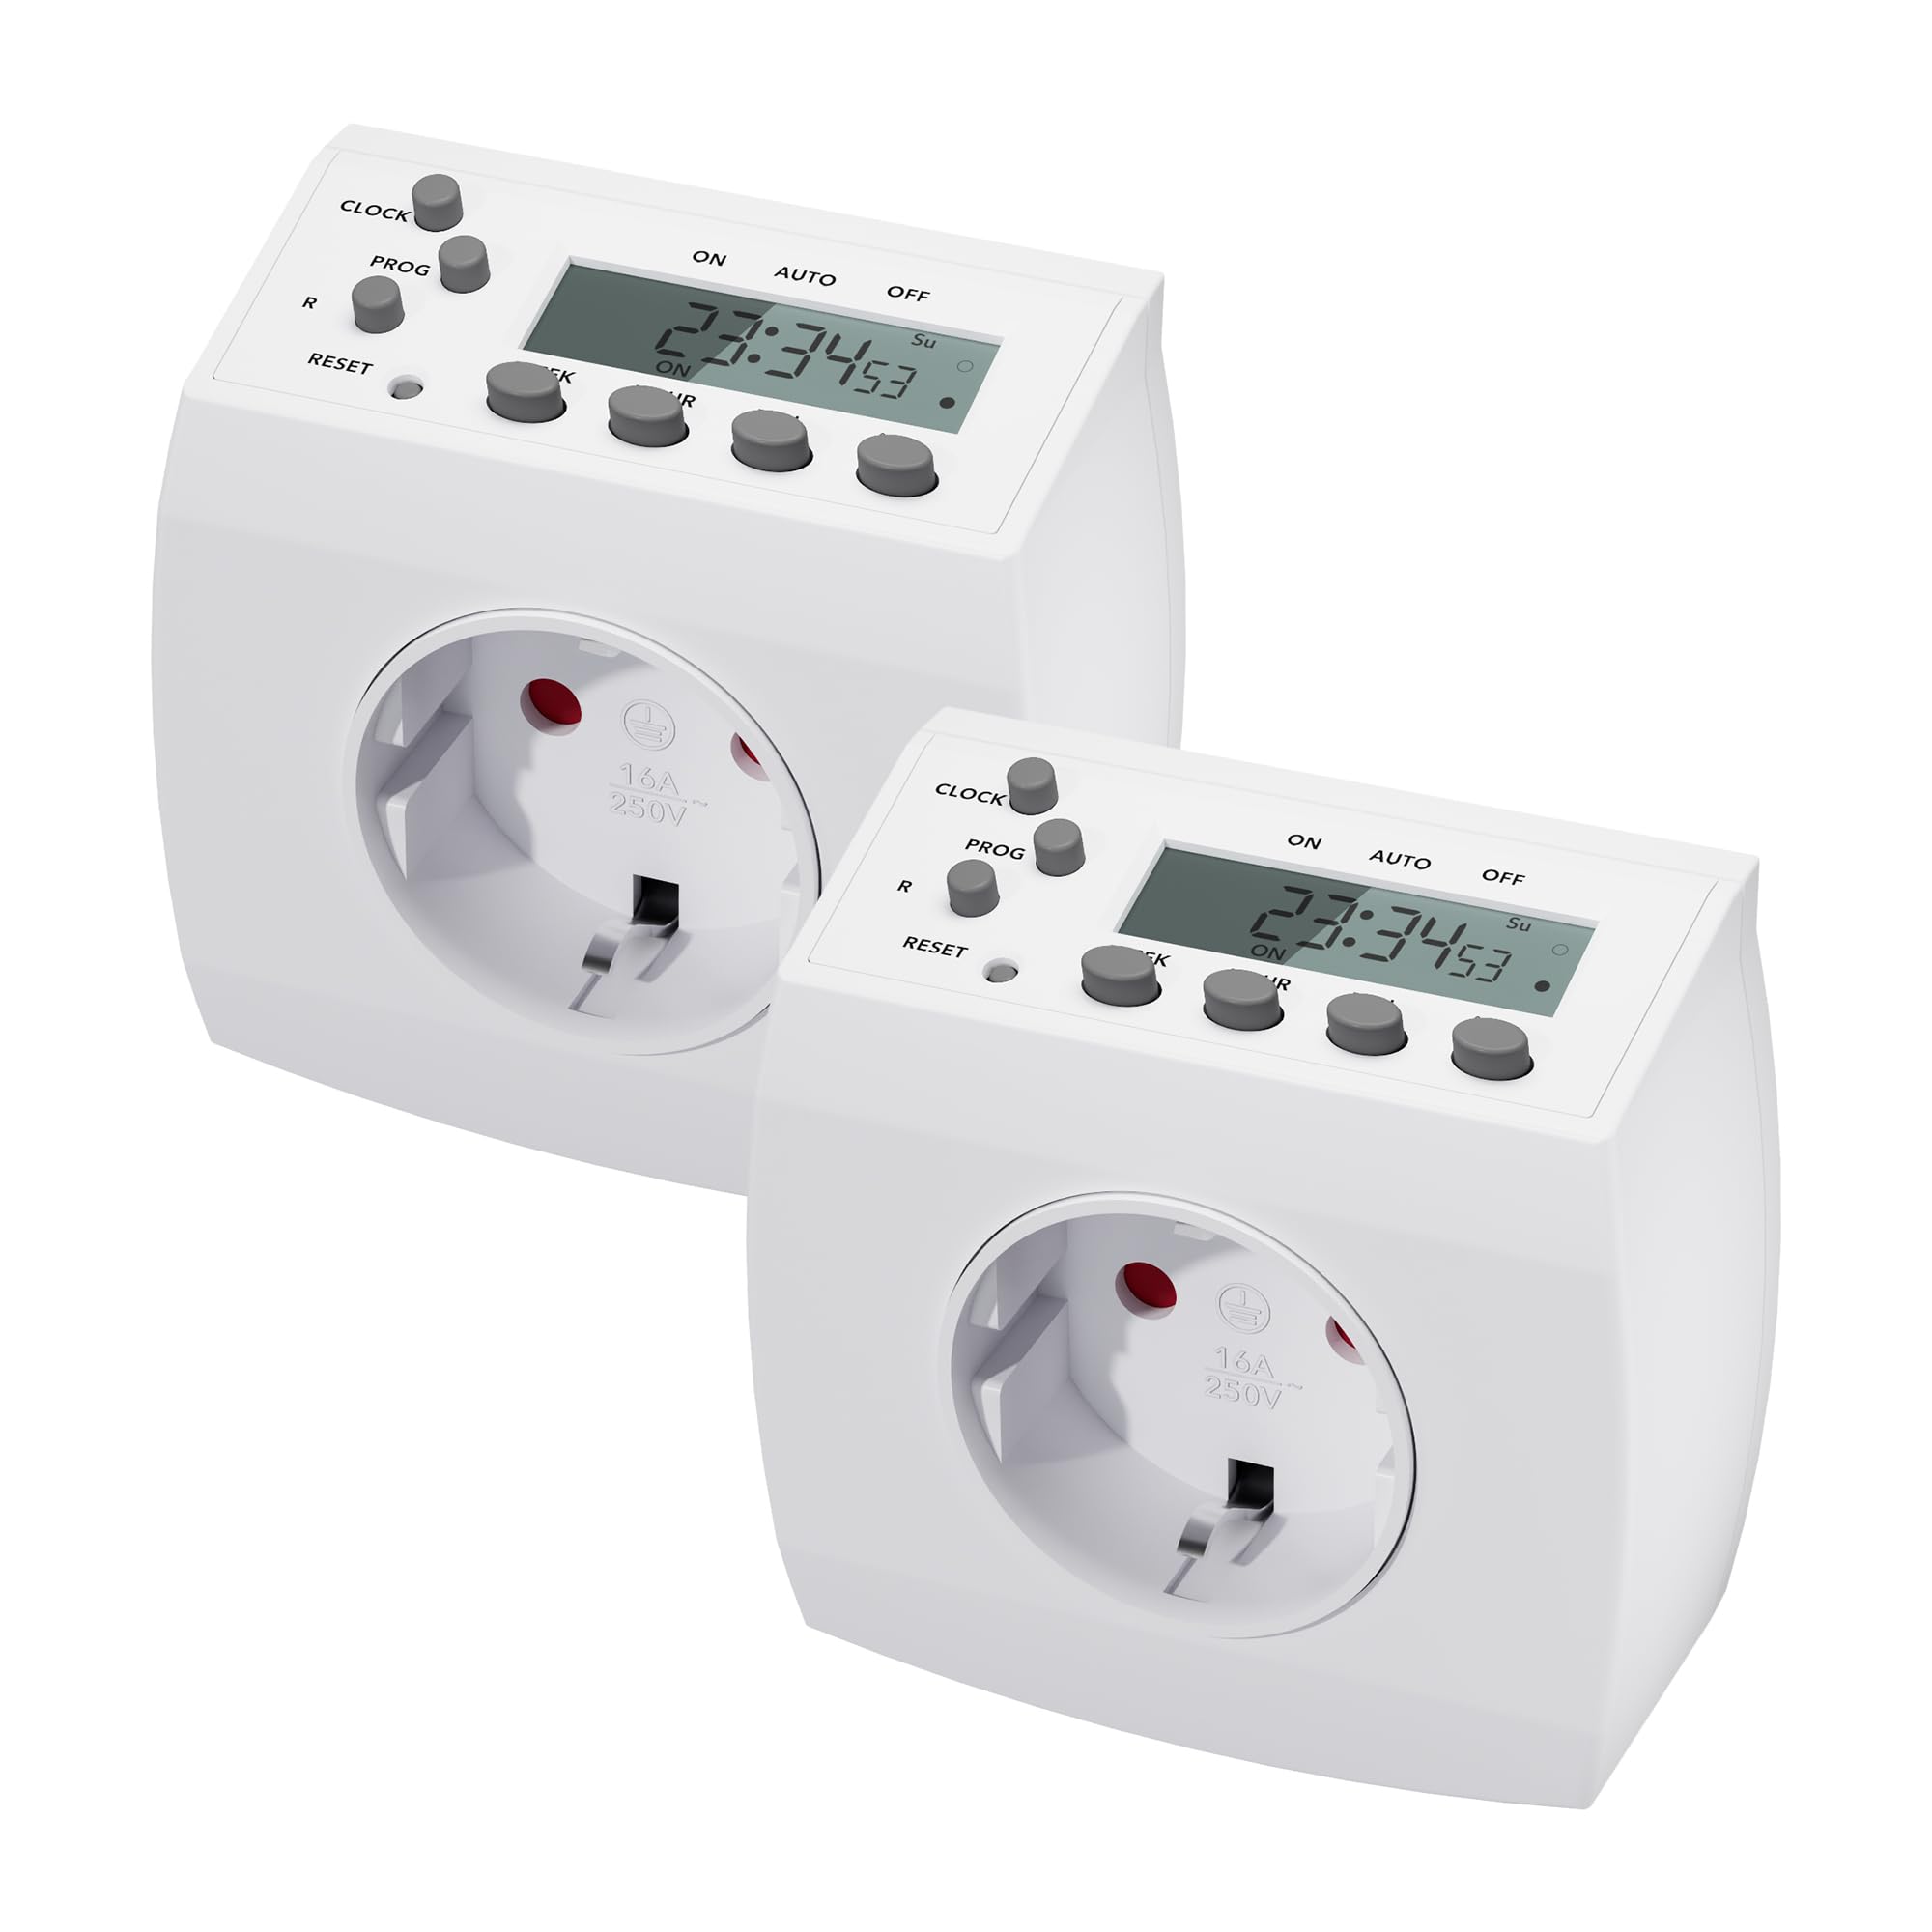
Image 1.1: HBN Digital Timer Plug in use with a coffee machine, highlighting key features.
2. Safety Instructions
- For indoor use only. Do not expose to moisture or extreme temperatures.
- Do not exceed the maximum load of 16A / 3680W.
- Ensure the timer is fully inserted into the wall socket.
- Do not connect multiple timers in series.
- Always unplug the timer from the wall socket before cleaning.
- Keep out of reach of children.
3. Product Overview
3.1 Components and Display
The HBN Digital Timer Plug features a clear LCD display and intuitive buttons for easy programming. The device is compact and designed for discreet integration into your home.

Image 3.1: Front and side view of the timer, highlighting buttons and display.
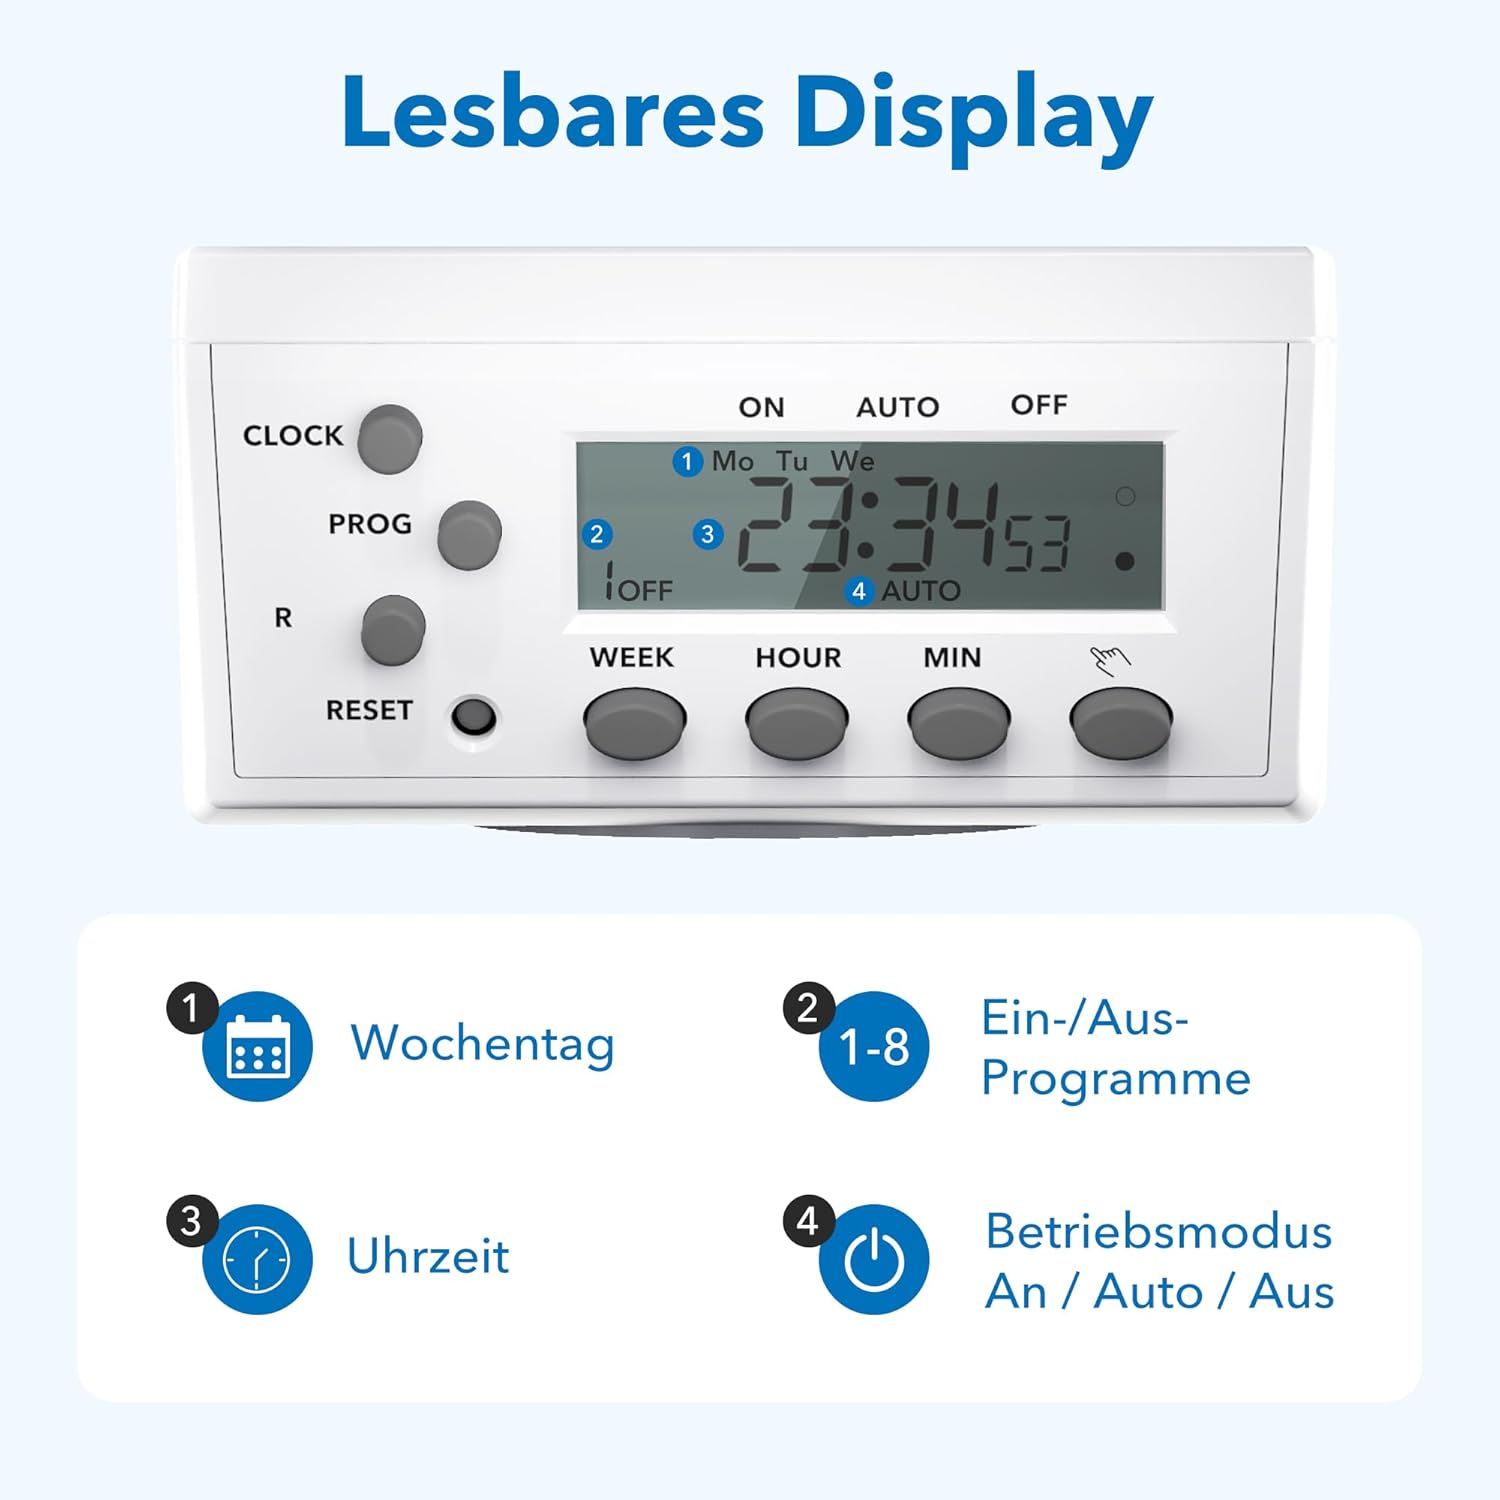
Image 3.2: Detailed view of the readable display, showing weekday, program, time, and mode indicators.
3.2 Technical Data and Dimensions

Image 3.3: Technical specifications and dimensions of the timer.
- Dimensions: Approximately 7.5cm x 7.5cm x 8cm
- Max. Programs: 8 ON/OFF programs per day
- Weekly Combinations: 15 different weekly settings
- Max. Load: 3680W / 16A
- Min. Switching Time: 1 minute
- Features: Manual ON/OFF, Summer/Winter time, Power failure memory
4. Setup
4.1 Initial Setup and Charging
- Plug the timer into a wall socket for at least 30 minutes to charge the internal battery. This battery maintains settings during power outages.
- Press the RESET button with a pointed object (e.g., a pen tip) to clear all previous settings. The display will show "0:00" and all segments will flash.
4.2 Setting Current Time
- Press the CLOCK button and hold it.
- While holding CLOCK, press the WEEK button repeatedly to select the current day of the week (Mo, Tu, We, Th, Fr, Sa, Su).
- While holding CLOCK, press the HOUR button repeatedly to set the current hour (0-23).
- While holding CLOCK, press the MIN button repeatedly to set the current minute (0-59).
- Release the CLOCK button. The current time is now set.
5. Operating Instructions
5.1 Programming ON/OFF Times
The timer allows for up to 8 ON/OFF programs. Each program can be set for specific days or combinations of days.
- Press the PROG button once. The display will show "1 ON" and the time will flash.
- Press WEEK to select the desired day(s) for the first ON program. Options include individual days, weekdays, weekends, or all days.
- Press HOUR and MIN to set the desired ON time.
- Press PROG again. The display will show "1 OFF" and the time will flash.
- Press WEEK to select the desired day(s) for the first OFF program (usually the same as the ON program).
- Press HOUR and MIN to set the desired OFF time.
- Repeat steps 1-6 for programs 2 through 8.
- After setting all desired programs, press the CLOCK button to return to the current time display.
5.2 Manual Override (ON/AUTO/OFF)
Press the MANUAL button (often labeled with a hand icon or similar) to cycle through the operating modes:
- ON: The connected appliance will remain continuously ON, overriding all programs.
- AUTO: The timer will operate according to the programmed ON/OFF times.
- OFF: The connected appliance will remain continuously OFF, overriding all programs.
5.3 Random Function
The random function can simulate presence in your home by turning appliances ON and OFF at irregular intervals, typically between 6:00 PM and 6:00 AM. This feature is useful for deterring potential intruders when you are away.

Image 5.1: Random function simulating presence for security.
- To activate the random function, press the R (Random) button. The display will show "R" or a similar indicator.
- To deactivate, press the R button again.
6. Maintenance
The HBN Digital Timer Plug requires minimal maintenance.
- Ensure the timer is unplugged from the power outlet before cleaning.
- Wipe the exterior with a soft, dry cloth. Do not use abrasive cleaners or solvents.
- Store in a cool, dry place when not in use.

Image 6.1: The timer operates silently, suitable for bedrooms.

Image 6.2: Versatile applications for the HBN Digital Timer Plug.
7. Troubleshooting
- Display is blank: Ensure the timer is plugged into a live socket. If it has been unplugged for a long time, the internal battery might be depleted. Plug it in for 30 minutes to charge.
- Appliance does not turn ON/OFF as programmed:
- Check if the timer is in "AUTO" mode.
- Verify that the ON/OFF programs are set correctly for the desired days and times.
- Ensure the appliance itself is switched ON.
- Check if the random function is accidentally activated.
- Timer is unresponsive: Press the RESET button with a pointed object to restore factory settings. You will need to reprogram the time and schedules.
8. Specifications
| Specification | Value |
|---|---|
| Model Number | 2xBND-50/SG3-VC |
| Voltage | 230V~50Hz |
| Max. Current | 16(3)A |
| Max. Power | 3680W |
| Number of Programs | 8 ON/OFF programs |
| Minimum Setting Time | 1 Minute |
| Color | White |
| Product Weight | 150 Grams |
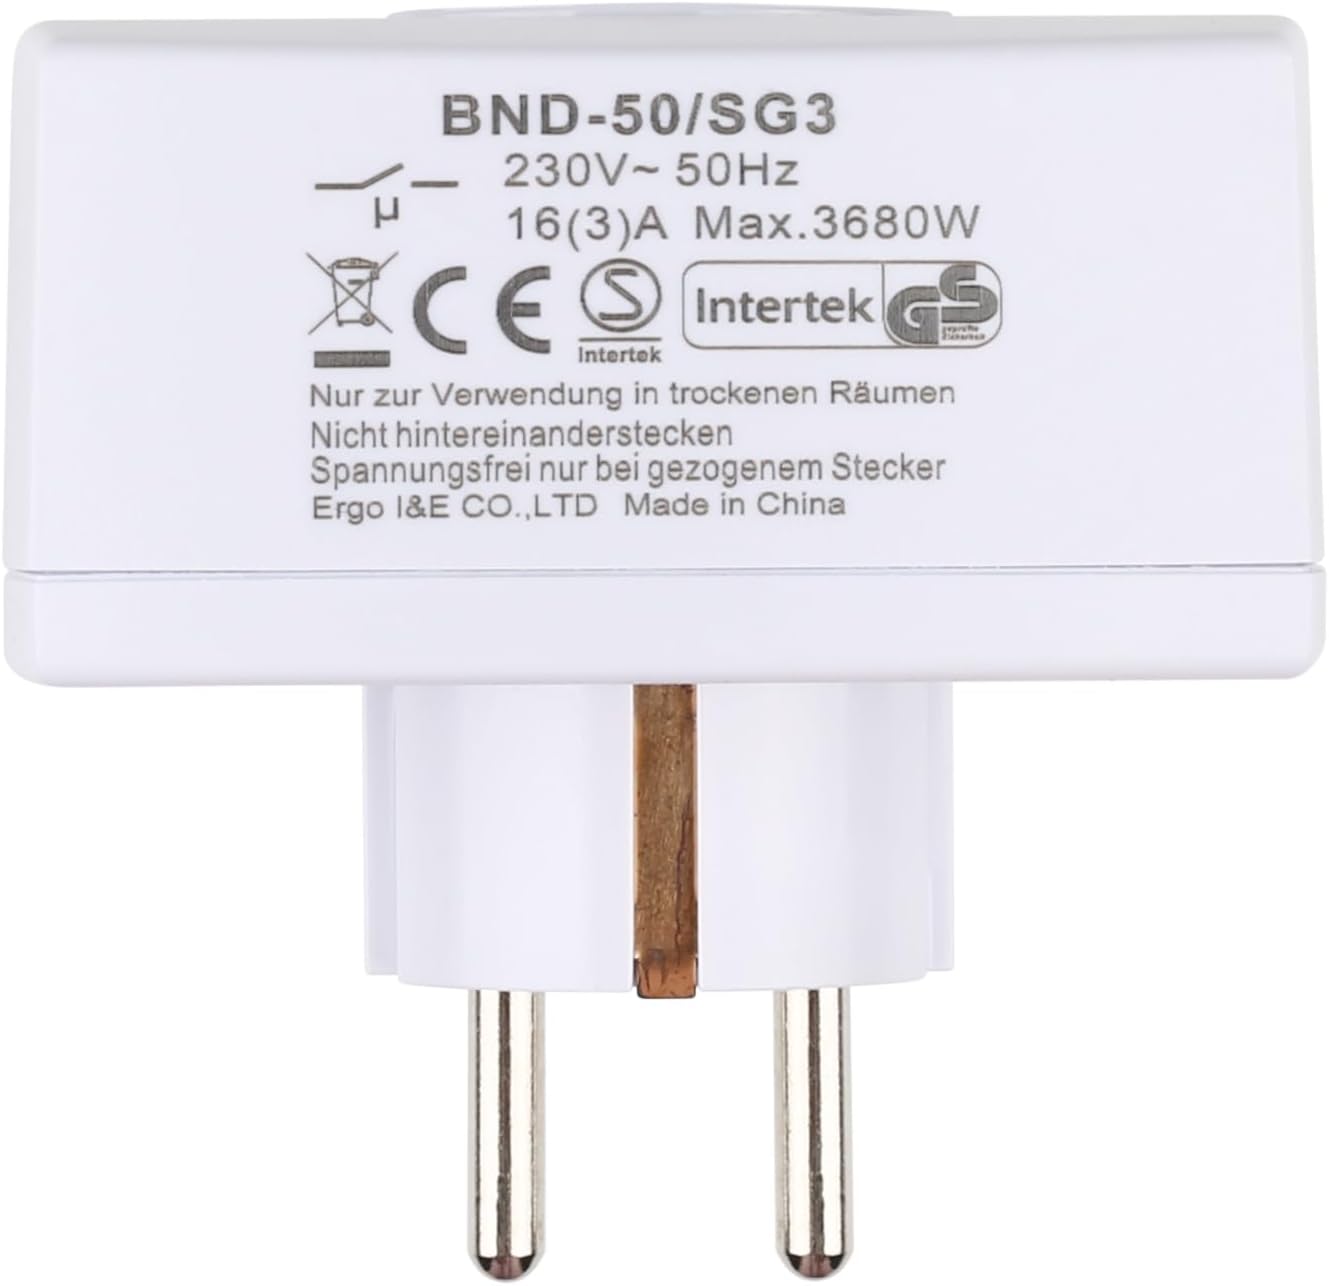
Image 8.1: Rear view of the timer with electrical specifications and certifications.
9. Warranty and Support
HBN products are designed for reliability and performance. For warranty information or technical support, please refer to the contact details provided with your purchase or visit the official HBN website. Keep your purchase receipt as proof of purchase.