
1. Introduction
This manual provides essential instructions for the safe and effective operation, setup, and maintenance of your R QIDI TECHNOLOGY i Box 8.9 Mono 3D Resin Printer. Please read this manual thoroughly before using the printer to ensure proper functionality and to prevent damage.
2. Safety Information
- Always wear appropriate personal protective equipment (PPE), including gloves and safety glasses, when handling resin.
- Operate the printer in a well-ventilated area to minimize exposure to resin fumes.
- Keep the printer away from direct sunlight and heat sources.
- Do not expose the resin vat or resin to UV light when not printing.
- Ensure the power supply is disconnected before performing any maintenance or cleaning.
- Keep out of reach of children and pets.
3. Package Contents
Verify that all components are present upon unpacking:
- R QIDI TECHNOLOGY i Box 8.9 Mono 3D Resin Printer
- Build Plate
- Resin Vat with FEP Film installed
- Power Adapter
- USB Drive
- Scraper
- Gloves
- Funnel
- Spare FEP Film
- Basic Tool Kit (e.g., Allen wrenches)
4. Product Overview
The i Box 8.9 Mono features an 8.9-inch 4K monochrome LCD for high-precision printing, a robust aluminum CNC internal structure, and a matrix parallel UV LED light source for uniform light distribution. It includes a hinged transparent cover for easy access and monitoring.
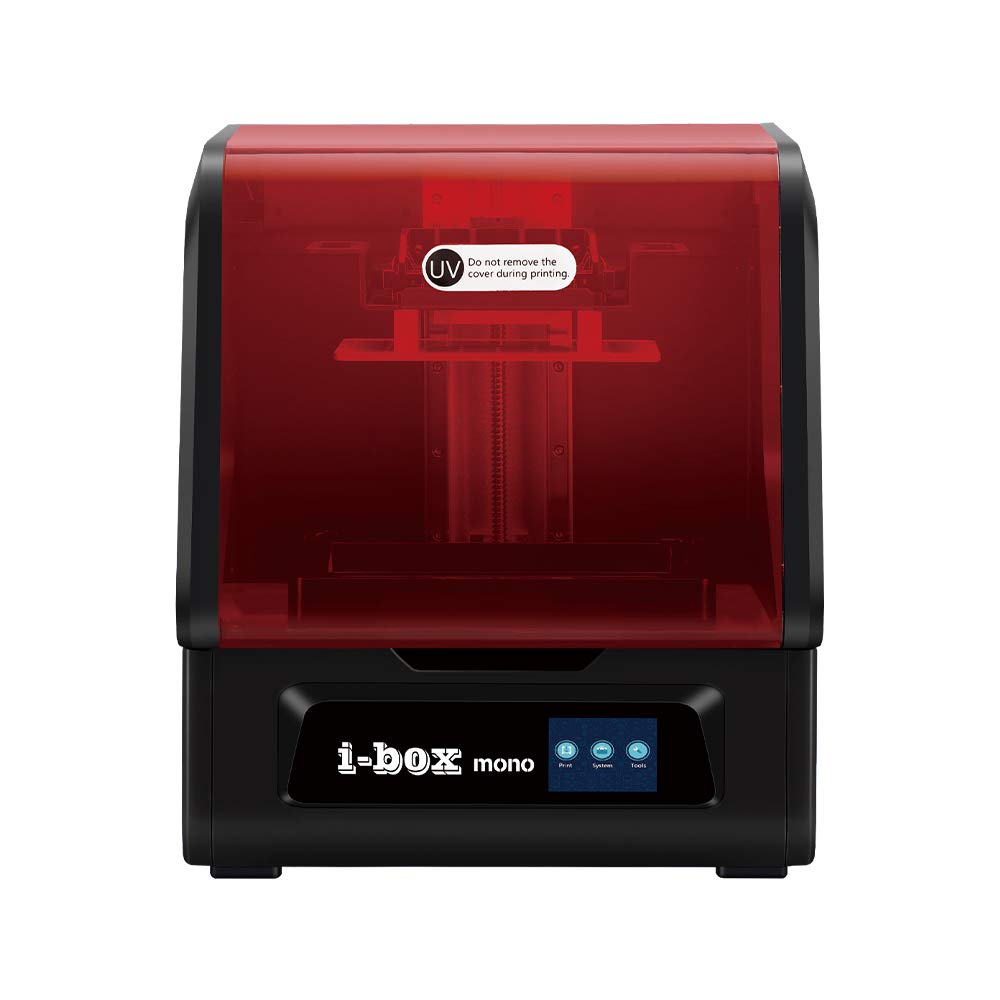
Front view of the R QIDI TECHNOLOGY i Box 8.9 Mono 3D Resin Printer, showcasing its red transparent cover and overall design.
5. Setup
5.1 Unpacking and Placement
- Carefully remove the printer and all accessories from the packaging.
- Place the printer on a stable, level surface in a well-ventilated room, away from direct sunlight.
5.2 Build Plate Leveling
Accurate leveling is crucial for successful prints.
- Install the build plate onto the Z-axis arm and tighten the top knobs to secure it.
- Loosen the single Allen screw on the side of the build plate mount. This allows the plate to move freely.
- Lower the Z-axis until the build plate gently presses against the LCD screen. Some models may require placing a piece of paper on the screen for calibration.
- Once the plate is flat against the screen (or paper), tighten the Allen screw to lock the build plate in position.
- Raise the Z-axis to its home position.
5.3 Software Installation
The printer is compatible with slicing software such as ChituBox and Lychee Slicer. Install the latest version of your preferred software and select the 'QIDI i Box 8.9 Mono' profile. Ensure the slicing settings, especially lift speed, are appropriate for your resin type to prevent print failures and FEP film wear.
6. Operating Instructions
6.1 Preparing for Printing
- Ensure the build plate is clean and properly leveled.
- Gently pour resin into the resin vat, ensuring it does not exceed the maximum fill line.
- Close the transparent cover to protect the resin from ambient UV light.
6.2 Starting a Print
- Save your sliced .STL file (or compatible format) to a USB drive.
- Insert the USB drive into the printer's USB port.
- Navigate the printer's touchscreen interface to select your print file.
- Confirm settings and start the print. The printer operates quietly during printing.
6.3 Post-Printing
- Once the print is complete, raise the Z-axis.
- Remove the build plate. The resin vat features a convenient rail to hang the build plate, allowing excess resin to drip back into the vat.
- Use the provided scraper to carefully remove the printed model from the build plate.
- Clean the printed model using isopropyl alcohol (IPA) and cure it under UV light according to resin manufacturer instructions.
7. Maintenance
7.1 Cleaning the Build Plate
After each print, clean the build plate with IPA to remove any residual resin. Ensure it is completely dry before the next print.
7.2 Cleaning the Resin Vat and FEP Film
- If changing resin types or storing the printer, drain the resin from the vat using a funnel and filter.
- Clean the vat and FEP film with IPA. Avoid using abrasive materials that could scratch the FEP film.
- Inspect the FEP film for damage or excessive wear. A loose FEP film can cause loud release popping during prints.
7.3 LCD Screen Care
Keep the LCD screen clean and free of resin spills. If resin leaks onto the screen, clean it immediately with a soft cloth and IPA. Never use sharp objects to scrape cured resin from the screen.
8. Troubleshooting
8.1 Print Not Sticking to Build Plate
- Solution: Re-level the build plate. Ensure the build plate is clean and free of resin residue. Increase bottom exposure time in slicing software.
8.2 Failed Prints / Partial Prints
- Solution: Check resin exposure settings; they may be too low or too high. Ensure the FEP film is clean and not damaged. Verify the model is properly supported in the slicing software. Adjust lift speed settings, as overly aggressive speeds can cause failures.
8.3 Resin Leaking from Vat
- Solution: Inspect the FEP film for punctures or tears. Ensure the FEP film is correctly installed and tightened in the resin vat frame. Check the vat's seals.
8.4 Loud Popping Sounds During Printing
- Solution: This often indicates the FEP film is too loose or the lift speed is too high. Check FEP tension and adjust lift speed in your slicing software.
9. Specifications
| Brand | R QIDI TECHNOLOGY |
| Model | i Box 8.9 Mono |
| Part Number | FDIBOX |
| Build Volume (LWH) | 192mm x 120mm x 200mm (7.55 x 4.72 x 7.87 inches) |
| LCD Screen | 8.9-inch 4K Monochrome LCD |
| Z-axis Accuracy | 0.00125mm |
| Light Source | Matrix Parallel UV LED (40 pcs UV LED lamp combination) |
| Connectivity | USB, Wi-Fi |
| Compatible Material | Resin |
| Supported File Format | STL |
| Package Dimensions | 56.77 x 48.26 x 44.83 cm |
| Package Weight | 22.75 kg |
| Manufacturer | ZHEJIANG QIDI TECHNOLOGY CO.,LTD |
10. Warranty and Support
For warranty information and technical support, please refer to the official R QIDI TECHNOLOGY website or contact their customer service directly. Keep your purchase receipt as proof of purchase for warranty claims. While support aims to be responsive, detailed troubleshooting may require user-specific adjustments and experimentation with print settings.