Olympic Electric Infinity
Olympic Electric Infinity Digital Electric Water Heater - 50 Liter User Manual
Model: Infinity
Introduction
This manual provides essential information for the safe and efficient operation, installation, and maintenance of your Olympic Electric Infinity Digital Electric Water Heater. Please read this manual thoroughly before installation and use, and keep it for future reference.
Safety Information
Always adhere to the following safety precautions to prevent injury or damage to the appliance.
- Electrical Safety: Ensure the power supply matches the specifications of the water heater (220V, 50/60Hz). Always connect to a grounded outlet. Do not use extension cords.
- Water Pressure: The maximum operating pressure is 8 bars. Ensure your water supply pressure does not exceed this limit.
- Installation: Installation must be performed by a qualified technician in accordance with local plumbing and electrical codes.
- Maintenance: Disconnect power before performing any maintenance or cleaning.
- Children and Pets: Keep children and pets away from the water heater during operation.
- Temperature: Hot water can cause severe burns. Exercise caution when using hot water.
Product Overview
The Olympic Electric Infinity water heater is designed for efficient and safe hot water supply. It features a durable enamel-coated tank for extended lifespan and a digital display for temperature monitoring.

Figure 1: Front view of the Olympic Electric Infinity Digital Electric Water Heater, showing its sleek white casing and the Olympic Electric logo.

Figure 2: Rear view of the water heater, illustrating the mounting brackets at the top and the blue (cold water inlet) and red (hot water outlet) connections at the bottom.
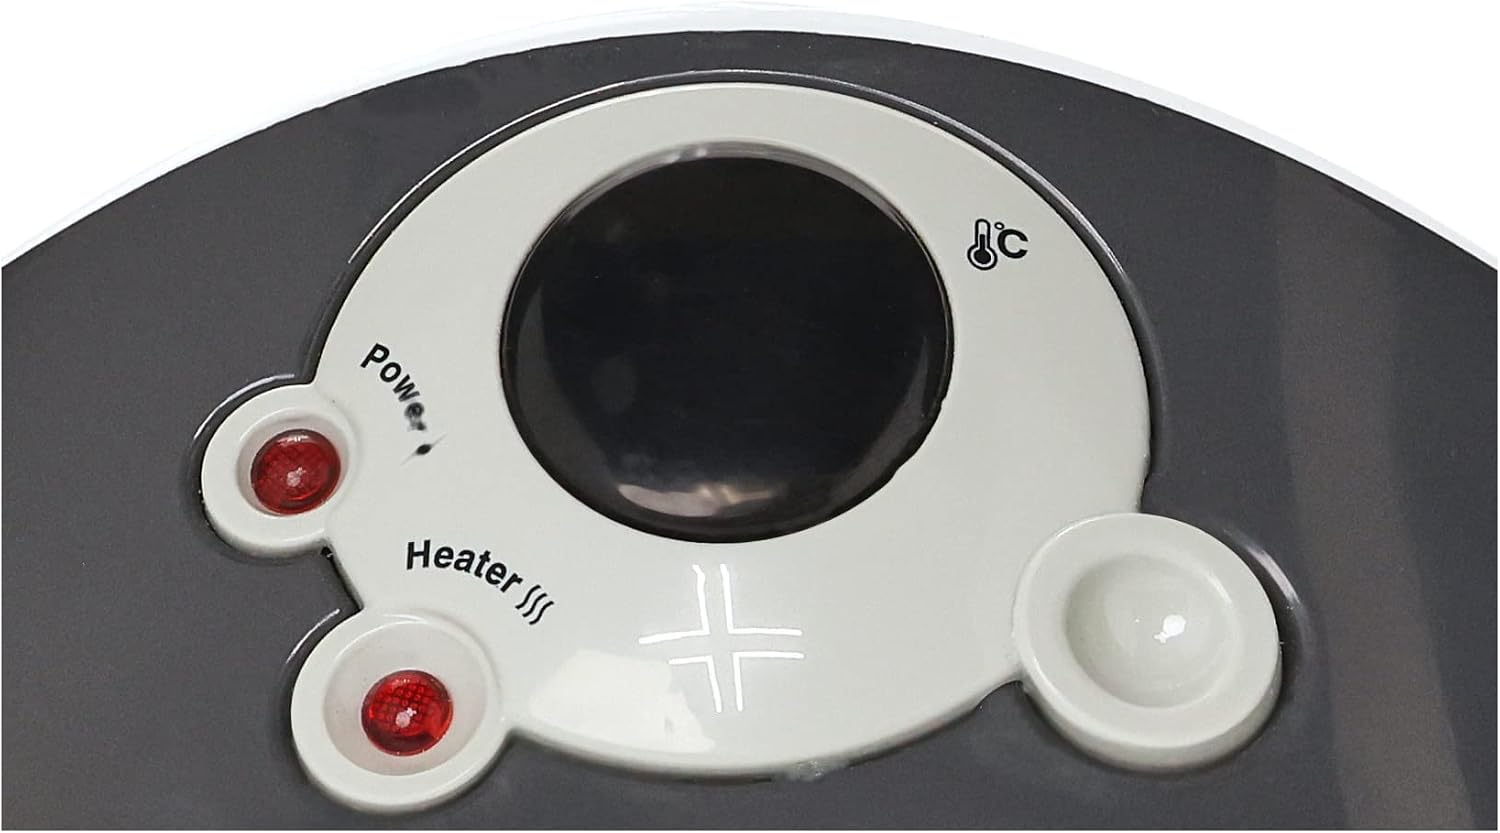
Figure 3: Close-up of the digital control panel located at the bottom of the water heater. It features a temperature display, power indicator, and heater indicator lights, along with temperature adjustment buttons.
Setup and Installation
Proper installation is crucial for the safe and efficient operation of your water heater. It is highly recommended that installation be carried out by a certified plumber or technician.
1. Choosing a Location
- Install the water heater vertically on a solid wall capable of supporting its full weight when filled with water (approx. 74 kg).
- Ensure adequate space around the unit for maintenance and ventilation.
- Locate it as close as possible to the main hot water usage points to minimize heat loss.
- Avoid locations where temperatures can drop below freezing.
2. Mounting the Unit
- Mark the drilling points on the wall using the provided mounting template or by measuring the distance between the mounting brackets on the unit (refer to Figure 2).
- Drill holes and insert appropriate wall anchors suitable for the wall material and weight.
- Securely fasten the mounting hooks/bolts into the wall.
- Carefully lift the water heater and hang it onto the secured mounting hooks. Ensure it is level and stable.
3. Plumbing Connections
- Connect the cold water supply line to the blue inlet pipe at the bottom of the heater.
- Connect the hot water outlet line to the red outlet pipe at the bottom of the heater.
- Install a pressure relief valve (PRV) on the cold water inlet line, as required by local codes, to prevent excessive pressure buildup.
- Open the cold water supply valve and a hot water faucet in your home to allow the tank to fill and air to escape. Once water flows steadily from the hot water faucet, close the faucet.
- Check all connections for leaks.
4. Electrical Connection
- Ensure the main power supply is OFF before making electrical connections.
- Connect the water heater to a dedicated, grounded electrical circuit with appropriate circuit breaker protection.
- Follow the wiring diagram provided with the unit (if applicable) and local electrical codes.
- Verify all electrical connections are secure.
Operating Instructions
1. Initial Startup
- Ensure the tank is completely filled with water (as per plumbing connection step 3). Operating an empty tank will damage the heating element.
- Turn on the main power supply to the water heater.
- The digital display will illuminate, showing the current water temperature.
2. Setting Temperature
- Use the temperature adjustment buttons on the control panel (refer to Figure 3) to set your desired water temperature.
- The heater will automatically begin heating the water to the set temperature. The "Heater" indicator light will be on during heating.
- Once the desired temperature is reached, the heater will turn off, and the "Heater" light will extinguish. It will cycle on and off to maintain the set temperature.
3. Energy Saving Tips
- Set the temperature to the lowest comfortable setting to save energy.
- Consider turning off the water heater if you will be away for an extended period.
- Ensure proper insulation of hot water pipes to minimize heat loss.
Maintenance
Regular maintenance ensures the longevity and efficiency of your water heater. Always disconnect power before performing any maintenance.
1. Draining the Tank (Annually)
Draining the tank helps remove sediment buildup, which can affect efficiency and tank life.
- Turn off the power supply to the water heater.
- Close the cold water inlet valve to the heater.
- Open a hot water faucet in your home to relieve pressure.
- Connect a hose to the drain valve at the bottom of the water heater and direct it to a suitable drain.
- Open the drain valve and allow the tank to empty completely.
- Once drained, close the drain valve, disconnect the hose, and reopen the cold water inlet valve.
- Refill the tank as per "Plumbing Connections" step 3 in the Setup section before restoring power.
2. Anode Rod Inspection (Every 1-2 Years)
The anode rod protects the tank from corrosion. It should be inspected and replaced if significantly corroded.
- This procedure is complex and should ideally be performed by a qualified technician.
- It involves draining the tank and accessing the anode rod, usually located at the top of the heater.
3. Cleaning the Exterior
Wipe the exterior of the water heater with a soft, damp cloth. Do not use abrasive cleaners or solvents.
Troubleshooting
Before calling for service, please check the following common issues and solutions:
| Problem | Possible Cause | Solution |
|---|---|---|
| No hot water or insufficient hot water |
|
|
| Water is too hot | Thermostat set too high | Lower the thermostat setting. |
| Leaking from the unit |
|
|
| Unusual noises (e.g., popping, rumbling) | Sediment buildup in tank | Drain and flush the tank (refer to Maintenance section). |
If the problem persists after attempting these solutions, please contact customer support.
Specifications
| Feature | Detail |
|---|---|
| Brand | Olympic Electric |
| Model Number | Infinity |
| Part Number | 93288.0 |
| Capacity | 50 Liters |
| Power (Wattage) | 1200 Watts |
| Voltage | 220 Volts |
| Frequency | 50/60 Hz |
| Dimensions (W x D x H) | 46 x 46 x 66 cm (18.1 x 18.1 x 26 inches) |
| Product Weight | 24 kg (52.9 lbs) |
| Maximum Pressure | 8 Bars |
| Color | White |
| Installation Type | Internal Installation (Wall Mounted) |
| Material | Multiple Materials (Enamel-coated tank) |
Warranty and Support
Warranty Information
Olympic Electric provides a manufacturer's warranty for this product. The duration and terms of the warranty may vary by region. Please refer to the warranty card included with your purchase or contact Olympic Electric customer service for detailed information.
Note: To activate the warranty, professional installation by an authorized technician may be required. Please retain your purchase invoice as proof of purchase.
Customer Support
For technical assistance, service requests, or inquiries regarding your Olympic Electric Infinity Digital Electric Water Heater, please contact Olympic Electric customer support.
- Website: Visit the official Olympic Electric website for support resources and contact details.
- Phone: Refer to the contact information provided in your product packaging or on the manufacturer's website for local service numbers.
When contacting support, please have your product model number (Infinity) and serial number (if applicable) ready.
Ask a question about this manual
Ask about setup, troubleshooting, compatibility, parts, safety, or missing instructions. Manuals+ will review the question and use this page’s manual context to help answer it.