
Introduction
The BEYIMEI PCI-E 1X to 16X Riser Card (VER010-X) is designed to extend a motherboard's PCI-E X1 slot to a PCI-E X16 slot, providing enhanced connectivity for graphics cards. This adapter is particularly useful for cryptocurrency mining setups (such as Ethereum mining) and custom PC builds requiring flexible component placement. It ensures stable power delivery and improved airflow within your system.

Image: The BEYIMEI VER010-X PCI-E 1X to 16X Riser Card, showcasing its design and multiple power connectors.
Safety Precautions
Please read these precautions carefully before use to prevent damage to your equipment or injury:
- This extension cord is suitable for motherboards with PCI-E slots.
- Always plug in the floppy drive power cord when using the riser.
- Ensure the computer is powered off and unplugged from the power source before inserting or unplugging the PCI-E extension cable.
- Use only the customized matching wire provided with the product. Do not substitute with other cables.
- Verify the correct orientation when plugging in connectors. Avoid reverse or off-position insertion to prevent device damage.
- When plugging in, hold the socket of the device firmly to avoid excessive force that could break the socket pin.
- For dual-core graphics cards and 16X motherboards, it is recommended to use the old flat cable.
Product Features
- PCI-E 1X to 16X Riser Card (VER010-X): Expands motherboard PCIE X1 slot to PCIE X16 slot for multiple graphics cards.
- Multi-interface Power Supply: Features 6PIN, 4PIN, and SATA 15PIN interfaces to enhance power supply capacity, reducing motherboard load.
- Enhanced Stability and Safety: Equipped with 8 solid capacitors for stable and safe graphics card power delivery.
- Rugged USB 3.0 Cable: 60cm USB cable is soft, stable, and allows flexible placement of the graphics card without signal attenuation up to 3 meters.
- Fixed Buckle Slot: The slot includes a fixed buckle for convenient graphics card removal and secure fastening, preventing accidental detachment.
- Pure Copper Power Cord: The power cord uses pure copper wire to prevent overheating during use.
- No Driver Required: Plug-and-play functionality, no additional drivers needed.
- LED Indicators and Fuses: Circuit board includes LED indicators and fuses for operational status and protection.
- Wide System Support: Compatible with all Windows systems, Linux, and Mac OS.

Image: Detailed view of the VER010-X riser card with key components labeled, including power interfaces, capacitors, and the fixed buckle slot.

Image: A comparison showing different production batches of the riser card, highlighting that product function and quality remain consistent despite minor component variations.
Package Contents
Each package of the BEYIMEI PCI-E 1X to 16X Riser Card (VER010-X) includes the following components:
- PCI-E riser card x 6
- PCI-E 1X plug-in card x 6
- 60cm USB 3.0 adapter cable x 6
Setup and Installation
Follow these steps to properly install your BEYIMEI PCI-E 1X to 16X Riser Card:
- Prepare Your System: Ensure your computer is completely powered off and unplugged from the power source.
- Install the PCI-E 1X Plug-in Card: Insert the smaller PCI-E 1X plug-in card into an available PCI-E X1 slot on your motherboard. Ensure it is seated firmly.
- Connect the USB 3.0 Cable: Connect one end of the 60cm USB 3.0 cable to the USB port on the PCI-E 1X plug-in card. Connect the other end to the USB port on the larger PCI-E 16X riser card.
- Connect Power to the Riser Card: Connect a power cable from your power supply to one of the available power interfaces on the PCI-E 16X riser card (6PIN, 4PIN, or SATA 15PIN). It is recommended to use the 6PIN connector for optimal stability.
- Install the Graphics Card: Carefully insert your graphics card into the PCI-E 16X slot on the riser card. Ensure the graphics card is securely fastened using the fixed buckle.
- Secure Components: Position the riser card and graphics card within your PC case or mining rig, ensuring adequate airflow and stability.

Image: An illustration demonstrating the connection of the USB 3.0 cable between the PCI-E 1X plug-in card and the PCI-E 16X riser card, along with power connections.
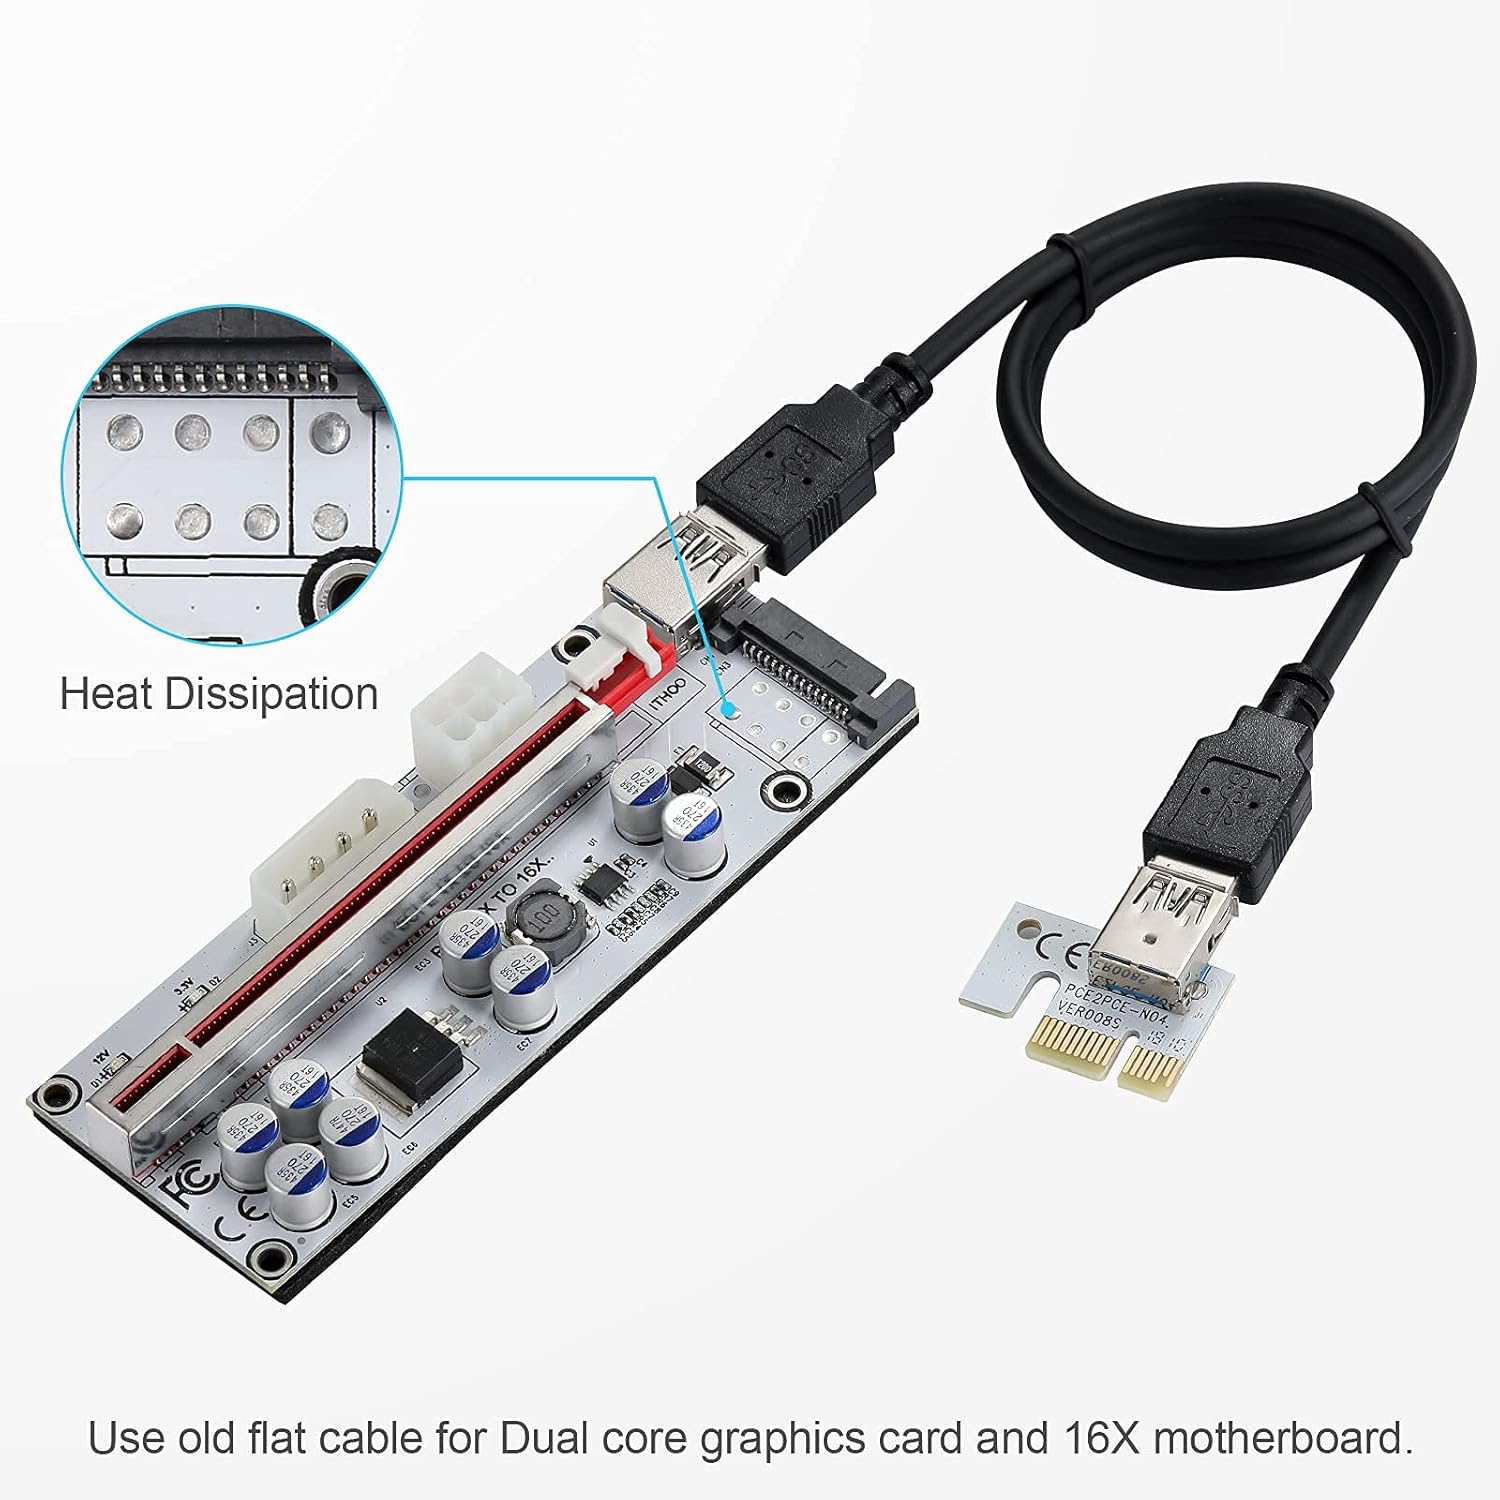
Image: Close-up of the 60cm USB 3.0 extension cable, highlighting its design for reliable data transmission.
Installation Video Guide (General Riser Setup)
Video: This video demonstrates the general setup process for a PCI-E riser card, including connecting the USB cable and power. While the specific model shown may vary, the installation principles are applicable.
Video: This video provides a review and setup guide for an AAAWAVE PCIe Riser (VER 011 PRO). Although a different model, it illustrates the physical connection of a graphics card to a riser and the riser to the motherboard via a USB cable.
Operating Instructions
Once installed, the BEYIMEI PCI-E 1X to 16X Riser Card operates automatically. Ensure all connections are secure and power is supplied correctly. The LED indicators on the riser card will confirm proper operation. No additional software or drivers are typically required for basic functionality.
- Verify that the LED indicators on the riser card are illuminated, indicating power is being supplied.
- Monitor your system's temperature and performance, especially in multi-GPU setups, to ensure optimal operation.
- For specific graphics card settings or mining software configurations, refer to the respective software documentation.
Maintenance
Proper maintenance can extend the lifespan of your riser card and connected components:
- Keep the riser card and its connections free from dust and debris. Use compressed air for cleaning.
- Periodically check all cable connections to ensure they are secure and not loose.
- Ensure adequate airflow around the riser card and graphics card to prevent overheating.
- Avoid bending or stressing the USB cable or power cables excessively.
Troubleshooting
If you encounter issues with your BEYIMEI PCI-E 1X to 16X Riser Card, consider the following troubleshooting steps:
- No Power/Graphics Card Not Detected:
- Ensure the computer is completely powered off before checking connections.
- Verify that all power cables (6PIN, 4PIN, or SATA) are securely connected to the riser card and the power supply.
- Check that the PCI-E 1X plug-in card is fully seated in the motherboard slot.
- Confirm the USB 3.0 cable is correctly connected between the 1X card and the 16X riser card.
- Test with a different power cable or power supply if possible.
- System Instability/Crashes:
- Ensure your power supply unit (PSU) has sufficient wattage to support all connected graphics cards and components.
- Check for proper ventilation and cooling within your system to prevent overheating.
- Update your graphics card drivers to the latest version.
- Inspect the riser card for any visible damage, such as bulging capacitors (though rare with solid capacitors, it's a general check for electronics).
- Slow Performance:
- Verify that the USB 3.0 cable is not damaged and is securely connected.
- Ensure your motherboard's BIOS settings are configured correctly for PCI-E slot detection and multi-GPU setups if applicable.
Specifications
| Attribute | Detail |
|---|---|
| Brand | BEYIMEI |
| Model Number | PCE164P-N08 VER010-X |
| Operating System Compatibility | Linux, Mac OS, Windows |
| Item Weight | 1.21 pounds (approx. 549g) |
| Package Dimensions | 7.76 x 5.31 x 4.02 inches (approx. 19.7 x 13.5 x 10.2 cm) |
| Color/Version | PCI-E 1X to 16X Riser Card (VER010-X) |
| Hardware Interface | PCI |
| Compatible Devices | Personal Computer, Laptop, Server, Television, Router, Printer |
| UPC | 770346736160 |

Image: Visual representation of the product with key dimensions and specifications.
Warranty and Support
For warranty information and technical support, please refer to the manufacturer's official website or contact their customer service directly. Keep your purchase receipt as proof of purchase for any warranty claims.