1. Introduction
Thank you for purchasing the CAMAQUI 3KW Electric Pool Water Heater. This manual provides essential information for the safe and efficient operation, installation, and maintenance of your new pool heater. Please read this manual thoroughly before installation and use, and keep it for future reference.
This electric heater is designed to provide consistent heating for above-ground and inground pools, as well as SPA and bath water, ensuring a comfortable swimming or bathing experience. It features a robust design with corrosion-resistant materials and an intelligent self-test system for enhanced safety.
2. Safety Information
WARNING: Failure to follow these safety instructions could result in fire, electric shock, serious injury, or death.
- Always ensure the heater is installed by a qualified electrician in accordance with all local and national electrical codes.
- Do not operate the heater if it is damaged or not functioning properly.
- Ensure the power supply matches the heater's requirements (220-240V/50-60Hz).
- A circulating pump of at least 0.75HP is required for proper operation. Operating without adequate circulation can cause damage to the heater and pose a safety risk.
- Ensure proper grounding to prevent electric shock.
- Keep children and pets away from the heater during operation.
- Do not attempt to repair or modify the heater yourself. Contact qualified service personnel.
- Disconnect power before performing any maintenance or service.
- The heater must be installed in a location that prevents water from splashing onto electrical components.
- Regularly inspect the power cord and connections for any signs of damage.
3. Product Features
The CAMAQUI Electric Pool Water Heater comes equipped with several features designed for efficiency, durability, and safety:
- Powerful Heating: 3KW heating capacity for effective water temperature control.
- Durable Construction: Heating element made of 316# stainless steel for corrosion resistance, especially against chlorine.
- Intelligent Self-Test System: Includes features for No Leakage, Dry Burn Protection, Fault Detection, and Power Protection.
- Easy Operation: Mechanical thermostat switch allows for simple temperature setting.
- Compact Design: Small footprint, suitable for hot tubs and swimming pool equipment, easy to install.
- Voltage Compatibility: Designed for 220-240V/50-60Hz power systems.

Figure 3.1: Visual representation of the Intelligent Self-Test System features.
4. Specifications
| Parameter | Value |
|---|---|
| Voltage | 220-240V/50-60Hz |
| Power | 3KW |
| Current | 14A |
| Phase Parameters | Single Phase |
| Inlet Size | 1.97 inch (50mm) |
| Outlet Size | 1.3 inch (32mm) |
| Wire Specification | 3*4mm² |
| Pipe Diameter (Recommended) | 1 inch |
| Product Dimensions | 13.39 x 4.8 x 4.92 inches (approx.) |
| Item Weight | 4.8 pounds |
| Heating Element Material | 316# Stainless Steel |
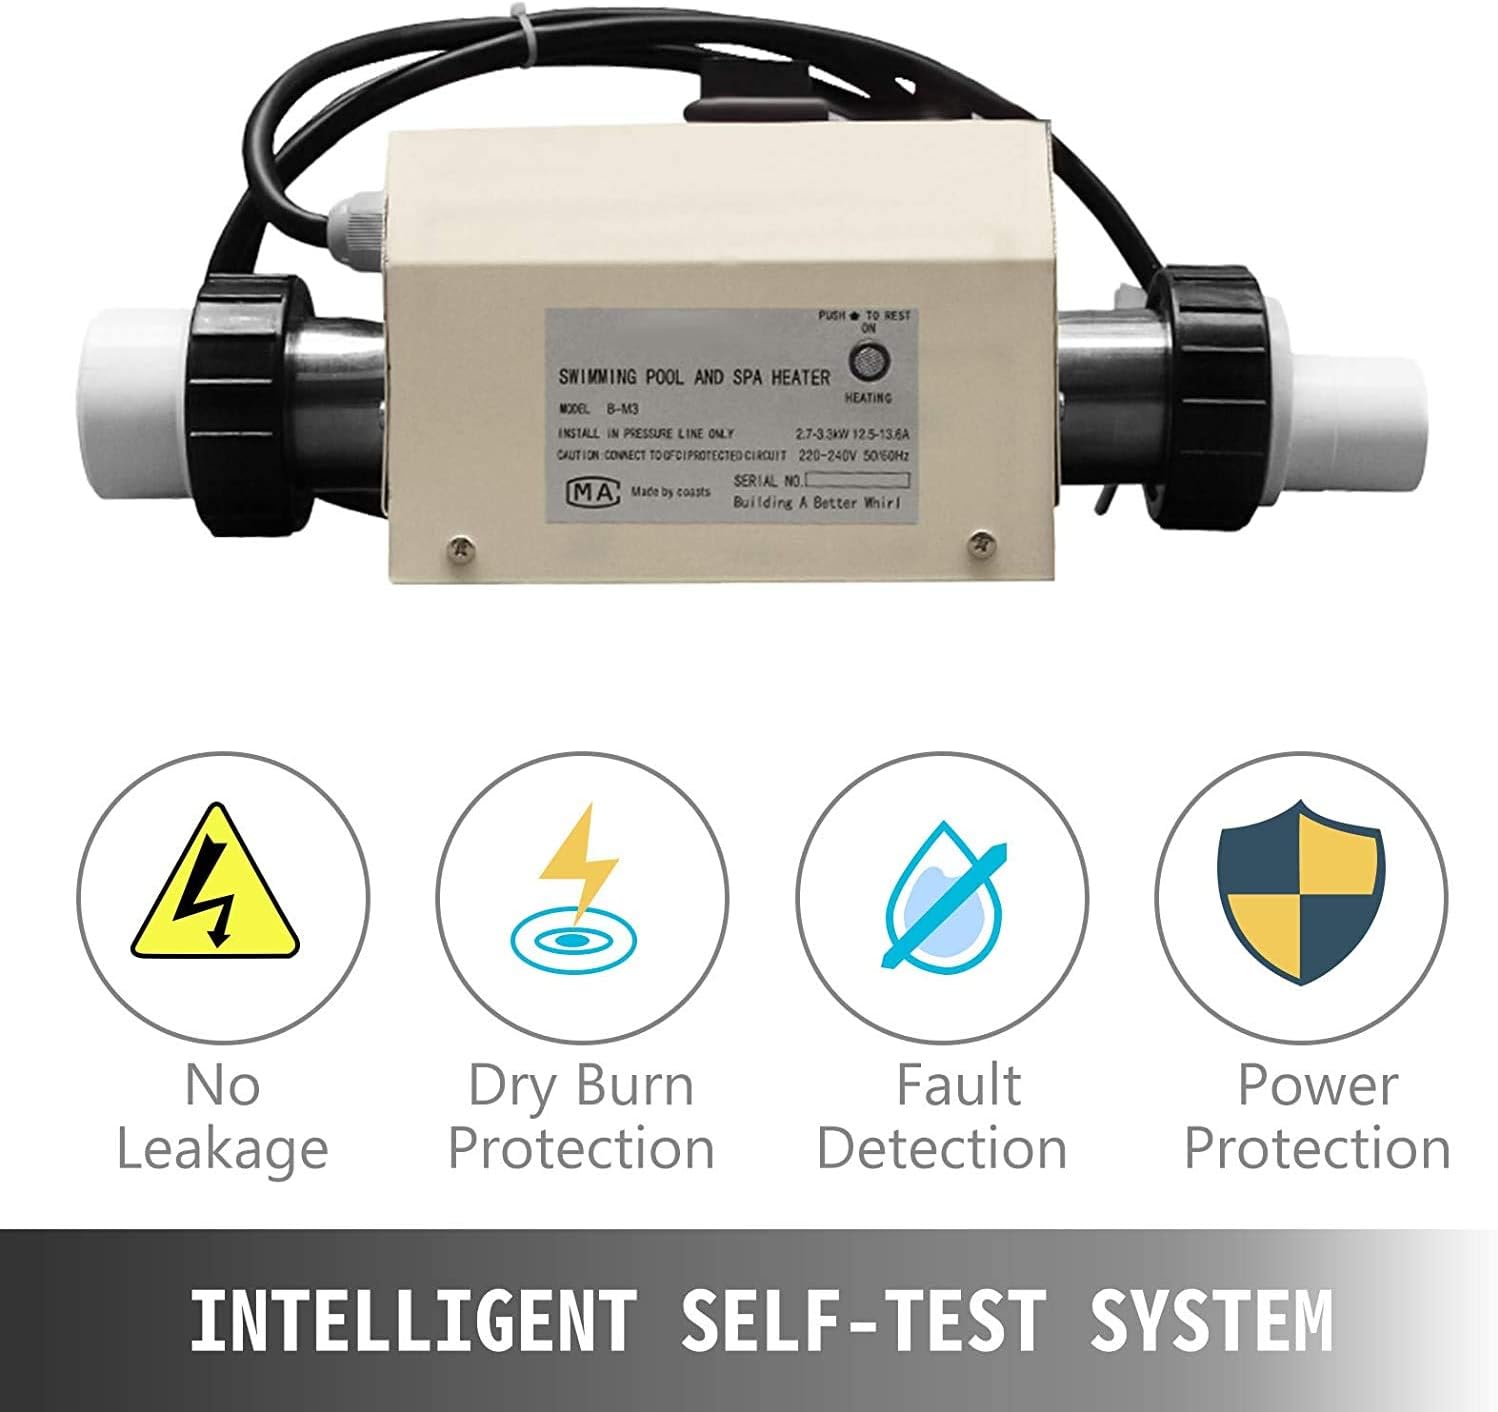
Figure 4.1: Rear view of the heater with specification label.
5. Setup and Installation
Proper installation is crucial for the safe and efficient operation of your pool heater. It is highly recommended that installation be performed by a certified professional.
5.1 Pre-Installation Checklist
- Verify power supply (220-240V/50-60Hz) is available at the installation site.
- Ensure a circulating pump of at least 0.75HP is connected to your pool system.
- Confirm pipe sizes: one interface is 50mm (1.97 inch) and the other is 32mm (1.3 inch).
- Prepare 3*4mm² wiring for electrical connection.
- Ensure the installation location is dry, well-ventilated, and protected from direct weather exposure.
- The heater should be installed in the return line of the pool's filtration system, after the filter and pump.
5.2 Installation Steps
- Mounting: Securely mount the heater in a stable, level position. It is designed to be installed in the circulating massage pipe, typically at the bottom of the bathtub or near the pool equipment.
- Plumbing Connections: Connect the pool's plumbing to the heater's inlet and outlet ports. Ensure a tight, leak-free connection. The heater has one 50mm interface and one 32mm interface.
- Electrical Wiring:
- Ensure power is OFF at the main breaker before wiring.
- Connect the 220-240V power supply to the heater's terminal block using 3*4mm² wire.
- Ensure proper grounding.
- It is crucial to connect the circuit to a GFCI (Ground Fault Circuit Interrupter) protected circuit for safety.
- System Priming: After plumbing connections are complete, fill the pool/spa and run the circulating pump to ensure the heater is fully primed with water and all air is purged from the system. Operating the heater without water will cause damage.
- Leak Check: Visually inspect all plumbing connections for leaks.


Figure 5.1: Heater plumbing connection point (left) and electrical cable entry (right).
6. Operating Instructions
Once the heater is properly installed and the system is primed with water, you can begin operation.
- Power On: Turn on the power supply to the heater at the main breaker.
- Activate Circulation Pump: Ensure your pool's circulating pump is running. The heater requires a minimum flow rate to operate safely and efficiently.
- Set Temperature: Use the temperature control dial on the front of the unit to set your desired water temperature. Rotate the dial towards "HOT" for warmer water and "COOL" for cooler water.
- Heating Indicator: The heater will begin heating when the water temperature is below the set point and the circulation pump is active. There may be an indicator light (if present) to show heating is in progress.
- Manual Reset: In case of an error or safety shutdown (e.g., dry burn protection), the heater may require a manual reset. Press the "MANUAL RESET" button (if present) to clear the fault and resume operation after addressing the underlying issue.

Figure 6.1: Temperature control dial and manual reset button.
7. Maintenance
Regular maintenance helps ensure the longevity and optimal performance of your pool heater.
- Regular Inspection: Periodically inspect the heater for any signs of physical damage, corrosion, or leaks. Check electrical connections for tightness and signs of overheating.
- Keep Area Clear: Ensure the area around the heater is free from debris, leaves, and anything that could obstruct airflow or pose a fire hazard.
- Water Chemistry: Maintain proper pool water chemistry (pH, chlorine levels, etc.) to prevent scale buildup and corrosion of the heating element. The 316# stainless steel element is corrosion-resistant, but extreme water conditions can still cause issues.
- Winterization (if applicable): If you live in an area with freezing temperatures, follow proper winterization procedures for your pool system, including draining the heater to prevent freeze damage.
- Professional Service: For any internal cleaning or complex maintenance, it is recommended to contact a qualified pool equipment technician.
8. Troubleshooting
This section provides solutions to common issues you might encounter with your pool heater. For problems not listed here, please contact customer support.
| Problem | Possible Cause | Solution |
|---|---|---|
| Heater not turning on. | No power; tripped breaker/GFCI; insufficient water flow; manual reset needed. | Check power supply and breaker. Ensure circulating pump is running. Press manual reset button. Verify water level and flow. |
| Water not heating sufficiently. | Temperature setting too low; insufficient run time; large pool volume; poor insulation; low flow rate. | Increase temperature setting. Allow more time for heating. Ensure adequate circulation. Check for heat loss from pool. |
| Heater cycles on and off frequently. | Low water flow; air in system; faulty sensor. | Check circulating pump and filter. Bleed air from the system. Contact professional if issue persists. |
| Leakage detected. | Loose plumbing connections; damaged seals/pipes. | Tighten all plumbing connections. Inspect pipes and seals for damage and replace if necessary. |
9. Warranty and Support
For warranty information, please refer to the documentation provided at the time of purchase or contact the seller/manufacturer directly. While specific warranty details are not provided in this manual, it is advisable to retain your proof of purchase.
For technical support, troubleshooting assistance beyond this manual, or to inquire about replacement parts, please contact CAMAQUI customer service through the retailer where you purchased the product or visit the official CAMAQUI website for contact information.
Consider purchasing extended protection plans for additional coverage, if available, as offered by your retailer.