
1. Introduction
This manual provides essential information for the safe and effective operation, setup, and maintenance of your IMAYCC 2100W Mortar Mixer. Please read these instructions carefully before using the product and retain them for future reference.
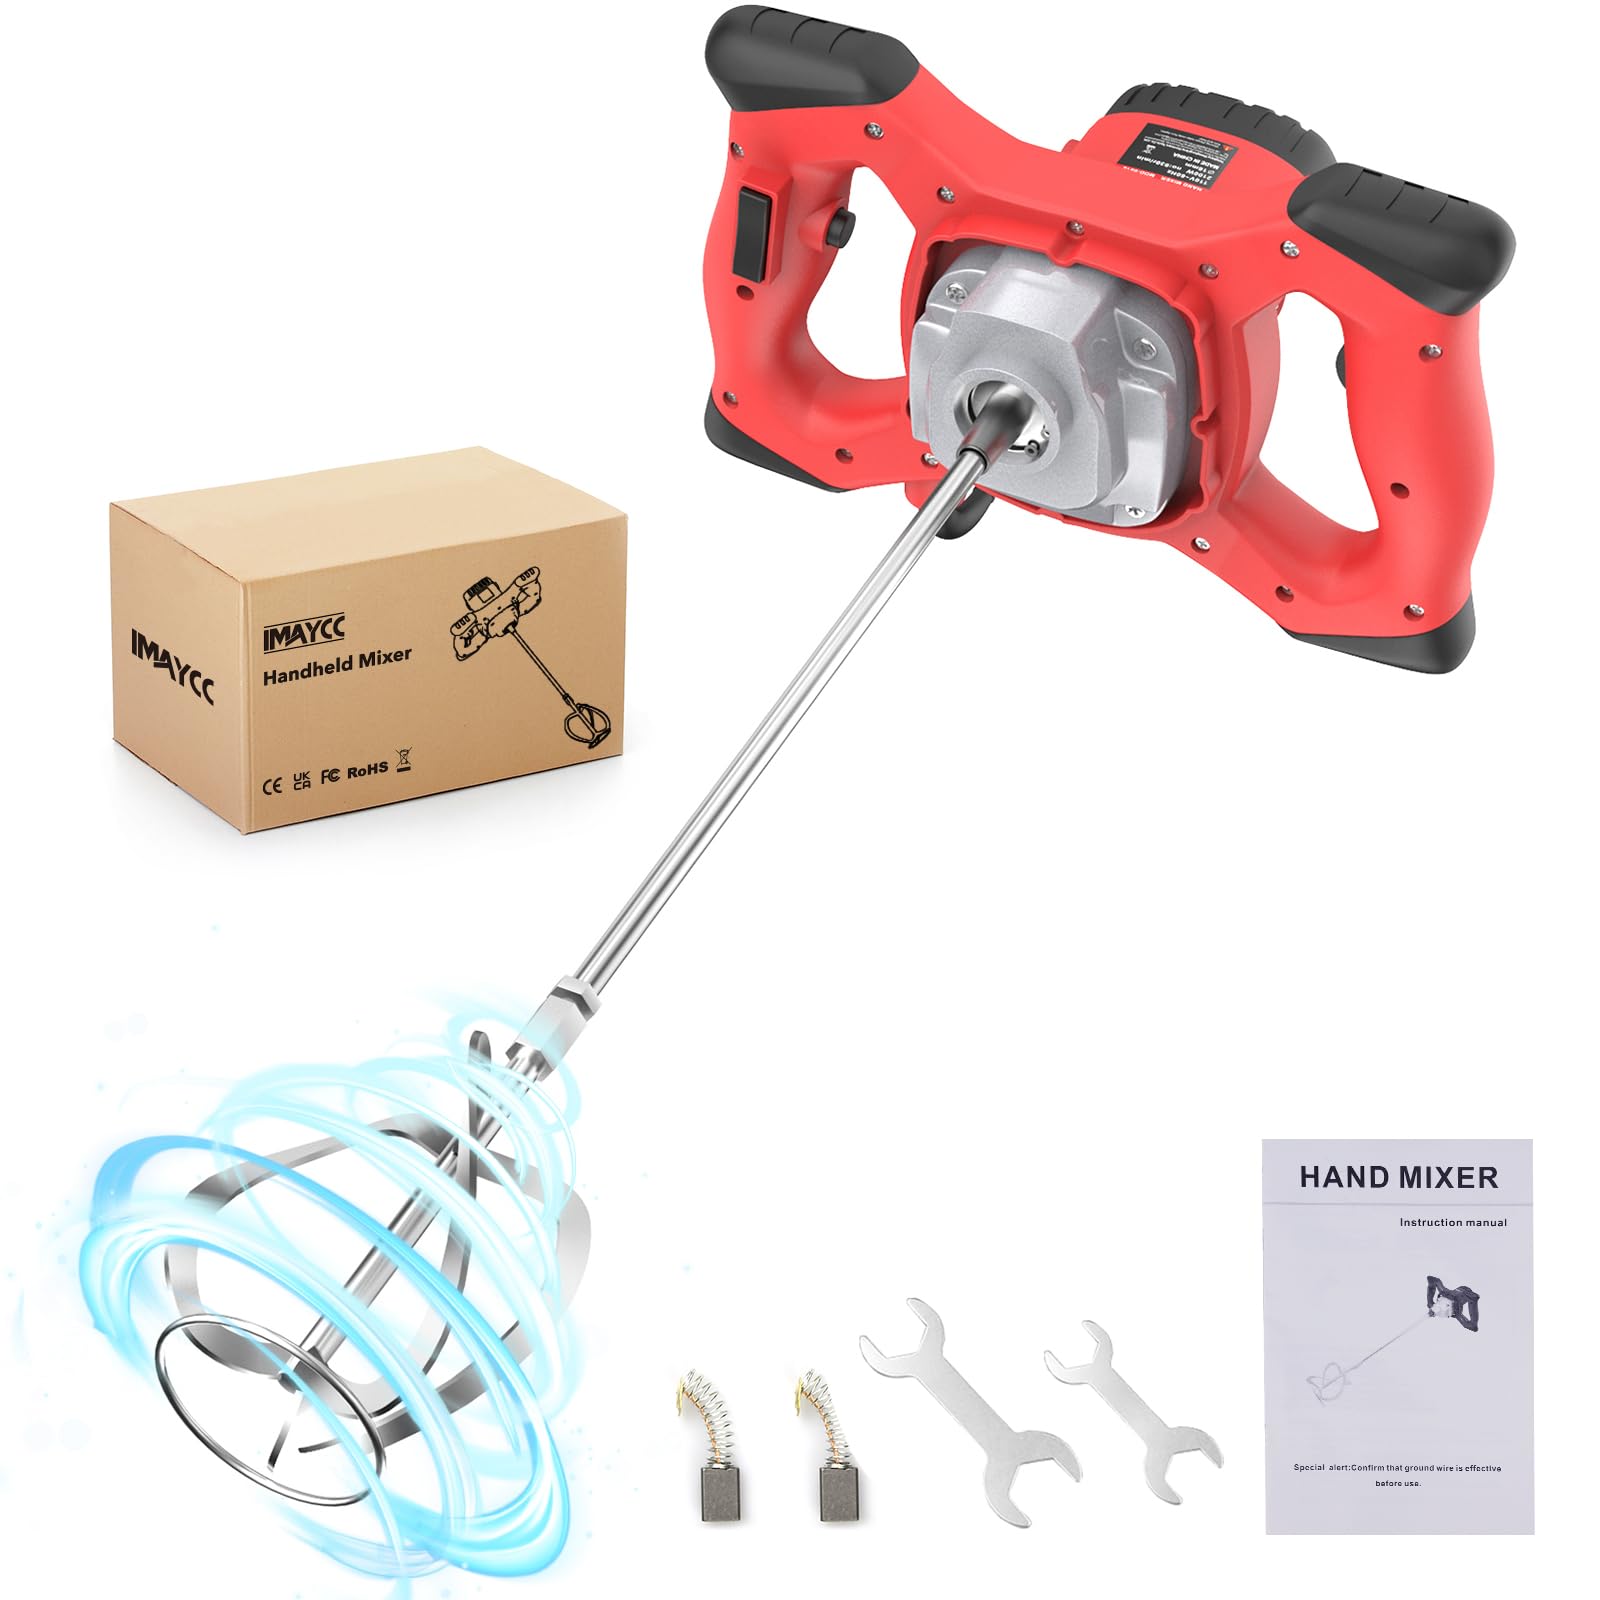
The IMAYCC 2100W Mortar Mixer, ready for operation with its mixing paddle.
2. Safety Instructions
Always follow basic safety precautions to reduce the risk of fire, electric shock, and personal injury when operating power tools.
- Wear appropriate personal protective equipment (PPE): Always wear safety glasses, hearing protection, and gloves.
- Ensure a stable work area: Operate the mixer on a firm, level surface. Keep the work area clean and well-lit.
- Avoid hazardous environments: Do not use the mixer in damp or wet locations, or expose it to rain.
- Secure materials: Ensure the mixing container is stable and cannot tip over during operation.
- Maintain a firm grip: Always hold the mixer firmly with both hands using the ergonomic handles.
- Disconnect power: Unplug the mixer from the power source before making any adjustments, changing accessories, or performing maintenance.
- Use correct voltage: Ensure the power supply matches the voltage specified on the mixer's rating plate (220V).
- Overheat protection: The mixer features overheat protection. If it shuts down, allow it to cool before resuming operation.
3. Product Components
Familiarize yourself with the parts of your IMAYCC Mortar Mixer for proper assembly and operation.

A comprehensive diagram identifying the main parts of the mixer, including the power switch, speed selector, ergonomic handles, and the detachable mixing paddle.
- Motor: 2100W powerful motor for efficient mixing.
- Reinforced Aluminum Gearbox: Provides durability and smooth power transmission.
- Ergonomic Handles: Designed for comfortable and secure two-hand operation.
- ON/OFF Switch with Lock: For continuous operation and safety.
- 6-Speed Selector: Allows adjustment of mixing speed from 270 to 930 RPM.
- M14 Quick Thread Interface: For easy attachment and detachment of mixing paddles.
- Thickened Dual-Paddle Mixer: Spiral rod design for thorough mixing.
- External Carbon Brush Design: For easy maintenance and replacement.

An exploded view highlighting key components: the powerful 2100W motor, durable aluminum gearbox, M14 threaded connection for the mixing paddle, and the accessible external carbon brush housing.
4. Setup
Follow these steps to assemble your mortar mixer before use:
- Unpack Components: Carefully remove all parts from the packaging. Check for any damage.
- Attach Mixing Paddle: Align the M14 threaded end of the mixing paddle with the M14 quick thread interface on the mixer's shaft.
- Secure Paddle: Rotate the mixing paddle clockwise until it is securely tightened onto the mixer shaft. Ensure it is firmly attached to prevent loosening during operation.
- Inspect Connections: Before plugging in, ensure all connections are secure and the paddle is correctly installed.
5. Operating Instructions
Proper operation ensures efficiency and safety.
5.1. Material Preparation
The mixer is suitable for various medium-viscosity materials, including:
- Oil paint
- Cement
- Linings
- Resins
- Printing inks
- Fine mortar
- Plaster
- Cement-containing adhesives

Examples of materials suitable for mixing with this tool, including mortar, different colored paints, and plaster, demonstrating its versatility.
5.2. Powering On and Speed Adjustment
- Connect Power: Plug the mixer into a suitable 220V power outlet.
- Select Speed: Use the 6-speed selector dial to choose the desired mixing speed (270-930 RPM). Start with a lower speed to prevent splashing, especially with liquid materials.
- Start Mixer: Press the ON/OFF switch. For continuous operation, engage the switch lock.
- Adjust Speed During Operation: You can adjust the speed while the mixer is running to achieve optimal consistency for your material.
5.3. Mixing Technique
- Submerge Paddle: Fully submerge the mixing paddle into the material before starting the mixer to prevent splashing.
- Move Slowly: Move the mixer slowly through the material, ensuring all parts are thoroughly mixed. Avoid rapid movements that could cause material to splash out of the container.
- Monitor Consistency: Continue mixing until the desired uniform consistency is achieved.
5.4. Overheat Protection
The mixer is equipped with an intelligent temperature cooling design to prevent overheating. If the machine becomes excessively hot, it will automatically shut down to prevent damage. Allow the mixer to cool down completely before attempting to restart it.

Illustration of the mixer's cooling system, which draws in cold air and expels hot air to prevent overheating, ensuring extended operation. The 6-speed adjustment dial is also visible.
6. Maintenance
Regular maintenance ensures the longevity and optimal performance of your mixer.
6.1. Cleaning
- Disconnect Power: Always unplug the mixer before cleaning.
- Clean Paddle: Immediately after use, clean the mixing paddle thoroughly to prevent material from hardening on it. Use water and a brush for water-based materials, or appropriate solvents for oil-based materials.
- Clean Mixer Body: Wipe the mixer body with a damp cloth. Do not use harsh chemicals or immerse the mixer in water. Ensure ventilation openings are clear of debris.
6.2. Carbon Brush Replacement
The mixer features an external carbon brush design for easy replacement. Worn carbon brushes can lead to reduced performance or motor failure.

A detailed view of the external carbon brush cover, illustrating the ease of access for maintenance and replacement of the carbon brushes.
- Disconnect Power: Ensure the mixer is unplugged.
- Locate Brush Caps: Identify the external carbon brush caps on the motor housing.
- Remove Caps: Use a screwdriver to unscrew and remove the brush caps.
- Replace Brushes: Carefully remove the old carbon brushes and insert new ones. Ensure they slide in smoothly.
- Secure Caps: Replace and tighten the brush caps.
7. Troubleshooting
Refer to this section for common issues and their solutions.
| Problem | Possible Cause | Solution |
|---|---|---|
| Mixer does not start | No power supply Faulty power cord/plug Worn carbon brushes | Check power connection and outlet Inspect cord for damage; replace if necessary Replace carbon brushes (refer to Maintenance) |
| Mixer stops during operation | Overheating Overload Loose power connection | Allow mixer to cool down Reduce load or material quantity Check power cord connection |
| Reduced mixing power | Worn carbon brushes Incorrect speed setting Material too viscous | Replace carbon brushes Adjust to a higher speed setting Add appropriate liquid to reduce viscosity |
| Excessive vibration or noise | Loose mixing paddle Damaged paddle Internal mechanical issue | Tighten mixing paddle Replace damaged paddle Contact customer support |
8. Specifications
| Feature | Specification |
|---|---|
| Power | 2100 W |
| Voltage | 220 V |
| Speed Adjustment | 6 speeds |
| No-Load Speed | 270-930 RPM |
| Mixing Rod Thread | M14 |
| Recommended Paddle Diameter | Ø 120 mm |
| Product Dimensions (Package) | 36.9 x 23.7 x 23.4 cm |
| Product Weight (Package) | 4.18 kg |
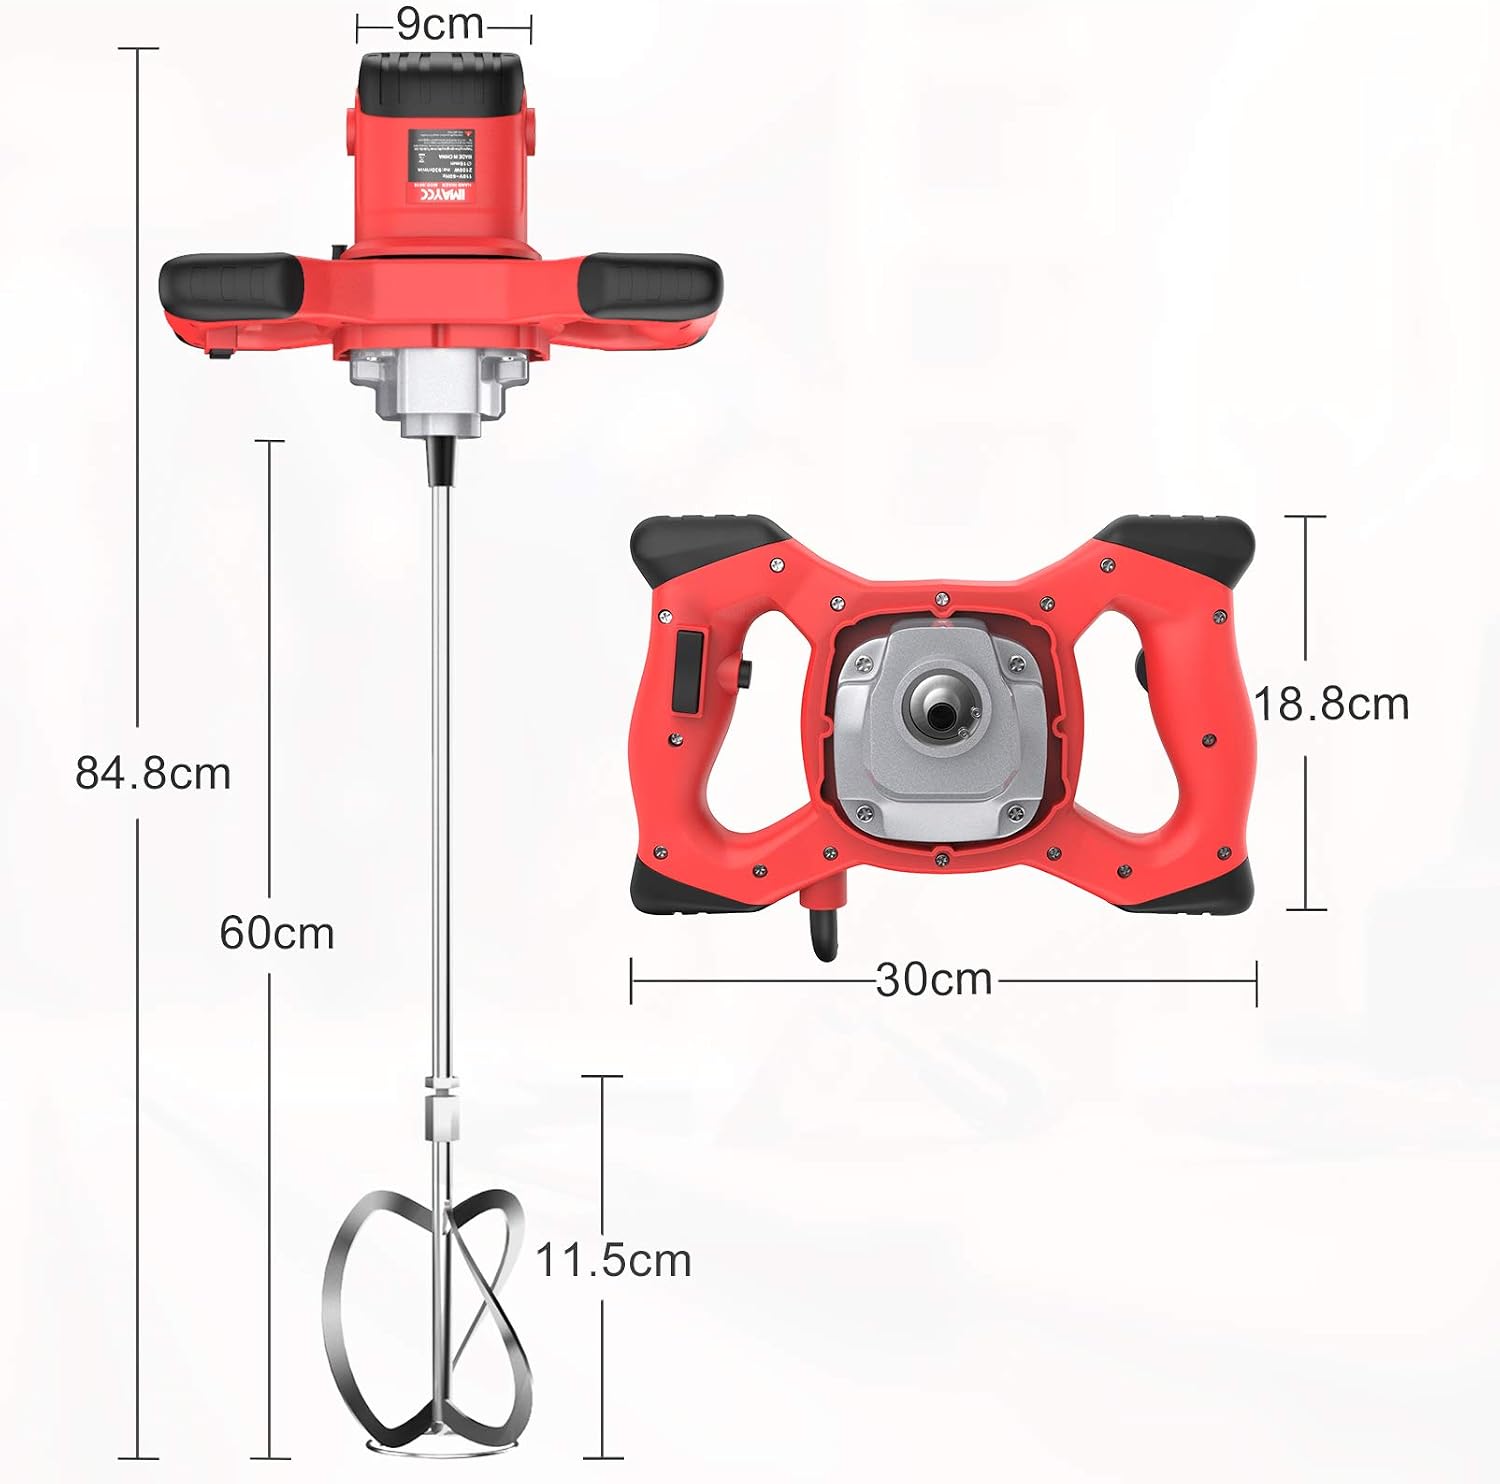
Diagram detailing the physical dimensions of the mixer and its paddle, providing measurements for the main unit and the mixing rod assembly.
9. Warranty and Support
IMAYCC products are manufactured to high-quality standards. For warranty information or technical support, please refer to the documentation included with your purchase or contact your retailer. Keep your proof of purchase for any warranty claims.