
1. Introduction
Thank you for choosing Brightown Solar String Lights. This manual provides essential information for the safe and efficient use of your new solar-powered outdoor lighting. These lights are designed to enhance your outdoor spaces with warm white illumination, featuring 8 lighting modes and automatic operation. Please read these instructions carefully before installation and retain for future reference.
2. Safety Information
- General Safety: Keep the product away from open flames, heat sources, and flammable materials.
- Water Resistance: The lights are IP65 waterproof, meaning they are protected against dust and low-pressure water jets. Do not submerge the solar panel or string lights in water.
- Installation: Ensure the solar panel is placed in a location that receives at least 6-8 hours of direct sunlight daily for optimal charging. Avoid placing it under shade or near strong light sources at night, as this may interfere with the automatic on/off function.
- Children and Pets: Keep the product out of reach of small children and pets to prevent accidental ingestion or entanglement.
- Maintenance: Do not attempt to modify or repair the product yourself. Contact customer support if issues arise.
3. Packing List
Each Brightown Solar String Light 2-pack includes the following components:
- Solar String Lights (2 sets, 60 LEDs each, 36.5 ft each)
- Solar Panel with integrated control unit (2 units)
- Ground Stake (2 sets, consisting of a rod and a spike)
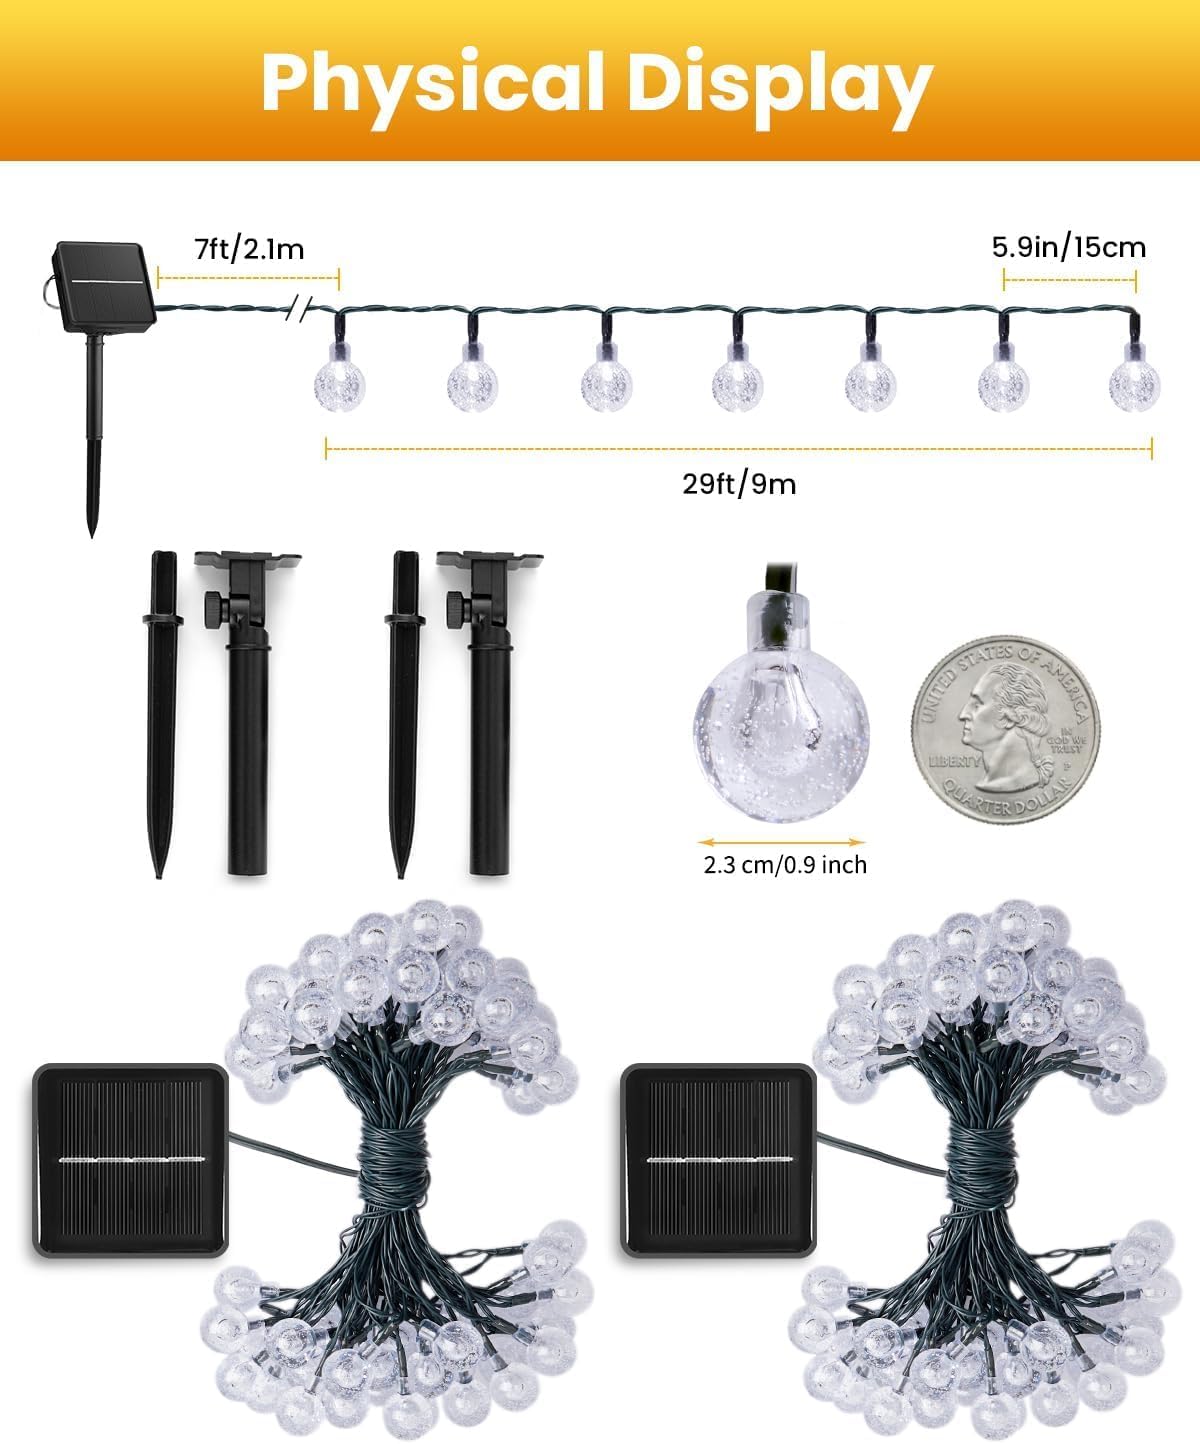
Figure 1: Physical Display and Components. This image illustrates the two sets of solar string lights, each with its solar panel and ground stake. Dimensions for the string length (29ft/9m of lights, 7ft/2.1m lead wire) and individual bulb size (2.3cm/0.9 inch) are provided.
4. Setup & Installation
Follow these steps to set up your Brightown Solar String Lights:
- Activate the Solar Panel: Locate the ON/OFF button on the back of the solar panel and press it to turn the unit ON.
- Remove Protective Film: Carefully peel off the transparent protective film from the surface of the solar panel to ensure maximum sunlight absorption.
- Assemble the Ground Stake: Connect the two parts of the ground stake (rod and spike) firmly together.
- Attach Solar Panel to Stake: Securely attach the solar panel unit to the assembled ground stake.
- Position the Solar Panel: Insert the ground stake into soft ground in a location that receives at least 6-8 hours of direct sunlight daily. Adjust the angle of the solar panel to face the sun directly for optimal charging efficiency.
- Arrange the String Lights: Unwind the string lights and arrange them in your desired outdoor area, such as along a fence, patio railing, or around plants.

Figure 2: Solar Panel Assembly and Placement. This image visually guides you through the simple assembly of the solar panel and its optimal placement for charging.
Video 1: Brightown Solar String Lights Overview. This official seller video demonstrates the product's features, including the packing list, setup steps, and various lighting modes. It provides a visual guide to the installation process.
5. Operating Instructions
Your Brightown Solar String Lights are designed for ease of use with automatic functions and multiple lighting options.
Automatic On/Off Function
The integrated light sensor automatically turns the lights on at dusk and off at dawn. Ensure the solar panel is not obstructed and is not exposed to other light sources at night, which could prevent the lights from activating.
Charging
The solar panel charges the built-in battery during the day. For optimal performance, allow the solar panel to receive at least 6-8 hours of direct sunlight. A full charge typically provides 8-10 hours of illumination at night.
Lighting Modes
The control unit on the solar panel features a "MODE" button to cycle through 8 different lighting effects. A built-in memory chip will save your last selected mode for convenience.
- Combination
- In Waves
- Sequential
- Slo-Glo
- Chasing/Flash
- Slow Fade
- Twinkle/Flash
- Steady On
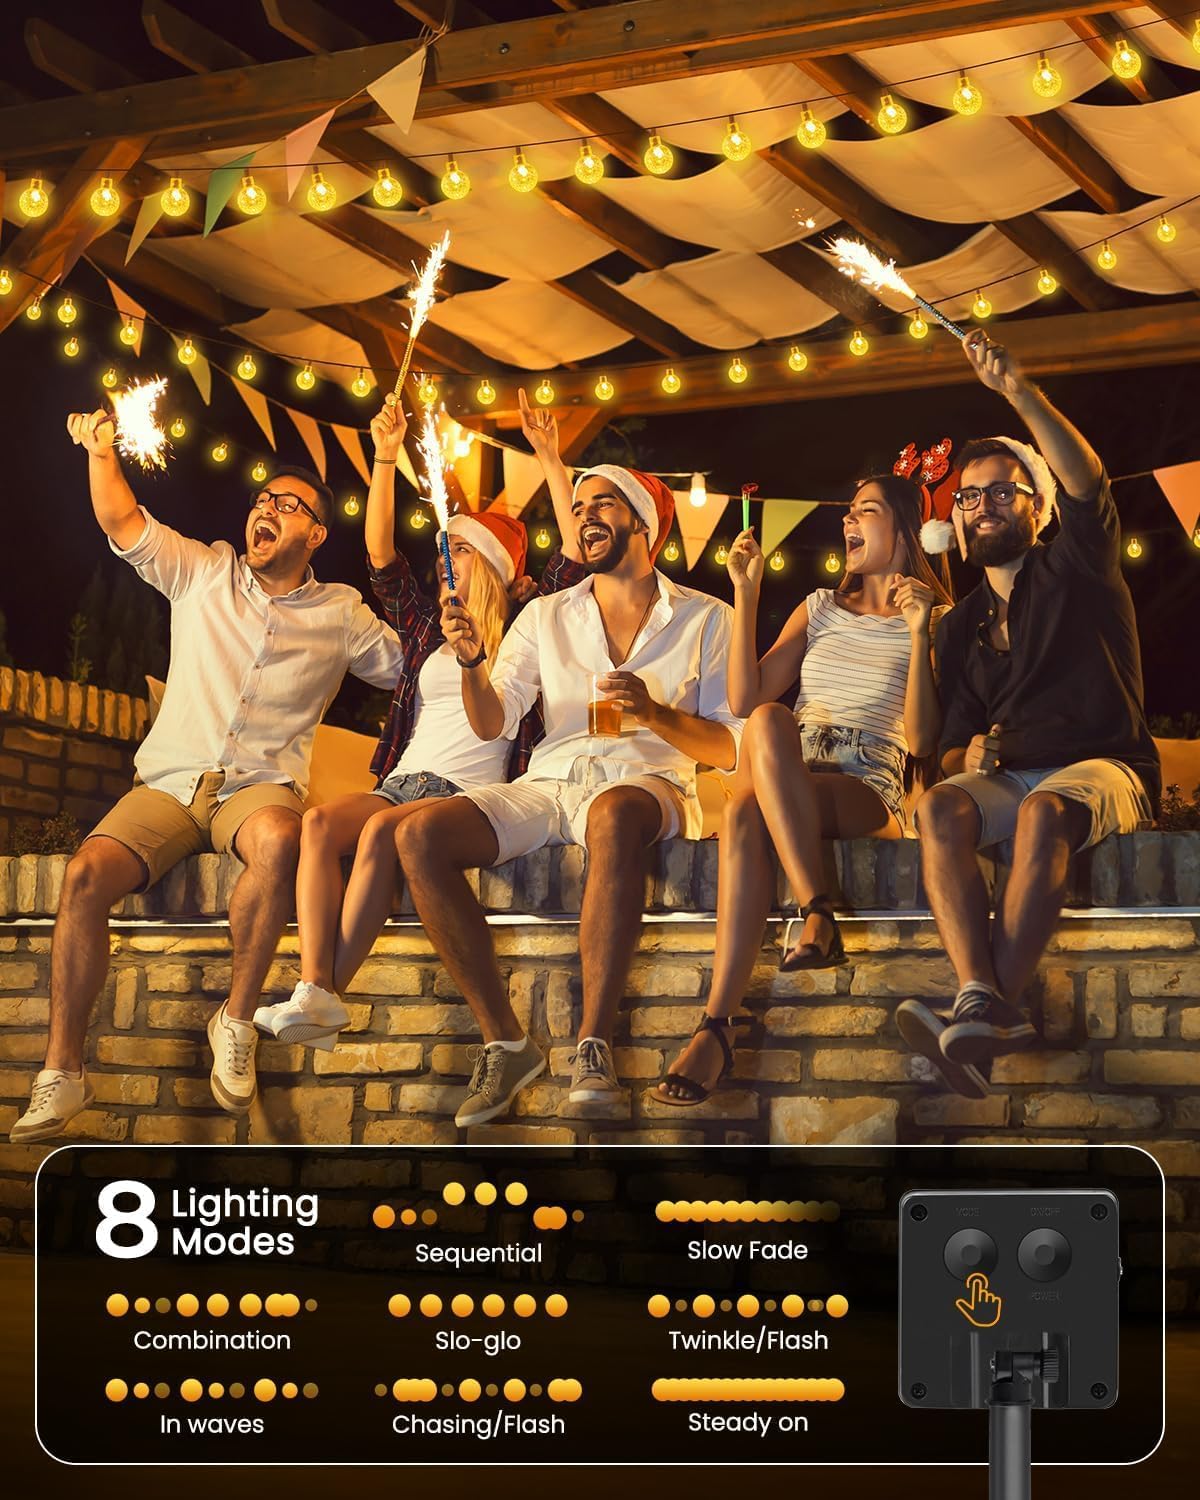
Figure 3: 8 Lighting Modes. This image displays the various lighting patterns available and highlights the control buttons on the solar panel for mode selection.
6. Maintenance
Proper maintenance ensures the longevity and optimal performance of your solar string lights.
- Solar Panel Cleaning: Regularly wipe the solar panel with a soft, damp cloth to remove dust, dirt, or debris. A clean panel ensures efficient charging.
- Placement Check: Periodically check that the solar panel remains in a location with direct sunlight and is not becoming shaded by growing plants or new obstructions.
- Winter Care: While the lights are weather-resistant, during prolonged periods of extreme cold or heavy snow, it is advisable to bring the solar panel indoors to protect the battery and extend its lifespan.
- Storage: If storing the lights for an extended period, ensure the solar panel is fully charged before storage. Store in a cool, dry place.

Figure 4: IP65 Waterproof Design. The lights are designed to withstand outdoor elements, including rain and splashes, ensuring durability.
7. Troubleshooting
If your solar string lights are not functioning as expected, try the following solutions:
| Problem | Possible Cause | Solution |
|---|---|---|
| Lights do not turn on at night. | 1. Solar panel is not turned ON. 2. Insufficient sunlight for charging. 3. Solar panel is dirty. 4. Strong ambient light at night. | 1. Press the "ON/OFF" button on the back of the solar panel. 2. Relocate the solar panel to an area receiving 6-8 hours of direct sunlight. 3. Clean the solar panel surface. 4. Ensure the solar panel is not near streetlights or other bright light sources at night. |
| Lights turn on but only for a short period. | 1. Insufficient charging during the day. 2. Battery capacity reduced over time. | 1. Ensure the solar panel receives maximum direct sunlight for 6-8 hours. 2. Consider replacing the internal rechargeable battery if performance significantly degrades after extended use (consult customer support). |
| Some bulbs are not lighting up. | Loose connection or damaged LED. | Gently check connections. If an individual LED is damaged, the string may still function due to parallel wiring. Contact customer support if multiple LEDs fail. |
8. Specifications
| Feature | Detail |
|---|---|
| Model Number | DY-SB-1-500 |
| Brand | Brightown |
| Quantity | 2 String Light Sets |
| LED Count | 60 LEDs per string (120 LEDs total) |
| String Length | 36.5 feet (11.1 meters) per string |
| Light Color | Warm White (2700 Kelvin) |
| Power Source | Solar Powered |
| Waterproof Rating | IP65 |
| Control Type | Button Control (ON/OFF, MODE) |
| Lighting Modes | 8 modes (Combination, In Waves, Sequential, Slo-Glo, Chasing/Flash, Slow Fade, Twinkle/Flash, Steady On) |
| Battery | Built-in 800mAh rechargeable battery (per solar panel) |
| Material | Plastic |
| Usage Environment | Outdoor |
| UPC | 701555958012 |
9. Warranty & Support
Brightown provides a 1-year manufacturer's warranty for this product, covering defects in materials and workmanship from the date of purchase.
For warranty claims, technical support, or any questions regarding your Brightown Solar String Lights, please contact our customer service team:
- Email: support@brightown.com
- Website: www.brightown.com
Please have your model number (DY-SB-1-500) and proof of purchase ready when contacting support.