1. Introduction
Thank you for choosing the ITOTIN Wall Mount Boom Arm. This product is designed to provide a stable and adjustable mounting solution for various equipment such as cameras, lights, or microphones, optimizing your workspace or studio setup. Please read this manual thoroughly before installation and use to ensure proper operation and safety.
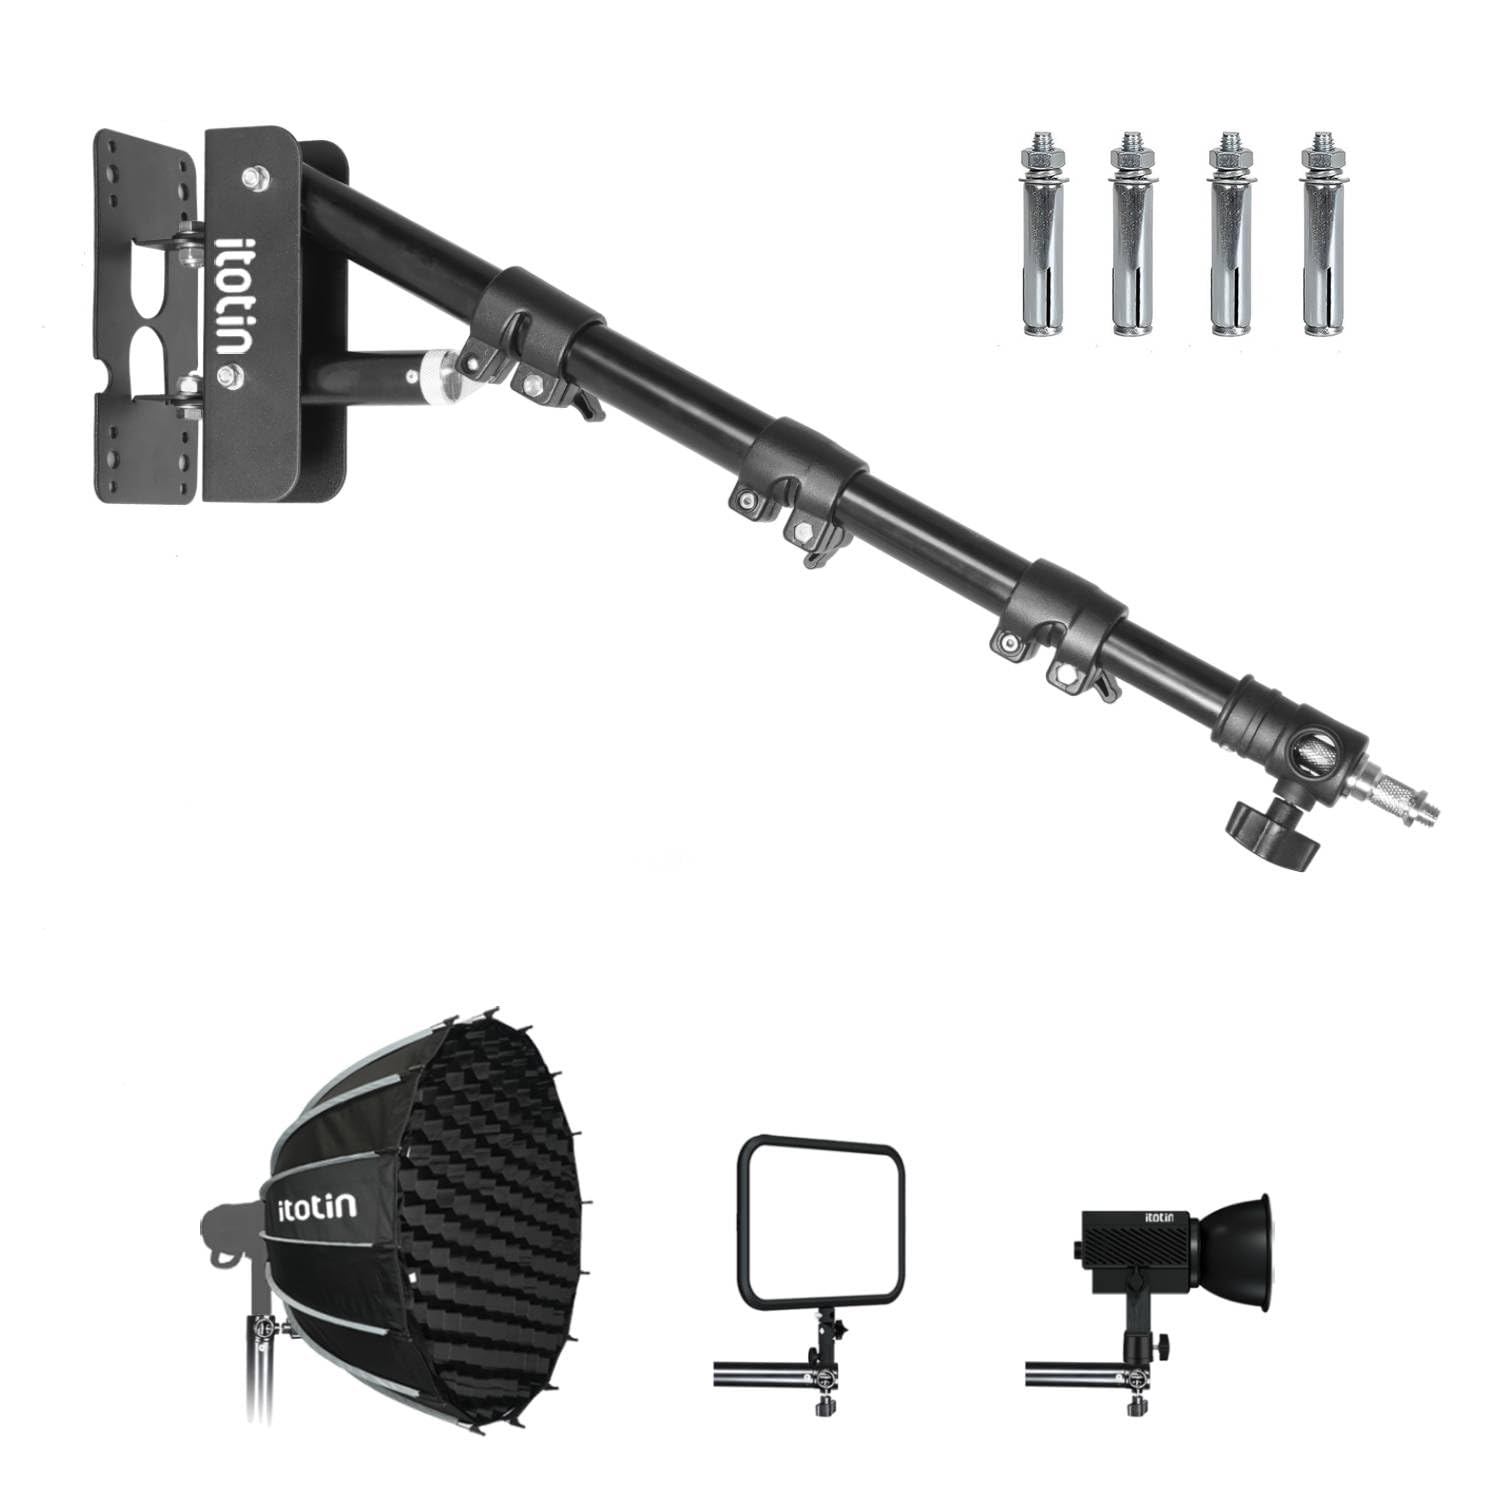
Figure 1: ITOTIN Wall Mount Boom Arm. This image shows the overall design of the boom arm, including its wall mounting plate and adjustable sections.
2. Safety Information
Please observe the following safety precautions to prevent injury or damage to the product:
- Ensure the mounting surface is structurally sound and capable of supporting the weight of the boom arm and any attached equipment.
- Use appropriate tools and hardware for installation. If unsure, consult a qualified professional.
- Do not exceed the maximum weight capacity of the boom arm. Overloading can lead to instability and damage.
- Regularly check all fasteners and connections to ensure they are secure.
- Keep hands and fingers clear of moving parts during adjustment to avoid pinching.
- Do not modify the product in any way. Unauthorized modifications may void the warranty and pose safety risks.
3. Package Contents
Carefully unpack the box and ensure all items are present. If any parts are missing or damaged, please contact customer support.
- ITOTIN Wall Mount Boom Arm
- Mounting Hardware (screws, anchors)
- User Manual (this document)
- Note: Specific hardware may vary.
4. Setup and Installation
Follow these steps for secure installation of your Wall Mount Boom Arm:
- Choose a Mounting Location: Select a sturdy wall surface (e.g., wood stud, concrete) capable of supporting the boom arm and your equipment. Avoid drywall without proper anchoring.
- Mark Drilling Points: Hold the boom arm's mounting plate against the wall at the desired height and orientation. Use a pencil to mark the positions for drilling holes. Ensure the plate is level.
- Drill Pilot Holes: Using an appropriate drill bit size for your mounting hardware (refer to hardware instructions), drill pilot holes at the marked points.
- Insert Wall Anchors (if necessary): If mounting into drywall or masonry, insert the provided wall anchors into the pilot holes until flush with the wall surface.
- Attach Mounting Plate: Align the mounting plate with the drilled holes. Insert the screws through the plate and into the wall/anchors. Tighten securely with a screwdriver or wrench. Do not overtighten.
- Attach Boom Arm: Connect the boom arm assembly to the mounted plate. Ensure all connections are firm and secure.
- Test Stability: Before attaching any equipment, gently test the boom arm's stability by applying light pressure. Ensure there is no wobbling or looseness.
5. Operating Instructions
The ITOTIN Wall Mount Boom Arm offers flexible positioning for your gear:
- Attaching Equipment: Secure your camera, light, or microphone to the boom arm's mounting stud. Ensure it is tightened firmly to prevent accidental detachment.
- Adjusting Arm Length: Loosen the locking knobs on the telescopic sections of the boom arm. Extend or retract the arm to the desired length, then tighten the knobs securely.
- Adjusting Angle and Rotation: The boom arm features pivot points that allow for horizontal and vertical adjustments. Loosen the corresponding locking mechanisms, position the arm as needed, and then re-tighten to lock it in place.
- Cable Management: Utilize any integrated cable clips or ties to neatly route cables along the boom arm, preventing tangles and ensuring a clean setup.
6. Maintenance
To ensure the longevity and optimal performance of your boom arm:
- Cleaning: Wipe the boom arm with a soft, dry cloth. Avoid abrasive cleaners or solvents that could damage the finish.
- Inspections: Periodically check all screws, bolts, and locking mechanisms for tightness. Re-tighten if any looseness is detected.
- Lubrication: If any moving parts become stiff, a small amount of silicone-based lubricant can be applied to pivot points, avoiding contact with locking surfaces.
7. Troubleshooting
| Problem | Possible Cause | Solution |
|---|---|---|
| Boom arm feels unstable after installation. | Loose mounting screws; inadequate wall support; overloaded. | Ensure all mounting screws are securely tightened. Verify the wall can support the weight. Reduce the load on the boom arm. |
| Boom arm sections do not hold position. | Locking knobs are not tightened sufficiently. | Firmly tighten all locking knobs after adjusting the arm to the desired position. |
| Difficulty adjusting arm movement. | Locking mechanisms are too tight; lack of lubrication. | Loosen locking mechanisms before attempting to adjust. Apply a small amount of silicone lubricant to pivot points if movement is stiff. |
8. Specifications
- Model: Wall Mount Boom Arm
- Brand: ITOTIN
- ASIN: B08Y6KJ1SL
- Package Dimensions: 7.32 x 3.62 x 1.77 inches
- Item Weight: 9.6 ounces
- Manufacturer: ITOTIN
- Date First Available: April 23, 2021
- Note: Specifications are subject to change without notice.
9. Warranty and Support
ITOTIN products are manufactured to high-quality standards. For information regarding warranty coverage, technical support, or replacement parts, please contact ITOTIN customer service through the retailer where the product was purchased or visit the official ITOTIN website. Please retain your proof of purchase for warranty claims.
Customer Support: Refer to your purchase platform for contact details.