MISINI S059
CADA Technology S059 Power Supply Function Kit User Manual
Model: S059-003 | Brand: MISINI
Introduction
This user manual provides detailed instructions for the CADA Technology S059 Power Supply Function Kit. This kit is designed to enhance technology vehicles and includes essential components such as motors, LED lights, a battery box, and a 2.4GHz remote control. Please read this manual thoroughly before use to ensure proper operation and longevity of your product.
Package Contents

The CADA Technology S059 Power Supply Function Kit includes the following items:
- 1 x 3.7V Lithium Battery
- 1 x 2.4GHz Remote Control
- 1 x 80cm White Round USB Charging Cable
- 1 x L-shaped Motor (L-Motor Pro)
- 1 x M-shaped Motor (M-Motor Pro)
- 1 x Power Steering Motor (Steering Motor Pro)
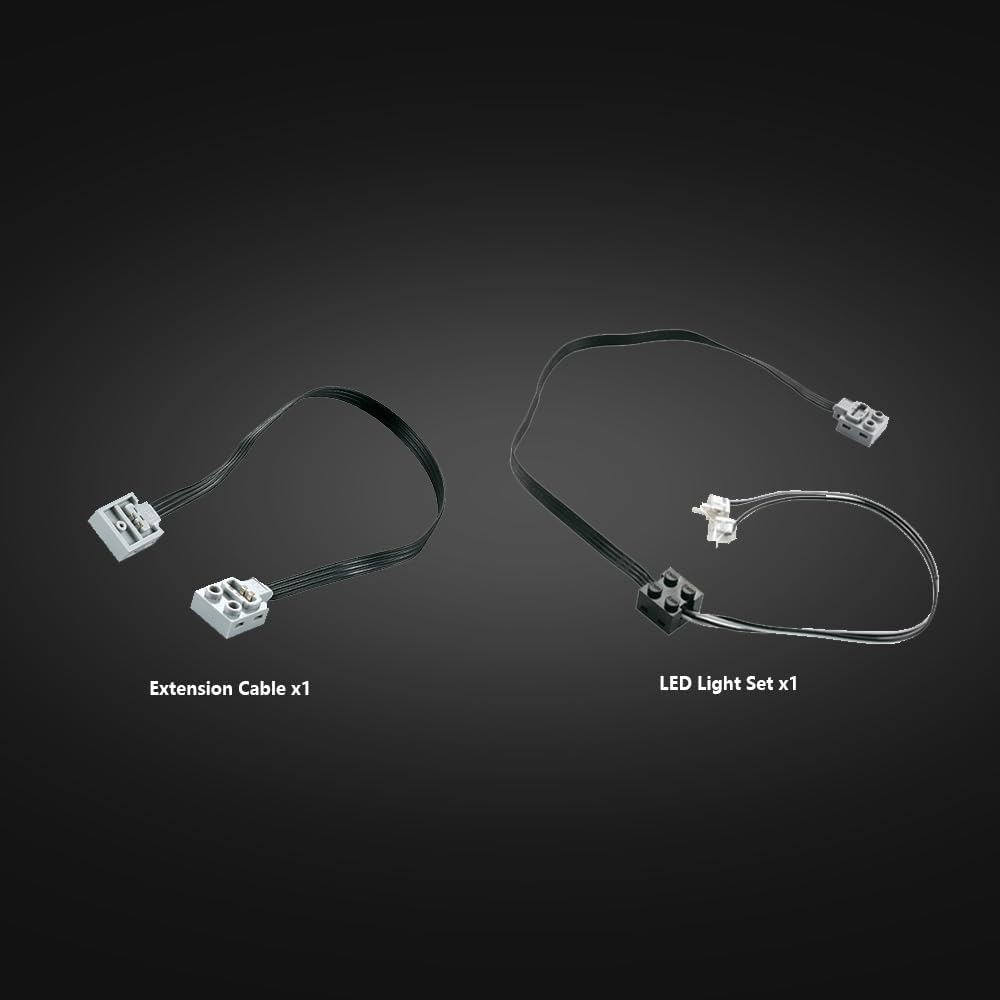
- 1 x Plug Extension Cable
- 1 x LED Light Group

Components Overview
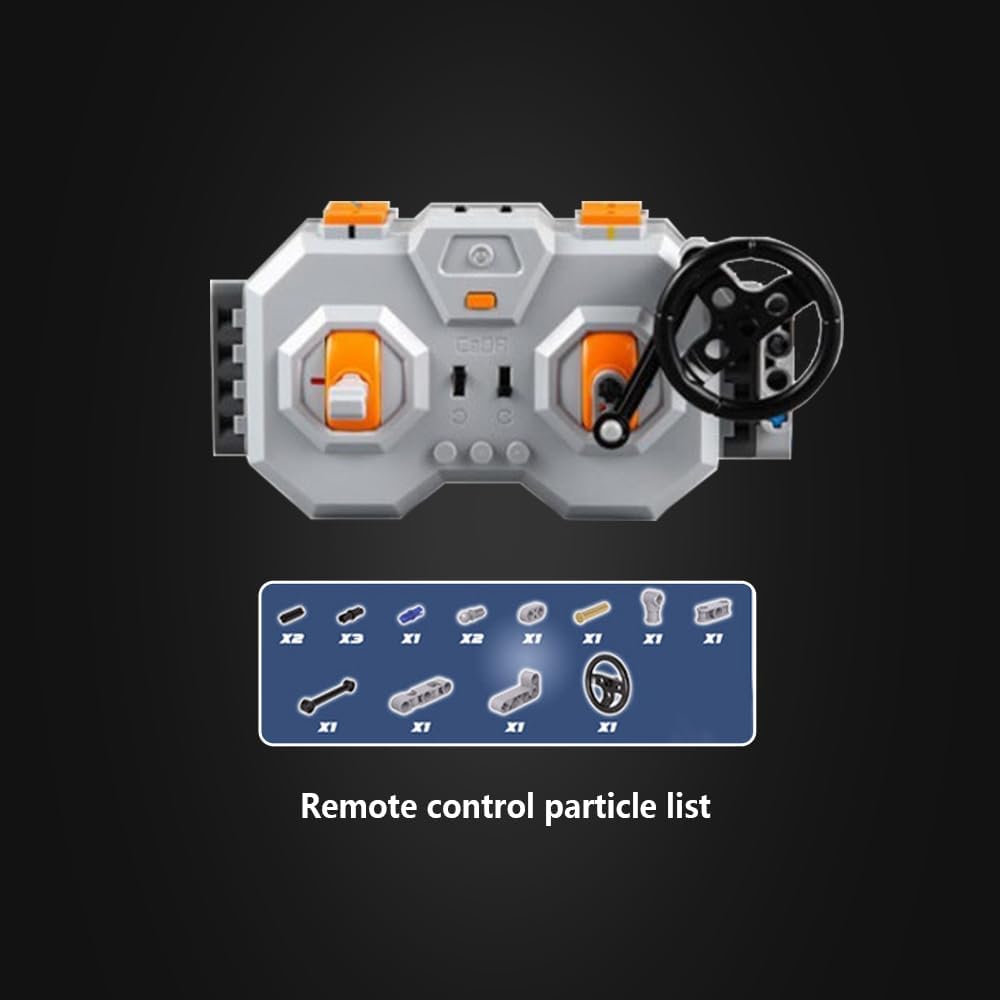
2.4GHz Remote Control

The 2.4GHz remote control allows for precise command of your technology vehicle. It features a 2.4GHz interference-free system with a range of up to 30 meters. Key functions include:
- Power Switch: Turns the remote control on/off.
- Indicator Light: Shows the status of the remote control.
- Forward and Backward Controls: For vehicle movement.
- Driving Steering: For directional control.
- Reverse Switch: For reversing movement.
Motors
The kit includes three types of motors for various functions:
- L-Motor Pro: Provides strong power for driving functions.
- M-Motor Pro: Offers balanced power and speed for general functions.
- Steering Motor Pro: Specifically designed for precise steering control.


LED Light Group and Extension Cable
The LED light group provides illumination for your model, and the extension cable allows for flexible placement of components.
Setup
Battery Charging
The kit includes a 3.7V Lithium battery (500mAh 7.4V, rechargeable). Before first use, fully charge the battery using the provided 80cm white round USB charging cable.
- Connect the small end of the USB charging cable to the charging port on the battery box.
- Connect the larger end of the USB charging cable to a standard USB power adapter (not included) or a computer USB port.
- The indicator light on the battery box will show charging status (refer to battery box specific instructions if available, otherwise general).
- Once fully charged, disconnect the cable.
Connecting Components
Connect the motors, LED light group, and extension cable to the 2.4G Rechargeable Battery Box according to your model's design. Ensure all connections are secure.
- Identify the ports on the 2.4G Rechargeable Battery Box.
- Plug the cables from the L-Motor Pro, M-Motor Pro, and Steering Motor Pro into the appropriate motor ports on the battery box.
- Connect the LED Light Group cable to an available port.
- Use the Extension Cable if additional length is required for any component connection.
- Ensure all plugs are fully inserted to establish a proper connection.
Operating Instructions
Pairing the Remote Control
To operate your model, the remote control must be paired with the battery box.
- Ensure the battery box is powered on.
- Turn on the 2.4GHz Remote Control using its power switch.
- The indicator light on both the remote control and battery box should indicate a successful connection (e.g., solid light). Refer to specific model instructions for pairing sequence if needed.
Controlling Your Model
Once paired, use the remote control to operate the connected motors and lights.
- Use the Forward and Backward controls to move the vehicle.
- Utilize the Driving Steering control for directional changes.
- The Reverse Switch can be used for specific reversing actions.
- The LED lights can be controlled via the remote if your model supports this function.
For specific control schemes, refer to the building instructions of your CADA Technology vehicle model (e.g., C61045W, C61007W, C61016W, C61018W, C61019W, C61020W).
Maintenance
- Cleaning: Use a soft, dry cloth to clean the components. Do not use water or cleaning agents.
- Storage: Store the kit in a cool, dry place away from direct sunlight and extreme temperatures.
- Battery Care: For long-term storage, charge the Lithium battery to approximately 50% capacity. Do not fully discharge the battery before storing.
- Connection Check: Periodically check all cable connections for looseness or damage.
Troubleshooting
| Problem | Possible Cause | Solution |
|---|---|---|
| Motors not responding. | Battery low or not charged; Remote control not paired; Loose connections; Motor malfunction. | Charge the battery; Re-pair the remote control; Check all cable connections; If problem persists, motor may be faulty. |
| Remote control not turning on. | Remote control battery low/dead. | Replace batteries in the remote control (if applicable, or ensure it's charged if rechargeable). |
| LED lights not working. | Loose connection; Damaged LED group. | Check the connection of the LED light group to the battery box; Inspect the LED group for visible damage. |
| Short operating time. | Battery not fully charged; Battery degradation. | Ensure battery is fully charged before use; Consider replacing the battery if it no longer holds a charge. |
Specifications
- Model Number: S059-003
- Battery Type: 3.7V Lithium Ion (500mAh 7.4V, rechargeable)
- Remote Control Frequency: 2.4GHz
- Remote Control Range: Up to 30 meters
- Charging Cable: 80cm USB charging cable
- Included Motors: L-Motor Pro, M-Motor Pro, Steering Motor Pro
- LED Light Cable Length: 53cm
- Item Weight: Approximately 14 ounces (397 grams)
- Package Dimensions: 9.49 x 6.57 x 2.01 inches (24.1 x 16.7 x 5.1 cm)
- Applicable Models: C61045W, C61007W, C61016W, C61018W, C61019W, C61020W, etc.

Warranty and Support
For warranty information or technical support, please contact MISINI customer service through the retailer where the product was purchased. Please retain your proof of purchase for any warranty claims.
Ask a question about this manual
Ask about setup, troubleshooting, compatibility, parts, safety, or missing instructions. Manuals+ will review the question and use this page’s manual context to help answer it.