1. Introduction
This manual provides comprehensive instructions for the installation, operation, and maintenance of the Fruhdi Power Recliner Mulin Motor Actuator ML8 ML8-205B1 Replacement Kit. This kit is designed to replace specific motor actuators in electric sofas, massage chairs, and seat beds. Please read this manual thoroughly before installation and use to ensure proper function and safety.
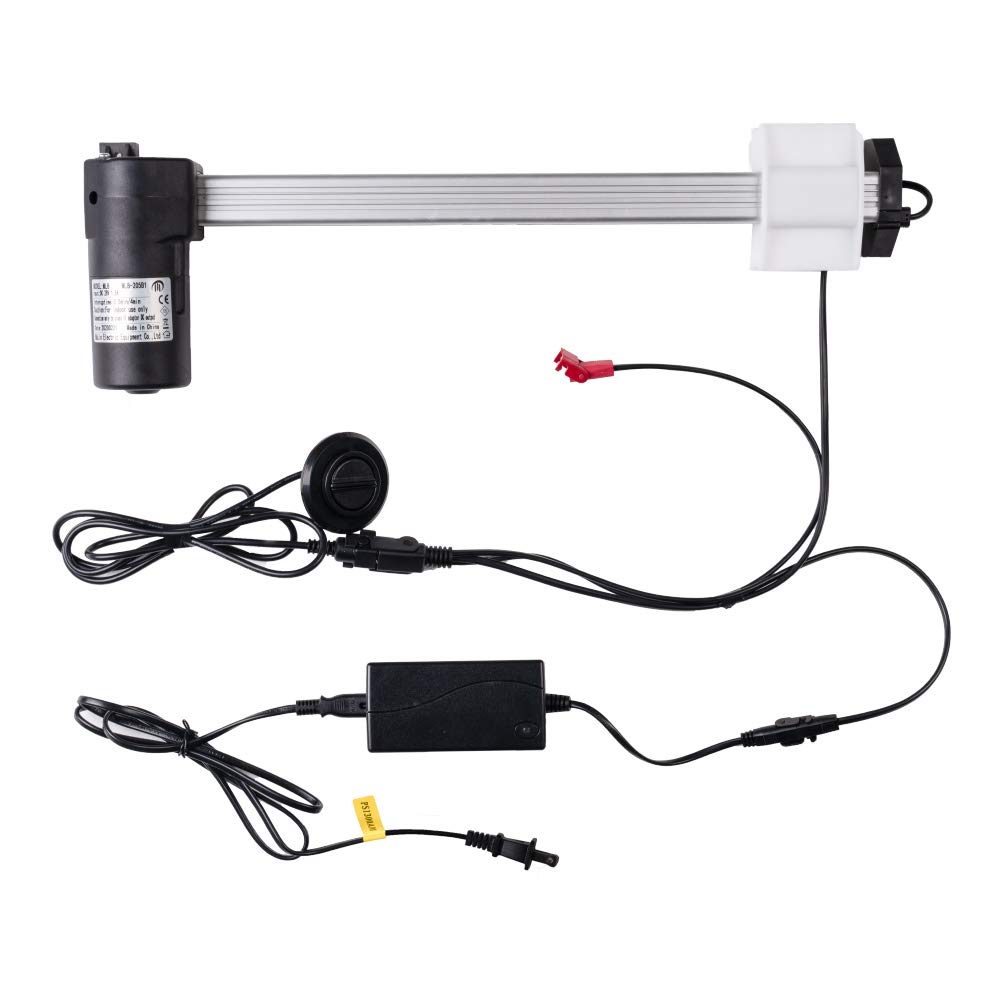
Image 1.1: Mulin ML8-205B1 Motor Actuator. This image displays a close-up of the motor actuator, highlighting the product label with model number ML8-205B1 and technical specifications.
2. Safety Information
WARNING: This product is intended for use by adults only. Always troubleshoot the existing switch, remote, or power supply before installing this replacement kit. Keep away from children and pets. Do not use if any component is damaged. Unplug the power cord from the wall outlet when the recliner is not in use or during maintenance. Always follow the manufacturer's instructions for safe operation and assembly of your recliner. This product is not intended as a permanent replacement for a broken chair mechanism if the underlying issue is not the motor. If in doubt, consult a professional technician.
3. Package Contents
The Fruhdi Power Recliner Mulin Motor Actuator ML8 ML8-205B1 Replacement Kit includes the following components:
- 1x Mulin Recliner Motor Actuator Replacement Model ML8 ML8-205B1
- 1x Mulin Round 2 Button 5 Pin Switch Remote Control
- 1x Mulin Lift Chair Power Supply Replacement Transformer Kit (Batteries not included)
- 1x Mulin 4.26 ft US Version AC Cable Cord

Image 3.1: Complete Replacement Kit. This image shows all items included in the package: the motor actuator, remote control, power supply, and AC power cord.
4. Specifications
Refer to the table below for detailed technical specifications of the Mulin Motor Actuator ML8 ML8-205B1:
| Feature | Specification |
|---|---|
| Model | ML8 ML8-205B1 |
| Stroke | 333mm / 13.11 inches |
| Minimum Install Dimension | 157mm / 6.18 inches |
| Max. Load | 800N |
| Speed | 36mm/s |
| Input | DC 28V 1.5A |
| Interruption Time | 0.5min/4min (0.5 minutes of operation, 4 minutes of rest) |
| Item Weight | 6.09 pounds (2.77 kg) |
| Package Dimensions | 25 x 7 x 4 inches |
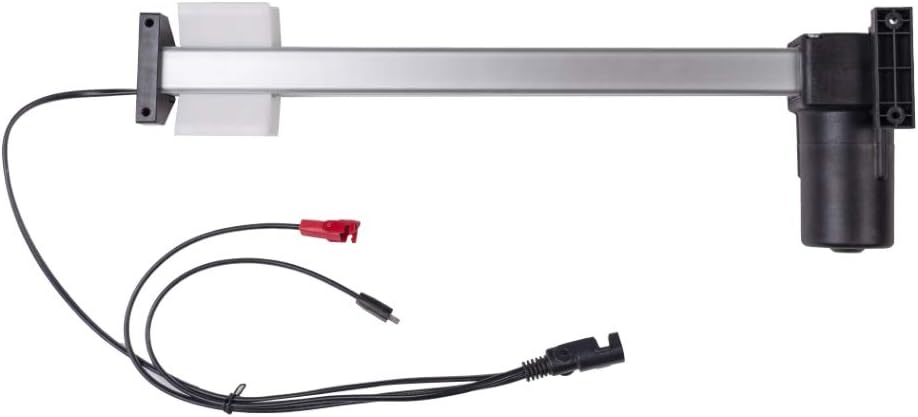
Image 4.1: Motor Actuator Extended. This image shows the motor actuator with its rod fully extended, illustrating its maximum stroke length.

Image 4.2: Motor Actuator Retracted. This image shows the motor actuator with its rod fully retracted, illustrating its minimum installation dimension.
5. Setup and Installation
Before proceeding with installation, ensure the recliner is unplugged from the power source. It is recommended to have assistance when handling heavy components or maneuvering the recliner.
5.1 Pre-Installation Checks
- Verify Compatibility: Confirm that your existing motor actuator's model number matches ML8 ML8-205B1 or is one of the compatible models (e.g., Okin jldq12.157.333k, Limoss 450917).
- Measure Length: Ensure the stroke length (333mm/13.11 inches) and minimum install dimension (157mm/6.18 inches) of the new motor match your recliner's requirements.
- Inspect Connectors: Check that the couplers and pin configurations on the new components match your recliner's wiring.
- Troubleshoot Existing Components: Before replacing the motor, ensure the issue is not with the existing switch/remote or power supply.
5.2 Motor Actuator Replacement
- Disconnect Power: Unplug the recliner from the wall outlet.
- Access Motor: Carefully turn the recliner over or tilt it to access the underside where the motor actuator is located.
- Disconnect Old Motor: Disconnect all cables from the old motor actuator, including the power cable and the hand control cable.
- Remove Old Motor: Unbolt or unclip the old motor actuator from its mounting brackets on the recliner frame. Note the orientation for correct installation of the new motor.
- Install New Motor: Position the new Mulin ML8 ML8-205B1 motor actuator into the mounting brackets. Secure it with the appropriate bolts or clips. Ensure it is firmly attached.
- Connect Cables: Connect the power cable and the hand control cable to the new motor actuator. Ensure all connections are secure.

Image 5.1: Motor Actuator with Cables. This image shows the motor actuator with its power and control cables connected, ready for installation into the recliner frame.
5.3 Power Supply and Remote Control Connection
- Connect Power Supply: Plug the power supply transformer into the motor actuator's power input cable.
- Connect AC Cable: Connect the 4.26 ft US Version AC Cable Cord to the power supply transformer.
- Connect Remote Control: Plug the 5-pin connector of the round 2-button remote control into the corresponding port on the motor actuator or power supply, depending on your recliner's wiring configuration.
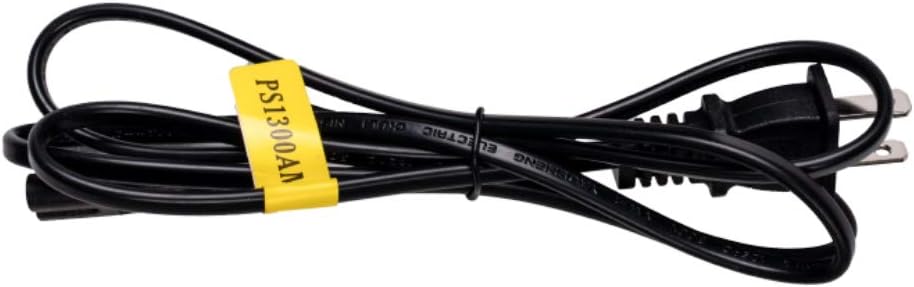
Image 5.2: Power Supply Transformer. This image displays the Mulin power supply unit, which converts AC power to DC power for the motor.

Image 5.3: AC Cable Cord. This image shows the standard US version AC power cord used to connect the power supply to a wall outlet.

Image 5.4: Remote Control. This image shows the round 2-button, 5-pin remote control used to operate the recliner's motor.
5.4 Final Checks
- Cable Management: Ensure all cables are routed safely and are not pinched or tangled.
- Test Functionality: Plug the recliner into a wall outlet and test the remote control to ensure the motor operates smoothly in both directions.
6. Operating Instructions
The recliner's movement is controlled by the included 2-button, 5-pin remote control.
- Extend Recliner: Press and hold the button typically marked with an 'up' arrow or a reclining chair icon to extend the footrest and recline the chair.
- Retract Recliner: Press and hold the button typically marked with a 'down' arrow or an upright chair icon to retract the footrest and return the chair to an upright position.
Release the button once the desired position is reached. Avoid continuous operation for extended periods to prevent motor overheating. Adhere to the interruption time specification of 0.5 minutes of operation followed by 4 minutes of rest.
7. Maintenance
Regular maintenance helps ensure the longevity and proper function of your recliner motor actuator.
- Cleaning: Keep the motor and surrounding areas free from dust and debris. Use a dry cloth to wipe down surfaces. Do not use liquid cleaners directly on the motor or electrical components.
- Cable Inspection: Periodically inspect all cables for signs of wear, fraying, or damage. Replace any damaged cables immediately.
- Mounting Hardware: Check that all bolts and fasteners securing the motor actuator to the recliner frame are tight. Tighten if necessary.
- Lubrication: The motor actuator is generally maintenance-free regarding lubrication. Do not apply lubricants unless specifically instructed by the manufacturer of your recliner.
- Power Disconnection: Unplug the recliner from the power outlet when not in use for extended periods or during any cleaning/maintenance.
8. Troubleshooting
If your recliner is not functioning correctly, perform the following troubleshooting steps:
| Problem | Possible Cause | Solution |
|---|---|---|
| Motor does not respond to remote. | No power, loose connection, faulty remote. | Ensure power cord is securely plugged into wall and power supply. Check all cable connections to the motor and remote. Test with a known working remote if available. |
| Motor makes noise but does not move. | Obstruction, motor overload, mechanical issue. | Check for any obstructions preventing movement. Ensure the recliner is not overloaded. Allow the motor to cool down if it has been operated continuously. If the issue persists, consult a professional. |
| Recliner moves slowly or intermittently. | Low power, worn motor, loose connection. | Verify the power supply is providing adequate voltage. Check all connections for looseness. If the motor is old, it may be nearing the end of its lifespan. |
| Power supply light is off. | No power from wall, faulty AC cable, faulty power supply. | Check wall outlet with another appliance. Ensure AC cable is fully inserted into the power supply and wall. Replace AC cable or power supply if suspected faulty. |
If these troubleshooting steps do not resolve the issue, it is recommended to contact a qualified technician or the product support for further assistance.
9. Warranty and Support
For information regarding warranty coverage or technical support for your Fruhdi Mulin Motor Actuator ML8 ML8-205B1 Replacement Kit, please refer to the documentation provided with your original purchase or contact the seller directly. Keep your purchase receipt as proof of purchase.