1. Introduction
This manual provides detailed instructions for the safe and proper installation, operation, and maintenance of your North Bayou Full Motion TV Wall Mount, Model 6222019301624. Please read all instructions carefully before assembly and use. Keep this manual for future reference.
Safety Information
- Weight Capacity: Do not exceed the maximum weight capacity of 17.2 kg (37.9 lbs). This mount is designed for televisions between 45 and 75 inches.
- Wall Type: Ensure the mounting surface can safely support the combined weight of the mount and your television. Suitable wall types include solid concrete, concrete block, and wood stud walls. Do not install on drywall alone.
- Professional Installation: If you are unsure about the installation process or the suitability of your wall, consult a qualified professional.
- Children: Keep children away from the installation area during assembly. Small parts may be a choking hazard.
2. Package Contents
Verify that all components are present and undamaged before proceeding with installation. If any parts are missing or defective, contact customer support.
- Wall Plate Assembly
- TV Bracket (VESA Plate)
- Mounting Hardware Kit (various screws, anchors, washers, spacers)
- Cable Management Clips
- Instruction Manual
3. Setup and Installation
Follow these steps carefully to ensure a secure installation.
3.1 Pre-Installation Checks
- TV Compatibility: Confirm your TV's VESA pattern (mounting hole distance) is compatible with the mount. This mount supports common VESA patterns.
- Weight: Ensure your TV's weight does not exceed 17.2 kg.
- Tools Required: Drill, stud finder (for wood studs), level, tape measure, pencil, Phillips head screwdriver, socket wrench.
3.2 Attaching the Wall Plate
- Determine the desired height and location for your TV. Use a stud finder to locate wood studs or ensure the concrete wall is suitable.
- Place the wall plate against the wall at the desired height and use a level to ensure it is perfectly horizontal. Mark the drilling points with a pencil.
- Drill pilot holes at the marked locations. For wood studs, use a 5.5mm drill bit. For concrete walls, use a 10mm masonry drill bit and insert concrete anchors.
- Secure the wall plate to the wall using the provided lag bolts and washers. Tighten firmly but do not overtighten.
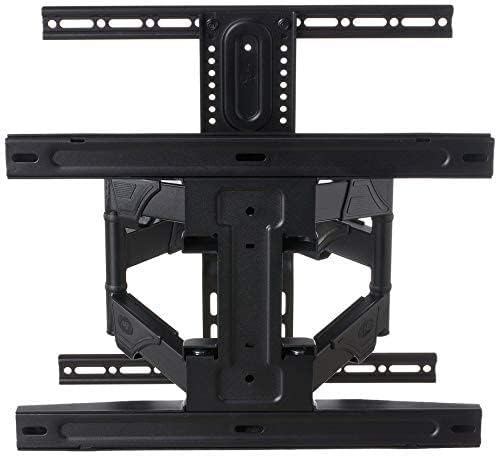
Figure 1: The TV wall mount in its folded position, illustrating the wall plate attachment points and the compact design of the articulating arms.
3.3 Attaching the TV Brackets to Your TV
- Carefully place your TV face down on a soft, clean surface to prevent screen damage.
- Identify the VESA mounting holes on the back of your TV.
- Select the appropriate screws, washers, and spacers from the hardware kit that fit your TV's mounting holes.
- Attach the TV brackets (VESA plate) to the back of your TV. Ensure the brackets are centered and securely fastened. Do not overtighten.

Figure 2: A detailed view of the VESA plate, highlighting the various mounting holes for different TV sizes and the mechanism for securing the TV to the mount.
3.4 Mounting the TV to the Wall Plate
- With assistance, carefully lift the TV with the attached brackets and hook them onto the wall plate.
- Ensure the TV is securely seated on the wall plate. Some mounts have safety screws or locking mechanisms; engage these if present.
- Perform a gentle tug test to confirm the TV is firmly attached to the wall mount.

Figure 3: The full motion TV wall mount extended, demonstrating its range of movement and robust construction, ready to hold a television.
4. Operating Instructions
This full-motion mount allows for flexible viewing angles.
4.1 Adjusting Tilt
To adjust the vertical tilt of your TV, loosen the tilt adjustment knobs or bolts on the TV brackets. Adjust the TV to the desired angle, then tighten the knobs/bolts to secure it in place.
4.2 Adjusting Swivel and Extension
Gently grasp the sides of your TV and move it horizontally to swivel left or right. The articulating arms allow you to extend the TV away from the wall or push it back closer to the wall. Move the TV slowly and smoothly to avoid sudden movements.
4.3 Cable Management
Utilize the integrated cable management clips or channels on the mount arms to route and secure your TV cables. This helps maintain a tidy appearance and prevents cables from getting snagged during adjustments.
5. Maintenance
Regular maintenance ensures the longevity and safe operation of your TV wall mount.
- Periodic Checks: Every 3-6 months, inspect all screws and bolts to ensure they are tight. Re-tighten if necessary.
- Cleaning: Wipe the mount with a soft, dry cloth. Avoid using abrasive cleaners or solvents that could damage the finish.
- Lubrication: The articulating joints are designed for smooth movement. If movement becomes stiff, a small amount of silicone-based lubricant can be applied to the pivot points.
6. Troubleshooting
Here are solutions to common issues you might encounter.
- TV is not level: Check the wall plate installation with a level. If the wall plate is level, adjust the fine-tuning level mechanism on the TV brackets if available, or slightly loosen the TV bracket screws, adjust, and re-tighten.
- Difficulty moving the TV: Ensure all adjustment knobs/bolts are sufficiently loosened for movement. If the mount feels stiff, apply a small amount of silicone lubricant to the pivot points.
- Mount feels loose: Immediately remove the TV from the mount. Re-check all wall plate and TV bracket connections. Ensure all screws are securely tightened and that the wall anchors (if used) are properly installed. Do not re-mount the TV until the issue is resolved.
7. Specifications
| Manufacturer | North Bayou |
| Model Number | 6222019301624 |
| Compatible TV Sizes | 45 - 75 inches |
| Maximum Weight Capacity | 17.2 kg (37.9 lbs) |
| Mount Type | Wall Mount |
| Movement Type | Full Motion (Swivel, Tilt, Extend) |
| Material | Reinforced Metal |
| Color | Black |
| Product Dimensions (folded) | Approx. 46.1 x 32.1 x 7.4 cm |
8. Warranty and Support
For warranty information or technical support, please refer to the product packaging or contact the manufacturer directly. Keep your purchase receipt as proof of purchase.