1. Introduction
This manual provides essential instructions for the assembly, operation, and maintenance of your VOLANTEXRC Ranger 2400 PNP (Plug-N-Play) RC Glider. The Ranger 2400 is designed for FPV (First Person View) flying and offers a stable flight experience with its large wingspan.
Important Note: This is a PNP version. A radio transmitter, receiver, flight battery, and battery charger are NOT INCLUDED and must be purchased separately to operate this aircraft.

This image illustrates that the Ranger 2400 PNP version does not include a remote control, battery, or charger. These components must be acquired separately.
2. Safety Information
Operating a remote control aircraft requires caution and adherence to safety guidelines. Failure to do so can result in injury or property damage.
- Always operate your RC glider in open areas, away from people, buildings, and obstacles.
- Ensure all components (motor, ESC, servos) are correctly connected and functioning before each flight.
- Verify the flight battery is fully charged and securely installed.
- Perform a range check of your radio system before the first flight of the day.
- Never fly near airports or restricted airspace.
- Adult supervision is recommended for younger operators.
3. Setup and Assembly
The Ranger 2400 features a user-friendly design for quick assembly.
3.1 Fuselage and Wing Assembly
The aircraft features an innovative unibody plastic fuselage, providing durability and lightweight protection. The wings attach using a 'Plug & Click' system.
- Carefully unpack all components.
- Align the main wings with the fuselage. Push the wings into place until the wing clips engage with an audible 'click'. Ensure both wings are securely fastened.
- Connect any necessary servo leads from the wings to the receiver in the fuselage.
- Attach the horizontal and vertical stabilizers to the tail section of the fuselage. Secure them using the provided hardware.

This image demonstrates the 'Plug & Click' easy wing mounting system, allowing for quick attachment and detachment of the wings.
3.2 Landing Gear Installation
The Ranger 2400 includes off-road landing gear for versatile take-offs and landings.
- Locate the slot on the underside of the fuselage for the landing gear.
- Insert the landing gear wire into the slot and secure it.
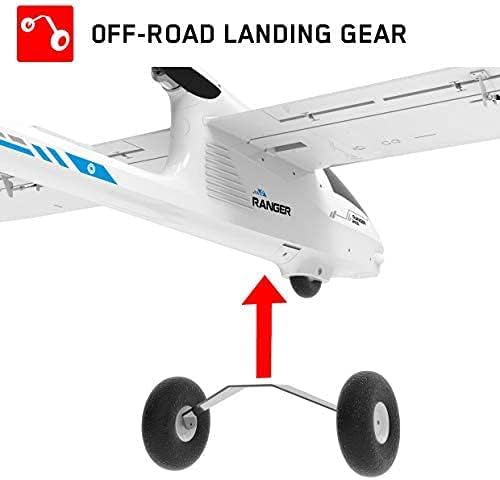
This image shows the off-road landing gear, designed for various terrain types, being attached to the aircraft's fuselage.
3.3 FPV Camera Mounting (Optional)
The Ranger 2400 is equipped with multiple camera mounting platforms for FPV systems.
- Identify the pre-cut holes and flat beds on the fuselage for camera installation.
- Mount your preferred FPV camera and video transmitter (not included) onto these platforms.
- Route the wiring neatly and securely, ensuring it does not interfere with control surfaces or propeller.

This image highlights the multiple camera mounting platforms available on the Ranger 2400 for FPV system deployment.
3.4 Component Installation (PNP)
As a PNP model, the Ranger 2400 comes with a servo, brushless motor, and brushless ESC pre-installed. You will need to install your own receiver, battery, and connect them.
- Install your chosen RC receiver into the designated compartment within the fuselage.
- Connect the ESC to the receiver's throttle channel and the servos to their respective channels (aileron, elevator, rudder).
- Insert your flight battery into the battery compartment.
3.5 Center of Gravity (CG) Adjustment
Proper CG is critical for stable flight. The recommended CG location is typically marked on the underside of the wings or specified in a separate quick-start guide. Adjust the battery position forward or backward to achieve the correct CG. If necessary, add small amounts of weight to the nose or tail to balance the aircraft.
4. Operating Instructions
4.1 Pre-Flight Checks
- Ensure all control surfaces (ailerons, elevator, rudder) move freely and in the correct direction relative to your transmitter inputs.
- Check that the propeller is securely attached and free from damage.
- Verify the flight battery is fully charged and secured within the aircraft.
- Confirm your transmitter battery is fully charged.
- Perform a final visual inspection for any loose parts or damage.
4.2 Take-off
For hand launch, hold the glider firmly, apply full throttle, and gently push it forward into the wind. For ground take-off, align the aircraft into the wind, slowly increase throttle, and apply slight up-elevator as speed increases to lift off.
4.3 Flight
The Ranger 2400 is a glider designed for stable flight. Use gentle control inputs. Practice basic maneuvers at a safe altitude before attempting more complex flying.
4.4 Landing
Approach into the wind. Reduce throttle and gradually decrease altitude. Maintain sufficient airspeed to keep control. Flare gently just above the ground by applying slight up-elevator to slow down and touch down smoothly.
5. Maintenance
Regular maintenance ensures the longevity and safe operation of your Ranger 2400.
- After Each Flight: Inspect the fuselage, wings, and tail for any damage (cracks, dents). Check propeller for nicks or bends. Ensure all control linkages are secure.
- Cleaning: Clean the aircraft with a soft, damp cloth. Avoid using harsh chemicals.
- Storage: Store the glider in a cool, dry place, away from direct sunlight and extreme temperatures. The 'Plug & Click' wing system allows for easy disassembly for compact storage.
- Battery Care: Follow the manufacturer's instructions for charging, discharging, and storing your flight batteries.
6. Troubleshooting
This section addresses common issues you might encounter.
| Problem | Possible Cause | Solution |
|---|---|---|
| Aircraft does not respond to controls. | Receiver not bound to transmitter; low battery in transmitter or aircraft; loose connections. | Ensure receiver is correctly bound; check battery levels; verify all connections are secure. |
| Motor cuts out at high speeds or does not run properly. | Faulty motor or ESC; insufficient battery discharge rate; loose motor connections. | Inspect motor and ESC for damage; ensure battery can supply required current; check motor wiring. Consider contacting support if issue persists. |
| Wings do not stay clipped. | Improper wing alignment; damaged wing clips. | Ensure wings are fully inserted and aligned until clips engage. Inspect clips for damage and replace if necessary. |
| Aircraft is unstable or difficult to control in flight. | Incorrect Center of Gravity (CG); control surfaces reversed; damaged airframe. | Re-check and adjust CG (refer to Section 3.5); verify control surface directions; inspect for structural damage. |
| Missing screws or confusing assembly instructions. | Packaging error; unclear diagram. | Refer to detailed diagrams if available. Contact customer support for missing parts. |
7. Specifications
Below are the technical specifications for the VOLANTEXRC Ranger 2400 PNP Glider:

This image provides a top-down and side view of the Ranger 2400, illustrating its wingspan and length dimensions.
- Brand Name: volantexrc
- Model Number (Manufacturer Part Number): 757-9 PNP-2
- Wingspan: 2400mm (94.5 inches)
- Length: 1143mm (45.0 inches)
- Flying Weight: 1050g
- Material Type: Foam, Plastic
- Included Components (PNP): Servo (9g *6pcs), Brushless motor (4023/1050KV), Brushless ESC (40A), FPV camera mounting platform, Wing clips for assembly
- Power Source: Battery Powered (Battery not included)
- Age Range Description: Adult (Manufacturer Minimum Age: 168 months)
- Operation Mode: Manual
- Additional Features: Portable
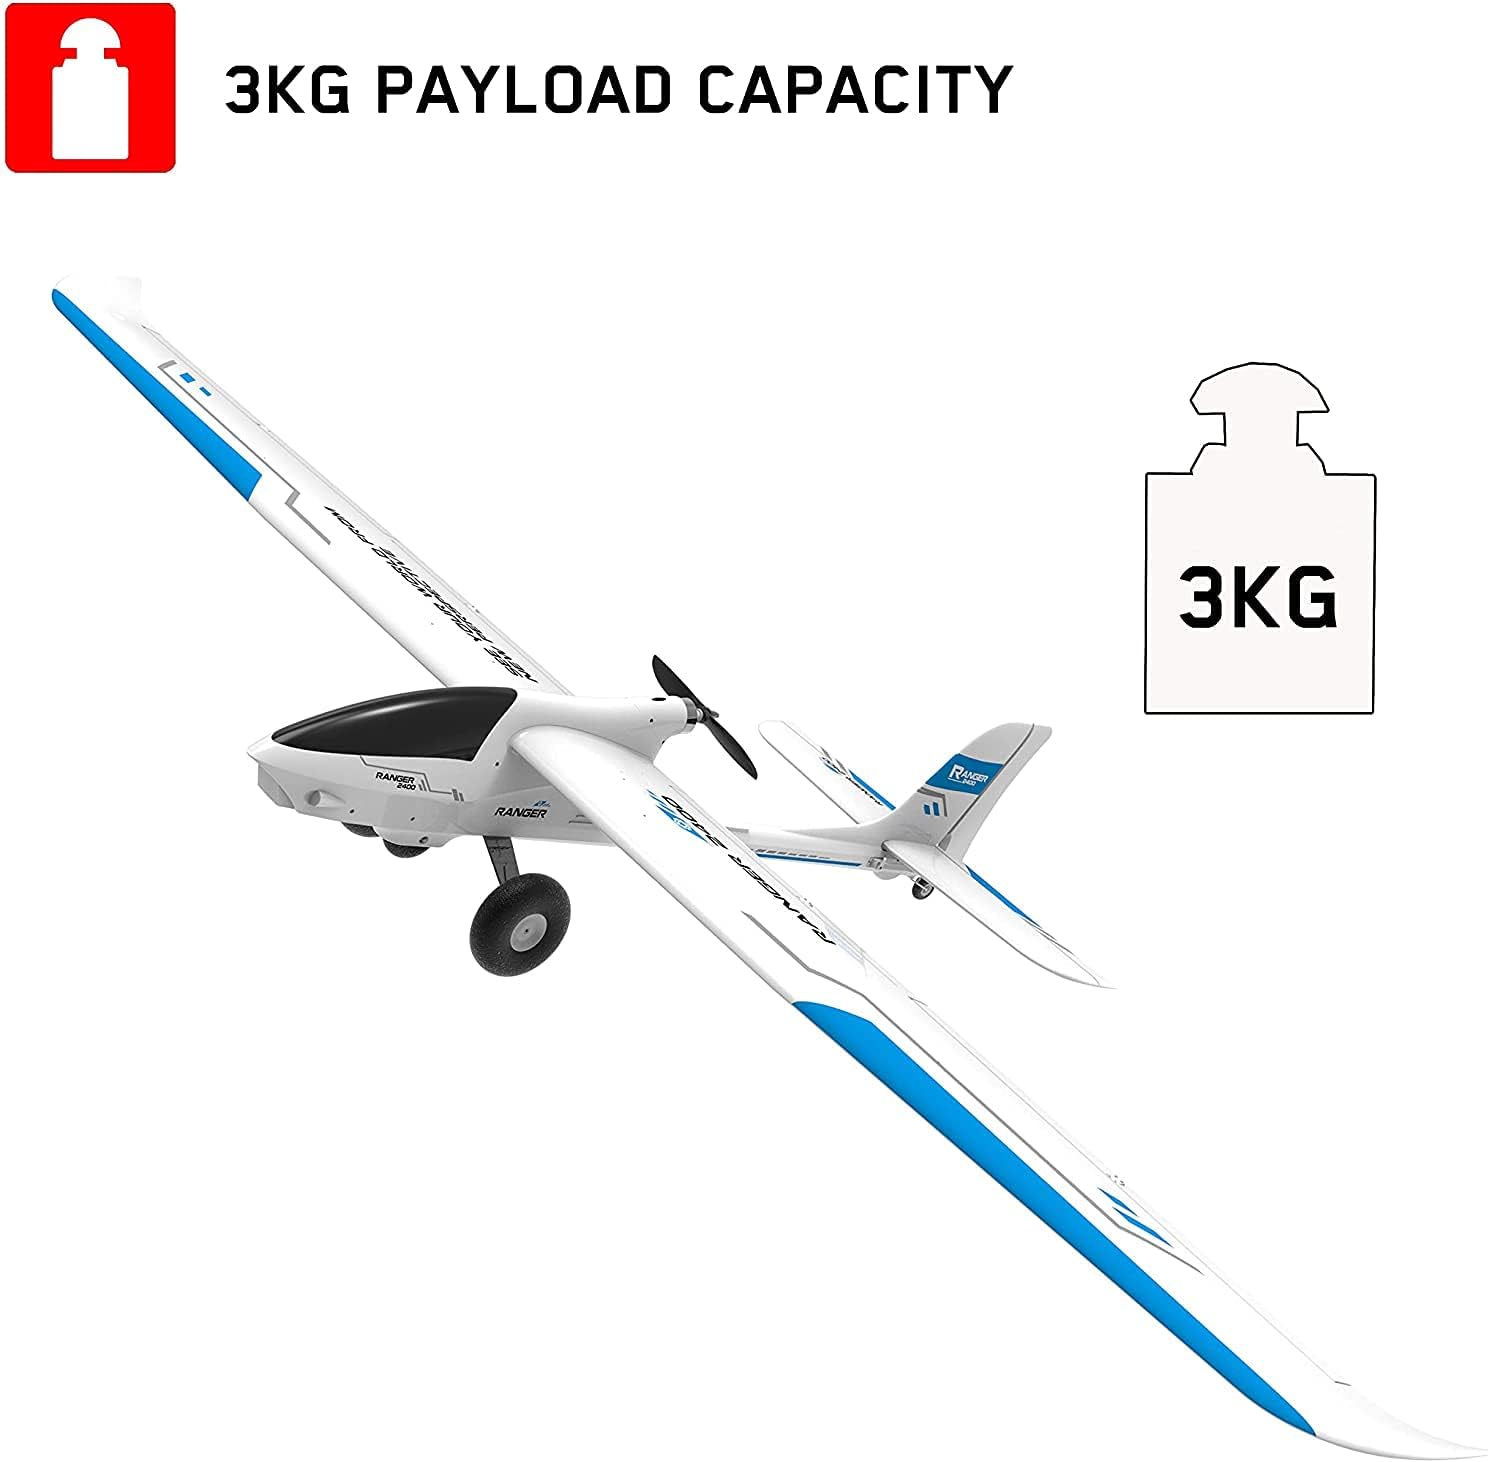
This image highlights the 3KG payload capacity of the Ranger 2400 glider, indicating its ability to carry additional equipment.
8. Warranty and Support
For warranty information, technical support, or replacement parts, please contact the manufacturer, EXHOBBY, or your retailer. Keep your purchase receipt as proof of purchase.
Manufacturer: EXHOBBY
For further assistance, please visit the official VOLANTEXRC website or contact their customer service.


