
Product Overview
Overland adventures require bringing plenty of gear along for the ride. Ensure that your Can-Am Defender has plenty of cargo space by installing Rough Country's rear cargo rack kit. This rock-solid rack design can provide storage to haul all of your gear without sacrificing your bed's space or dumping capabilities. Rough Country's cargo rack kit is constructed from heavy-duty steel and features a laser-cut mesh pattern that provides plenty of mounting points to secure your load. Since adventure doesn't end when the sun goes down, four flush mount led lights are an available option. Installation is easy; all needed hardware is included and only requires some minor drilling. The kit, coated in a durable black powder coat finish, will give you years of protection from the harshest elements.
This product is compatible with a wide range of Can-Am Defender models from 2016 to 2024, ensuring a precise fit for various configurations. It fits Defender HD10, HD9, HD8, and HD5 models, including XT, DPS, X mr, Limited, Lone Star, Mossy Oak Hunting Edition, and XT-P variants. It also supports Defender MAX and PRO versions, covering 6X6, 4-door, and specialized trim levels such as the MAX HD10 X mr, PRO HD10 XT, and Defender 6X6 XT. Whether you own a Defender from 2016 or the latest 2024 model, this product is designed for a seamless fit across multiple trims and configurations.

Image: The Rough Country Rear Cargo Rack with integrated LED lights, shown mounted on a Can-Am Defender.
What's Included
Please verify that all components are present before beginning installation:
- Full Size Cargo Rack Driver
- Side Gussets
- Floor Stiffener, End Cap
- 4x 2" Flush Mount LED Lights
- Mounting Hardware
Safety Information
RC recommends a certified technician install lift systems. Knowledge of RC instructions, suspension procedures and post install checks are required. If a system is installed without knowledge and expertise it may impact the integrity/operating safety.
Legal Disclaimer
It is ultimately the buyer's responsibility to have all bolts/nuts checked for tightness after the first 500 miles, and then again every 1,000 miles. Wheel alignment, steering system, suspension, and driveline systems must be inspected by a qualified, professional mechanic at least every 3,000 miles.
Installation Guide
This section outlines the general steps for installing your Rough Country Rear Cargo Rack. For detailed, step-by-step instructions and diagrams, please refer to the official Installation Manual PDF provided by Rough Country.
Download Official Installation Manual: Installation Manual (PDF)
Before You Begin
- Ensure you have all components listed in 'What's Included'.
- Gather necessary tools, which typically include drills, wrenches, and a measuring tape.
- Park the vehicle on a level surface and engage the parking brake for safety.
- Disconnect the vehicle's battery before beginning any electrical work related to the LED lights.
General Installation Steps
- Position the cargo rack components on the vehicle's rear bed area according to the manual's diagrams.
- Align mounting points and accurately mark drilling locations. Drilling is required for proper installation of this rack.
- Secure the rack using the provided hardware, ensuring all bolts are tightened to the specified torque values.
- Install the four 2-inch flush mount LED lights into their designated positions on the rack.
- Route the wiring for the LED lights, ensuring it is secured and protected from moving parts, heat sources, or sharp edges. Connect to a suitable power source (e.g., vehicle's electrical system, auxiliary switch).
- Verify all connections are secure and the rack is stable before operating the vehicle.

Image: Side profile of a Can-Am Defender showcasing the installed Rough Country Rear Cargo Rack.
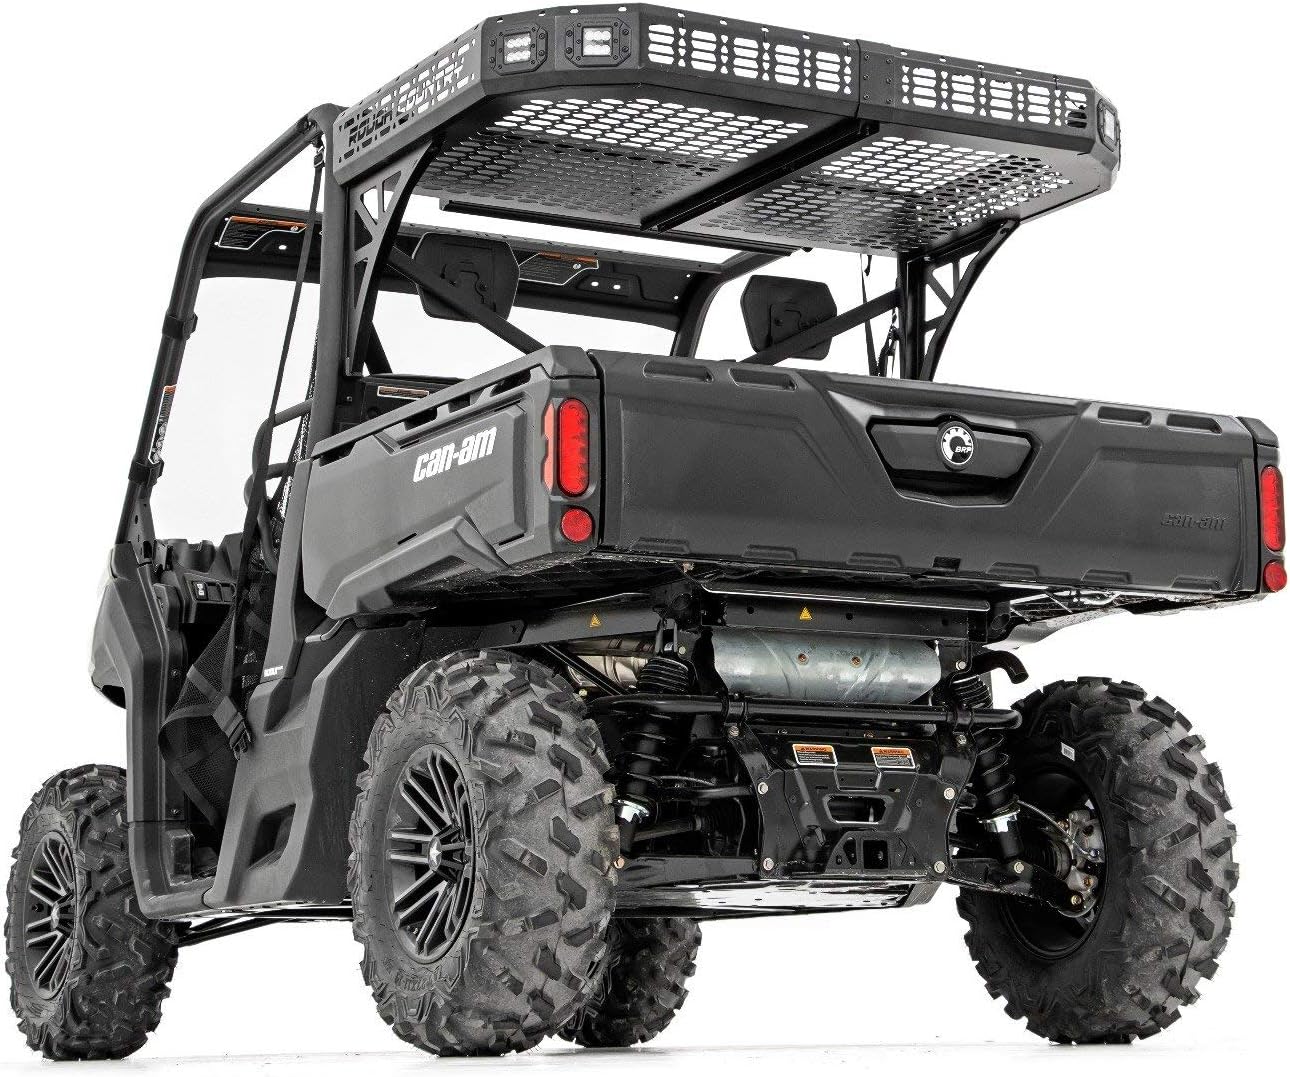
Image: Rear view of the Can-Am Defender, highlighting the cargo rack's position above the bed.

Image: Detailed view of the robust steel construction and laser-cut mesh pattern of the cargo rack.
Operation of LED Lights
The Rough Country Rear Cargo Rack includes four 2-inch flush mount LED lights designed to provide enhanced visibility for night rides and utility. These lights deliver 2880 lumens per pair and have an IP67 waterproof rating, ensuring durability in various weather conditions.
Once properly wired to your vehicle's electrical system, the LED lights can be activated via the connected switch (switch not included, typically wired to an auxiliary switch or a dedicated circuit). Ensure the lights are only used when necessary and in compliance with local regulations.
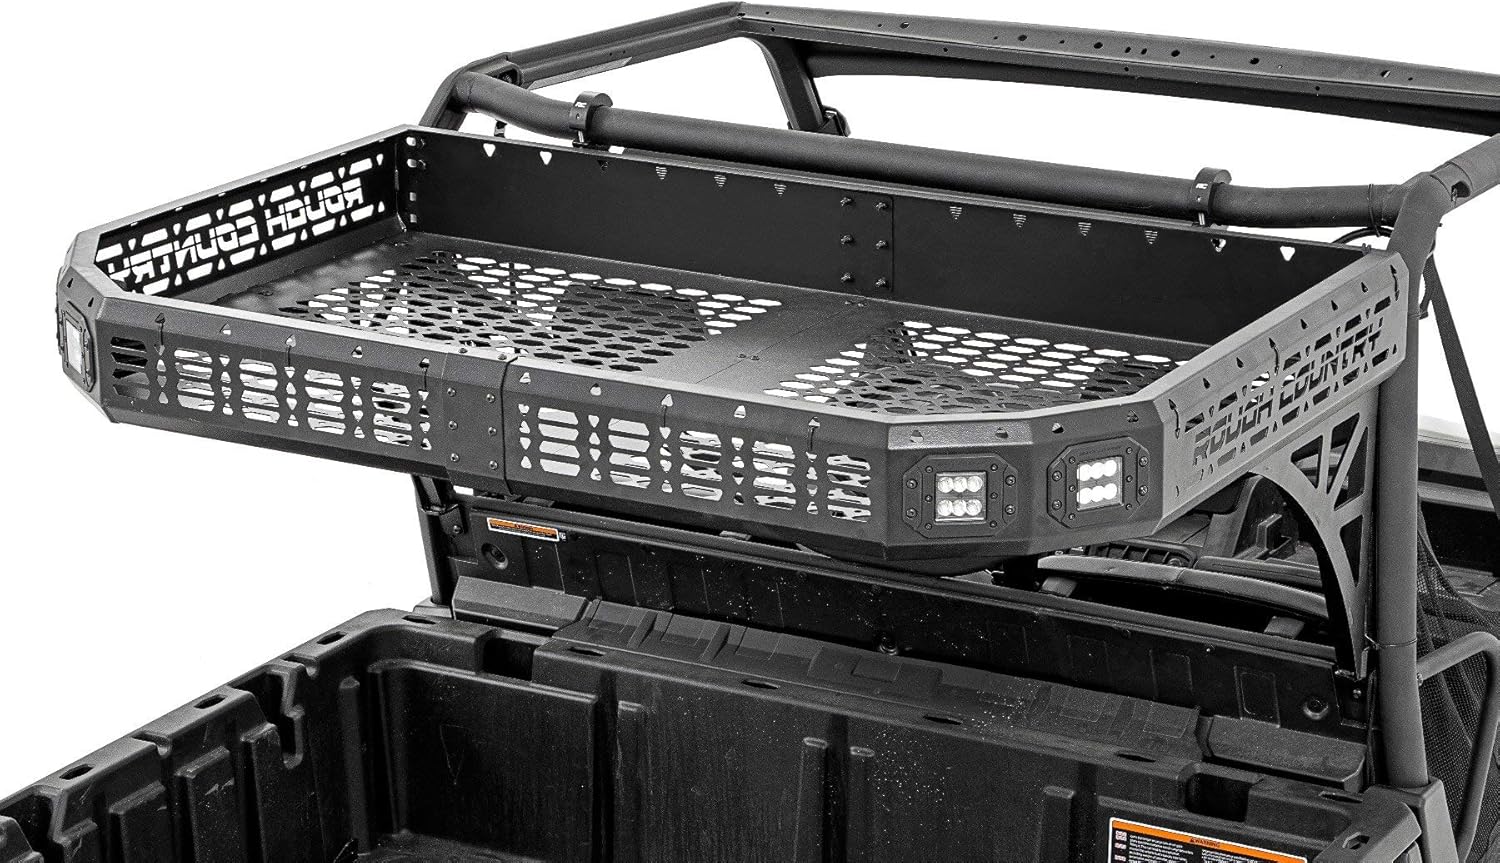
Image: Close-up view of the integrated 2-inch flush mount LED lights on the cargo rack.
Maintenance
- Fastener Inspection: Regularly inspect all mounting hardware for tightness, especially after the first 500 miles of use and then every 1,000 miles, as per the legal disclaimer.
- Finish Protection: Check the condition of the black powder coat finish. Touch up any chips or scratches promptly to prevent corrosion and maintain the rack's appearance.
- Wiring Check: Periodically inspect LED light wiring for any signs of wear, fraying, or loose connections. Ensure all wires are securely fastened and protected.
- Cleaning: Clean the cargo rack and LED lenses periodically with mild soap and water to remove dirt, mud, and debris. Avoid abrasive cleaners that could damage the finish or lenses.
Troubleshooting
- Rack Fitment Issues
- If the rack does not fit correctly, especially with full cab models, minor modifications or adjustments to brackets may be necessary. Refer to the installation manual for specific guidance or contact Rough Country support for assistance. Ensure all components are correctly oriented before drilling or making permanent modifications.
- LED Lights Not Functioning
- Check all electrical connections for proper seating and continuity. Verify the power source is active and the switch (if installed) is functioning correctly. Ensure no wires are pinched, cut, or damaged. If issues persist after checking connections, consult a qualified automotive electrician.
- Loose or Rattling Rack
- Re-check all mounting bolts and nuts for proper torque. Ensure the rack is securely fastened to the vehicle's frame or bed. Over time, vibrations from off-road use can loosen fasteners, requiring periodic re-tightening as part of routine maintenance.
Product Specifications
| Feature | Detail |
|---|---|
| Brand | Rough Country |
| Model | Rough Country Rear Cargo Rack w/LED Lights for 17-21 Defender - 97027 |
| Item Model Number | 92037 |
| Product Dimensions (L x W x H) | 40 x 29.75 x 12.75 inches |
| Item Weight | 65.8 pounds |
| Mounting Type | Bolt-on Roof Mount |
| Special Features | 2" LED lights are included. |
| Construction | Drilling Required: Yes |
| Color | Black |
| UPC | 843030197599 |
Warranty and Customer Support
This Rough Country Rear Cargo Rack is backed by a 3-Year warranty, ensuring peace of mind regarding its quality and durability.
For technical assistance, installation questions, or warranty claims, please contact Rough Country customer support. You can find their contact information on their official website or through your purchase platform. When contacting support, please have your product model number (97027 or 92037) and purchase details readily available.
As a reminder, it is recommended to have all bolts/nuts checked for tightness after the first 500 miles, and then again every 1,000 miles. Wheel alignment, steering system, suspension, and driveline systems must be inspected by a qualified, professional mechanic at least every 3,000 miles to ensure continued safe operation.

