1. Introduction
This manual provides essential instructions for the assembly, operation, and maintenance of your INTSUPERMAI Cobbler Sewing Machine. Designed for versatility, this machine is suitable for repairing various leather products and footwear, including cloth shoes, rubber shoes, leather shoes, sneakers, and high heels.
Constructed from durable aluminum with a smooth, lightweight finish, the machine features a spray molding technology for enhanced durability and gloss retention. Its humanized design allows for precise arm adjustments during sewing, ensuring efficient operation with low noise and a long service life.
2. Product Overview and Components
Familiarize yourself with the main components of your INTSUPERMAI Cobbler Sewing Machine.
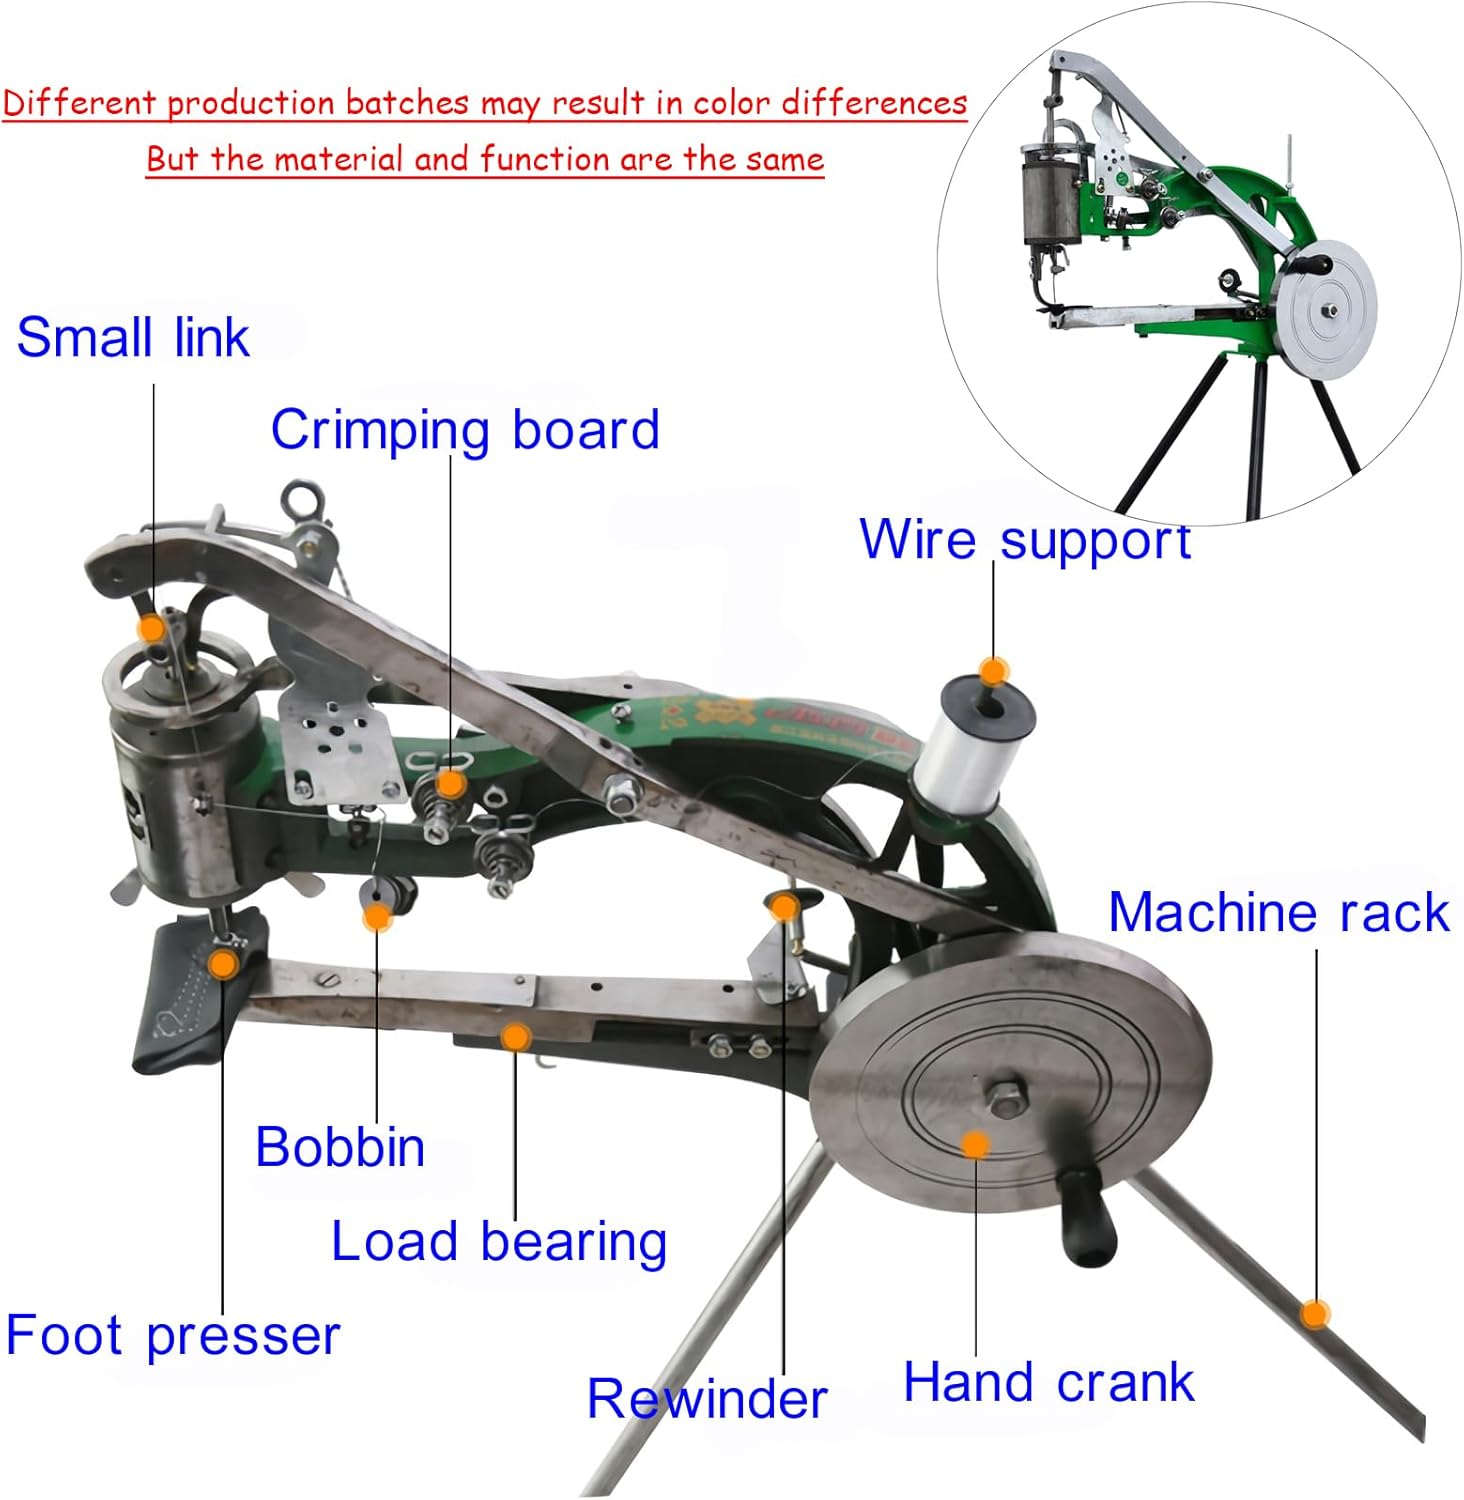
Figure 2.1: Overview of the Cobbler Sewing Machine with key components labeled, including the foot presser, bobbin, hand crank, and machine rack.

Figure 2.2: Detailed diagram illustrating various parts such as the Needle Bar Rocker Arm, Shuttle Bed, Thread Leaping, Hand Crank, and Bracket.

Figure 2.3: Front view with key dimensions: 13 inches (330mm) height, 10.2 inches (260mm) depth, 18.9 inches (480mm) length, and a hand plate diameter of 6.9 inches (175mm).

Figure 2.4: Side and front views showing overall dimensions: 24.4 inches (62cm) height and 18.5 inches (47cm) width at the base.
3. Setup Instructions
The INTSUPERMAI Cobbler Sewing Machine requires assembly. Follow these steps carefully for proper installation.
3.1 Machine Assembly
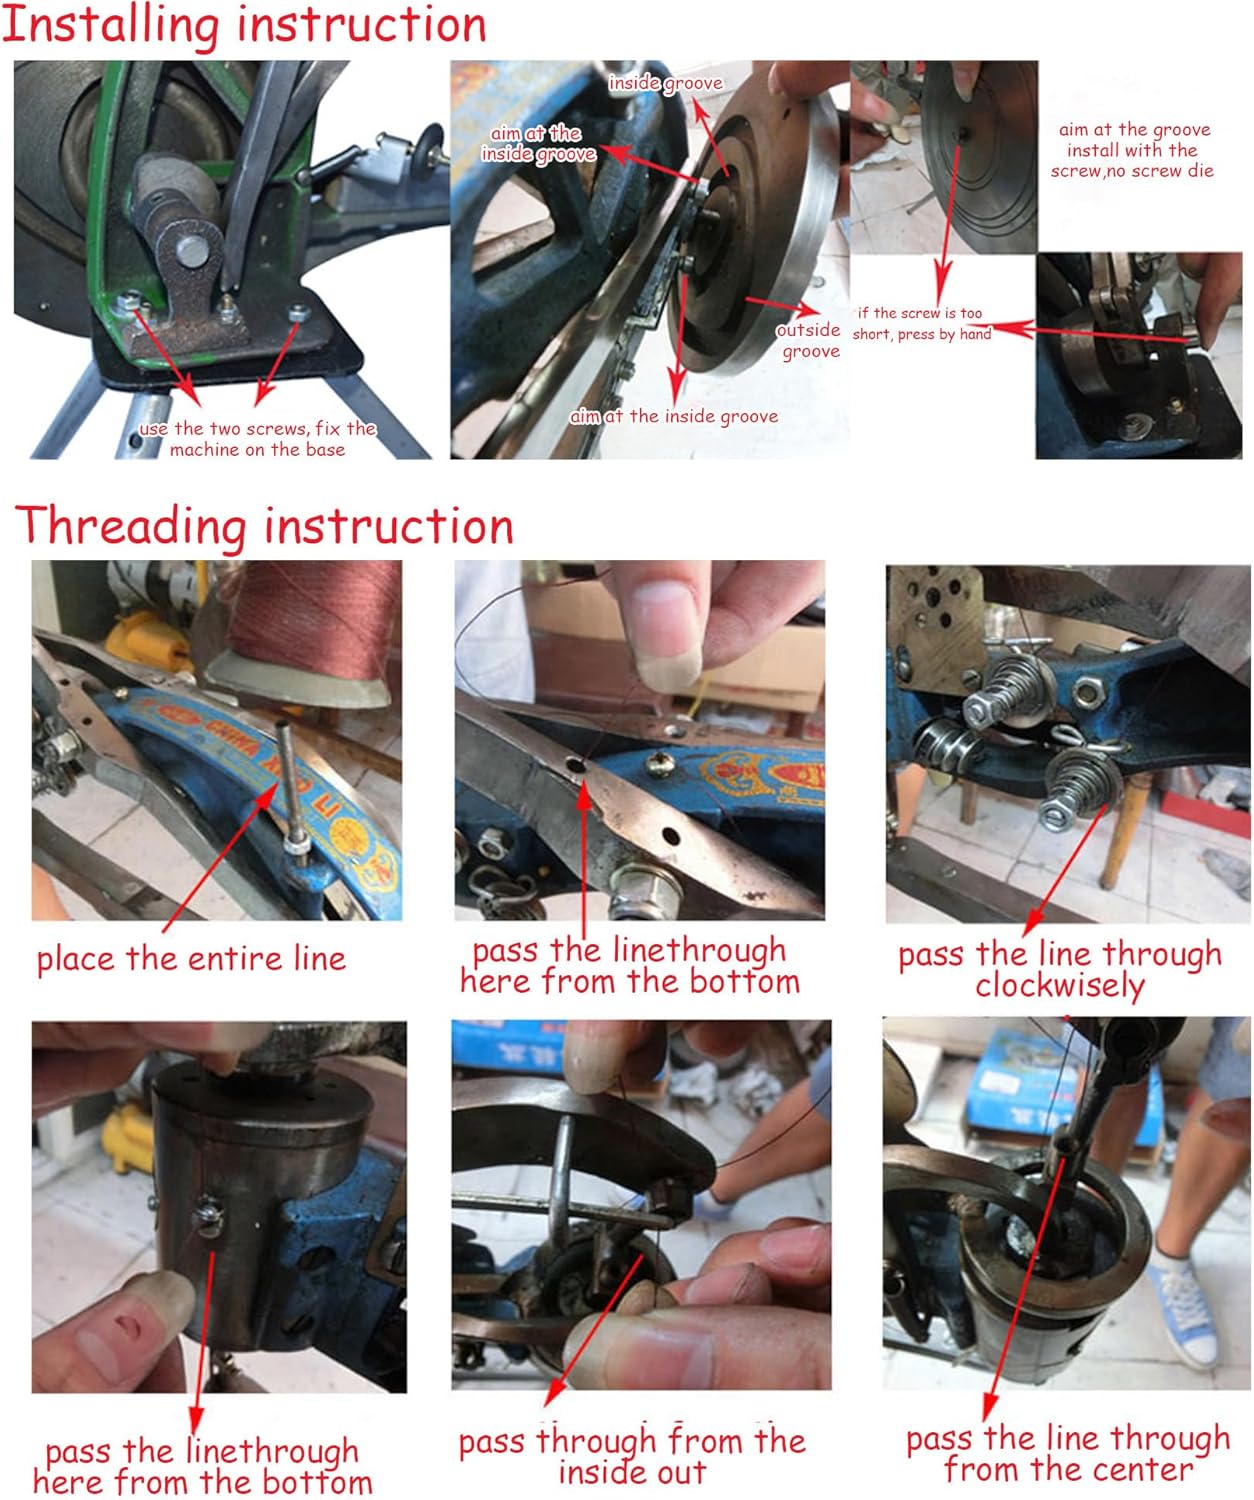
Figure 3.1: Visual guide for installing the machine. Secure the machine to its base using the two screws. Ensure the screw aligns with the inside groove. If the screw is too short, press by hand to engage.
3.2 Threading Instructions
Correct threading is crucial for proper machine operation and stitch quality.

Figure 3.2: Step-by-step threading guide. Pass the entire line, then pass the line from the bottom, through the line ball board clockwise, then from the bottom of the needle mechanism, from the inside out, and finally through the center of the needle.
3.3 Needle Installation and Presser Foot Adjustment

Figure 3.3: Details on needle installation and presser foot. The needle chuck holds the needle in place. Ensure the needle's groove faces outward to prevent thread breakage. The sewing machine head position is also shown.
4. Operating Instructions
Once assembled and threaded, follow these guidelines for operating your sewing machine.
4.1 Hand Crank Operation
Always turn the hand crank in a clockwise direction during operation. Turning the hand crank backward can cause the shuttle to knot, leading to operational issues and potential damage.
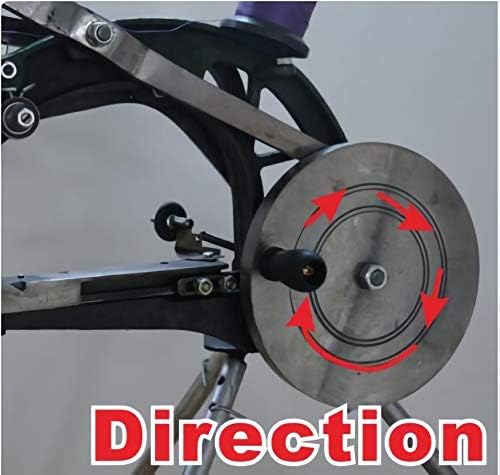
Figure 4.1: Illustration showing the correct clockwise rotation for the hand crank.
5. Maintenance
Regular maintenance ensures the longevity and optimal performance of your sewing machine.
- Cleaning: Regularly clean dust and lint from the machine, especially around the needle, shuttle, and feed dog areas. Use a soft brush or compressed air.
- Lubrication: Apply a small amount of sewing machine oil to moving parts as indicated in the detailed component diagram (Figure 2.2) or as needed to ensure smooth operation.
- Needle Replacement: Replace needles regularly, especially if they become bent, dull, or if you experience skipped stitches or thread breakage.
- Storage: When not in use, store the machine in a clean, dry place to prevent rust and dust accumulation.
6. Troubleshooting
This section addresses common issues you might encounter during operation.
- Thread Knotting: If the thread knots, ensure the hand crank is only turned clockwise. Re-thread the machine carefully, following the instructions in Section 3.2.
- Skipped Stitches: Check if the needle is installed correctly with the groove facing outward (Figure 3.3). Ensure the needle is not bent or dull.
- Thread Breakage: Verify that the thread is not snagging anywhere along its path. Check for burrs on the needle or other parts. Ensure the needle is correctly installed and not dull.
- Machine Stiff: Apply lubrication to moving parts as described in the Maintenance section. Check for any obstructions in the mechanism.
For issues not covered here, please refer to the support information provided.
7. Specifications
| Feature | Detail |
|---|---|
| Brand | INTSUPERMAI |
| Model Number | 12ebd823-2b29-42ba-ae43-0dbcde330d1e |
| ASIN | B08XBNZPJL |
| UPC | 794590764427 |
| Manufacturer | INTSUPERMAI |
| Item Weight | 25 pounds |
| Package Dimensions | 25 x 16 x 9 inches |
| Color | Black |
| Is Electric | No |
8. Warranty and Support
Information regarding product warranty and customer support was not provided in the available product data. Please refer to your purchase documentation or contact the retailer for details on warranty coverage and support options.