1. Product Overview
The Lamisola DC2 Digital Alarm Clock is a modern and functional timepiece designed for bedrooms, offices, and living rooms. It features a large LED mirror display with adjustable brightness, dual USB charging ports for convenience, and multiple alarm modes with snooze functionality.

Image: The Lamisola DC2 Digital Alarm Clock in white, showcasing its sleek design.
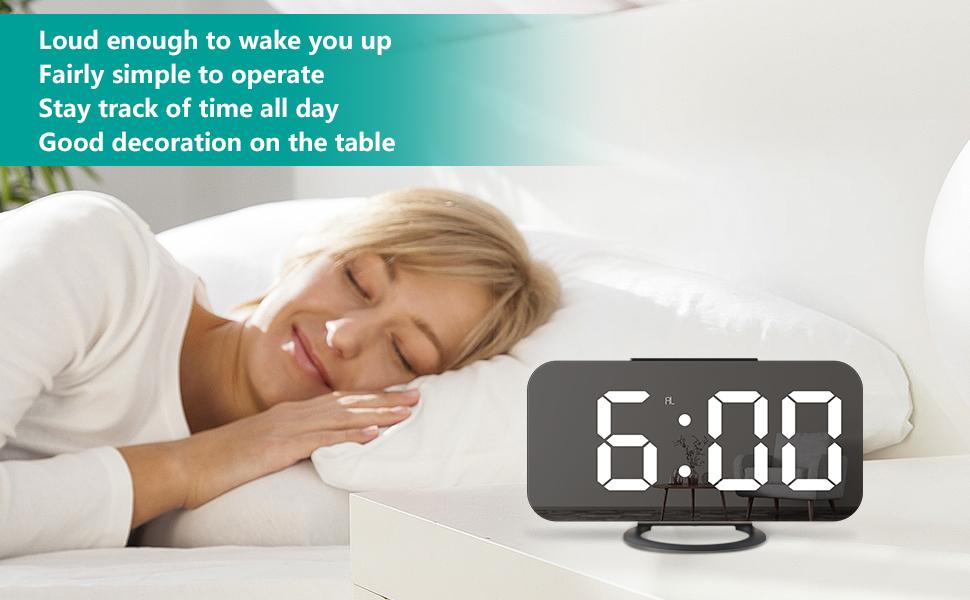
Image: The digital alarm clock displayed on a bedside table, showing its large, clear time display.
2. Package Contents
Please check the package for the following items:
- Lamisola DC2 Digital Alarm Clock
- USB Power Cable
- User Manual
- CR2016 Battery (pre-installed for memory backup)
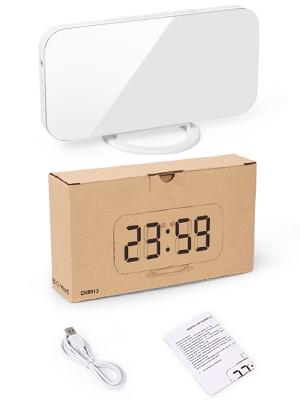
Image: The alarm clock, USB cable, and user manual as included in the product packaging.
3. Component Identification
Familiarize yourself with the clock's buttons and ports:

Image: Front and back view of the clock with labels for Light Sensor, Mode, Up, Down buttons, Snooze button, PM indicator, Alarm indicator, Wall Hanging Hole, Dual USB Charging Ports, Input Port, CR2016 Battery compartment, and Detachable Stand.
- Light Sensor: Automatically adjusts display brightness.
- M (Mode) Button: Used for setting time, alarm, and other modes.
- + (Up) Button: Increases values during setting, adjusts brightness.
- - (Down) Button: Decreases values during setting, adjusts brightness, turns alarm ON/OFF.
- Snooze Button: Located on top, activates snooze function.
- Dual USB Charging Ports: For charging external devices (5V/1A).
- Input Port: For connecting the USB power cable.
- CR2016 Battery Compartment: Houses the backup battery.
- Detachable Stand: Allows for tabletop use or wall mounting.
4. Setup
- Power Connection: Connect the provided USB power cable to the Input Port on the back of the clock. Plug the other end into a USB power adapter (not included) or a powered USB port. The display will light up.
- Battery Installation (Memory Backup): The clock comes with a pre-installed CR2016 battery. This battery serves as a memory backup to retain time and alarm settings during a power outage. Ensure the insulating film is removed from the battery compartment before first use.
- Stand or Wall Mount: Attach the detachable stand for tabletop use, or remove it to hang the clock on a wall using the integrated wall hanging hole.
Video: A demonstration of the Lamisola Digital Clock's basic setup and time setting process.
5. Operating Instructions
5.1. Time Setting
- Press and hold the "M" (Mode) button for 3 seconds to enter time setting mode. The hour digits will flash.
- Press the "+" or "-" buttons to adjust the hour.
- Press the "M" button again to switch to minute setting. The minute digits will flash.
- Press the "+" or "-" buttons to adjust the minutes.
- Press the "M" button a third time to select 12-hour or 24-hour format. Use "+" or "-" to toggle.
- Press the "M" button again to confirm and exit time setting mode.
5.2. Alarm Setting
- Press the "M" (Mode) button once to enter alarm setting mode. The alarm hour digits will flash.
- Press the "+" or "-" buttons to adjust the alarm hour.
- Press the "M" button again to switch to alarm minute setting. The alarm minute digits will flash.
- Press the "+" or "-" buttons to adjust the alarm minutes.
- Press the "M" button again to confirm and exit alarm setting mode.
- To activate/deactivate the alarm, press the "-" button. An "AL" indicator will appear on the display when the alarm is active.
Video: Instructions on setting the alarm for the digital clock.
5.3. Snooze Function
When the alarm sounds, press the large Snooze button on top of the clock. The alarm will pause and sound again after the preset snooze interval (default is 5 minutes, adjustable from 5-60 minutes during alarm setting).
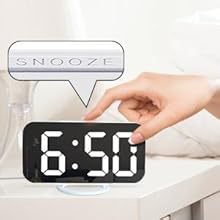
Image: A close-up view of the prominent snooze button located on the top of the clock.
5.4. Brightness Adjustment
The clock offers adjustable brightness levels:
- Manual Adjustment: In normal time display mode, press the "+" or "-" buttons to cycle through 3 brightness levels (Low, Medium, High).
- Auto-Dimming/Night Mode: The clock can automatically dim the display during a set night period (default 18:00-6:00). To activate/deactivate or adjust the night mode, refer to the detailed instructions in the full user manual.
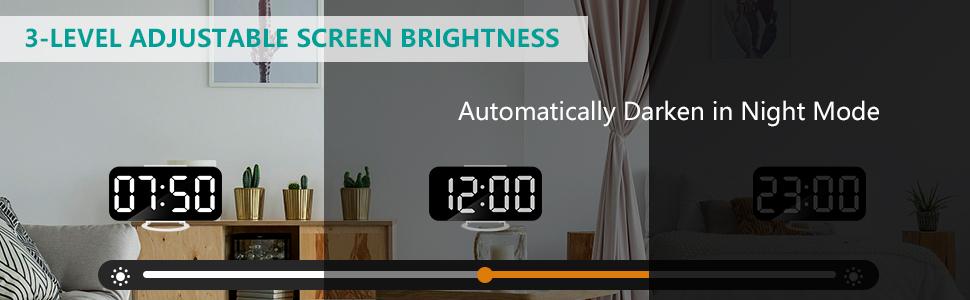
Image: Visual representation of the clock display at low, medium, and high brightness settings.
5.5. USB Charging Ports
The clock is equipped with dual USB ports (5V/1A) on the side, allowing you to charge your smartphone, tablet, or other USB-powered devices conveniently.

Image: The alarm clock with two USB cables connected, demonstrating its charging capability for mobile devices.
5.6. Mirror Functionality
The large LED display surface also functions as a clear mirror when the display is off or at its lowest brightness setting, adding a practical element to its design.

Image: The clock's display reflecting a person's face, highlighting its mirror functionality.
6. Maintenance
- Cleaning: To clean the mirror display, gently wipe it with a soft, dry, lint-free cloth. Avoid using abrasive cleaners or sprays that may damage the surface.
- Battery Replacement: The CR2016 backup battery typically lasts for a long time. If you notice that time settings are not retained after a power disconnection, the battery may need replacement. Open the battery compartment on the back of the clock, replace the old battery with a new CR2016 battery, and close the compartment securely.
7. Troubleshooting
- Display is blank: Ensure the USB power cable is securely connected to both the clock and a working power source. Check if the power adapter is functioning correctly.
- Time/Alarm settings are lost after power outage: Verify that the CR2016 backup battery is correctly installed and has sufficient charge. Remove the insulating film if it's the first use. Replace the battery if necessary.
- Alarm is not sounding: Check if the "AL" indicator is displayed on the screen, indicating the alarm is active. Ensure the alarm volume is not set to zero (if applicable, refer to full manual for volume settings).
- Display is too bright/dim: Adjust the brightness manually using the "+" or "-" buttons. If auto-dimming is active, ensure the night mode settings are appropriate for your environment.
8. Specifications
| Feature | Detail |
|---|---|
| Brand | Lamisola |
| Model Number | DC2 |
| Color | White |
| Display Type | Digital LED Mirror |
| Product Dimensions | 6.22"W x 3.07"H |
| Power Source | Corded Electric (USB), Battery Powered (CR2016 for backup) |
| Special Features | Adjustable Brightness, Alarm, Dual USB Charging Ports, Silent Clock, Snooze, Mirror Function |
| Material | Plastic |
| Item Weight | 0.42 Pounds (6.7 ounces) |
9. Warranty and Support
The Lamisola DC2 Digital Alarm Clock comes with a limited warranty. For detailed warranty information, product support, or assistance with troubleshooting, please refer to the contact information provided in your product packaging or visit the official Lamisola website.