
1. Product Overview
The GadgetMonster Smartphone Vlogging Kit GM006 is a universal kit designed to enhance your smartphone video recording experience. It includes essential accessories for vlogging, live streaming, and content creation, providing improved audio and lighting.
The kit comprises a directional microphone, a 6-inch LED ring light, a flexible smartphone holder, and a tripod with handles, all designed for easy assembly and use with any smartphone.

Figure 1: The GadgetMonster Smartphone Vlogging Kit assembled and held, showcasing its compact design and ease of use for mobile content creation.
Kit Components:
- Directional Microphone: Professional-grade microphone with a 3.5mm jack for clear audio capture.
- 6-inch LED Ring Light: Provides optimal illumination for videos, with adjustable brightness via a USB cable remote control.
- Smartphone Holder: Flexible and universal holder compatible with all smartphones.
- Tripod with Handles: Functions as a stable tripod or a handheld grip for mobile recording.
2. Setup Instructions
Follow these steps to assemble your GadgetMonster Smartphone Vlogging Kit:
2.1 Assembling the Tripod and Phone Holder
- Unfold the tripod legs to create a stable base.
- Locate the smartphone holder. It typically has a standard 1/4-inch screw mount at its base.
- Attach the smartphone holder to the top of the tripod by screwing it clockwise until secure.
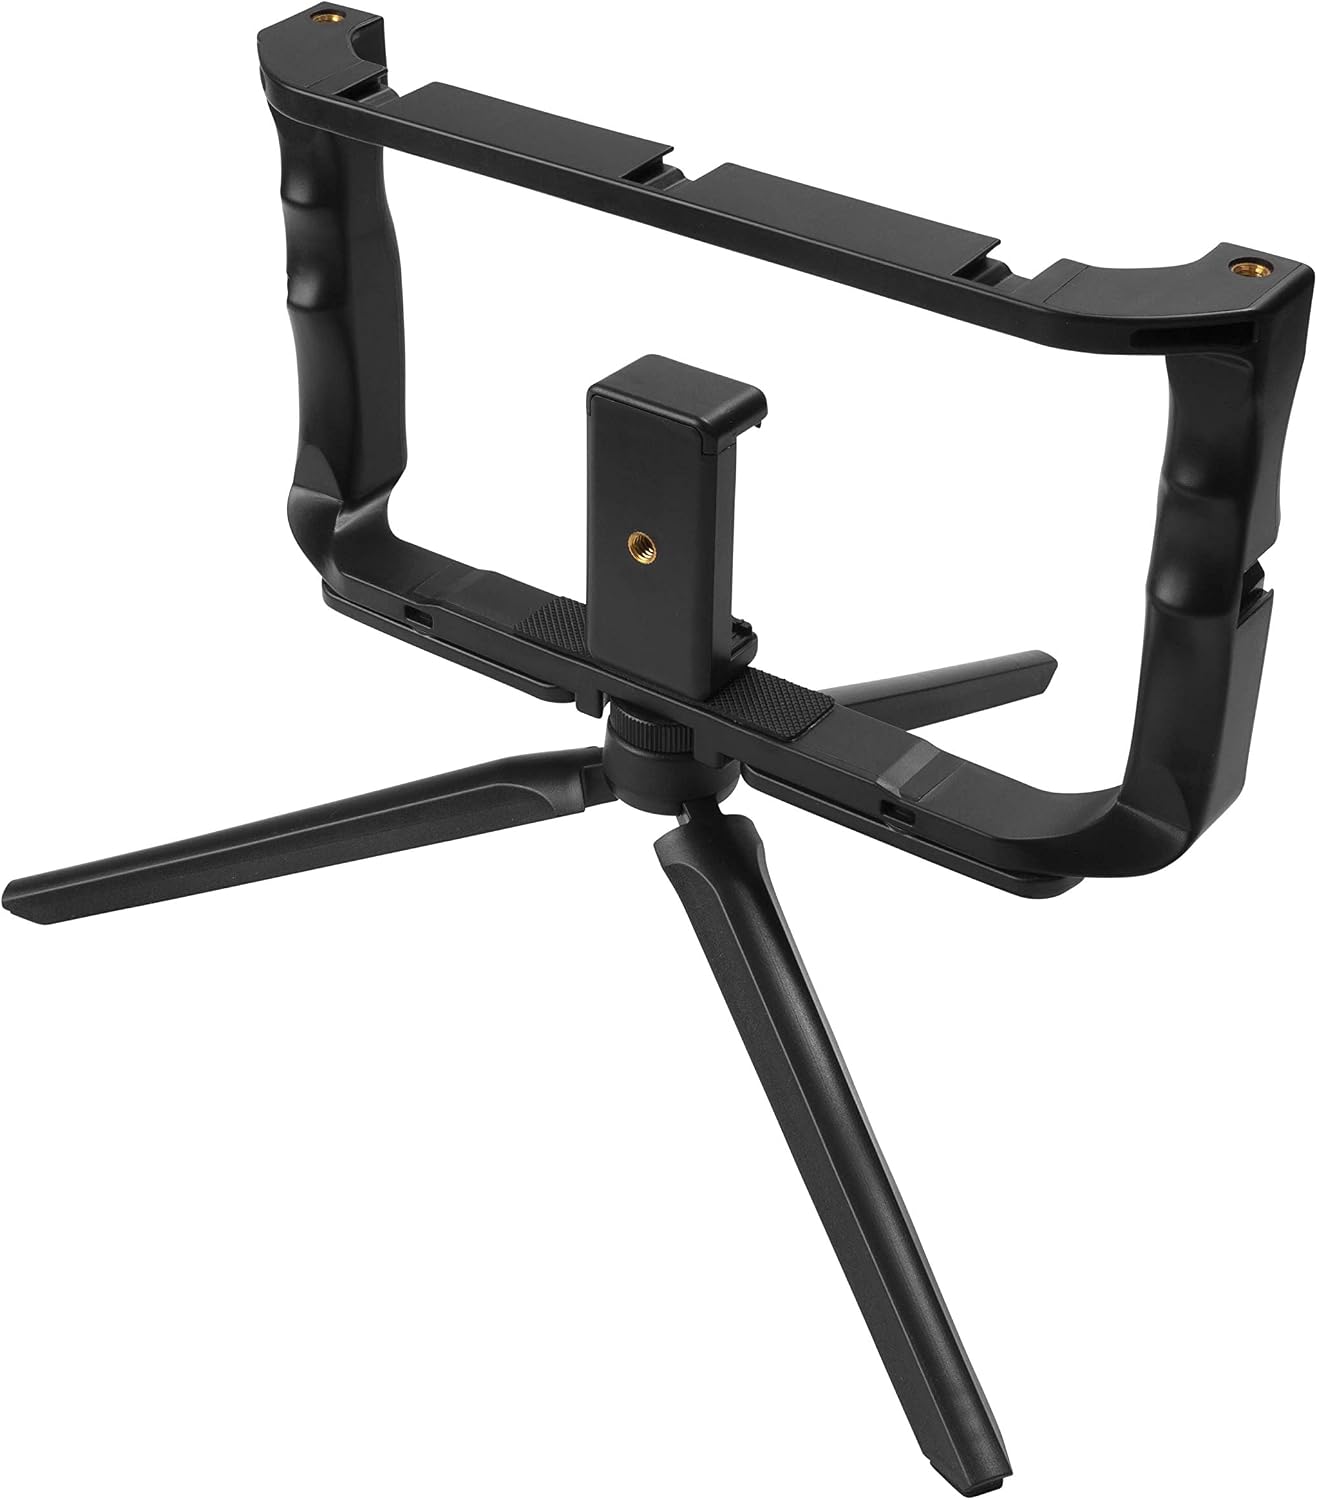
Figure 2: The tripod base with the smartphone holder mounted, ready for accessory attachment.

Figure 3: Detailed view of the smartphone rig, showing the adjustable holder and mounting points for accessories.
2.2 Attaching the Microphone
- Identify the cold shoe mount or 1/4-inch screw thread on the top frame of the smartphone rig.
- Slide the microphone into the cold shoe mount or screw it onto the thread until it is firmly in place.
- Connect the microphone's 3.5mm audio jack cable to your smartphone's headphone jack. If your smartphone lacks a 3.5mm jack, an adapter (not included) may be required.
2.3 Attaching the LED Ring Light
- Locate the remaining cold shoe mount or 1/4-inch screw thread on the top frame of the smartphone rig.
- Mount the LED ring light by sliding it into the cold shoe mount or screwing it onto the thread.
- Connect the USB cable of the ring light to a power source (e.g., a USB power bank, wall adapter, or computer USB port).
2.4 Inserting Your Smartphone
- Gently expand the spring-loaded clamp of the smartphone holder.
- Carefully insert your smartphone into the holder, ensuring it is securely gripped and centered.
- Verify that the phone's buttons and ports are not obstructed by the holder.

Figure 4: The complete vlogging kit with a smartphone, microphone, and LED ring light fully assembled and ready for use.
3. Operating Instructions
3.1 Using the Microphone
- Ensure the microphone is securely connected to your smartphone's audio input.
- For optimal audio quality, position the microphone to face the sound source.
- Test the audio recording before starting your main session to ensure proper function and sound levels.
3.2 Using the LED Ring Light
- Connect the ring light's USB cable to a power source.
- Use the inline remote control on the USB cable to turn the light on/off and adjust brightness levels.
- Experiment with different brightness settings to achieve the desired lighting effect for your video.

Figure 5: The vlogging kit with the LED ring light turned on, demonstrating its illumination capability for recording.
3.3 Using the Tripod/Handheld Grip
- Tripod Mode: Place the kit on a flat, stable surface with the tripod legs extended for stationary recording.
- Handheld Mode: Fold the tripod legs together to form a comfortable grip for mobile recording and dynamic shots.
4. Maintenance
- Cleaning: Use a soft, dry cloth to wipe down the components. Avoid abrasive cleaners or solvents.
- Storage: Store the kit in a cool, dry place away from direct sunlight and extreme temperatures when not in use.
- Cable Care: Handle cables gently to prevent damage. Avoid sharp bends or excessive pulling.
- Microphone Windscreen: Ensure the foam windscreen on the microphone is clean and free from debris for optimal sound quality.
5. Troubleshooting
| Problem | Possible Cause | Solution |
|---|---|---|
| No audio from microphone. |
|
|
| LED ring light does not turn on. |
|
|
| Smartphone is not stable in the holder. |
|
|
6. Specifications
| Feature | Detail |
|---|---|
| Brand | GadgetMonster |
| Model Number | GM006 |
| Color | Black |
| Connectivity Technology | Auxiliary (for microphone) |
| Hardware Interface | USB (for ring light power) |
| Special Features | Integrated Support/Holder |
| Compatible Devices | Smartphone |
| Rechargeable Battery | No (external power required for ring light) |
| International Article Code (EAN/UPC) | 07333048048424 |
7. Warranty and Support
For warranty information and technical support, please refer to the official GadgetMonster website or contact your retailer. Keep your proof of purchase for any warranty claims.
Manufacturer: GadgetMonster
Website: www.gadgetmonster.com (Note: This is a placeholder URL, please refer to actual product packaging or documentation for official support channels.)