AEROPRO A612
AEROPRO A612 Digital Tire Inflator with Pressure Gauge User Manual
Model: A612
1. Introduction
Thank you for choosing the AEROPRO A612 Digital Tire Inflator with Pressure Gauge. This device is designed for accurate tire pressure measurement and inflation across various vehicles, including cars, motorcycles, trucks, and bicycles. Please read this manual thoroughly before operation to ensure safe and efficient use of the product.
2. Safety Instructions
- Always wear appropriate eye protection when operating pneumatic tools.
- Ensure the air compressor is turned off and depressurized before connecting or disconnecting the inflator.
- Do not exceed the maximum pressure rating of the tire or the inflator (203 PSI).
- Keep children and unauthorized persons away from the work area.
- Inspect the inflator and hose for damage before each use. Do not use if damaged.
- Store the inflator in a dry, secure location away from extreme temperatures.
3. Product Overview
The AEROPRO A612 Digital Tire Inflator combines a precise digital pressure gauge with an air chuck and inflation gun for convenient tire maintenance.

Figure 1: Labeled components of the AEROPRO A612 Digital Tire Inflator.
This image displays the AEROPRO A612 Digital Tire Inflator with various parts labeled. Key components include the LCD backlit display, ON/OFF button, Function (FUNC) button for unit switching, Valve Reset Button, Air Chuck with clip design, and a 1/4" NPT Quick-connect male fitting. The display shows pressure readings in PSI, BAR, KPA, and KG/CM.
Key Features:
- Digital LCD Backlit Display: Provides clear pressure readings in various units.
- Measurement Range: 0-203 PSI (0-14 Bar, 0-1400 Kpa, 0-14.2 kg/cm²).
- Durable Construction: Aluminum alloy body with a rubber protective shell for shock resistance.
- Integrated Bleed Button: Allows for precise pressure adjustment.
- Quick-Connect Coupler: For easy attachment to air compressors.
- Flexible Rubber Hose: For convenient access to tire valves.
4. Setup
4.1 Battery Installation
The AEROPRO A612 operates on two 1.5V alkaline batteries (included).
- Locate the battery compartment cover on the back of the digital gauge.
- Carefully remove the cover.
- Insert two 1.5V alkaline batteries, ensuring correct polarity (+/-).
- Replace the battery compartment cover securely.
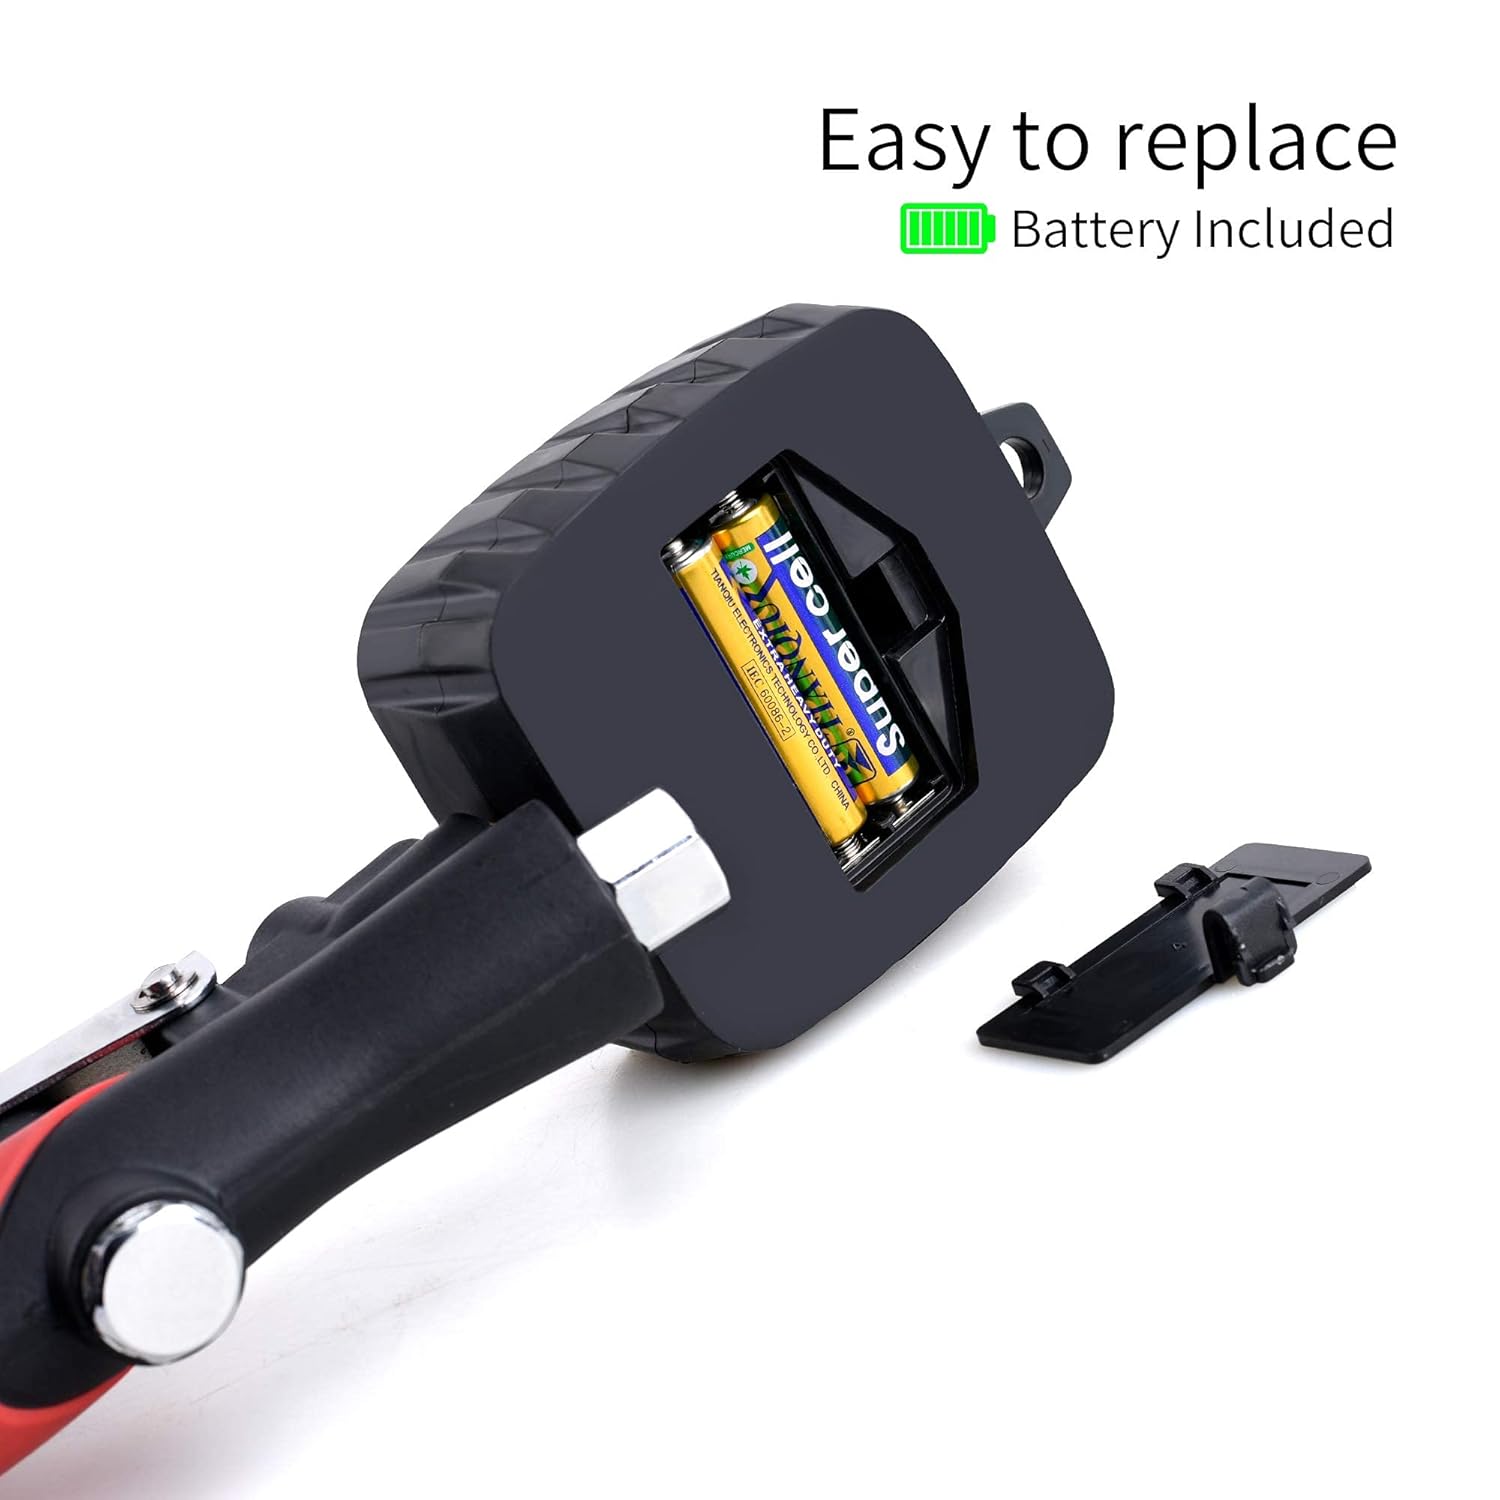
Figure 2: Battery compartment for 1.5V alkaline batteries.
This image shows the rear of the digital gauge with the battery cover removed, revealing two 1.5V batteries inside the compartment. The text "Easy to replace Battery Included" is visible, indicating the simplicity of battery replacement.
4.2 Connecting to an Air Compressor
- Ensure your air compressor is off and its air tank is depressurized.
- Connect the 1/4" NPT Quick-connect male fitting of the inflator to the female coupler of your air compressor hose.
- Verify the connection is secure to prevent air leaks.
5. Operation
5.1 Powering On and Unit Selection
- Press the ON/OFF button to turn on the digital gauge. The display will illuminate.
- Press the FUNC button repeatedly to cycle through the available pressure units: PSI, BAR, KPA, and KG/CM². Select your desired unit. The device features smart unit memory, retaining your last selection.
5.2 Measuring Tire Pressure
- Ensure the inflator is connected to an air compressor (even if not inflating, for proper gauge function).
- Press the ON/OFF button to activate the gauge.
- Firmly press the air chuck onto the tire valve stem. The clip design allows for hands-free attachment.
- The current tire pressure will be displayed on the LCD screen.

Figure 3: Measuring tire pressure with the AEROPRO A612.
This image shows a person using the AEROPRO A612 Digital Tire Inflator to measure the pressure of a vehicle tire. The air chuck is securely attached to the tire valve, and the digital display is visible, showing a pressure reading.
5.3 Inflating Tires
- Connect the air chuck to the tire valve stem as described in Section 5.2.
- Ensure the air compressor is turned on and supplying air.
- Squeeze the trigger handle of the inflator to begin inflating the tire. The digital display will show the increasing pressure.
- Release the trigger once the desired pressure is reached.
- Remove the air chuck from the tire valve.
5.4 Deflating Tires (Bleed Function)
If the tire pressure is too high, use the built-in bleed button:
- With the air chuck connected to the tire valve and the gauge displaying pressure, press the bleed button (often located near the gauge or handle).
- Air will be released from the tire, and the digital display will show the decreasing pressure.
- Release the bleed button when the desired pressure is achieved.
6. Maintenance
- Cleaning: Wipe the inflator with a clean, damp cloth. Do not use harsh chemicals or abrasive cleaners.
- Storage: Store the device in a dry, dust-free environment. Avoid direct sunlight and extreme temperatures.
- Battery Replacement: Replace batteries when the display becomes dim or the device fails to power on. Refer to Section 4.1 for battery installation.
- Hose and Fittings: Regularly check the rubber hose and quick-connect fittings for wear, cracks, or damage. Replace if necessary to ensure proper sealing and safety.
7. Troubleshooting
| Problem | Possible Cause | Solution |
|---|---|---|
| Gauge does not power on. | Dead or incorrectly installed batteries. | Replace batteries, ensuring correct polarity. |
| Inaccurate pressure reading. | Air leak at connection points; gauge malfunction. | Check all connections for leaks. Ensure air chuck is firmly seated on valve stem. If problem persists, contact support. |
| Air leaks from air chuck. | Improper connection to valve stem; worn O-rings. | Ensure air chuck is fully and squarely seated on the valve stem. Inspect and replace O-rings if worn. |
| Cannot inflate tire. | Air compressor not supplying air; blockage in hose/inflator. | Check air compressor operation. Inspect hose and fittings for blockages. |
8. Specifications
- Model: A612
- Measurement Range: 0-203 PSI (0-14 Bar, 0-1400 Kpa, 0-14.2 kg/cm²)
- Power Source: 2 x 1.5V AAA Alkaline Batteries (included)
- Product Dimensions: 9.64 x 3.14 x 1.96 inches
- Item Weight: 1.15 Pounds (approx. 0.52 kg)
- Material: Aluminum alloy, Rubber
- Manufacturer: AEROPRO TOOLS INC
9. Warranty and Support
AEROPRO Tools is committed to providing high-quality products. For warranty information, technical support, or service inquiries, please contact AEROPRO Tools customer service through their official website or the retailer where the product was purchased. Please have your model number (A612) and purchase date available when contacting support.
For more information, visit the AEROPRO Store on Amazon.
Ask a question about this manual
Ask about setup, troubleshooting, compatibility, parts, safety, or missing instructions. Manuals+ will review the question and use this page’s manual context to help answer it.