Introduction
The Kampa Tailgater AIR Inflatable SUV Drive Away Awning is designed to extend your vehicle's living space, providing a versatile and convenient shelter solution. This awning attaches to vehicles with a rear tailgate, such as SUVs, MPVs, crossovers, large cargo cars, and pickup trucks equipped with a hardtop. Its inflatable design ensures quick and easy setup, while the durable Weather Shield material offers reliable protection from the elements. This manual provides essential information for the proper setup, operation, maintenance, and troubleshooting of your Tailgater AIR awning.
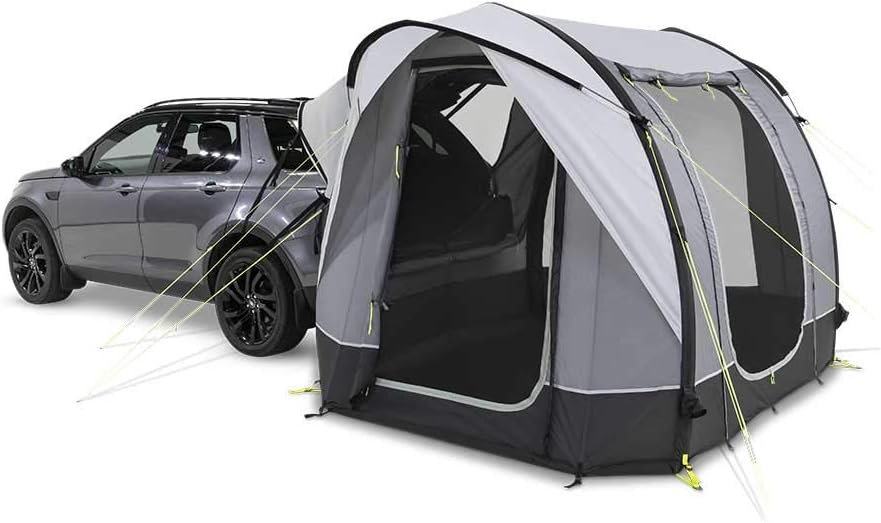
Image: The Kampa Tailgater AIR awning fully set up and attached to the rear of an SUV, demonstrating its extended living space.
Key Features
- Inflatable Design: Features an external multi-point inflation system for rapid setup and pack-down.
- Standalone Capability: Can be detached from the vehicle and left freestanding, allowing you to drive away and return.
- Weather Protection 68D Material: Constructed from durable and weather-resistant fabric to withstand various conditions.
- Wet Weather Entrance: Designed to minimize water ingress during entry and exit in rainy conditions.
- Cable Entry Point: Convenient access point for electrical cables, ensuring power supply inside the awning.
Setup Instructions
1. Unpacking and Positioning
- Remove the awning from its carry bag and unroll it on a clean, flat surface near your vehicle.
- Identify the vehicle connection tunnel and position the awning so this tunnel is aligned with your vehicle's tailgate.
2. Inflation
- Locate the inflation valves on the external multi-point inflation system.
- Attach the included hand pump to the valve.
- Inflate the air beams until the awning takes shape and feels firm. Do not over-inflate.

Image: A close-up view of the inflation valve, showing its design for easy connection to the hand pump.
3. Vehicle Attachment
- Open your vehicle's tailgate.
- Drape the connection tunnel over the tailgate.
- Secure the connection tunnel to your vehicle using the provided connection straps. Ensure a snug fit to prevent drafts and water ingress. The attachment height varies between 160 - 210 cm, measured with the tailgate up.
4. Pegging and Guying
- Use the included pin set (pegs) to secure the base of the awning to the ground.
- Extend and peg out all guy ropes to provide stability, especially in windy conditions. Adjust tension as needed.

Image: Detail of a guy rope with its tensioning mechanism, highlighting the robust construction.
Operating the Awning
Entry and Exit
The awning features multiple entry points. Utilize the main front door for general access. The wet weather entrance is designed to provide sheltered access during rain, preventing water from entering the main living area.
Driving Away and Re-attachment
To drive away, simply disconnect the vehicle connection tunnel from your vehicle. The awning is designed to be freestanding, allowing you to leave it pitched while you explore. Upon return, re-align your vehicle with the connection tunnel and re-secure it using the straps.
Cable Management
Use the designated cable entry point to safely route electrical cables into the awning, ensuring they are not pinched or damaged.
Maintenance
Cleaning
- Clean the awning fabric with mild soap and water. Do not use harsh detergents or abrasive cleaners.
- Rinse thoroughly and allow the awning to dry completely before packing away to prevent mildew.
Storage
- Ensure the awning is completely dry before folding and storing it in its carry bag.
- Store in a cool, dry place away from direct sunlight and extreme temperatures.
Image: A detailed view of the awning's fabric and seam, illustrating the quality of the Weather Protection 68D Material.
Troubleshooting
| Problem | Possible Cause | Solution |
|---|---|---|
| Awning not inflating properly | Valve not fully closed; puncture in air beam; pump malfunction. | Ensure all valves are securely closed. Check air beams for visible damage and repair if necessary. Verify pump functionality. |
| Water pooling on roof | Insufficient tension in air beams or guy ropes; improper setup. | Re-inflate air beams to recommended pressure. Adjust guy ropes to create proper tension and slope for water run-off. |
| Awning unstable in wind | Guy ropes not fully extended or pegged; insufficient pegging. | Ensure all guy ropes are extended and securely pegged. Add additional pegs if ground conditions are loose. |
Specifications
| Attribute | Value |
|---|---|
| Brand | Kampa |
| Model | Tailgater AIR |
| Material Type | Polyester (Weather Protection 68D) |
| Color | All Grey |
| Product Dimensions (L x W x H) | 215 x 305 x 215 cm (2.15D x 3.05W x 2.15H metres) |
| Item Weight | 17.15 Kilograms |
| Tailgate Attachment Height Range | 160 - 210 cm (measured with tailgate up) |
| Assembly Required | Yes |
| Manufacturer | Dometic |
| ASIN | B08VS3L85N |

Image: Technical diagram illustrating the overall dimensions of the awning, including height, width, depth, and connection width range.
Warranty and Support
Specific warranty information for the Kampa Tailgater AIR Inflatable SUV Drive Away Awning is not provided in the product details. Please refer to the manufacturer's official website or contact Kampa customer support for detailed warranty terms and conditions, as well as for any product support inquiries.
Manufacturer: Dometic
For further assistance, please visit the official Kampa or Dometic support channels.