1. Introduction
The GET Jumpstarter Mini is a compact and lightweight device designed to restart motorcycles, scooters, ATVs, and UTVs with gas engines up to 2000cc when their battery is low. Beyond its primary function, it also serves as a portable power bank for charging electronic devices and features a built-in LED flashlight for convenience. Its durable, water-resistant hardshell case ensures protection and portability.
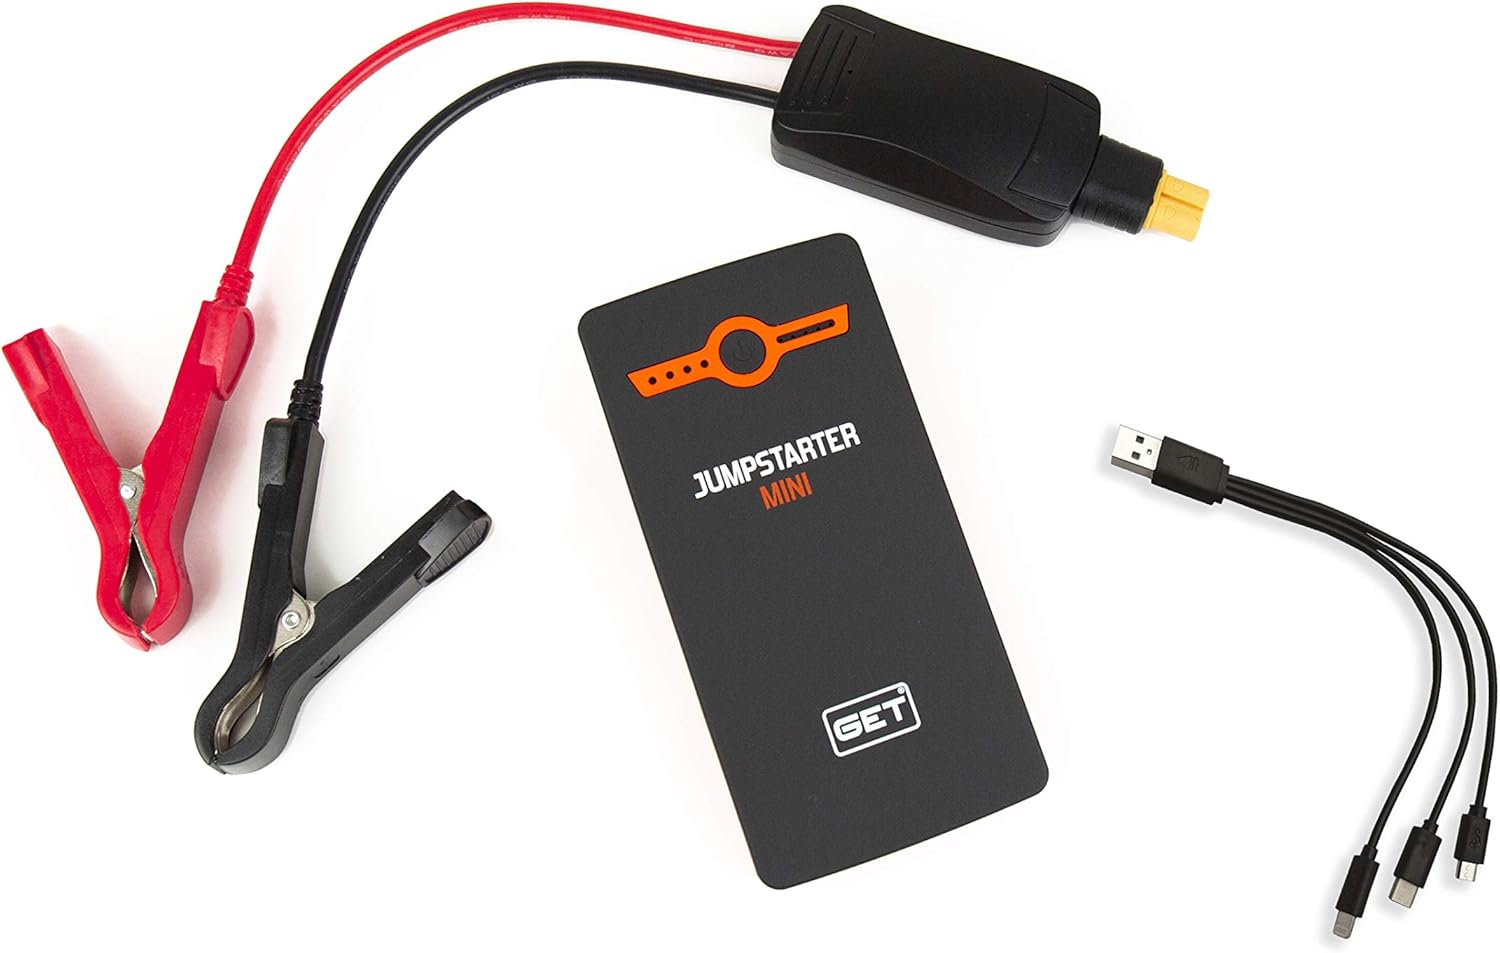
2. What's in the Box
- GET Jumpstarter Mini (6000mAH Powerbank)
- Precision Boost Battery Clamps
- Hardshell Case
- 3-in-1 USB Charging Cable
- User Guide and Warranty Information

3. Safety Information
Read all safety warnings and instructions before using this product. Failure to follow the warnings and instructions may result in electric shock, fire, and/or serious injury.
- Do not short-circuit the battery clamps. Ensure positive (+) and negative (-) terminals do not touch.
- Do not jump-start vehicles with engines larger than 2000cc (gasoline).
- Keep out of reach of children.
- Do not expose the device to rain or wet conditions.
- Do not disassemble the unit. Refer all servicing to qualified personnel.
- Use only the provided battery clamps and charging cables.
- Ensure proper ventilation during use and charging.
- Avoid extreme temperatures. Store the device in a cool, dry place.
4. Setup
4.1 Initial Charging
Before first use, fully charge the GET Jumpstarter Mini. Connect the provided 3-in-1 USB charging cable to the device's input port and a USB power adapter (not included). The LED indicators will show the charging progress. A full charge is indicated when all LEDs are solid.
4.2 Checking Battery Level
Press the power button once to check the current battery level. The LED indicators will illuminate to show the remaining charge.
5. Operating Instructions
5.1 Jump Starting a Vehicle
- Ensure the GET Jumpstarter Mini is sufficiently charged (at least 50%).
- Connect the blue end of the precision boost battery clamps to the jumpstarter's output port. Ensure a secure connection.
- Attach the red (+) clamp to the vehicle's positive battery terminal.
- Attach the black (-) clamp to the vehicle's negative battery terminal or a solid, unpainted metal part of the vehicle's chassis.
- Once connected, the indicator light on the clamp unit should turn green, indicating it's ready to jump-start. If it's red, check connections.
- Start the vehicle's engine. Do not crank for more than 3 seconds. If the vehicle does not start, wait 30 seconds before trying again.
- Once the vehicle starts, immediately disconnect the black (-) clamp first, then the red (+) clamp from the vehicle battery.
- Disconnect the battery clamps from the jumpstarter unit.
Note: This device is suitable for motorcycles, scooters, ATVs, and UTVs with gas engines up to 2000cc.

5.2 Using as a Power Bank
The GET Jumpstarter Mini can charge various electronic devices via its USB output port (5V/1A - 5V/2.1A).
- Connect your device's USB charging cable to the jumpstarter's USB output port.
- Connect the other end of the cable to your electronic device (e.g., smartphone, tablet, MP3 player).
- The jumpstarter will automatically begin charging your device.
5.3 Activating the LED Light
The built-in LED flashlight provides illumination in low-light conditions.
- To turn on the LED light, press and hold the power button for approximately 3 seconds.
- Press the power button again to cycle through different light modes (e.g., solid, strobe, SOS, if available).
- To turn off the LED light, press and hold the power button again for 3 seconds.

6. Maintenance
6.1 Charging
For optimal battery life, it is recommended to fully charge the GET Jumpstarter Mini every 3-6 months, even when not in use. This prevents deep discharge and prolongs the battery's overall lifespan.
6.2 Storage
Store the device in its hardshell case in a cool, dry place, away from direct sunlight, moisture, and flammable materials. Avoid storing in temperatures above 60°C (140°F) or below -20°C (-4°F).
6.3 Cleaning
Wipe the device with a soft, dry cloth. Do not use harsh chemicals or abrasive cleaners. Ensure all ports are free of dust and debris.
7. Troubleshooting
| Problem | Possible Cause | Solution |
|---|---|---|
| Vehicle does not start | Low charge on jumpstarter; incorrect clamp connection; vehicle battery completely dead; engine size exceeds capacity. | Ensure jumpstarter is fully charged. Check clamp connections (red to +, black to -/chassis). Ensure vehicle engine is within 2000cc gas limit. Wait 30 seconds between attempts. |
| Jumpstarter not charging | Faulty charging cable; faulty USB adapter; damaged input port. | Try a different USB cable and adapter. Ensure cable is fully inserted. If problem persists, contact support. |
| LED light not working | Low battery; incorrect operation. | Charge the jumpstarter. Press and hold the power button for 3 seconds to activate. |
| Power bank not charging devices | Low charge on jumpstarter; faulty USB cable; device incompatibility. | Charge the jumpstarter. Try a different USB cable. Ensure your device is compatible with 5V USB charging. |
8. Specifications
| Feature | Specification |
|---|---|
| Battery Capacity | 6000mAH |
| Battery Cell Composition | Lithium Ion |
| Dimensions | 133mm x 66mm x 16.49mm |
| Weight | 176.5g |
| Output | 5V/1A - 5V/2.1A |
| Input | 5V/1A |
| Starting Current | 200A |
| Peak Current | 360A |
| Gas Engine Rating | Up to 2000cc |
| Vehicle Service Type | ATV, Scooter, UTV, Watercraft, Motorcycle |
9. Warranty and Support
This product is covered by a manufacturer's warranty. For detailed warranty information and terms, please refer to the manufacturer's official website or the warranty card included in the packaging.
For technical support, troubleshooting assistance, or warranty claims, please contact the manufacturer directly. Contact information can typically be found on the manufacturer's website or in the product documentation.