
ASUS PRIME Z590-P
ASUS Prime Z590-P Motherboard User Manual
Model: PRIME Z590-P | Brand: ASUS
1. Introduction
This manual provides detailed instructions for the installation, operation, and maintenance of your ASUS Prime Z590-P motherboard. The ASUS Prime Z590-P is engineered to support 11th and 10th Gen Intel Core processors, offering robust power delivery, comprehensive cooling, and advanced connectivity options for a stable and high-performance computing experience.
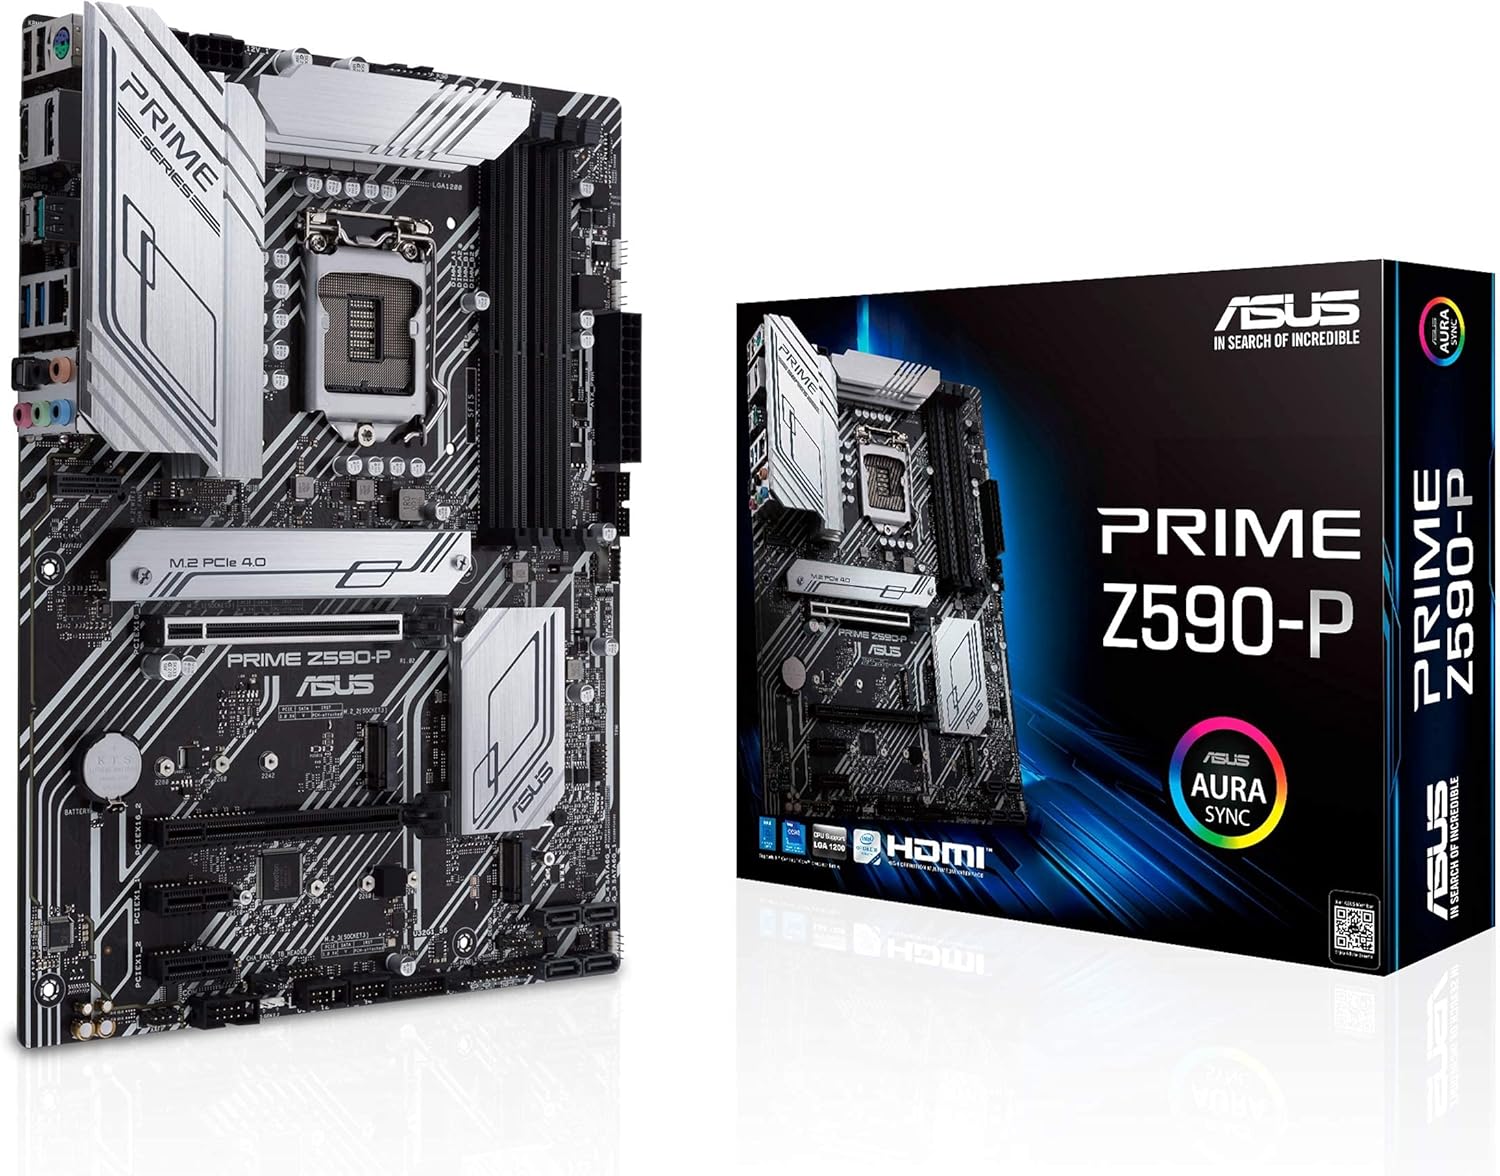
Figure 1.1: The ASUS Prime Z590-P motherboard alongside its retail packaging.
2. Package Contents
Verify that all items listed below are present in your product package. If any item is missing or damaged, contact your retailer.

Figure 2.1: Included accessories and documentation with the ASUS Prime Z590-P motherboard.
- ASUS Prime Z590-P Motherboard
- Rear I/O Panel Shield
- User Guide
- Support DVD (Drivers and Utilities)
- SATA Cables (Quantity may vary)
- M.2 Screw Package
- M.2 Rubber Spacers
3. Setup and Installation
Follow these steps for proper installation of your motherboard and components.
3.1 Component Overview

Figure 3.1: Key power delivery and cooling features on the motherboard.
The motherboard features 10+1 DrMOS power stages, VRM heatsinks, PCH heatsink, and multiple fan headers for comprehensive cooling and stable power delivery.
3.2 CPU Installation
The ASUS Prime Z590-P supports Intel LGA 1200 socket processors (11th/10th Gen Intel Core). Carefully align the CPU with the socket and gently lower it into place. Secure the retention arm.
3.3 Memory (RAM) Installation

Figure 3.2: Memory (DIMM) and storage (M.2) slot locations.
This motherboard features 4 DIMM slots supporting up to 128GB of DDR4 memory at speeds up to 5133 MHz (OC). Ensure memory modules are installed in the correct slots for dual-channel operation as per the user manual. ASUS OptiMem II technology enhances memory stability and performance.
3.4 Storage Device Installation
The board includes 3 M.2 slots for NVMe SSDs (1x PCIe 4.0 x4, 2x PCIe 3.0 x4 & SATA) and multiple SATA ports for 2.5-inch/3.5-inch drives. Install M.2 drives into the designated slots and secure them with the provided screws and rubber spacers.
3.5 Expansion Card Installation
Install your graphics card or other PCIe expansion cards into the PCIe 4.0 x16 slot or other available PCIe slots. Ensure the card is fully seated and secured with the case screw.
3.6 Connectivity and I/O Panel

Figure 3.3: Rear I/O panel and internal connectivity headers.
Connect peripherals to the rear I/O panel, which includes USB 2.0, USB 3.2 Gen 1, USB 3.2 Gen 2x2 Type-C, HDMI, DisplayPort, 2.5Gb LAN, and audio jacks. Ensure all necessary power cables (24-pin ATX, 8-pin CPU) are securely connected to the motherboard.

Figure 3.4: RGB and Audio features.
The motherboard also features Addressable Gen 2 RGB Headers for customizable lighting and dedicated audio shielding for enhanced sound quality.
3.7 Initial Power On and BIOS Setup
After assembling all components, connect your display and power on the system. Access the UEFI BIOS by pressing the designated key (usually DEL or F2) during startup. Configure boot order, enable XMP for memory, and adjust other settings as needed.
4. Operating Your Motherboard
Once the operating system is installed, you can utilize ASUS's proprietary software for system optimization.
4.1 Driver Installation
It is crucial to install the latest drivers from the ASUS support website or the provided support DVD. Prioritize chipset, LAN, audio, and graphics drivers. Installing drivers before Windows Update can prevent potential conflicts and ensure optimal performance.
4.2 Software Utilities
ASUS provides various utilities for system management, including fan tuning/control, power management, and temperature monitoring. These tools allow for fine-tuning your system's performance and acoustics.
5. Maintenance
Regular maintenance helps ensure the longevity and stable operation of your motherboard.
5.1 Cleaning
Periodically clean dust from the motherboard and components using compressed air. Ensure the system is powered off and unplugged before cleaning. Pay attention to heatsinks and fan blades to maintain effective cooling.
5.2 BIOS Updates
Check the ASUS support website regularly for BIOS updates. BIOS updates can improve system stability, compatibility, and performance. Follow the instructions provided by ASUS carefully when performing a BIOS update.
6. Troubleshooting
This section addresses common issues you might encounter.
6.1 System Instability or Blue Screens
If your system experiences random blue screens or instability, ensure all drivers are correctly installed and up-to-date. Conflicting drivers, especially those automatically installed by Windows Update, can cause issues. It is recommended to install official ASUS drivers before connecting to the internet for the first time after an OS installation.
6.2 No Display Output
Verify that your monitor is correctly connected to the graphics card or integrated graphics port. Ensure all power cables to the motherboard and graphics card are securely seated. Reseat RAM modules and the graphics card.
6.3 Component Not Detected
If a component (e.g., M.2 SSD, RAM, PCIe card) is not detected, ensure it is properly seated in its slot. Check the BIOS settings to confirm the component is enabled and recognized. For M.2 drives, be aware of potential lane sharing with SATA ports, which might disable certain SATA ports when an M.2 drive is in use.
7. Specifications
| Feature | Specification |
|---|---|
| Brand | ASUS |
| Model Name | PRIME Z590-P |
| CPU Socket | LGA 1200 |
| Compatible Processors | 10th and 11th Generation Intel Core |
| Chipset Type | Intel Z590 |
| RAM Memory Technology | DDR4 |
| Memory Clock Speed | Up to 5133 MHz (OC) |
| Memory Storage Capacity | 128 GB (Max) |
| Product Dimensions | 9.6 x 2 x 12 inches (ATX Form Factor) |
| Item Weight | 2.6 pounds |
| PCIe Slots | PCIe 4.0 x16, other PCIe slots |
| M.2 Slots | 3 (1x PCIe 4.0 x4, 2x PCIe 3.0 x4 & SATA) |
| LAN | 2.5 Gb Ethernet |
| USB Ports | USB 2.0, USB 3.2 Gen 1, USB 3.2 Gen 2x2 Type-C |
| Video Output | HDMI, DisplayPort |
| Audio | 5x Audio Jacks, Optical S/PDIF Out |
| Platform | Windows 10 |
8. Official Product Videos
There are no official product videos from the seller available for this product at this time. Please refer to the text and images for detailed information.
9. Warranty and Support
9.1 Warranty Information
For detailed warranty information, please refer to the warranty card included with your product or visit the official ASUS support website. Warranty terms and conditions may vary by region.
9.2 Technical Support
If you encounter any issues that cannot be resolved using this manual or the troubleshooting section, please contact ASUS technical support. You can find contact information on the official ASUS website: www.asus.com/support/
Related Documents - PRIME Z590-P
 |
ASUS PRIME Z590-P Motherboard User Manual This user manual provides detailed information on the ASUS PRIME Z590-P motherboard, including specifications, installation guides, BIOS setup, and safety precautions. Learn how to build and configure your PC system with this comprehensive guide from ASUS. |
 |
ASUS Pro WS W480-ACE Motherboard User Manual Detailed user manual for the ASUS Pro WS W480-ACE motherboard, covering installation, specifications, BIOS, RAID, and troubleshooting. Learn about CPU, memory, expansion slots, storage, I/O, and special features for professional workstation use. |
 |
ASUS ProArt B760-CREATOR D4 Motherboard User Manual and Specifications Detailed user manual and specifications for the ASUS ProArt B760-CREATOR D4 motherboard, covering package contents, system specifications, layout, connectors, installation guides for CPU, DIMM, and M.2, and rear panel I/O. |
 |
راهنمای مادربرد ASUS TUF GAMING Z590-PLUS WIFI راهنمای جامع مادربرد ASUS TUF GAMING Z590-PLUS WIFI، شامل مشخصات فنی، راهنمای نصب، چیدمان قطعات، تنظیمات BIOS و پیکربندی RAID برای پردازندههای اینتل نسل ۱۰ و ۱۱. |
 |
ASUS TUF Gaming Z790-PLUS D4 Motherboard User Manual Comprehensive user guide for the ASUS TUF Gaming Z790-PLUS D4 motherboard, detailing specifications, installation, safety precautions, BIOS setup, and package contents. Essential information for PC builders and gamers. |
 |
ASUS PRIME H510M-R Motherboard Benutzerhandbuch: Installation, Spezifikationen und BIOS-Infos Umfassendes Benutzerhandbuch für das ASUS PRIME H510M-R Motherboard, das Installation, Sicherheitshinweise, Hardware-Übersicht, BIOS-Informationen, detaillierte Spezifikationen und Umwelt-Compliance abdeckt. |
Ask a question about this manual
Ask about setup, troubleshooting, compatibility, parts, safety, or missing instructions. Manuals+ will review the question and use this page’s manual context to help answer it.