1. Product Overview
The DAYTEE Wireless Emergency Call System is designed to provide a reliable and easy-to-use method for individuals to signal for assistance. It consists of a receiver unit and multiple transmitter call buttons.
1.1 Package Contents
- 1x Receiver
- 2x Transmitters
- 1x Charging Cable
- 1x User Manual
- 3x Lanyards

Figure 1: Package Contents. This image displays all items included in the DAYTEE Wireless Emergency Call System package, including the receiver, two transmitters, charging cable, lanyards, and the user manual.
1.2 Component Identification
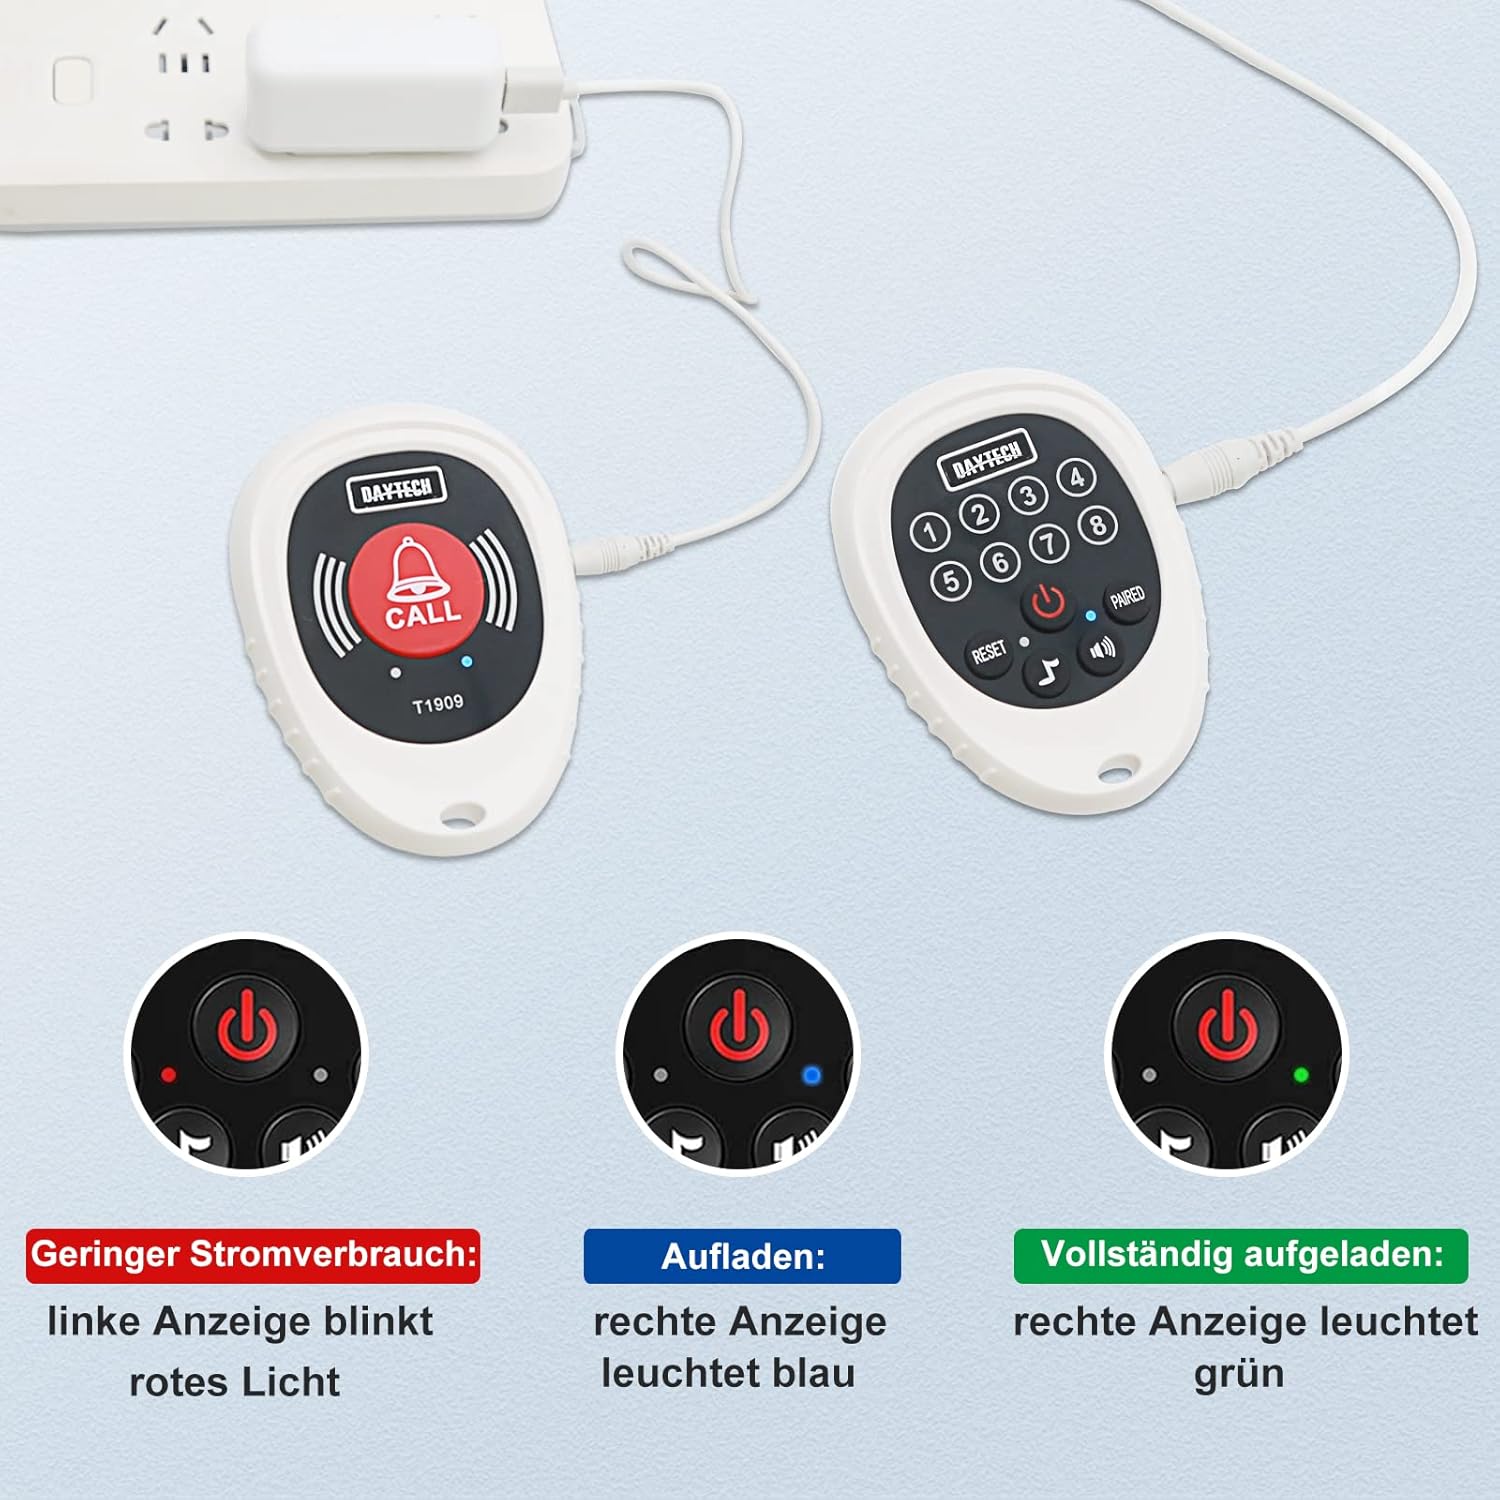
Figure 2: Receiver Unit Components. This image highlights the various parts of the receiver, including channel indicators (1-8), power button, reset button, sound/volume buttons, pairing button, speaker, battery compartment, and lanyard hole.

Figure 3: Receiver and Transmitter Units. This image displays the main receiver unit and two compact transmitter call buttons, illustrating the complete system.
2. Setup
2.1 Initial Charging
Before first use, ensure both the receiver and transmitters are fully charged. Connect the charging cable to the receiver and a power source.

Figure 4: Charging the Devices. This image illustrates how to connect the charging cable to both the receiver and transmitter units for power replenishment.
2.2 Powering On
- Press and hold the power button on the receiver for 3 seconds to turn it on. The channel indicators will flash sequentially.
- Ensure the transmitters have charged batteries and are ready for use.
3. Operating Instructions
3.1 Pairing Transmitters with Receiver
The devices may come pre-paired. If not, or if you need to pair additional transmitters:
- Press and hold the "PAIRED" button on the receiver for 3 seconds. The CH1 channel indicator will flash.
- Activate the transmitter (e.g., press its call button). The transmitter will send a signal.
- The transmitter will then be connected to the CH1 channel. Repeat for other channels if pairing multiple transmitters.
3.2 Making an Emergency Call
To signal for assistance:
- Press the "CALL" button on the transmitter.
- The receiver will ring, and the corresponding channel display will flash blue, indicating a successful connection and call.

Figure 5: Emergency Call Scenario. This image depicts a user pressing the call button, and the receiver unit alerting a caregiver, demonstrating the system's primary function.
3.3 Volume and Sound Settings
The receiver offers 4 volume levels and 12 selectable ringtones.
- Use the sound/volume buttons on the receiver to adjust the volume.
- To set the receiver to silent mode with only flashing alerts, select the 0 decibel setting. This is useful in environments where audible alerts are not desired.
3.4 Ending a Call Alert
If the receiver is actively ringing due to a call, and you wish to stop the alert, use the "stop" function on the receiver. This will silence the ringtone and stop the channel lights from flashing.
4. Maintenance
4.1 Battery Management
- Low Battery Reminder: If the indicator light on a unit flashes permanently, it signifies a low battery. Charge the unit immediately.
- Charging Time: The CALL button (transmitter) can last approximately 3 hours fully charged and can be used for up to 30 days. The receiver can last about 3 hours fully charged and can be used for up to 7 days. Charge devices regularly to ensure continuous operation.
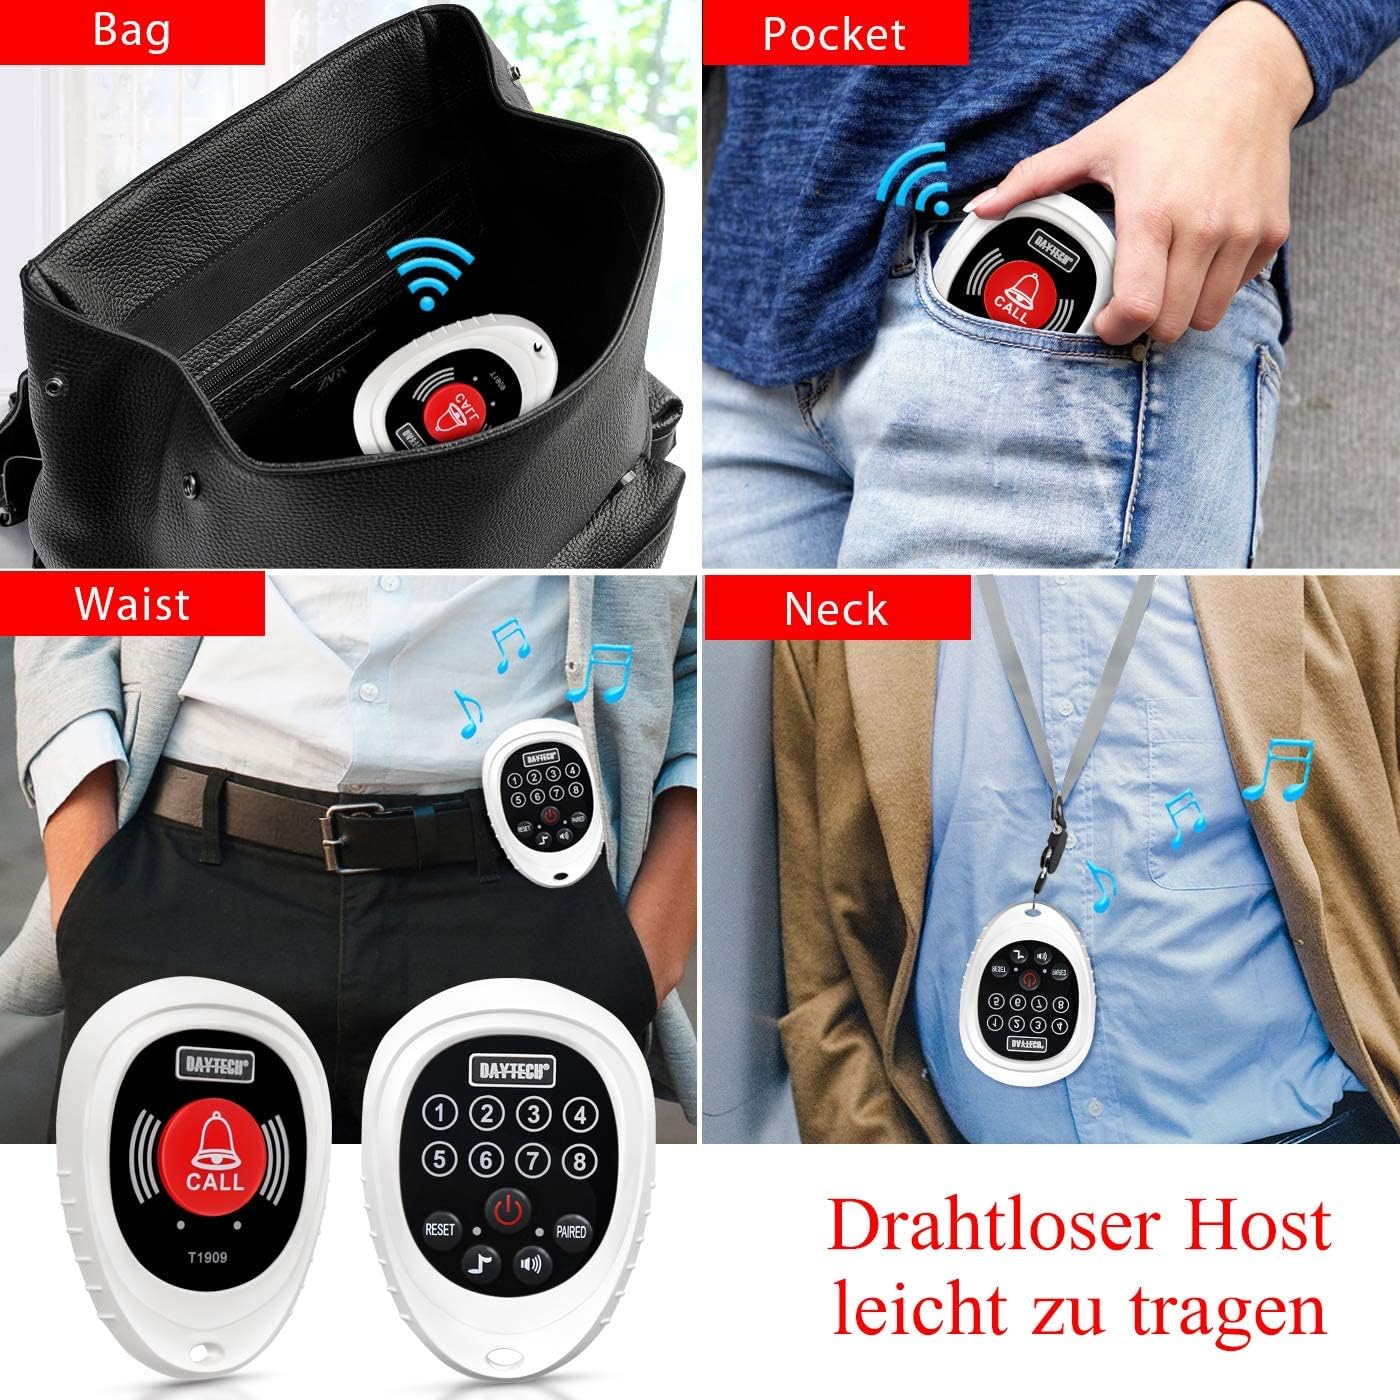
Figure 6: Battery Status Indicators. This image illustrates the different LED indicators for low power (red), charging (blue), and fully charged (green) states on the devices.
4.2 Cleaning
Wipe the devices with a soft, dry cloth. Do not use abrasive cleaners or immerse in water.
4.3 Storage
Store the system in a cool, dry place away from direct sunlight and extreme temperatures when not in use for extended periods.
5. Troubleshooting
5.1 Receiver Does Not Respond to Transmitter
If the receiver does not respond when the transmitter button is pressed, check the following:
- Power Status: Ensure the receiver is turned ON. If not, press the power button to turn it on.
- Pairing: Verify that the receiver and transmitter are properly paired. If not, follow the pairing instructions in Section 3.1.
- Transmitter Battery: Check if the transmitter's battery is incorrectly installed or has a low battery level. Correct the installation or replace/charge the battery.
- Range and Interference: Confirm that the transmitter and receiver are within the operational range and that there are no excessive interferences (e.g., thick walls, large metal objects) between them. The system has a maximum range of 1000 meters in an open area, but this is significantly reduced by obstacles.
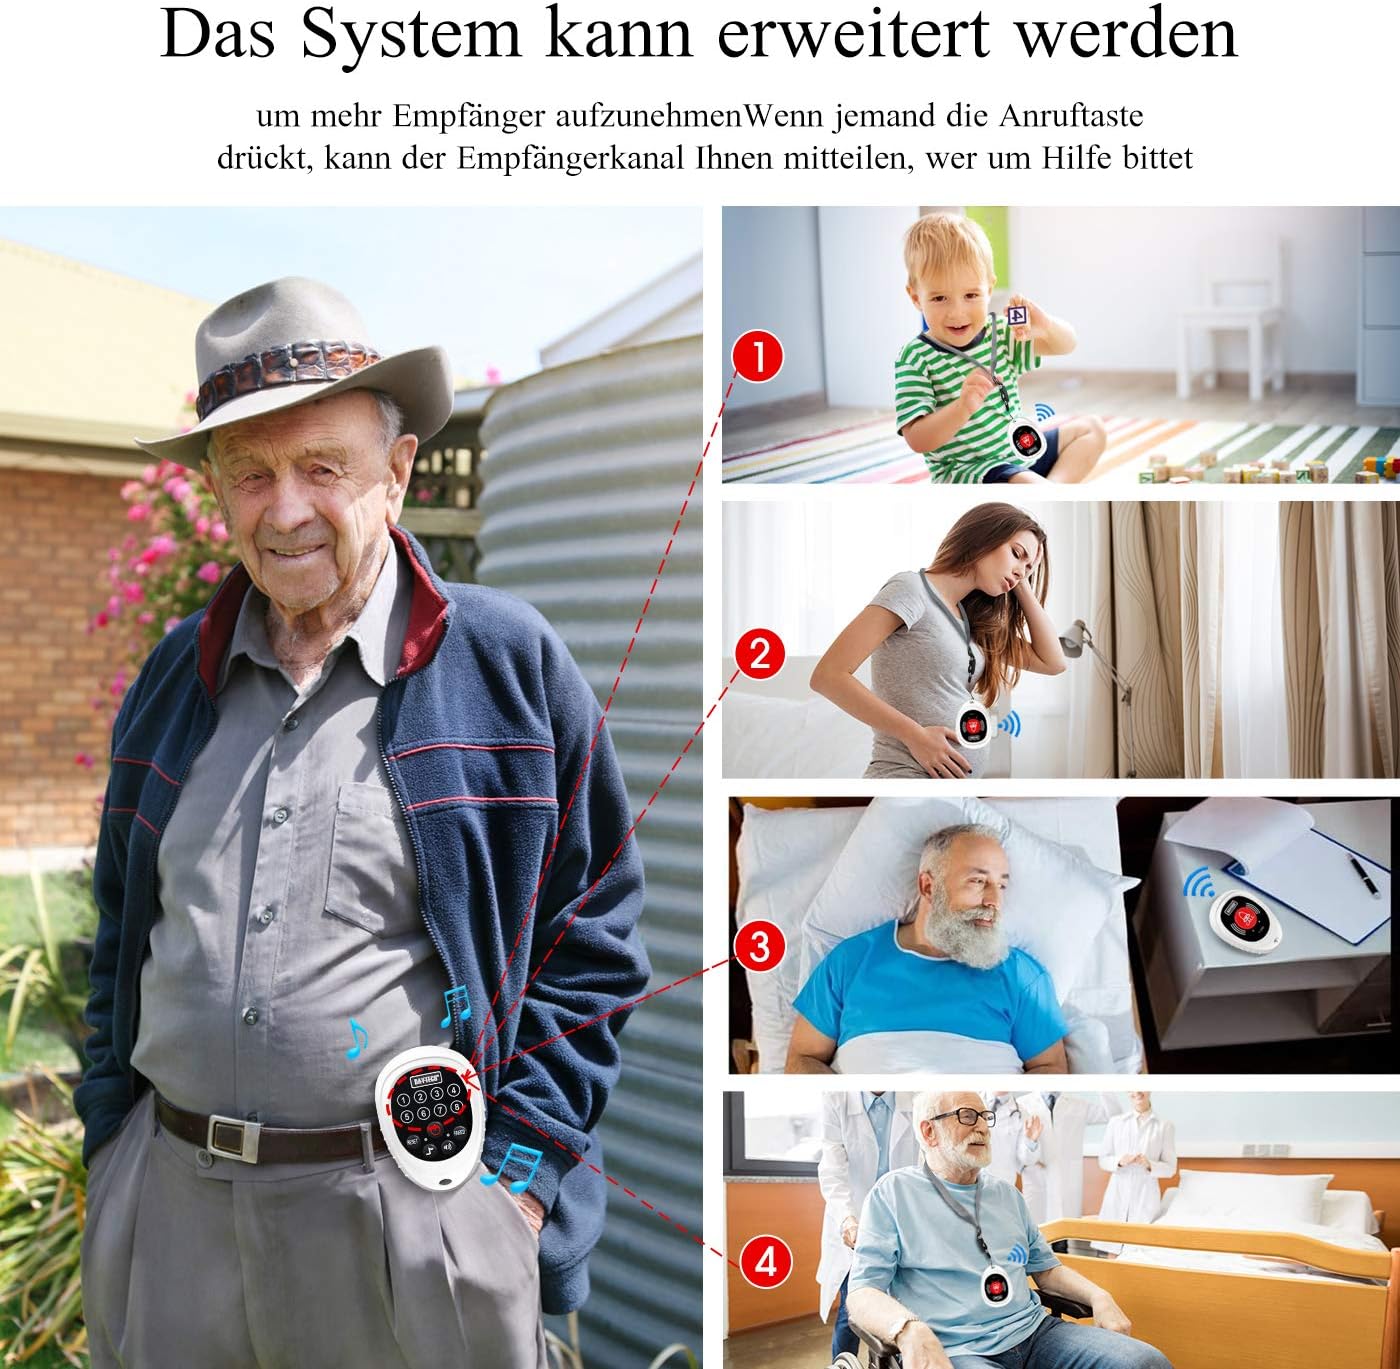
Figure 7: Wireless Range and Obstacles. This image illustrates how the wireless signal can travel through different household materials, indicating that walls and other objects can reduce the effective range.
6. Specifications
| Feature | Detail |
|---|---|
| Model Number | CC07 2-1 EU |
| Brand | DAYTEE |
| Package Dimensions | 13.3 x 10 x 9.9 cm |
| Weight | 290 g |
| Batteries (Receiver) | Lithium Ion (included) |
| Batteries (Transmitter) | 3 AAA batteries required (included) |
| Power Source | Battery Powered |
| Maximum Range | 1000 Metres (open area) |
| Date First Available | 17 Feb. 2021 |
7. Warranty and Support
For warranty information and technical support, please refer to the contact details provided with your purchase or visit the official DAYTEE website. Keep your purchase receipt for warranty claims.