Introduction
Thank you for choosing the VEVOR Money Bill Counter. This professional device is engineered for high-speed and accurate counting of banknotes, significantly improving efficiency in various financial and retail environments. It incorporates advanced detection technologies to identify counterfeit currency, ensuring the integrity of your cash handling processes. Please read this manual thoroughly before operation to ensure proper use and maintenance.

Figure 1: VEVOR Money Bill Counter with included external display and power cable.
Product Features
- Accurate Counting: Designed for precise counting of banknotes.
- High Efficiency: Counts over 1000 bills per minute, optimizing workflow.
- Counterfeit Detection: Equipped with UV (Ultraviolet) and MG (Magnetic) detection to identify fake bills.
- External LED Display: Provides clear and visible counting results, can be placed up to 1.6 meters from the main unit.
- User-Friendly Operation: Supports manual and batch counting modes (1 to 1999 bills).
- Portable Design: Compact structure with a convenient carrying handle, weighing approximately 5.9 kg.
- Wide Application: Suitable for various currencies including Euro and British Sterling, commonly used in shops, banks, and restaurants.
Setup
1. Unpacking and Inspection
- Carefully remove the bill counter from its packaging.
- Verify that all components are present: main unit, external LED display, power cable, cleaning brush, and screwdriver.
- Inspect the unit for any signs of damage during transit. If damage is found, contact your supplier immediately.
2. Placement
Place the bill counter on a stable, flat, and dry surface. Ensure there is adequate space around the machine for proper ventilation and operation.
3. Connecting the External Display
Connect the external LED display cable to the designated port on the rear of the main unit. The external display provides a clear view of the counting process for customers or additional staff.

Figure 2: External LED display and included cleaning tools.
4. Power Connection
Connect the power cable to the power inlet on the back of the machine, then plug the other end into a suitable power outlet. Ensure the power switch is in the OFF position before connecting.

Figure 3: Rear view of the bill counter, highlighting the power connection and external display port.
Operating Instructions
1. Power On/Off
- To power on the machine, flip the red power switch located on the rear of the unit to the 'I' (ON) position.
- To power off, flip the switch to the 'O' (OFF) position.
2. Basic Counting
- Ensure the machine is powered on and in standby mode.
- Straighten the banknotes and place them neatly into the hopper (the top input tray). Ensure the bills are not folded or crumpled.
- The machine will automatically start counting the bills. The count will be displayed on the main unit's LED screen and the external display.
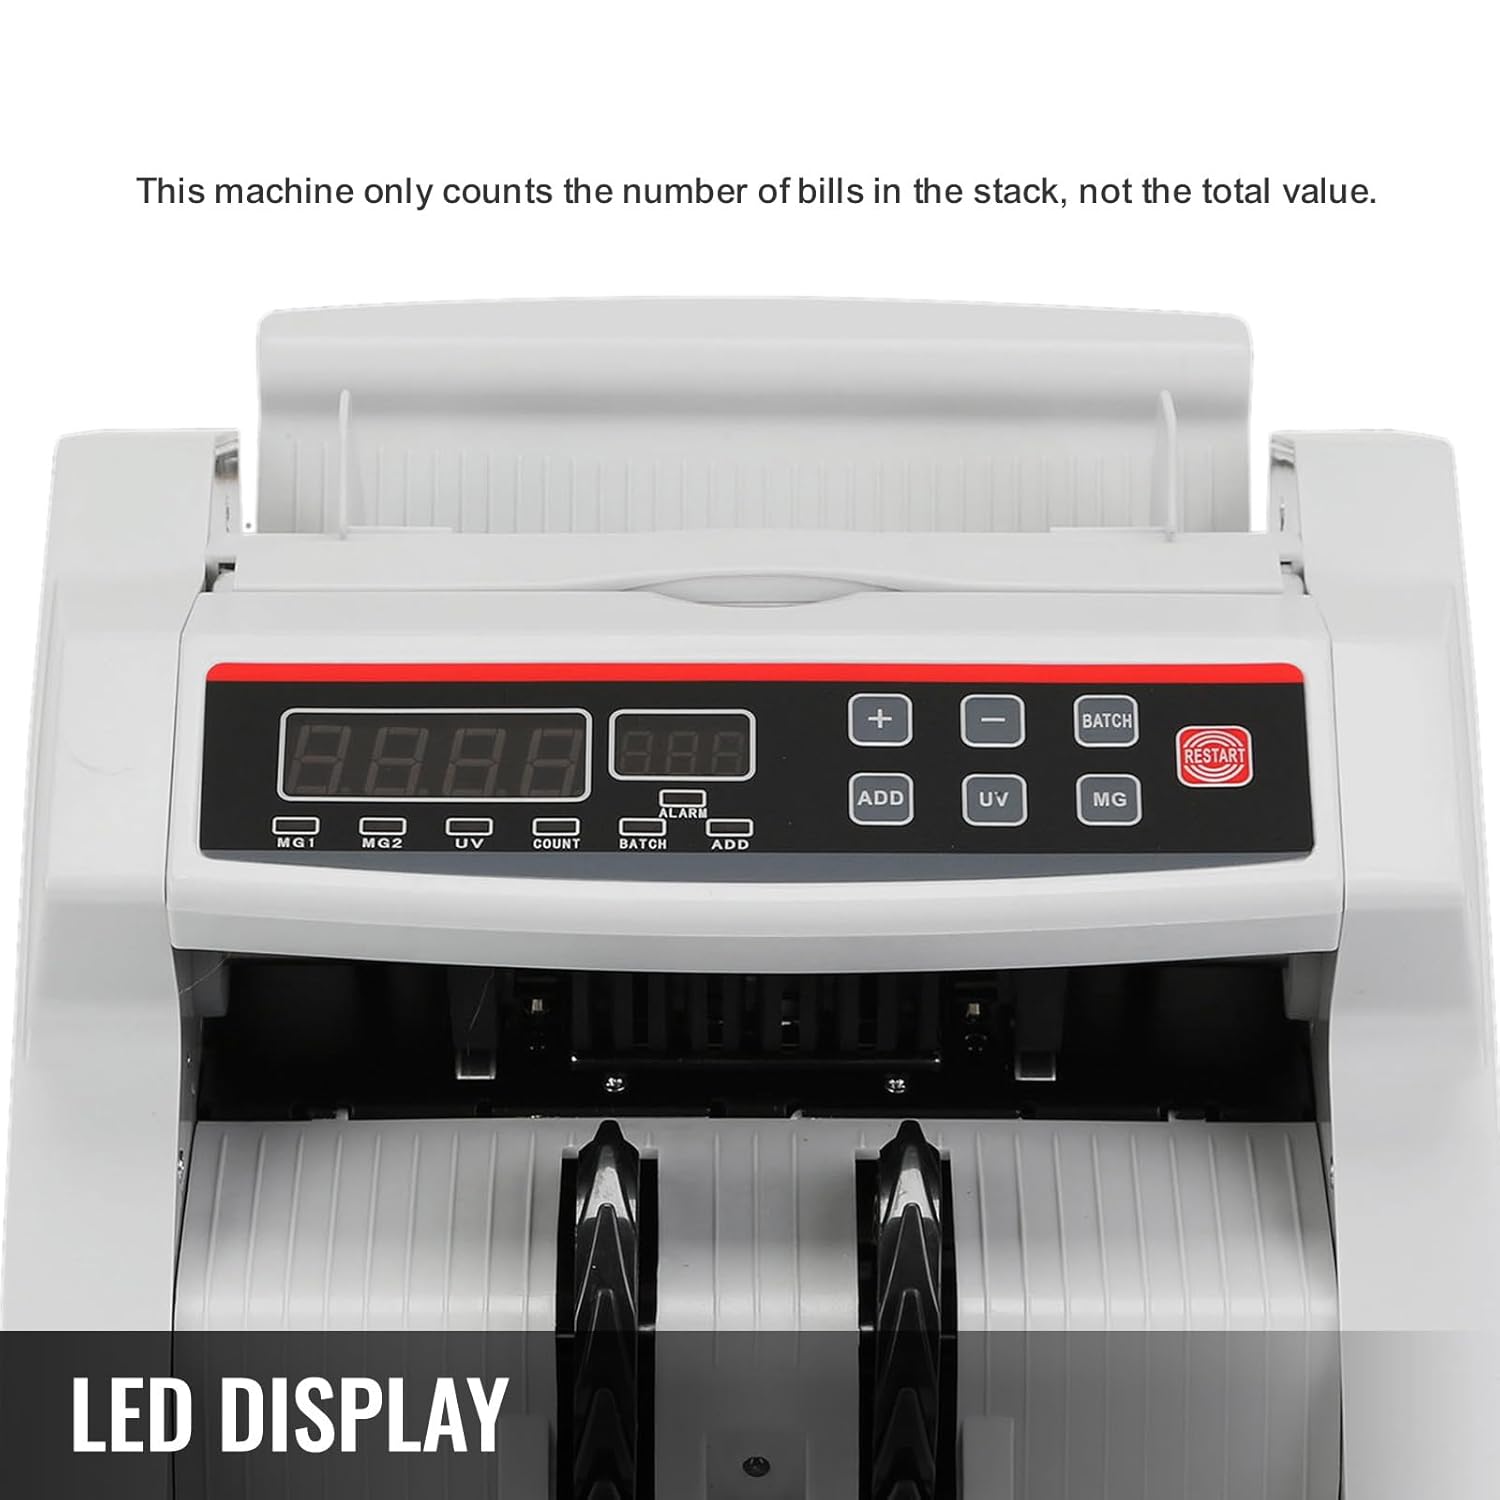
Figure 4: Detailed view of the control panel and LED display.
3. Counterfeit Detection (UV/MG)
The machine automatically performs UV (Ultraviolet) and MG (Magnetic) detection during counting. If a suspicious bill is detected, the machine will stop, and an error code or indicator will appear on the display. Remove the suspicious bill and press the 'RESTART' button to resume counting.

Figure 5: The bill counter's design supports efficient anti-counterfeiting functions.
4. Batch Counting
To count bills in specific batches:
- Press the 'BATCH' button.
- Use the '+' and '-' buttons to set the desired batch size (e.g., 10, 20, 50, 100). The machine can be set to count in batches between 1 and 1999.
- Place the bills into the hopper. The machine will stop once the set batch quantity is reached. Remove the batch and the machine will automatically resume counting for the next batch.
5. Add Function
To accumulate the total count of multiple batches:
- Press the 'ADD' button. The 'ADD' indicator on the display will light up.
- Each subsequent count will be added to the previous total.
- To exit Add mode, press the 'ADD' button again.
Maintenance
Regular maintenance ensures the longevity and optimal performance of your bill counter.
1. Cleaning
Dust and debris can accumulate on sensors and rollers, affecting counting accuracy. Clean the machine regularly:
- Always power off and unplug the machine before cleaning.
- Use the provided cleaning brush to gently remove dust from the hopper, stacker, and internal components.
- For stubborn dirt, use a soft, dry cloth. Do not use liquid cleaners or abrasive materials.
- Pay special attention to the sensors located in the bill path.
2. Storage
When not in use for extended periods, store the bill counter in a cool, dry place, away from direct sunlight and excessive humidity.
Troubleshooting
If you encounter issues with your VEVOR Money Bill Counter, refer to the following common problems and solutions:
| Problem | Possible Cause | Solution |
|---|---|---|
| Machine stops frequently or jams. | Bills are crumpled, folded, or stuck together; dust on sensors. | Straighten bills before placing them in the hopper. Ensure bills are not stuck together. Clean the machine's sensors and rollers. |
| Inaccurate counting results. | Bills are not properly aligned; sensors are dirty. | Ensure bills are neatly stacked and aligned. Clean the machine's sensors. Try counting the stack multiple times. |
| Counterfeit detection errors. | Dust on UV/MG sensors; bill is genuinely suspicious. | Clean the UV/MG sensors. Verify the suspicious bill using other methods if possible. |
| Machine does not power on. | Power cable not connected; power outlet issue. | Check power cable connection. Try a different power outlet. Ensure power switch is ON. |
If the problem persists after attempting these solutions, please contact VEVOR customer support for assistance.
Specifications
| Feature | Specification |
|---|---|
| Model Number | 4jtubw53ys |
| Counting Speed | >1000 bills/minute |
| Hopper Capacity | >130 bills |
| Detection Methods | UV (Ultraviolet), MG (Magnetic) |
| External Display Cable Length | Approx. 1.6 meters |
| Product Dimensions (L x W x H) | Approx. 26 cm x 23.5 cm x 17 cm (based on package dimensions and image) |
| Product Weight | Approx. 5.9 kg |
| Power Supply | AC 220V/50Hz (typical for EU market, implied by power cord) |

Figure 6: Product dimensions for reference.
Warranty and Support
VEVOR products are designed and manufactured to the highest quality standards. For information regarding warranty coverage, technical support, or spare parts availability, please refer to the warranty card included with your product or visit the official VEVOR website. You may also contact your point of purchase for assistance.
Please have your model number (4jtubw53ys) and purchase date ready when contacting support.