vidaXL 148714
vidaXL Hinged Insect Screen for Doors
Model: 148714
Brand: vidaXL
1. Introduction
This manual provides essential information for the proper assembly, installation, operation, and maintenance of your vidaXL Hinged Insect Screen for Doors. Please read these instructions carefully before beginning assembly or use to ensure safe and effective operation. This insect screen is designed to prevent insects such as flies, wasps, bees, and mosquitoes from entering your home or workplace while allowing fresh air circulation.
The screen features a high-quality aluminum frame and UV-resistant fiberglass mesh. It is equipped with two handles, one on the inside and one on the outside, for easy opening and closing. The design allows for adjustment to fit various door sizes.
2. Safety Information
- Always follow all local building codes and regulations when installing this product.
- Wear appropriate personal protective equipment (PPE) such as safety glasses and gloves during assembly and installation.
- Keep small parts and tools out of reach of children to prevent choking hazards or injury.
- Ensure the door frame is structurally sound and capable of supporting the weight of the insect screen.
- Exercise caution when using power tools. Read and understand the tool manufacturer's instructions before use.
- Do not modify the product in any way not described in this manual. Unauthorized modifications may compromise safety and void the warranty.
3. Package Contents
Verify that all components are present and undamaged before beginning assembly. If any parts are missing or damaged, contact vidaXL customer support.
- Aluminum frame profiles
- Fiberglass mesh screen
- Handles (inside and outside)
- Hinge components
- Mounting accessories (screws, wall anchors, small parts)
- Assembly instructions (refer to this manual)
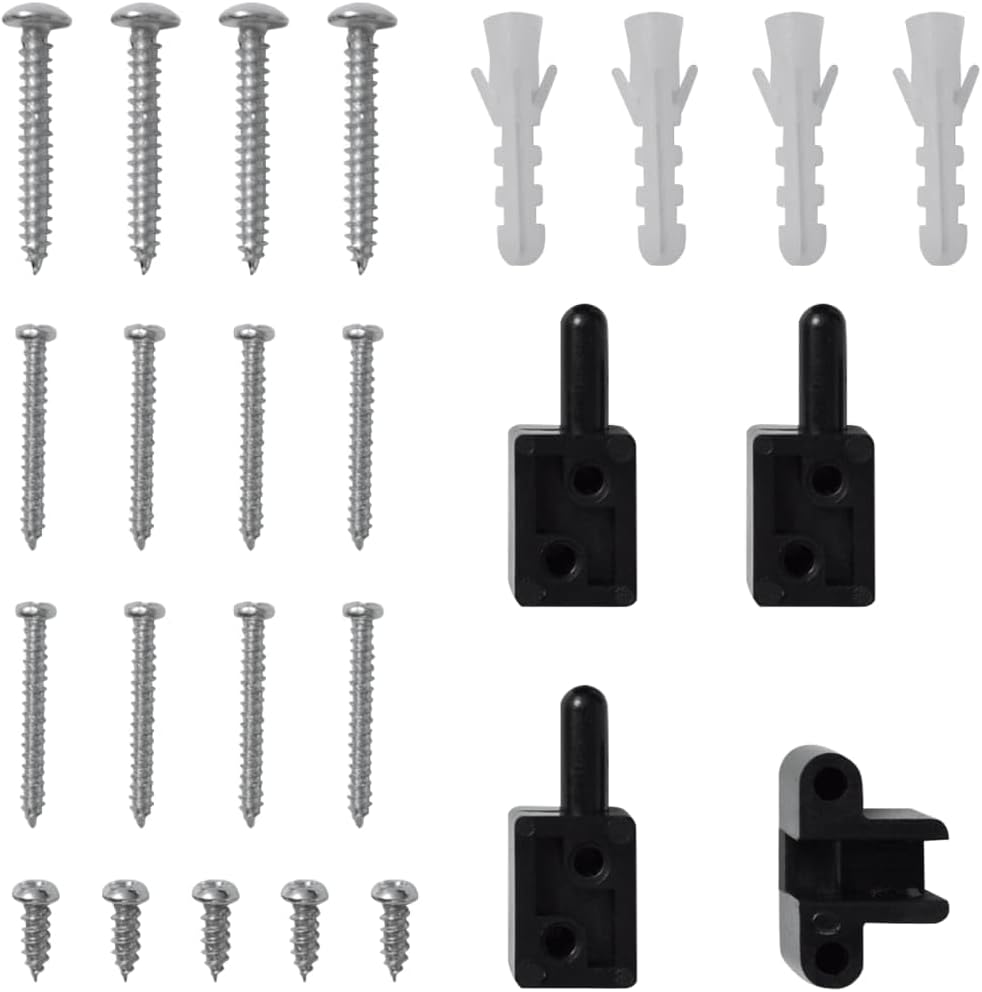
Figure 1: Included mounting accessories, including screws, wall anchors, and hinge parts.
4. Setup and Installation
Assembly is required for this product. The following steps provide a general overview. Refer to the detailed assembly instructions included in your product packaging for specific diagrams and precise measurements.
4.1. Preparation
- Measure Your Door Frame: Carefully measure the width and height of the door opening where the insect screen will be installed. The screen is adjustable, but accurate measurements are crucial for proper fitting.
- Clear the Area: Ensure the installation area is clean, clear of obstructions, and well-lit.
- Gather Tools: You will need a measuring tape, pencil, drill, screwdriver, level, and possibly a saw for cutting aluminum profiles if adjustment is needed.
4.2. Frame Assembly
- Assemble the aluminum frame profiles according to the specific instructions provided with your product. This typically involves connecting the horizontal and vertical profiles using corner connectors.
- Ensure the frame is square and secure.
4.3. Mesh Installation
- Lay the fiberglass mesh over the assembled frame.
- Secure the mesh into the frame's groove using the spline and a spline roller (if included or required). Ensure the mesh is taut and free of wrinkles.
- Trim any excess mesh carefully with a utility knife.
4.4. Handle and Hinge Attachment
- Attach the handles to the designated locations on the screen frame using the provided screws. Ensure they are securely fastened.
- Install the hinge components onto the screen frame as per the instructions.
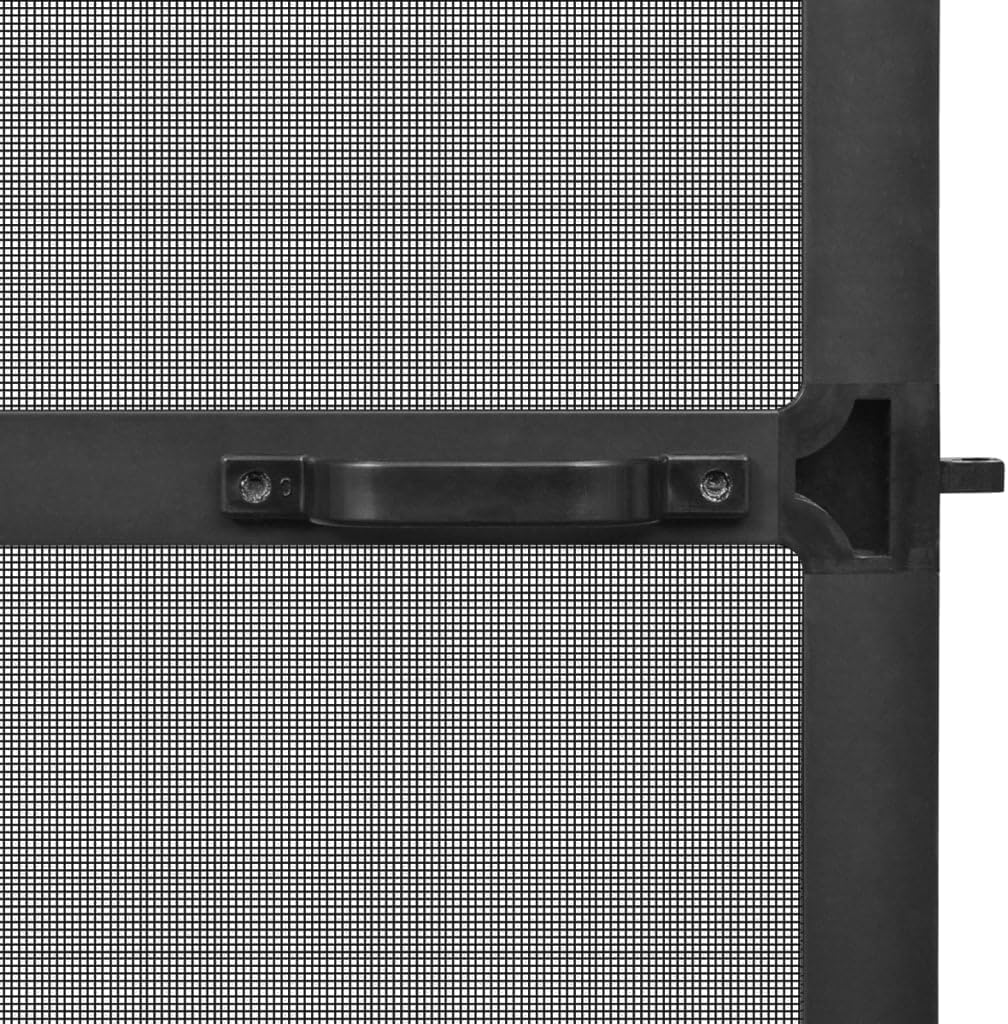
Figure 2: Detail of the interior handle and latch.

Figure 3: Detail of the exterior handle and latch.

Figure 4: Example of a hinge component.
4.5. Mounting to Door Frame
- Position the assembled insect screen within the door opening. Use a level to ensure it is perfectly vertical.
- Mark the locations for the hinge mounting points on the door frame.
- Drill pilot holes at the marked locations. If installing into masonry or concrete, use appropriate wall anchors.
- Secure the hinge mounting plates to the door frame using the provided screws.
- Attach the insect screen to the mounted hinges. Test the screen's movement to ensure it opens and closes smoothly without binding.
- Adjust hinges if necessary to achieve proper alignment and function.

Figure 5: Assembled insect screen, angled view.

Figure 6: Assembled insect screen, front view.
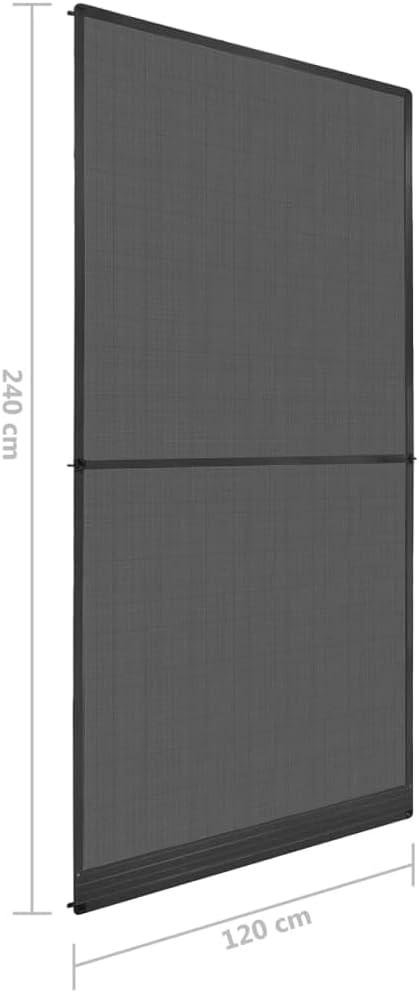
Figure 7: Insect screen with approximate dimensions (120 cm width x 240 cm height).
5. Operating Instructions
The vidaXL Hinged Insect Screen is designed for simple operation.
- To open the screen, gently pull the handle towards you. The screen will swing open on its hinges.
- To close the screen, push it back into the door frame until it latches securely.
- Avoid forcing the screen if it encounters resistance. Check for obstructions or misalignment.
6. Maintenance
Regular maintenance will help prolong the life and effectiveness of your insect screen.
- Cleaning the Mesh: Periodically clean the fiberglass mesh with a soft brush or a vacuum cleaner with a brush attachment to remove dust, pollen, and debris. For stubborn dirt, gently wipe with a damp cloth and mild soap solution, then rinse with clean water and allow to air dry.
- Cleaning the Frame: Wipe the aluminum frame with a damp cloth to remove dirt and grime. Avoid abrasive cleaners or harsh chemicals that could damage the finish.
- Hinge Inspection: Annually inspect the hinges for any signs of wear or looseness. Tighten screws if necessary. Lubricate hinges with a silicone-based spray if they become stiff.
- Damage Check: Regularly check the mesh for tears or holes. Small repairs can often be made with mesh repair kits.
7. Troubleshooting
If you encounter issues with your insect screen, refer to the following common problems and solutions:
- Screen does not close properly:
- Check for obstructions in the door frame or along the screen's path.
- Verify that the hinges are properly aligned and securely fastened. Adjust if needed.
- Ensure the door frame itself is not warped or uneven.
- Mesh is loose or torn:
- If the mesh is loose, the spline may have come out of its groove. Re-insert the spline firmly.
- For small tears, use a mesh repair kit. For large tears, the mesh may need to be replaced.
- Handles are loose:
- Tighten the screws securing the handles to the frame. Do not overtighten.
If problems persist, contact vidaXL customer support for further assistance.
8. Specifications
| Model Number | 148714 |
| Brand | vidaXL |
| Frame Material | Aluminum |
| Mesh Material | Fiberglass (UV-resistant) |
| Frame Color | Anthracite |
| Mesh Color | Black |
| Overall Dimensions (W x H) | 47.2 x 94.5 inches (approximately 120 x 240 cm) |
| Adjustability | Can be adjusted to fit various door sizes |
| Assembly Required | Yes |
| Mounting Accessories | Included |
9. Warranty and Support
For warranty information, product support, or to purchase replacement parts, please refer to the documentation included with your purchase or visit the official vidaXL website. Keep your proof of purchase for warranty claims.
Related Documents - 148714
 |
VidaXL Extended Producer Responsibility (EPR) Guide Learn about VidaXL's commitment to Extended Producer Responsibility (EPR) for EEE and textile waste. Discover recycling information, obligations, and partners. |
 |
vidaXL Garden Shed Assembly Instructions Comprehensive assembly instructions for the vidaXL Garden Shed, including a parts list and step-by-step visual guides. SKU: 46363. |
 |
VidaXL Gabion Installation and Safety Guide This comprehensive guide from vidaXL provides essential safety warnings and step-by-step assembly instructions for gabion structures, ensuring proper installation and use. Covers multiple languages. |
 |
vidaXL Recliner Assembly Instructions Assembly guide for the vidaXL recliner, including parts list and step-by-step instructions. |
 |
vidaXL Media Console Assembly Instructions Detailed assembly instructions for the vidaXL media console, including a parts list and step-by-step guidance. |
 |
vidaXL Gazebo Assembly Instructions Comprehensive assembly instructions for the vidaXL Gazebo, including parts list, assembly steps, and safety warnings. Ensure proper installation for a safe and durable structure. |
Ask a question about this manual
Ask about setup, troubleshooting, compatibility, parts, safety, or missing instructions. Manuals+ will review the question and use this page’s manual context to help answer it.