
Fisher-Price BB321
User Manual: Fisher-Price Manual Breast Pump 130ml
Model: BB321
1. Introduction
The Fisher-Price Manual Breast Pump is designed for convenience and ease of use, simplifying the routine for mothers. It features a design with few parts, making assembly and cleaning quick and straightforward.
This breast pump promotes breast health by helping to relieve discomfort and obstruction of mammary glands. Its versatility allows it to be used for both milk expression and massage, adapting to your specific needs. The silicone flange stimulates milk secretion naturally and effectively, while the homogeneous and gentle suction mimics a baby's natural feeding, providing a more comfortable experience. The ergonomic handle offers extra comfort during use, reducing hand strain. Made from silicone and polypropylene (PP), the pump is 100% BPA-free, ensuring your baby's safety. Its user-friendly design means you do not need to lean forward during use, offering a more practical and comfortable experience.

Figure 1.1: Assembled Fisher-Price Manual Breast Pump.
2. Safety Information
Important Notice: The Ministry of Health warns that a breastfed child does not need a bottle, nipple, or pacifier. The use of a bottle, nipple, or pacifier harms breastfeeding.
There are no specific safety warnings beyond the general health advisory regarding breastfeeding practices.
- Always inspect all components before each use for any signs of wear or damage. Discard and replace any damaged parts immediately.
- Ensure all parts are clean and sterilized before first use and after each subsequent use.
- Do not leave the breast pump or its components within reach of children.
- This product is intended for personal use only. Do not share with others.
3. Components
The Fisher-Price Manual Breast Pump consists of a few key components designed for easy assembly and effective milk expression. The main components include:
- Silicone Flange: The soft part that comes into contact with the breast, designed for comfort and effective suction.
- Pump Body: The main unit connecting the flange to the bottle, housing the valve system.
- Handle/Lever: The ergonomic handle used to create suction.
- Valve: A small component that regulates milk flow into the bottle.
- Bottle (130ml): For collecting expressed milk.
- Protective Cap: For hygiene and protection when not in use.

Figure 3.1: Exploded view of the breast pump components.

Figure 3.2: Breast pump with protective cap and spare valves.
4. Setup and Assembly
Before first use, and after each cleaning, ensure all parts are completely dry. Follow these steps to assemble your breast pump:
- Attach the Valve: Gently insert the small valve into the bottom of the pump body. Ensure it is securely seated to prevent milk leakage and maintain suction.
- Attach the Silicone Flange: Place the silicone flange onto the top of the pump body. Press firmly around the edges to ensure a tight seal.
- Connect the Handle: Slide the ergonomic handle onto the side of the pump body, aligning it with the pivot point. Ensure it clicks into place securely.
- Screw on the Bottle: Screw the 130ml collection bottle onto the bottom of the assembled pump body until it is firmly attached.
Your Fisher-Price Manual Breast Pump is now ready for use.
5. Operating Instructions
The manual breast pump is designed for comfortable and efficient milk expression. It can also be used for breast massage to stimulate milk flow.
5.1. Preparing for Expression
- Wash your hands thoroughly with soap and water.
- Find a comfortable and relaxed position. The pump's design allows for upright posture, eliminating the need to lean forward.
- Ensure your breast is clean.
5.2. Milk Expression
- Position the Flange: Center the silicone flange over your nipple, ensuring a good seal around your breast.
- Initiate Suction: Gently press the ergonomic handle to create suction. You will feel a gentle pull on your nipple.
- Mimic Baby's Suckling: Release the handle to break the suction. Repeat this pressing and releasing motion rhythmically, mimicking your baby's natural suckling pattern. Start with short, quick pumps to stimulate let-down, then switch to longer, slower pumps once milk begins to flow.
- Adjust as Needed: Adjust the pressure and rhythm to what feels most comfortable and effective for you. The pump provides homogeneous and gentle suction.
- Collect Milk: Milk will flow into the attached 130ml bottle. Continue pumping until your breast feels empty or milk flow significantly slows.
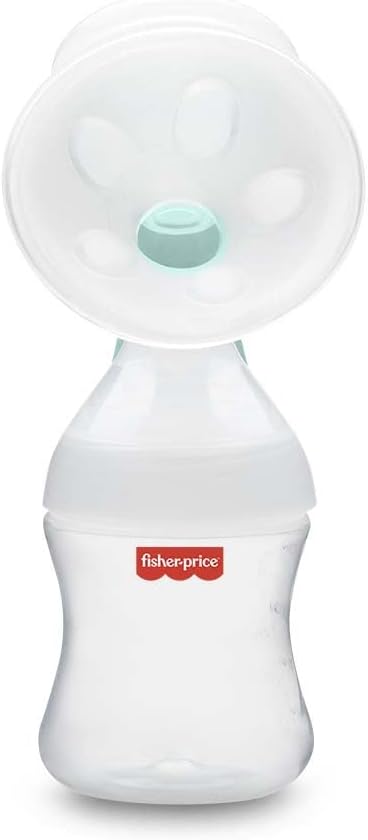
Figure 5.1: Top view of the silicone flange.
5.3. Massage Mode
The soft silicone cushion is designed to help relieve inflammation of the mammary glands when used in massage mode. This can be particularly useful before expression to encourage let-down or to alleviate discomfort.
- Position the silicone flange over your breast as you would for expression.
- Apply gentle, consistent pressure with the handle, without fully releasing, to create a sustained, gentle massage sensation.
- Move the pump slightly around the breast to target different areas, focusing on any tender or engorged spots.
6. Maintenance and Cleaning
Proper cleaning and sterilization are crucial for hygiene and the longevity of your breast pump. The pump's few parts make this process simple and quick.
6.1. Disassembly
After each use, disassemble all parts of the breast pump: separate the bottle, pump body, silicone flange, valve, and handle.
6.2. Cleaning
- Rinse all separated parts immediately after use with cold water to remove any milk residue.
- Wash all parts in warm, soapy water using a soft brush. Ensure all milk residue is removed from crevices.
- Rinse thoroughly with clean water.
6.3. Sterilization
Sterilize all parts (except the handle, if it contains non-sterilizable components) before first use and at least once a day. Refer to the specific sterilization instructions in the original product manual to avoid damaging silicone parts.
- Boiling: Place all clean parts in a pot of boiling water for 5 minutes. Ensure parts do not touch the bottom or sides of the pot to prevent melting.
- Steam Sterilizer: Use a microwave or electric steam sterilizer according to the manufacturer's instructions.
- Cold Water Sterilization: Use sterilization tablets/solution according to the manufacturer's instructions.
After sterilization, allow parts to air dry on a clean drying rack or use a clean cloth. Store assembled or disassembled in a clean, dry place.
7. Troubleshooting
| Problem | Possible Cause | Solution |
|---|---|---|
| No suction or weak suction. |
|
|
| Milk not flowing or slow flow. |
|
|
| Discomfort or pain during pumping. |
|
|
8. Specifications
| Feature | Detail |
|---|---|
| Model Number | BB321 |
| Capacity | 130ml |
| Material | Silicone and Polypropylene (PP) |
| BPA-Free | Yes |
| Color | White and Green |
| Dimensions (Product) | 19.8 x 9.4 x 22 cm |
| Weight (Product) | 360 g |
| Manufacturer | Multilaser (under Fisher-Price brand) |
| Certification | Anvisa: 25351.475267/2019-16 |
9. Warranty and Support
For warranty information, please refer to the documentation included with your purchase or visit the official Fisher-Price website. Keep your proof of purchase for any warranty claims.
For technical support, troubleshooting assistance, or to inquire about replacement parts, please contact Fisher-Price customer service. You can often find contact details on the product packaging or the official brand website:
- Official Brand Store: Fisher-Price Store on Amazon.com.br
- Refer to the manufacturer's website for the most up-to-date contact information.
Related documentsBB321


Ask a question about this manual
Ask about setup, troubleshooting, compatibility, parts, safety, or missing instructions. Manuals+ will review the question and use this page’s manual context to help answer it.