1. Introduction
This manual provides essential information for the safe and efficient operation, maintenance, and troubleshooting of your Philips Series 8000 Aqua Plus Cordless Vacuum Cleaner, model XC8347/01. This appliance is designed for both vacuuming and wet cleaning, featuring an exclusive Aqua brush for simultaneous dust and stain removal. Please read this manual thoroughly before first use and keep it for future reference.
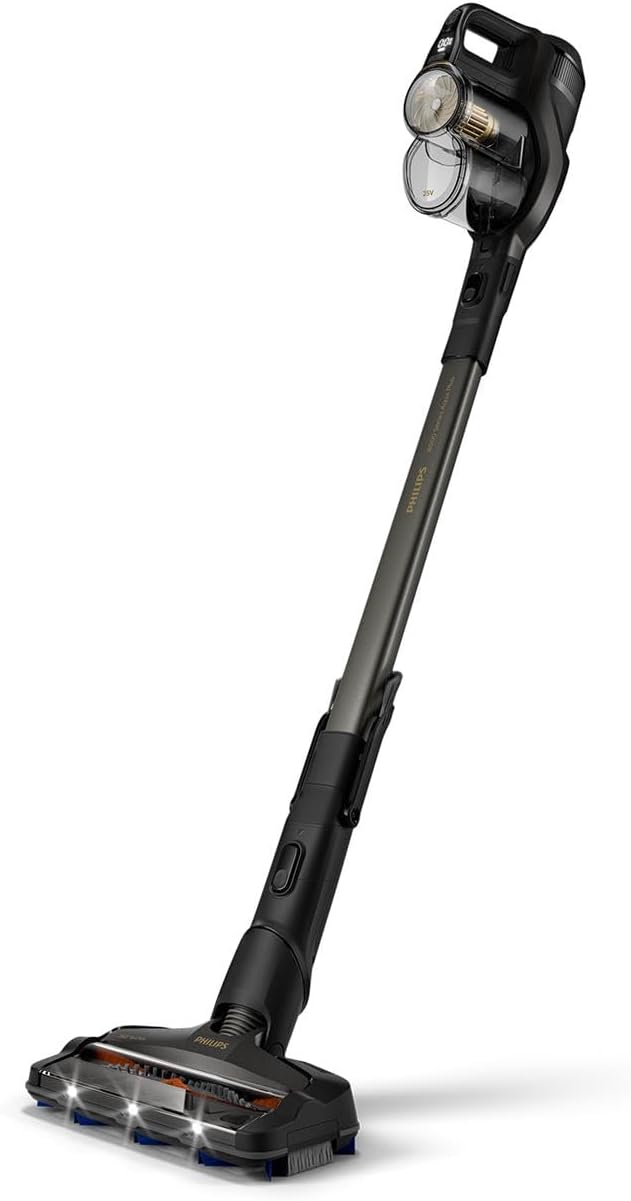
Image 1: Philips Series 8000 Aqua Plus Cordless Vacuum Cleaner. This image shows the complete cordless vacuum cleaner unit, highlighting its sleek design and the main brush head.
2. Important Safety Information
Always follow basic safety precautions when using electrical appliances to reduce the risk of fire, electric shock, or injury.
- Do not use the appliance outdoors or on wet surfaces.
- Do not allow to be used as a toy. Close attention is necessary when used by or near children.
- Use only as described in this manual. Use only manufacturer's recommended attachments.
- Do not use with damaged cord or plug. If appliance is not working as it should, has been dropped, damaged, left outdoors, or dropped into water, return it to a service center.
- Do not pull or carry by cord, use cord as a handle, close a door on cord, or pull cord around sharp edges or corners. Do not run appliance over cord. Keep cord away from heated surfaces.
- Do not unplug by pulling on cord. To unplug, grasp the plug, not the cord.
- Do not handle plug or appliance with wet hands.
- Do not put any object into openings. Do not use with any opening blocked; keep free of dust, lint, hair, and anything that may reduce airflow.
- Keep hair, loose clothing, fingers, and all parts of body away from openings and moving parts.
- Do not pick up anything that is burning or smoking, such as cigarettes, matches, or hot ashes.
- Do not use to pick up flammable or combustible liquids, such as gasoline, or use in areas where they may be present.
- Do not pick up toxic material (e.g., chlorine bleach, ammonia cleaner, drain cleaner).
- Do not use in an enclosed space where vapors are present from oil base paint, paint thinner, some mothproofing substances, flammable dust, or other explosive or toxic vapors.
- Do not use to pick up hard or sharp objects such as glass, nails, screws, coins, etc.
- Do not use without dust bag and/or filters in place.
- Always turn off this appliance before connecting or disconnecting hose.
- Store the appliance indoors. After use, put the appliance away to prevent tripping accidents.
- Use only the charger supplied by the manufacturer to recharge.
- Do not incinerate the appliance even if it is severely damaged. The batteries can explode in a fire.
3. Package Contents
Verify that all components are present in the packaging before assembly.

Image 2: Philips Series 8000 Aqua Plus Cordless Vacuum Cleaner with included accessories. This image displays the main vacuum unit along with various attachments such as the crevice tool, extra filter, microfiber pads, and the Aqua brush base.
- Main Vacuum Unit
- 360° Suction Nozzle / Aqua Brush
- Integrated Brush
- Crevice Tool
- Mini Turbo Brush
- Extra Filter
- Charging Adapter
- Wall-mount Docking Station
- Microfiber Pads (x2)
- Detergent Compartment / Water Tank
4. Setup
4.1 Assembly
- Attach the Extension Wand: Insert the extension wand into the main vacuum unit until it clicks securely into place.
- Attach the Nozzle: Connect the desired nozzle (e.g., 360° Suction Nozzle or Aqua Brush) to the other end of the extension wand. Ensure it clicks firmly.
- Install the Filter: Ensure the washable filter is correctly installed in the dustbin.
- Wall-Mount Docking Station (Optional): If desired, mount the docking station to a wall using the provided screws and anchors. Ensure it is placed near a power outlet.
4.2 Initial Charging
Before first use, fully charge the appliance.
- Connect the charging adapter to the charging port on the main vacuum unit or the wall-mount docking station.
- Plug the adapter into a power outlet.
- The battery indicator lights will illuminate, showing the charging status. A full charge typically takes approximately 4-5 hours.
- Once fully charged, the indicator lights will show a steady state or turn off, depending on the model.
5. Operating Instructions
5.1 Basic Vacuuming
- Press the power button to turn on the vacuum cleaner.
- Select the desired power mode (e.g., Eco, Normal, Turbo) using the mode selection button.
- Guide the 360° suction nozzle over the floor surface. The LED lights on the brush head will illuminate to reveal hidden dust.
- For optimal performance, move the vacuum cleaner slowly and steadily.

Image 3: The vacuum cleaner's LED lights illuminating dust under furniture. This image demonstrates the effectiveness of the LED lights in revealing hidden dirt in dimly lit areas.
5.2 Using the Aqua Brush for Wet Cleaning
The Aqua brush allows for simultaneous vacuuming and wet cleaning.
- Prepare the Water Tank: Fill the water tank with clean tap water. For enhanced cleaning, you may add a small amount of non-foaming floor cleaning solution (refer to solution manufacturer's instructions). Do not exceed the maximum fill line.
- Attach Microfiber Pad: Securely attach a clean microfiber pad to the Aqua brush base.
- Connect Aqua Brush: Attach the filled Aqua brush to the extension wand.
- Start Cleaning: Turn on the vacuum cleaner. The Aqua brush will dispense water onto the floor while simultaneously vacuuming.
- Dual Suction: The brush features dual suction channels (front and rear) to optimize performance and adapt suction as needed.
- One-Pass Cleaning: The Aqua brush is designed to vacuum and mop in a single pass, effectively removing dust, dirt, and sticky stains.

Image 4: A user operating the Philips Series 8000 Aqua Plus for wet cleaning on a hard floor. This image illustrates the vacuum in action, demonstrating its ability to clean and mop simultaneously.

Image 5: The Aqua brush cleaning a floor with visible dirt marks. This image highlights the vacuum's effectiveness in removing both dry debris and wet stains in one pass.

Image 6: A close-up view of the Aqua brush head, showing arrows indicating the dual suction paths for efficient cleaning. This image visually explains how the brush captures dirt from multiple directions.

Image 7: The detergent compartment of the Aqua brush. This image shows where cleaning solution can be added to the water tank for wet cleaning.
5.3 Using Attachments
- Crevice Tool: Ideal for reaching narrow spaces, corners, and edges.
- Mini Turbo Brush: Effective for cleaning pet hair and embedded dirt from upholstery, carpets, and car interiors.
- Integrated Brush: Convenient for quick dusting of surfaces, shelves, and delicate items.
6. Maintenance
Regular maintenance ensures optimal performance and extends the lifespan of your appliance. Always turn off and unplug the vacuum cleaner before performing any maintenance.
6.1 Emptying the Dustbin
- Press the dustbin release button and remove the dustbin from the main unit.
- Hold the dustbin over a waste bin and open the bottom flap to empty the contents.
- Close the flap securely.
6.2 Cleaning the Filter
The washable filter should be cleaned regularly, ideally after every 5-10 uses, or when suction power decreases.
- Remove the filter from the dustbin.
- Tap the filter gently over a waste bin to remove loose dust.
- Rinse the filter under running tap water until the water runs clear.
- Allow the filter to air dry completely for at least 24 hours before reinserting it into the dustbin. Do not use a hairdryer or other heating devices.
6.3 Cleaning the Aqua Brush and Microfiber Pads
- After each wet cleaning session, remove the microfiber pad from the Aqua brush.
- Rinse the microfiber pad under running water or machine wash it according to its care label.
- Empty any remaining water from the water tank and rinse it thoroughly.
- Allow all components to air dry completely before reassembling.
- The Aqua brush features an "Always Clean" coating to protect against bacterial growth after cleaning.

Image 8: A close-up of the microfiber wipe used with the Aqua brush. This image emphasizes the "Always Clean" coating designed to prevent bacterial proliferation.
6.4 Cleaning the Brush Roll
Periodically check the brush roll for tangled hair or debris.
- Remove the brush roll cover (if applicable, refer to specific model diagrams).
- Carefully cut and remove any tangled hair or fibers from the brush roll using scissors.
- Reassemble the brush roll and cover.
7. Troubleshooting
If you encounter issues with your Philips Series 8000 Aqua Plus, refer to the following table for common problems and solutions.
| Problem | Possible Cause | Solution |
|---|---|---|
| Appliance does not turn on. | Battery is discharged. | Charge the appliance fully. |
| Reduced suction power. | Dustbin is full. Filter is clogged. Brush roll is tangled. | Empty the dustbin. Clean or replace the filter. Remove tangled hair/debris from the brush roll. |
| Water is not dispensing from Aqua brush. | Water tank is empty. Microfiber pad is not properly attached. Dispensing nozzle is clogged. | Refill the water tank. Reattach the microfiber pad correctly. Clean the dispensing nozzle. |
| Appliance stops during operation. | Battery is low. Overheating protection activated. | Recharge the battery. Turn off the appliance and allow it to cool down for at least 30 minutes. |
| Unusual noise during operation. | Obstruction in the nozzle or hose. Damaged brush roll. | Check for and remove any obstructions. Inspect the brush roll for damage. |
8. Specifications
| Feature | Specification |
|---|---|
| Brand | PHILIPS |
| Model Number | XC8347/01 |
| Color | Titanium Black |
| Product Dimensions (L x W x H) | 38.8 x 19 x 79.4 cm |
| Item Weight | 5.5 Kilograms |
| Power | 130 Watts |
| Voltage | 25 Volts |
| Noise Level | 84 Decibels |
| Battery Runtime | Up to 80 minutes (1 hour and 20 minutes) |
| Battery Type | 1 Lithium-ion (included) |
| Special Feature | Bagless |
| Filter Type | Cartridge |
| Surface Recommendation | Upholstery (and hard floors, carpets) |
| Power Source | Battery Powered |
| Included Components | Aqua brush, Extra filter, Long crevice tool, 360° suction brush, Mini Turbo brush |
9. Warranty and Support
For warranty information, product registration, or technical support, please refer to the warranty card included with your purchase or visit the official Philips website. Keep your proof of purchase for warranty claims.
Online Support: www.philips.com/support